Servings: 10 to 12 slices | Prep Time: 45 minutes | Chill Time: 4 hours (or overnight) | Bake Time: 25 to 30 minutes | Total Time: ~5 to 6 hours
If you have ever sat in a proper Italian pasticceria, taken one bite of something creamy and pastry-layered, and thought “I need to make this at home” — this recipe is for you. The Italian Cream Filled Pastry Cake is one of those desserts that looks wildly impressive but follows a clear, learnable process.
I first had something like this at a family gathering years ago, made by someone’s grandmother who refused to share the recipe. So I spent months reverse-engineering it. What I landed on is rich, creamy, flaky, and genuinely unforgettable. And yes, it’s absolutely worth every minute.
Have you ever wondered why Italian pastry desserts always taste better than anything else at the table? It’s the combination of light pastry, silky cream filling, and careful layering that does it. This recipe nails all three. Let’s get into it.
What Exactly Is an Italian Cream Filled Pastry Cake?
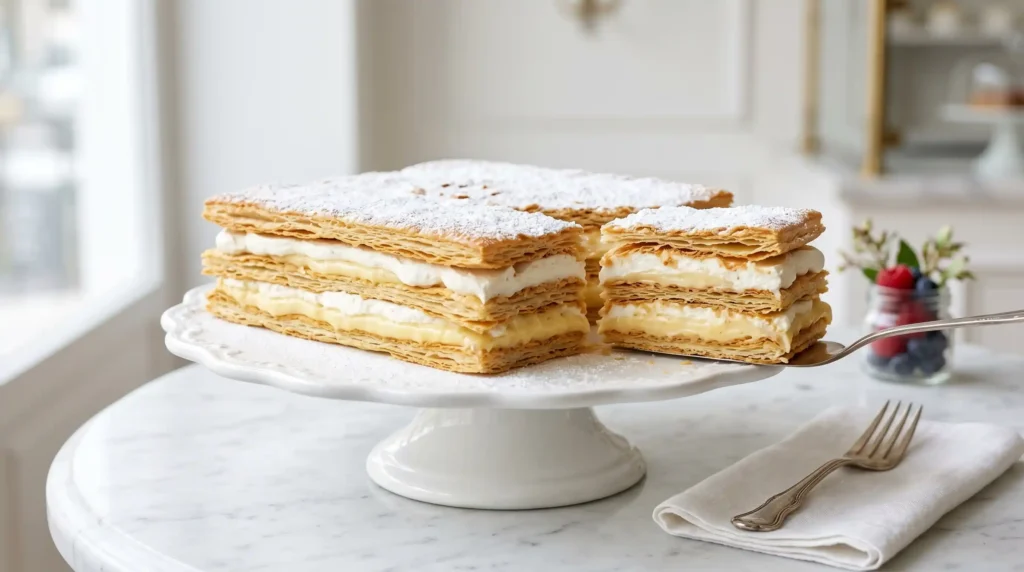
The Italian Cream Filled Pastry Cake — sometimes called a Millefoglie or Torta di Sfoglia — is a layered dessert made from crisp, baked puff pastry sheets sandwiched together with a thick Italian pastry cream. The top layer is usually dusted with powdered sugar or finished with a light glaze.
Think of it as a more refined, cream-heavy cousin of the Napoleon cake. The key difference is the Italian pastry cream (crema pasticcera), which uses egg yolks and whole milk to create a filling that’s rich but not heavy. It’s smooth, vanilla-forward, and holds its shape beautifully when chilled.
IMO, this is one of the most impressive desserts you can bring to any occasion. It looks like it came from a bakery, slices beautifully, and tastes even better on day two once the cream and pastry have fully melded together.
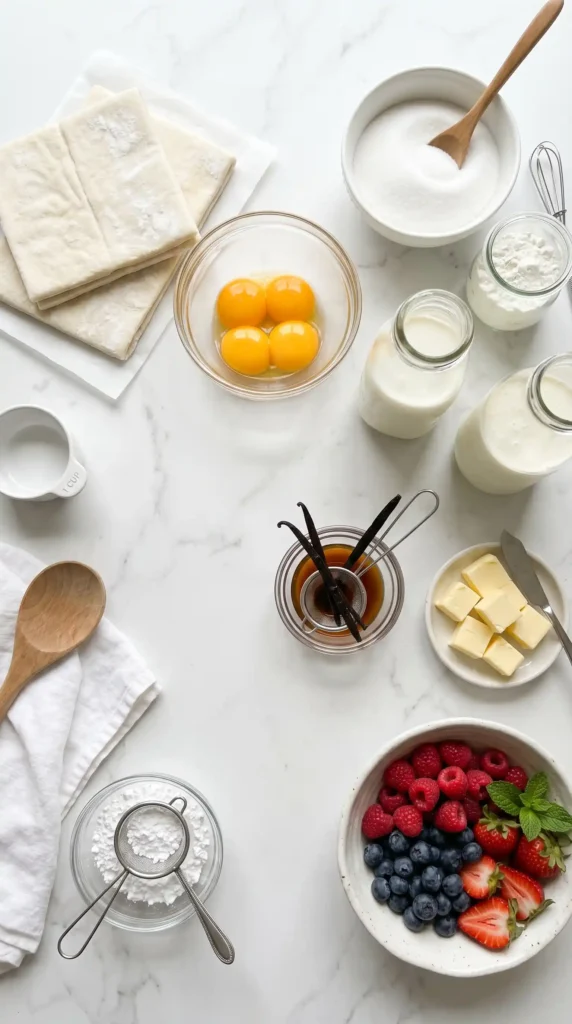
Full Ingredient List With Quantities
For the Pastry Layers
- 2 sheets (about 500g total) ready-made puff pastry, thawed if frozen
- 2 tablespoons (16g) powdered sugar, for dusting before baking
For the Italian Pastry Cream (Crema Pasticcera)
- 6 large egg yolks
- 3/4 cup (150g) granulated sugar
- 1/3 cup (40g) cornstarch
- 2 and 1/2 cups (600ml) whole milk
- 1 teaspoon pure vanilla extract or 1 vanilla bean, split and scraped
- 2 tablespoons (30g) unsalted butter, cold and cubed
For the Whipped Cream Layer
- 1 cup (240ml) heavy whipping cream, very cold
- 2 tablespoons (16g) powdered sugar
- 1/2 teaspoon vanilla extract
For Finishing
- 3 to 4 tablespoons (24 to 32g) powdered sugar, for dusting the top
- Optional: fresh berries or a drizzle of caramel for garnish
Why This Recipe Actually Delivers
A lot of home attempts at Italian cream filled pastry cake fail because of two things: soggy pastry or runny filling. This recipe solves both. The pastry gets dusted with powdered sugar before baking, which helps it caramelize and stay crisp even after the cream goes on.
The filling uses cornstarch as the thickener instead of flour, which gives the pastry cream a silkier, glossier finish. Cold butter stirred in at the end adds richness and creates a beautifully smooth texture. Chilling the assembled cake for at least 4 hours lets everything set without losing the layers.
Adding a layer of lightly whipped cream on top of the pastry cream before assembling gives you two distinct textures inside — the dense, custard-like pastry cream and the lighter, airier whipped layer. That contrast makes every bite more interesting than a single-cream filling.
How to Make Italian Cream Filled Pastry Cake Step by Step
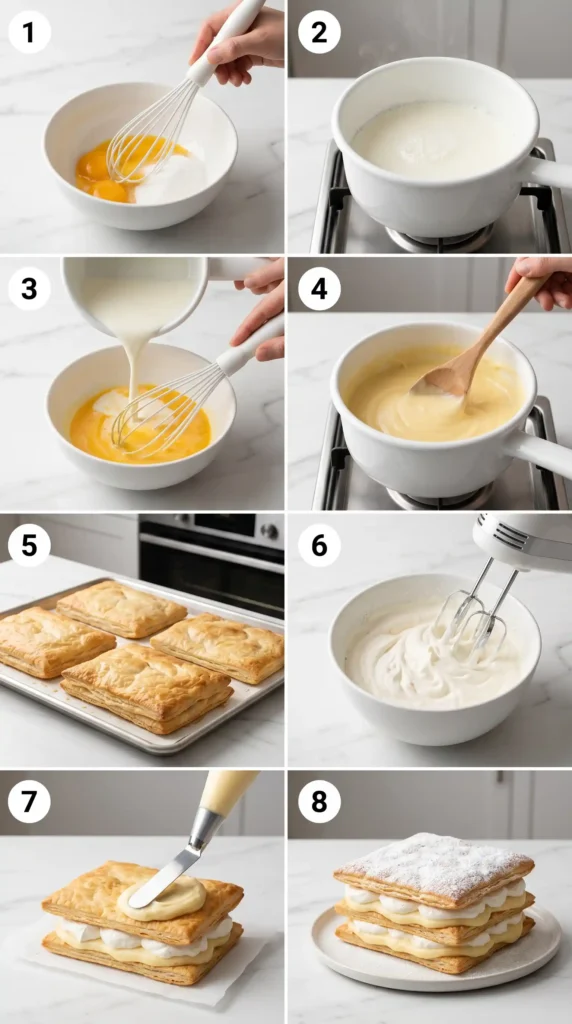
This recipe has three main components: the baked pastry layers, the pastry cream, and the whipped cream. Each one is straightforward on its own. Bring them together and you get something truly special.
Step 1: Make the Italian Pastry Cream
Start with the pastry cream because it needs time to chill completely before you assemble the cake. In a medium saucepan, whisk together the egg yolks, granulated sugar, and cornstarch until you get a smooth, pale yellow mixture. This usually takes about 2 minutes of active whisking — don’t rush it.
In a separate saucepan, heat the whole milk over medium heat with the vanilla. Bring it just to a gentle simmer — you’ll see small bubbles forming around the edges. Do not let it boil. As soon as it simmers, remove it from the heat and let it sit for 30 seconds.
Now, very slowly pour the hot milk into the egg mixture in a thin, steady stream, whisking constantly as you pour. This process is called tempering — it gradually raises the temperature of the eggs without scrambling them. If you dump the hot milk in all at once, you’ll get sweet scrambled eggs. Nobody wants that. :/
Pour the entire combined mixture back into the saucepan and set it over medium-low heat. Stir constantly with a wooden spoon or silicone spatula, reaching every corner of the pan. After 4 to 6 minutes, the cream will thicken noticeably and start to bubble gently. Cook it for 1 more minute after the first bubble, then remove it from the heat immediately.
Stir in the cold cubed butter, one piece at a time, until fully melted and incorporated. The cream should look glossy and smooth. Transfer it to a clean bowl, press plastic wrap directly onto the surface to prevent a skin from forming, and refrigerate for at least 2 hours or until fully cold and firm.
Step 2: Bake the Puff Pastry Layers
Preheat your oven to 400 degrees Fahrenheit (200 degrees Celsius). Line two large baking sheets with parchment paper. Unfold or unroll your puff pastry sheets and cut each one to roughly the same rectangle — about 10 by 12 inches works well. Place each sheet on a prepared baking sheet.
Use a fork to dock the pastry all over — poke holes across the entire surface in a grid pattern. This stops the pastry from puffing up unevenly into large air pockets. Then dust the tops generously with powdered sugar. The sugar caramelizes in the oven and creates a lacquered, slightly crunchy top surface that holds up beautifully under the cream.
Bake the pastry sheets for 25 to 30 minutes until they are deep golden brown and feel crisp and firm when you press the center gently. They will puff up slightly even with docking — that’s normal. Remove them from the oven and let them cool completely on a wire rack before you assemble. Assembling on warm pastry melts the cream and creates a soggy disaster.
Step 3: Make the Whipped Cream
Pour the very cold heavy cream into a chilled mixing bowl. Add the powdered sugar and vanilla extract. Beat on medium-high speed with a hand mixer or stand mixer until the cream holds firm peaks — meaning it stands up and holds its shape without drooping. This usually takes 3 to 4 minutes. Don’t overwhip or it will turn grainy.
Once the pastry cream is fully chilled and firm, take it out of the fridge and whisk it briefly to loosen it slightly. It should be thick but spreadable. Then gently fold in about a third of the whipped cream to lighten the texture. Keep the remaining whipped cream separate for layering.
Step 4: Assemble the Cake
Place one pastry sheet on a flat serving board or plate. This is your base layer. Spread all of the pastry cream mixture evenly over the pastry, right to the edges. Use an offset spatula for the smoothest result. The layer should be about 1 inch thick — generous but even.
Spread the remaining plain whipped cream evenly over the pastry cream layer. This lighter layer sits on top of the heavier custard and creates that lovely textural difference when you cut and serve the cake. Keep it as level as possible.
Carefully place the second pastry sheet on top, golden side up. Press it down very gently — just enough to make contact with the cream without squashing everything out the sides. Refrigerate the assembled cake for at least 4 hours, and ideally overnight. This chill time is what makes it slice cleanly.
Step 5: Finish and Serve
Right before serving, dust the top pastry layer generously with sifted powdered sugar. You can use a stencil to create a pattern if you want to get decorative — a simple lattice or star design looks stunning. Add fresh berries or a drizzle of caramel on the side if you like.
To slice the cake cleanly, use a sharp serrated knife and a gentle sawing motion. Press down too hard and the pastry will shatter. A slow, careful cut gives you neat slices that show off all the layers. Wipe the knife between cuts for the cleanest presentation.
Tips for Getting This Right
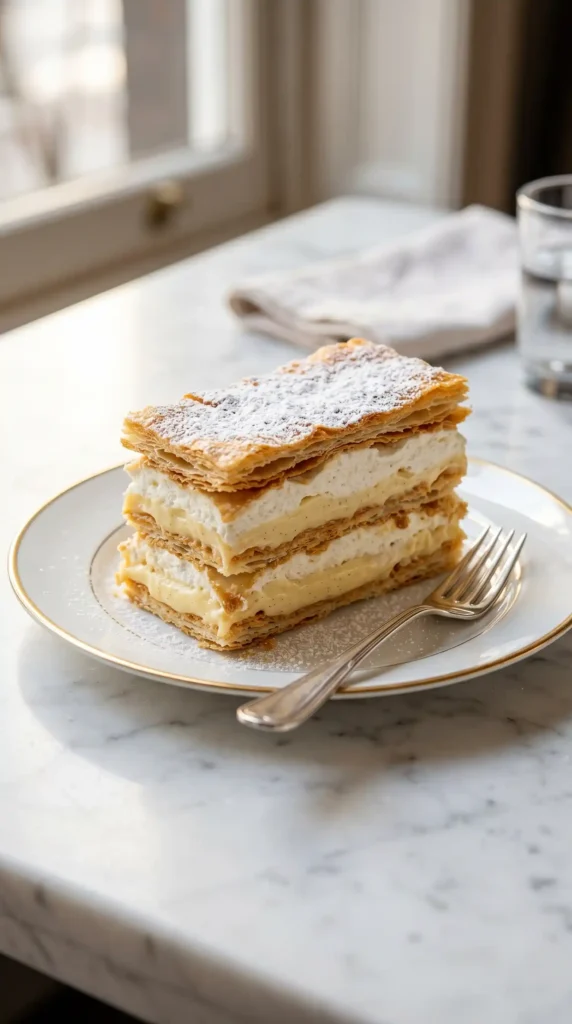
- Chill everything cold: Warm cream won’t hold. Make sure your pastry cream is fully cold and your whipping cream is straight from the fridge.
- Don’t skip the docking: Undocked puff pastry rises into uneven bubbles that are hard to stack. Dock every inch for flat, even layers.
- Dust sugar before baking: It caramelizes into a protective shell that keeps the pastry crisper under the cream filling.
- Overnight chilling wins: Four hours is the minimum. Overnight gives you a cake that slices cleanly and tastes even better.
- Use whole milk: Skimmed or reduced-fat milk gives a thinner, less stable pastry cream. Full-fat is non-negotiable here.
Frequently Asked Questions
Can I use store-bought puff pastry for this recipe?
Yes, absolutely. Good-quality all-butter puff pastry from the store works beautifully and saves a lot of time. Look for brands that list butter as the fat, not vegetable shortening — the flavor difference is significant. Thaw it in the fridge overnight before using.
How far in advance can I make an Italian cream filled pastry cake?
You can assemble the cake up to 24 hours in advance and keep it refrigerated. The pastry will soften slightly over time as it absorbs moisture from the cream, but many people actually prefer that texture. If you want maximum crispiness, assemble it 4 to 6 hours before serving.
Why did my pastry cream turn lumpy?
Lumps form when the egg mixture heats too fast or the cream isn’t stirred constantly. If your cream does turn lumpy, strain it immediately through a fine mesh sieve while it’s still hot. Push it through with a spatula and it will come out smooth. Then chill as normal.
Can I make this recipe gluten-free?
Yes. Use gluten-free puff pastry, which some specialty brands now produce. The pastry cream is naturally gluten-free as long as you use cornstarch and not flour. The whipped cream layer is also gluten-free. Check all your labels to be sure.
How do I store leftover Italian cream filled pastry cake?
Store leftovers in the refrigerator in an airtight container or tightly covered with plastic wrap for up to 3 days. The pastry will continue to soften as days go by but the flavor stays excellent. Do not freeze the assembled cake — the cream texture changes significantly after freezing.
Final Thoughts
This Italian Cream Filled Pastry Cake is one of those recipes that genuinely rewards the effort you put in. The process has a few steps, but none of them are complicated. You just need a little patience — especially that chill time — and the result is a dessert that looks and tastes like it came from a real Italian pasticceria.
Whether you make it for a dinner party, a birthday, or just because you want something extraordinary on a weekend, this cake delivers. It’s elegant, it’s creamy, and it slices like a dream after a proper rest in the fridge. FYI, it also tends to disappear from the table faster than you’d expect — so you might want to make two. 🙂
Give it a go. Follow each step carefully, chill it properly, and slice it with confidence. Your guests will ask for the recipe — and this time, you can actually share it.
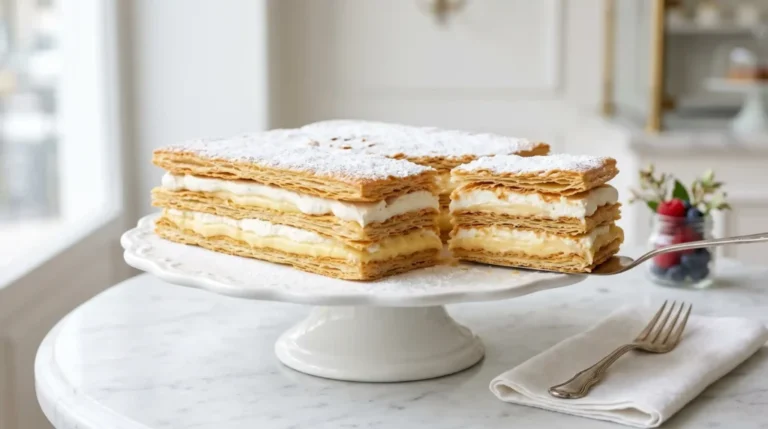
Italian Cream Filled Pastry Cake
Ingredients
Method
- In a medium saucepan, whisk together egg yolks, granulated sugar, and cornstarch until smooth.
- Heat whole milk with vanilla in a separate saucepan over medium heat until just simmering.
- Slowly pour hot milk into egg mixture while whisking constantly to temper the eggs.
- Pour mixture back into saucepan and cook over medium-low heat, stirring until thickened.
- Stir in cold cubed butter until melted; refrigerate for at least 2 hours.
- Preheat your oven to 400°F (200°C) and line baking sheets with parchment.
- Prepare pastry sheets, dock them with a fork, and dust with powdered sugar.
- Bake for 25-30 minutes until golden brown; cool completely on a wire rack.
- In a chilled mixing bowl, beat together heavy cream, powdered sugar, and vanilla until firm peaks form.
- Place one pastry sheet on serving plate and spread pastry cream evenly on top.
- Spread whipped cream over the pastry cream layer.
- Carefully place the second pastry sheet on top and refrigerate for at least 4 hours.
- Dust the top layer with powdered sugar just before serving.
- Slice carefully with a serrated knife for neat presentation.