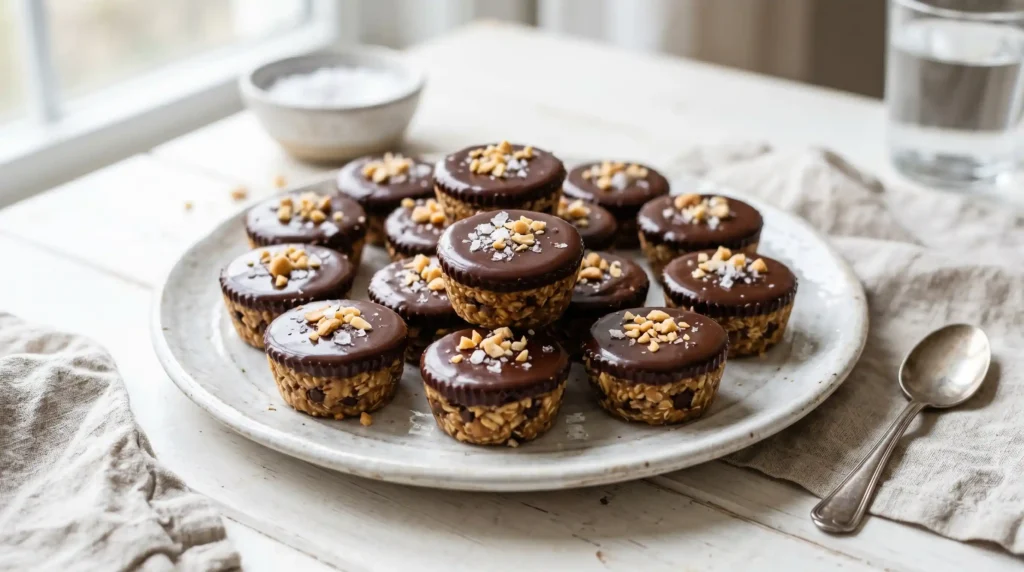
There is a certain category of recipe that you make once as an experiment, realise immediately that you have made a significant life mistake by discovering it, and then make again twice that week. No-Bake Chocolate Oatmeal Peanut Butter Cups belong firmly in that category. Chewy, sweet, salty, chocolatey, satisfying — they hit every single snack craving simultaneously and require twenty minutes of work, no oven, and ingredients you almost certainly already own.
I made these for the first time on a Thursday afternoon when I needed something that felt like dessert but could pass as a snack with enough conviction. The result had disappeared by Friday morning — shared among four people who had each individually promised themselves they would only have one. The batch since then has never lasted more than 48 hours in our fridge. The recipe has earned a permanent spot, which means it has also earned a proper write-up.
Have you ever made something that immediately became the most-requested item in your household? This is that recipe. Let us make it properly.
Why This Combination Is Essentially Impossible to Resist
Peanut butter and chocolate is one of the most well-documented flavour pairings in dessert history — the salty, nutty richness of peanut butter and the slightly bitter, sweet depth of dark chocolate create a contrast that triggers genuine craving in a way that neither ingredient does alone. Adding oats to the peanut butter base provides a chewy, slightly earthy texture that grounds the richness and makes each cup feel more substantial than a pure peanut butter confection.
The honey binds the oat and peanut butter base without requiring cooking — it acts as the adhesive that holds the mixture together as it chills and firms in the muffin cups. Coconut oil in the base adds a subtle richness and helps the mixture set to a firmer consistency than it would achieve without it. The combination of honey and coconut oil means these cups set at refrigerator temperature without needing any heat at any point in the process.
The chocolate top layer is the finishing element that makes these look and feel like proper confectionery rather than health balls pressed into a cup. A silky, even chocolate disc on top of each chewy base produces a two-texture, two-flavour experience in every bite that tastes genuinely satisfying. IMO, this is the most effective twenty-minute treat in existence and the fact that it requires no oven is simply a bonus.
What You Need-No-Bake Chocolate Oatmeal Peanut Butter Cups
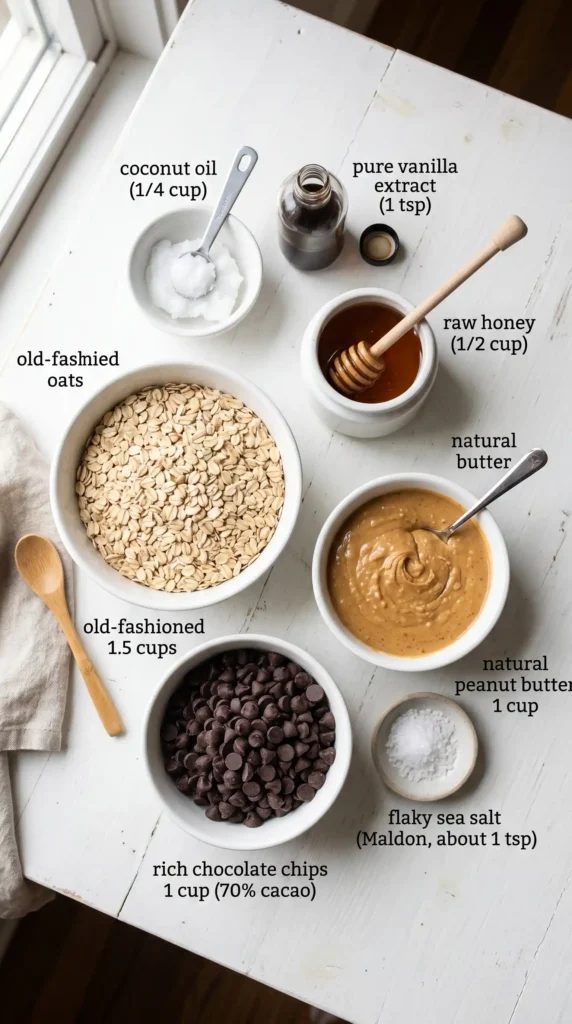
Eight ingredients that probably live in your kitchen right now. The peanut butter should be smooth for the most even base texture — natural peanut butter with no added sugar works best and produces a less sweet base that balances the honey and the chocolate layer more elegantly than sweetened peanut butter. Chunky peanut butter works too and adds extra textural variation if that appeals.
For the Oatmeal Peanut Butter Base
- 1 and 1/2 cups (135g) rolled oats — old-fashioned oats produce a chewier, more substantial base than quick oats, which blend in more finely and produce a softer result
- 3/4 cup (195g) smooth natural peanut butter — no added sugar version produces the best balance
- 1/4 cup (85g) honey or pure maple syrup — honey produces a slightly warmer, floral sweetness; maple syrup produces a more neutral, caramel-adjacent sweetness
- 3 tablespoons (42g) coconut oil, melted
- 1 teaspoon pure vanilla extract
- 1/4 teaspoon salt — even if using salted peanut butter, additional salt amplifies the sweet-salty contrast significantly
For the Chocolate Top Layer
- 1 cup (170g) dark chocolate chips — semi-sweet or dark work best; milk chocolate produces a sweeter, less complex result
- 1 tablespoon coconut oil (helps the chocolate melt smoothly and produces a glossier, less brittle set)
- Flaky sea salt for finishing (optional but genuinely excellent — adds a final flavour contrast that makes these taste genuinely sophisticated)
Natural Peanut Butter vs. Conventional Peanut Butter — The Real Difference HereConventional peanut butter contains added sugar, hydrogenated oils, and salt — it tastes sweeter and produces a slightly stiffer, more uniform base. Natural peanut butter contains only peanuts and sometimes salt — it tastes more intensely of peanut, produces a slightly softer base, and separates in the jar (stir it before measuring). For this recipe, natural peanut butter produces a better sweet-salty balance because the honey provides all the sweetness you need. FYI — if you only have conventional peanut butter, reduce the honey by 1 tablespoon to compensate for the added sugar.
How to Make No-Bake Chocolate Oatmeal Peanut Butter Cups Step by Step
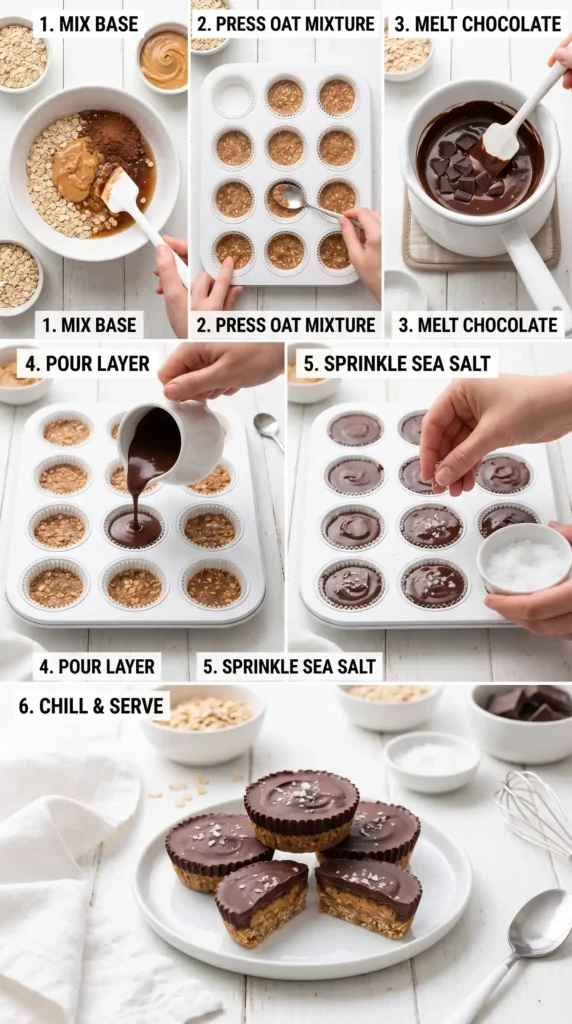
Two stages: make and press the oat base into cups, then melt and pour the chocolate top layer. Both stages take about 10 minutes each. The remaining 30 minutes is chilling time — the refrigerator sets the cups solid enough to unmould and eat without falling apart. Read through everything once, then make it at your own speed without any pressure.
Step 1: Line the Muffin Tin
Line a standard 12-cup muffin tin with paper or silicone cupcake liners. This is the one non-negotiable step that prevents a catastrophic attempt to pry set chocolate and peanut butter directly from an unlined metal tin — an experience nobody needs in their day. Standard paper cupcake liners work perfectly and peel away cleanly once the cups are fully chilled and firm. If you want mini cups, use a 24-cup mini muffin tin instead and reduce the amount of base and chocolate in each cup accordingly.
Step 2: Make the Oatmeal Peanut Butter Base
If the coconut oil is solid at room temperature, melt it first — either in a microwave in 15-second intervals, stirring between each, until just liquid, or in a small saucepan over very low heat. Cool slightly before using so it is liquid but not hot.
In a large mixing bowl, combine the rolled oats, peanut butter, honey or maple syrup, melted coconut oil, vanilla extract, and salt. Stir vigorously with a rubber spatula or wooden spoon until every oat is coated in the peanut butter mixture and everything looks uniformly combined — no dry oat pockets, no unmixed peanut butter at the bottom of the bowl. The mixture should look thick, clumping together when pressed, and slightly shiny from the coconut oil and honey. Taste it — it should taste sweet, salty, and intensely of peanut butter. Adjust with a pinch more salt if it needs more contrast.
Divide the oat mixture evenly among the 12 lined muffin cups — about 2 heaped tablespoons per cup for standard-size cups. Use the back of a spoon or your fingers to press the mixture firmly into each cup, creating a flat, compact, even layer that reaches the edges of the liner. Pressing firmly is important — a loosely packed base crumbles when you try to remove it from the liner and does not hold together cleanly when eaten. Press the base until it feels dense and solid with no visible gaps. Place the muffin tin in the fridge while you prepare the chocolate layer.
Step 3: Melt the Chocolate
Place the dark chocolate chips and tablespoon of coconut oil in a microwave-safe bowl. Microwave on medium power (50%) for 30 seconds. Remove and stir with a spatula — stir from the bottom upward in slow circles. Return to the microwave for another 20 seconds at medium power. Stir again. Continue in 15-second intervals at medium power, stirring thoroughly after each one, until the chocolate is completely melted and looks smooth and glossy with no visible unmelted chips.
Medium power is essential here — full microwave power overheats chocolate rapidly, causing it to seize into a grainy, thick paste that cannot be poured or spread. Seized chocolate cannot be fixed by adding liquid and the batch is wasted. Medium power melts it gently and evenly. The coconut oil in the bowl serves as a smoothing agent — it lowers the melting point slightly and produces a glossier, thinner melted chocolate that pours and spreads more easily than melted chocolate without it.
Alternatively, melt the chocolate using a double boiler — place the chocolate chips and coconut oil in a heatproof bowl set over a pot of barely simmering water. Stir constantly as the chocolate melts, never letting the water touch the base of the bowl. This method takes slightly longer but produces the most controlled, smoothest result and eliminates any risk of overheating. Remove from the heat the moment all chips have melted and the chocolate looks smooth.
Step 4: Pour the Chocolate Layer
Remove the muffin tin from the fridge — the oat base should feel firm and slightly cool to the touch. Spoon or pour the melted chocolate evenly over each oat base cup, covering the surface completely from edge to edge. Use about 1 to 1.5 tablespoons of chocolate per cup for a generous but not overwhelming chocolate layer. Tilt the muffin tin gently side to side to encourage the chocolate to spread evenly across the surface of each cup if needed — it flows quite freely while warm.
Immediately sprinkle a pinch of flaky sea salt over the chocolate surface of each cup while the chocolate is still completely fluid. The salt crystals sink very slightly into the surface and adhere as the chocolate sets — this finishing touch looks beautiful and the contrast of flaky salt against the sweet chocolate makes these cups taste significantly more complex than they would without it. If you want, you can also add a small sprinkle of additional rolled oats or a half peanut for visual appeal.
Step 5: Chill and Set
Return the muffin tin to the refrigerator and chill for a minimum of 30 minutes until the chocolate layer looks fully set — no visible liquid sheen remaining and the surface feels firm when pressed very gently with a fingertip. At 30 minutes in a cold fridge the cups are mostly set. At 45–60 minutes they are completely firm and release from the liners cleanly without any chocolate smearing.
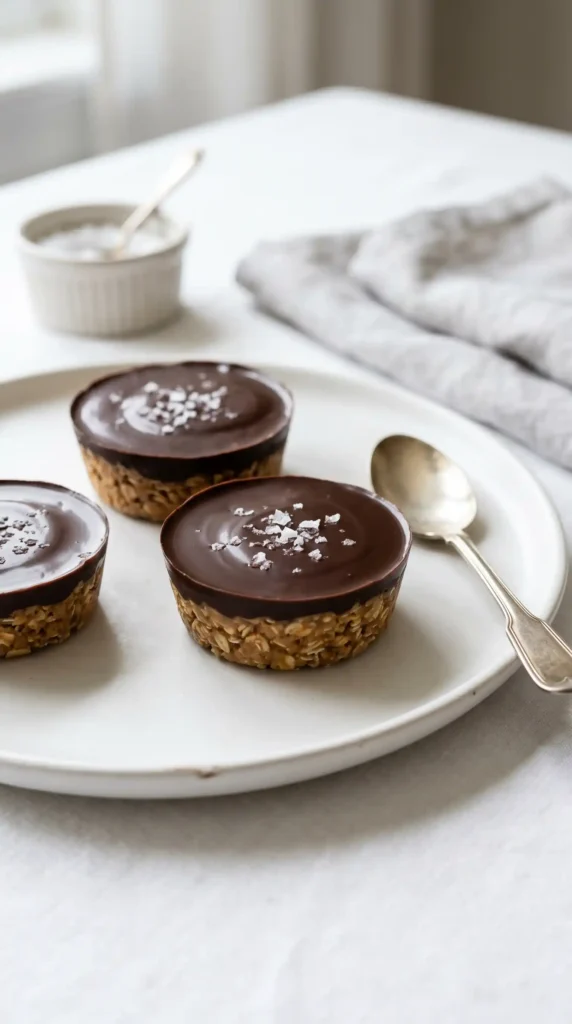
To remove from the muffin tin, lift each cup out by the edge of the paper liner and peel the liner away from the sides — it should release without tearing or pulling any oat base or chocolate with it. If any cups stick slightly, run the tip of a butter knife around the inside edge of the liner before peeling. The finished No-Bake Chocolate Oatmeal Peanut Butter Cups should look like polished individual chocolates — a clean chocolate disc on top, visible oat texture visible at the edges, and a neat, uniform shape throughout.
Why Medium Microwave Power Matters — Never Skip ThisChocolate burns at temperatures above 46°C for dark chocolate — and a standard microwave on full power reaches temperatures well above this within 30 seconds. Burned or seized chocolate looks thick, grainy, and dull and cannot be recovered by stirring or adding liquid. Medium power slows the heating rate enough that the chocolate melts evenly without the risk of hotspots burning the cocoa butter. One batch of burned chocolate is usually enough to make the medium-power lesson stick permanently.
Variations Worth Making
Almond Butter Version
Swap the peanut butter for smooth almond butter in the exact same quantity. Almond butter produces a slightly milder, less aggressive base flavour than peanut butter — the nuttiness is more subtle and allows the honey and vanilla notes to come through more clearly. Use milk chocolate instead of dark for an overall softer, sweeter flavour profile. This version suits people who find peanut butter too dominant in desserts or who have peanut allergies.
Double Chocolate Version
Add 2 tablespoons of unsweetened cocoa powder to the oat base mixture along with the other wet ingredients. The cocoa turns the base a rich, dark brown and produces a chocolate-peanut butter-oat combination that tastes like a deconstructed chocolate peanut butter bar. Top with dark chocolate as directed. The double chocolate version is significantly more intense in flavour and suits anyone who finds the plain base too mild by comparison.
Coconut and Dark Chocolate Version
Add 1/4 cup of unsweetened desiccated coconut to the oat base mixture and replace the vanilla extract with 1/2 teaspoon of coconut extract. Toast the coconut lightly in a dry pan for 2 minutes before adding for extra flavour depth. The coconut adds a subtle tropical note and additional texture variation throughout the base. Top with dark chocolate and a pinch of toasted coconut flakes scattered over the chocolate before it sets.
Storage and Make-Ahead Tips
Store No-Bake Chocolate Oatmeal Peanut Butter Cups in an airtight container in the refrigerator for up to 7 days. The chocolate stays firm and the oat base stays chewy throughout this period without significant quality loss. Keep them cold — at room temperature in a warm kitchen, the coconut oil in the base begins to soften and the cups lose their structural firmness, becoming slightly greasy and misshapen rather than holding the clean, neat form they have straight from the fridge.
These also freeze beautifully for up to 2 months. Place the fully set cups in a single layer in a zip-lock bag or airtight container with parchment between layers. Pull from the freezer and allow 10–15 minutes at room temperature before eating — the base softens back to its ideal chewy texture within that time. This makes them an excellent make-ahead snack to have in the freezer for any moment when a chocolate peanut butter craving hits without warning.
Frequently Asked Questions
Can I use quick oats instead of rolled oats?
Yes, though the texture will differ. Quick oats are smaller and finer than rolled oats and absorb the peanut butter and honey mixture more completely, producing a smoother, less chewy base with less visible oat texture. Rolled oats produce a chunkier, chewier base with more textural variation per bite. Both versions taste excellent — the choice depends on whether you prefer a more cohesive, fudge-like base (quick oats) or a chewier, more oat-forward texture (rolled oats). Old-fashioned rolled oats consistently produce the better result.
Can I make these cups without coconut oil?
Yes with adjustments. In the base, replace the coconut oil with an equal amount of melted unsalted butter — the cups will taste richer and slightly less neutral but still hold together well when chilled. In the chocolate layer, replace the coconut oil with the same amount of unsalted butter — butter produces a slightly less glossy chocolate topping that sets slightly softer than the coconut oil version but still firms adequately in the fridge. The texture difference is minor and neither substitution compromises the fundamental quality of the cups.
Can I make these nut-free?
Yes. Sunflower seed butter works as a direct substitute for peanut butter in the same quantity — it has a similar fat content and binds the oats in the same way. The flavour is milder and slightly more earthy than peanut butter, which means the honey and chocolate notes come through more prominently. Tahini also works and produces an interesting sesame-chocolate-oat flavour profile. Both options make these suitable for tree nut and peanut allergies.
My chocolate layer cracked when I bit into the cups — how do I prevent this?
A cracking chocolate top usually means the chocolate layer is too thick or was chilled too cold before eating. Use only 1 to 1.5 tablespoons of chocolate per cup to keep the layer thin and manageable. Allow the cups to rest at room temperature for 5 minutes before eating — slightly less cold chocolate cracks less dramatically than fully refrigerator-cold chocolate when bitten. The tablespoon of coconut oil in the chocolate also reduces cracking by keeping the chocolate slightly less brittle than unsupplemented melted chocolate chips produce.
Can I make these vegan?
Yes with one substitution. Replace the honey with pure maple syrup or agave nectar in the same quantity. Both produce a slightly different flavour note — maple syrup adds a caramel-like quality, agave is more neutral — but both bind the oat base effectively and set to the same consistency during chilling. Dark chocolate chips are often naturally vegan — check the label to ensure no milk solids are present. All other ingredients in the base recipe are already plant-based.
Final Thoughts
These No-Bake Chocolate Oatmeal Peanut Butter Cups earn their place as the most dangerous recipe in this entire collection — dangerous in the specific sense that once you make them, you will need to have a container available at all times. They satisfy the chocolate craving, the peanut butter craving, the sweet-salty craving, and the need for something that genuinely feels like a treat without the effort of an actual bake. Twenty minutes. Eight ingredients. Twelve cups of something genuinely irresistible.
They work for snacking, for lunchboxes, for dessert, for a midnight something-sweet, and for any gathering where you want to bring something impressive without any actual baking anxiety. The make-ahead and freezer-friendly format makes them one of the most practical treats you can have in regular rotation.
Melt that chocolate on medium power. Press that base firmly into each liner. Do not skip the flaky salt. And then exercise the kind of self-control that this recipe specifically and deliberately makes very difficult. Good luck — you are going to need it. IMO, that is the most honest thing I can tell you about these cups.
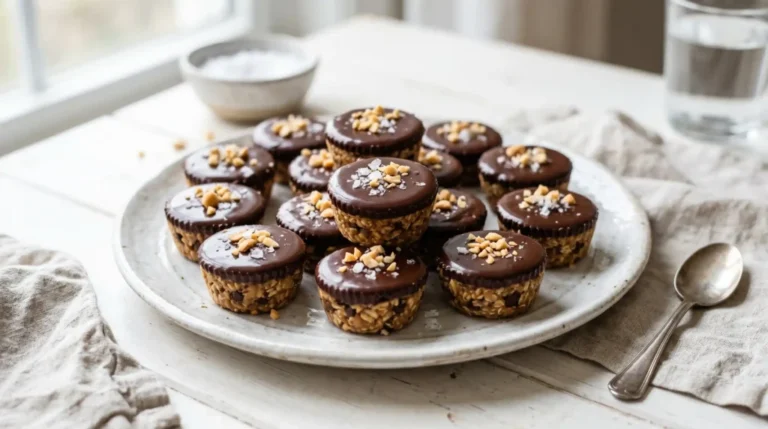
No-Bake Chocolate Oatmeal Peanut Butter Cups
Ingredients
Method
- Line a standard 12-cup muffin tin with paper or silicone cupcake liners.
- In a large mixing bowl, melt the coconut oil if solid. Combine rolled oats, peanut butter, honey or maple syrup, melted coconut oil, vanilla extract, and salt. Stir until uniformly mixed.
- Divide the oat mixture evenly among the muffin cups, pressing firmly to create an even layer.
- Melt chocolate chips with coconut oil using a microwave or double boiler until smooth.
- Pour the melted chocolate over each oat base cup and sprinkle a pinch of flaky sea salt on top.
- Chill in the refrigerator for at least 30 minutes until set.