Servings: 4 jars | Prep Time: 20 minutes | Chill Time: 2 hours | Total Time: 2 hours 20 minutes
You Had Me at No-Bake
Let me paint you a picture. It is a hot afternoon, you want dessert, but you absolutely do not want to turn on the oven. Sound familiar? That is exactly where the No-Bake Key Lime Cheesecake Jar recipe enters the chat and honestly saves the day.
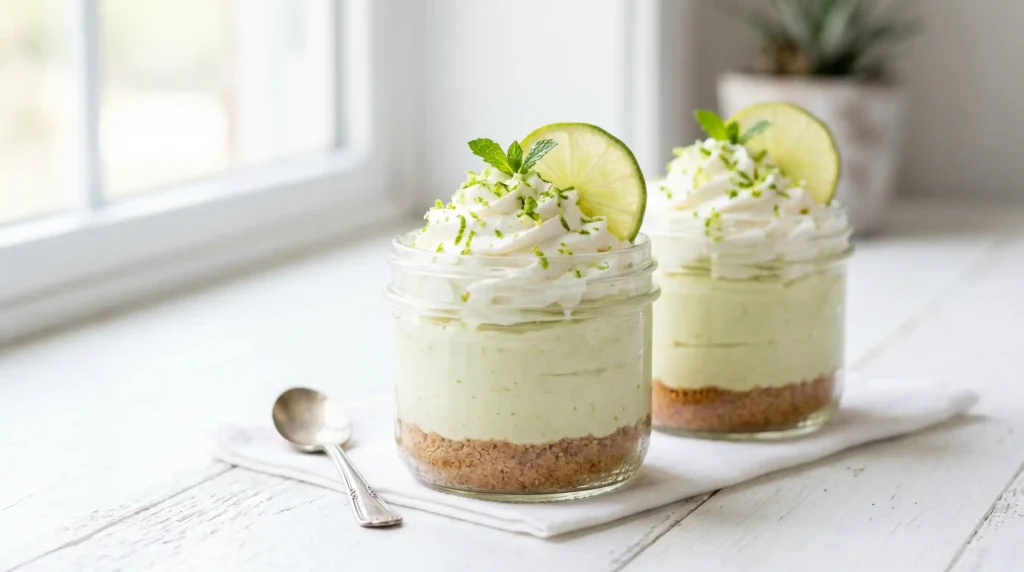
These little jars pack a buttery graham cracker crust, a creamy tangy cheesecake filling, and that bright citrus punch that makes key lime anything so irresistible. No oven, no water bath, no fuss whatsoever.
I first made these for a summer cookout, and let me tell you, they disappeared before I even got one for myself. That was the moment I knew this recipe deserved a permanent spot in my rotation.
What You Need for No-Bake Key Lime Cheesecake Jar
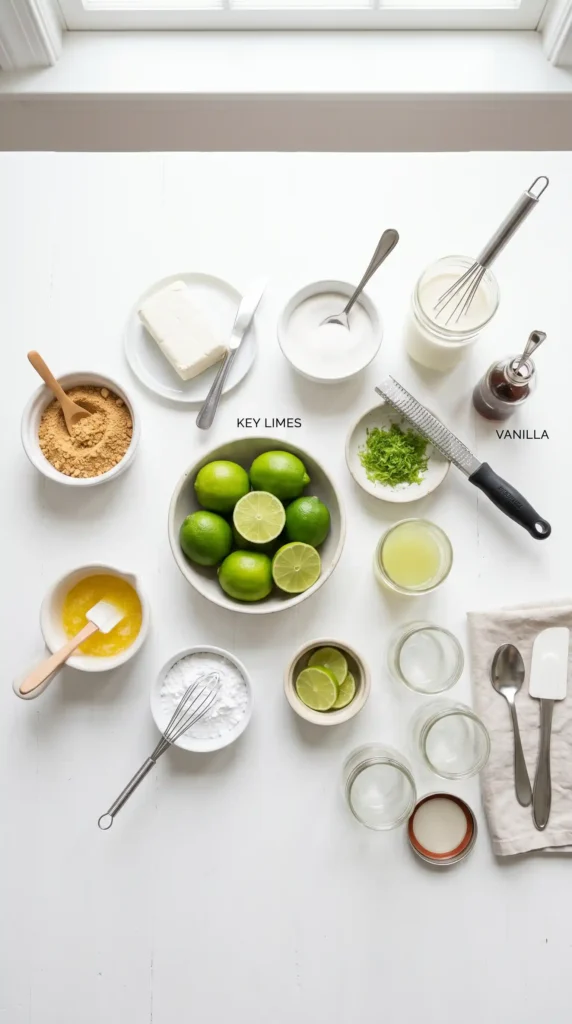
Here is the full ingredient list, broken down neatly so you can grab everything in one grocery run. No mystery items, no obscure specialty stores needed.
For the Graham Cracker Crust
- 1 and 1/2 cups graham cracker crumbs (about 10 full cracker sheets)
- 3 tablespoons granulated sugar
- 6 tablespoons unsalted butter, melted
For the Key Lime Cheesecake Filling
- 16 oz (2 blocks) full-fat cream cheese, softened to room temperature
- 1 cup powdered sugar, sifted
- 1/2 cup fresh key lime juice (about 12 to 15 key limes, or bottled works too)
- 2 tablespoons key lime zest
- 1 teaspoon pure vanilla extract
- 1 cup heavy whipping cream, cold
For the Topping (Optional but Highly Recommended)
- 1/2 cup whipped cream
- Extra key lime zest for garnish
- Thin lime slices for decoration
Why Individual Jars Are Kind of Genius
Can we take a second to appreciate the jar format? IMO, it is one of the smartest ways to serve a no-bake dessert. You get perfect individual portions, zero slicing drama, and they look ridiculously cute at any gathering.
Jars also solve the serving problem completely. No uneven slices. No cheesecake falling apart when you cut it. Everyone gets their own perfectly layered, creamy little situation and that is a beautiful thing.
Plus, you can make these a day ahead, stick them in the fridge, and pull them out when you need them. Have you ever thought about how much stress that removes from hosting? It is genuinely life-changing.
How to Make No-Bake Key Lime Cheesecake Jars Step by Step
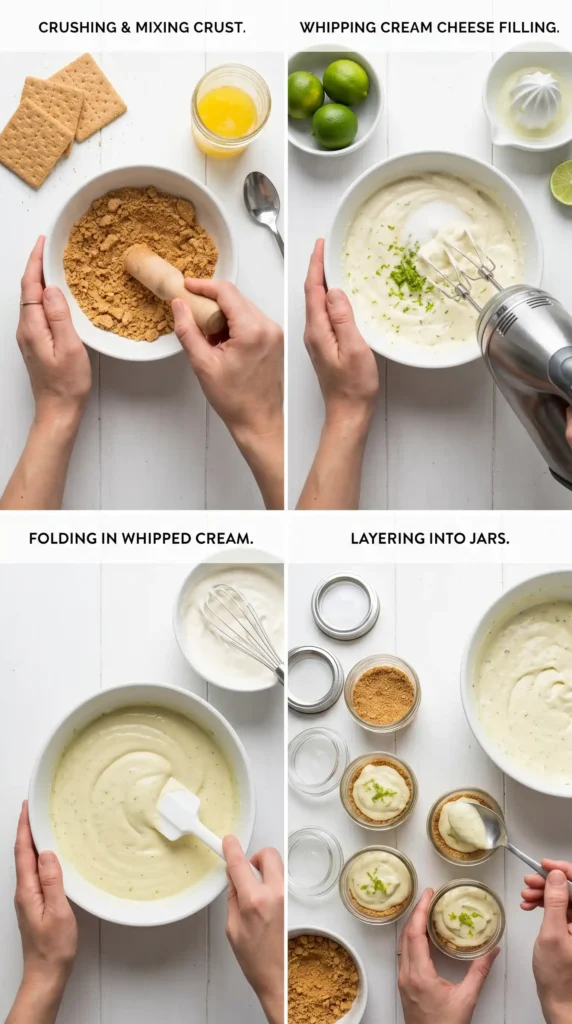
Okay, let us get into the actual making process. I am going to walk you through every single step in detail because the little things here actually matter for getting that perfect texture and layer structure.
Step 1: Prepare Your Jars
Start by choosing your jars. Wide-mouth mason jars work beautifully. Eight-ounce jars are the sweet spot for individual portions. Give them a good wash and dry them completely before you start building layers.
Set all four jars out on your counter in a row. Having them ready before you start means you can work quickly and efficiently without scrambling mid-process. Line them up and get mentally prepared for the delicious work ahead.
Step 2: Make the Graham Cracker Crust Layer
Grab your 1 and 1/2 cups of graham cracker crumbs and pour them into a medium mixing bowl. Add 3 tablespoons of granulated sugar and give it a quick stir to combine everything evenly.
Now pour in your 6 tablespoons of melted unsalted butter. Stir everything together thoroughly until every single crumb is coated in butter. The mixture should look like wet sand and hold its shape when you press a pinch between your fingers.
Spoon about 3 to 4 tablespoons of the crust mixture into each jar. Use the back of a spoon or the bottom of a small glass to press the crumbs down firmly and evenly into a compact layer. This firmness is what keeps the crust from crumbling into the filling later.
Place the jars in the fridge for about 10 minutes while you work on the filling. This quick chill helps the crust set slightly and stay in place when you add the cheesecake layer on top.
Step 3: Juice and Zest Your Key Limes
This step is where the real flavor magic happens. Roll each key lime firmly on your counter with your palm before cutting. This breaks down the inner membranes and helps you get every last drop of juice out.
Cut your key limes in half and juice them until you have 1/2 cup of fresh juice. Strain out any seeds or large pulp pieces. Fresh juice gives you a brighter, more vibrant flavor compared to bottled, but bottled key lime juice is a completely acceptable shortcut on busy days.
Zest 2 tablespoons worth from your key limes before juicing them. Zesting after juicing is a nightmare, so always do this step first. The zest carries intense citrus oils that punch up the flavor of the filling dramatically.
Step 4: Beat the Cream Cheese Base
Make absolutely sure your cream cheese is at room temperature before starting. Cold cream cheese will leave you with lumps in your filling no matter how long you beat it, and nobody wants that.
Using a hand mixer or stand mixer, beat the 16 oz of softened cream cheese on medium speed for about 2 full minutes. You want it completely smooth and fluffy before adding anything else. Scrape down the sides of the bowl at least once during this process.
Add the 1 cup of sifted powdered sugar to the cream cheese and continue mixing on medium speed for another minute. Sifting the sugar prevents any tiny lumps from making it into your filling. The mixture should be smooth, creamy, and just slightly sweet at this stage.
Step 5: Add the Key Lime Flavor
Now comes the best part. Pour in your 1/2 cup of fresh key lime juice slowly while mixing on low speed. Adding it slowly prevents any potential curdling of the cream cheese, keeping everything silky smooth.
Add the 2 tablespoons of key lime zest and the 1 teaspoon of vanilla extract. Mix on medium speed for about 30 seconds until everything is evenly distributed. The filling will look pale yellow-green at this point, which is exactly right.
Taste the filling here. Is it tangy enough? Does it need a touch more lime? This is your moment to adjust. FYI, the flavor intensifies slightly after chilling, so keep that in mind before going wild with extra juice.
Step 6: Whip the Heavy Cream
Pour the 1 cup of cold heavy whipping cream into a clean mixing bowl. Cold cream whips up much better than cream at room temperature, so do not skip the chill factor here.
Whip on medium-high speed until stiff peaks form, which usually takes about 3 to 4 minutes. You will know it is ready when you lift the beater and the cream holds a firm peak that does not flop over. Do not overbeat or you will end up with butter, which would be a tragic outcome for your cheesecake.
Step 7: Fold the Whipped Cream Into the Filling
This is the step that takes your filling from dense and heavy to light and airy. Use a rubber spatula and fold the whipped cream into the key lime cream cheese mixture gently. Do not stir aggressively.
Fold in thirds for the best result. Add one third of the whipped cream first, fold it in completely, then add the second third, fold again, and finally add the last third. This gradual method keeps all the air you just whipped into the cream intact.
The final filling should be thick, creamy, and airy all at once. It should hold its shape when scooped but still feel light and smooth. If it looks good, it is good.
Step 8: Fill the Jars
Take your jars out of the fridge. Now spoon or pipe the cheesecake filling on top of the chilled graham cracker crust in each jar. Fill each jar to about three-quarters full to leave room for toppings.
If you want a really clean and professional look, transfer the filling into a piping bag or a zip-lock bag with the corner snipped off. This gives you beautiful swirls and much better control over the amount going into each jar.
Tap each jar gently on the counter a few times after filling to settle the mixture and remove any air pockets hiding between the filling and the sides of the jar. This also helps the layers look cleaner from the outside.
Step 9: Chill Until Set
Refrigerate the filled jars for at least 2 hours. This chill time is non-negotiable. The filling needs time to firm up and the flavors need time to meld together and develop into something truly special.
If you can wait overnight, do it. The No-Bake Key Lime Cheesecake Jar actually tastes better after a full night in the fridge. The lime flavor deepens, the filling firms up perfectly, and the crust gets this almost cookie-like texture that is completely addictive.
Step 10: Add Toppings and Serve
Right before serving, pull the jars out of the fridge and add your toppings. Pipe or spoon a generous dollop of whipped cream onto each jar. Sprinkle fresh key lime zest over the top and add a thin lime slice on the rim for a pop of color.
Serve them straight from the fridge. These jars are best served cold. Hand each guest their own jar with a long spoon and watch their faces when they take that first bite. Worth every single step.
Tips to Make No-Bake Key Lime Cheesecake Jar
A few small things can make a noticeable difference in the final result. Here are the ones that actually matter from personal experience.
- Room temperature cream cheese: Always. Non-negotiable. Cold cream cheese ruins the texture.
- Sift the powdered sugar: Takes 30 extra seconds and prevents lumps entirely.
- Zest before you juice: Trust the process here.
- Fold, never stir: Stirring deflates the whipped cream and makes the filling dense.
- Chill fully: Two hours minimum. Overnight is even better.
How to Store Your No-Bake Key Lime Cheesecake Jar
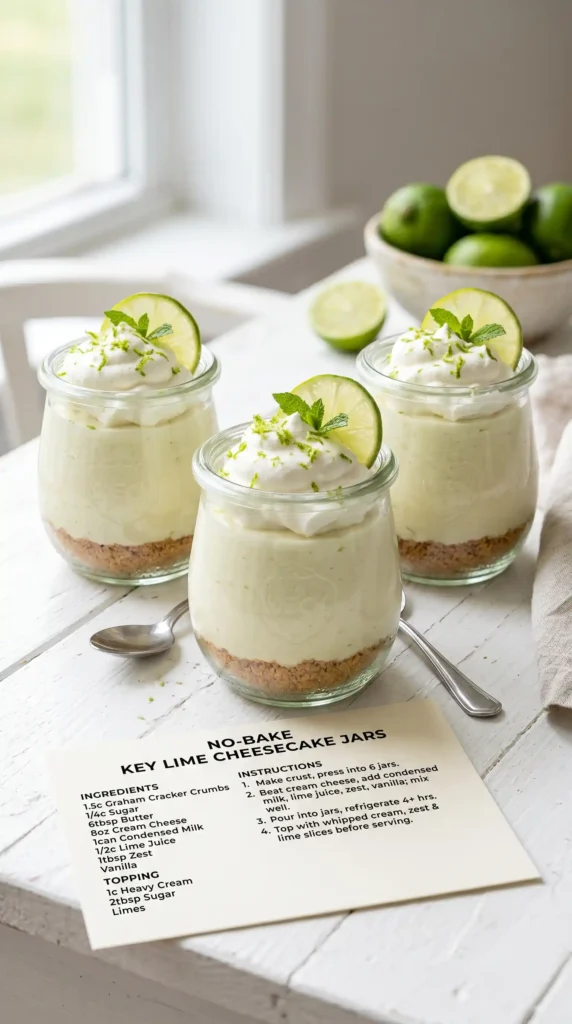
Store sealed jars in the refrigerator for up to 4 days. If you are making them ahead for a party, add the whipped cream topping and garnishes only right before serving so they stay fresh and pretty.
You can also freeze the filled jars without the topping for up to one month. Thaw overnight in the fridge before serving. The texture may be very slightly different but honestly still absolutely delicious
FAQs About No-Bake Key Lime Cheesecake Jars
1. Can I use regular limes instead of key limes?
Yes, regular limes work just fine. The flavor will be a little less floral and slightly more tart, but the recipe holds up beautifully. Persian limes are more widely available, so no stress if key limes are hard to find in your area.
2. Can I use low-fat cream cheese?
Full-fat cream cheese is strongly recommended. Low-fat versions have more moisture and less fat content, which means your filling may not set up properly and will likely turn out too soft. For best results, stick with the full-fat block-style cream cheese.
3. How far in advance can I make these jars?
You can make them up to 2 days in advance without any issues. The crust stays firm, the filling stays set, and the flavor actually improves with time in the fridge. Just hold off on adding whipped cream toppings until you are ready to serve.
4. Can I use bottled key lime juice?
Yes, bottled key lime juice is a completely acceptable substitute. The flavor is slightly less bright than fresh but still very good. If you go this route, look for 100 percent pure key lime juice with no added sugar or artificial flavors for the cleanest taste.
5. Why is my cheesecake filling too runny?
This usually comes down to two things. Either the cream cheese was not soft enough before mixing, leading to under-incorporation, or the whipped cream was not whipped to stiff peaks before folding. Make sure your cream cheese is fully softened and your heavy cream is properly whipped before combining them.
6. Can I make this recipe into a full cheesecake instead of jars?
Absolutely. Press the crust into the bottom of a 9-inch springform pan, spread the filling over it, and chill for at least 4 hours or overnight. The ingredient amounts in this recipe yield enough for one standard cheesecake. Just adjust your chill time accordingly.
Go Make These Already
The No-Bake Key Lime Cheesecake Jar recipe is one of those rare recipes that looks impressive, tastes incredible, and requires zero stress to pull off. No oven, no complicated techniques, no special equipment beyond a mixer and some jars.
You get a buttery crunchy crust, a silky tangy cheesecake filling, and that hit of bright citrus that makes every single bite feel like a small vacation. What is not to love? Make them ahead, stash them in the fridge, and pull them out whenever you need to impress someone or simply want to treat yourself. And hey, maybe hide one in the back of the fridge this time so you actually get to eat yours.
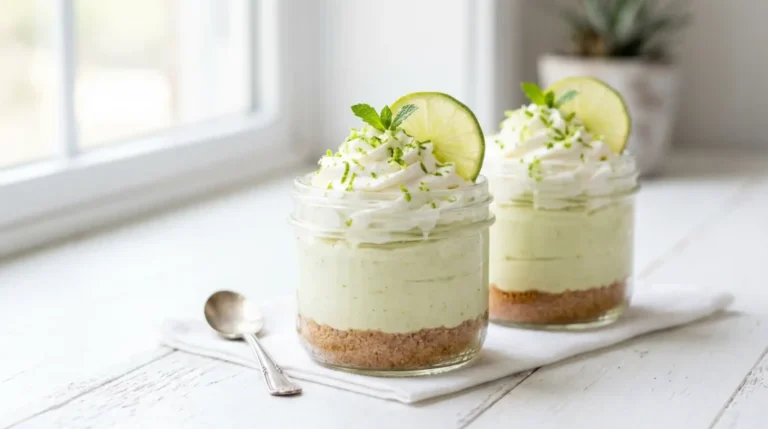
No-Bake Key Lime Cheesecake Jars
Ingredients
Method
- Start by choosing your wide-mouth mason jars (8-ounce jars work well). Wash and dry them completely.
- Set all four jars out on your counter.
- In a medium mixing bowl, combine the graham cracker crumbs and granulated sugar. Stir to combine.
- Add the melted unsalted butter and mix thoroughly until the crumbs are coated and resemble wet sand.
- Press about 3 to 4 tablespoons of the crust mixture firmly into the bottom of each jar.
- Refrigerate the jars for about 10 minutes.
- Roll each key lime on the counter to release juice, then cut in half and juice to get 1/2 cup of juice.
- Zest 2 tablespoons worth of key limes before juicing.
- Beat the softened cream cheese on medium speed for about 2 minutes until smooth.
- Add the sifted powdered sugar and mix for another minute.
- Pour in the fresh key lime juice slowly while mixing on low speed.
- Add the key lime zest and vanilla extract, mix until evenly distributed.
- Whip the cold heavy whipping cream until stiff peaks form (about 3 to 4 minutes).
- Gently fold the whipped cream into the key lime cream cheese mixture, doing this in thirds.
- Spoon or pipe the cheesecake filling on top of the graham cracker crust in each jar.
- Refrigerate the jars for at least 2 hours.
- Add whipped cream, key lime zest, and lime slices as topping right before serving.