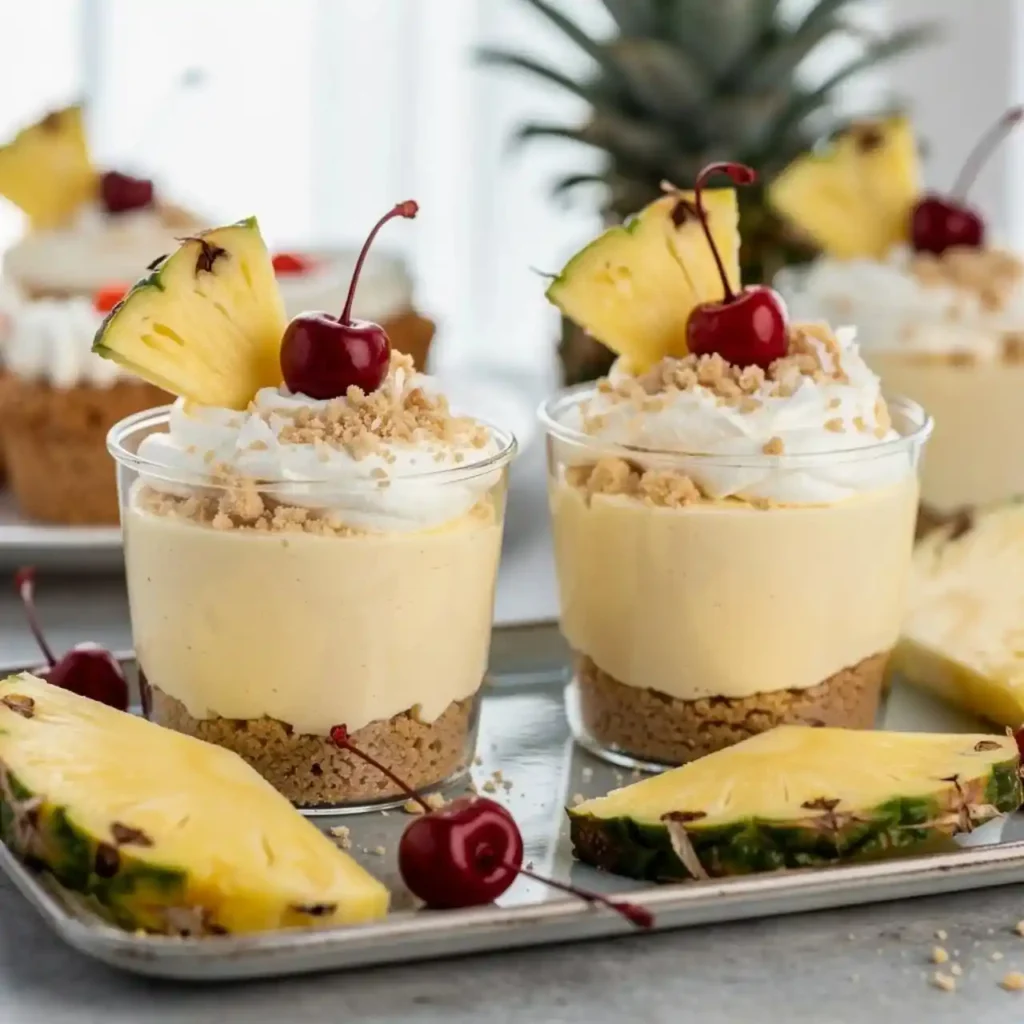
Want dessert that tastes tropical without turning on the oven? No-bake pineapple cheesecake mousse delivers exactly that. I first made this on a sweltering afternoon when baking felt like a punishment, not an option.
Servings: Makes 6 servings Prep time: 20 minutes Chill time: 2 hours minimum, overnight for best results Total time: About 2 hours 20 minutes, mostly hands-off
What Makes This Mousse So Special?
This dessert combines creamy cheesecake flavor with light, airy mousse texture, then adds bright pineapple for a tropical twist. No oven, no water bath, no stress.
Have you ever wanted cheesecake flavor without the fuss of baking a whole cheesecake? This recipe solves that problem in under half an hour of actual work.
What You’ll Need
This recipe keeps things simple with pantry and fridge staples. FYI, quality cream cheese makes a noticeable difference in how smooth your final mousse turns out.
- Cream cheese: 1 block (8 oz), softened at room temperature
- Heavy whipping cream: 1 cup
- Powdered sugar: 1/2 cup
- Vanilla extract: 1 teaspoon
- Crushed pineapple: 1 cup, well drained
- Shredded coconut: 1 cup
- Crushed graham crackers: 1/2 cup
Preparing the Cream Cheese Base
Start by placing your softened cream cheese into a large mixing bowl. Beat it on medium speed until it turns smooth and creamy, with absolutely no lumps remaining.
Softened cream cheese matters more than people expect here. Cold cream cheese straight from the fridge clumps up and refuses to blend smoothly, no matter how long you beat it.
Gradually add the powdered sugar and vanilla extract while continuing to mix. This step builds the sweet, fluffy base your entire mousse depends on, so don’t rush past it.
Keep mixing until everything looks fully combined and slightly glossy. The mixture should feel light, not dense, which sets you up perfectly for the next step.
Whipping the Cream
In a separate bowl, pour in your heavy whipping cream and begin whipping on medium-high speed. Watch closely as it transforms from liquid into soft, billowy peaks.
Stop whipping once soft peaks form, meaning the cream holds its shape but the tip gently folds over rather than standing perfectly straight. Overwhipping here turns your cream grainy and clumpy.
This step is genuinely crucial for that light, airy mousse texture everyone loves. Skipping it or under-whipping the cream leaves you with something closer to dense cheesecake filling.
Folding Everything Together
Gently fold the whipped cream into your cream cheese mixture using a spatula. Work in broad, sweeping motions, scraping from the bottom of the bowl upward.
Take your time here and avoid stirring aggressively. Aggressive mixing deflates all that air you just worked to whip in, leaving you with a flatter, denser mousse than intended.
Once fully combined, your mixture should look pale, fluffy, and cloud-like. This is genuinely one of my favorite textures to work with in any no-bake dessert.
Adding the Tropical Flavor
Now stir in your drained crushed pineapple and shredded coconut. Fold gently but thoroughly so every bite gets that burst of tropical flavor throughout the mousse.
Draining the pineapple properly is non-negotiable. Excess liquid waters down your mousse and prevents it from setting up firm enough to hold its shape once chilled.
Press the crushed pineapple against a fine mesh strainer with a spoon to remove as much juice as possible before adding it in. Your future self will thank you.
Layering for Presentation
Grab clear serving glasses or small bowls for the prettiest presentation. Layering isn’t just for looks either, it adds crunch and texture contrast throughout each bite.
Start with a spoonful of crushed graham crackers at the bottom of each glass. This creates a crunchy base reminiscent of classic cheesecake crust, without any baking required.
- Add a layer of pineapple cheesecake mousse over the graham crackers
- Sprinkle another light layer of crushed graham crackers on top
- Add a second layer of mousse, filling toward the top of the glass
- Finish with a dollop of extra whipped cream and a pinch of coconut
Repeat these layers until your glasses reach the top. Building height here makes for an impressive dessert that looks far more complicated than it actually was to make.
Chilling for Maximum Flavor
Cover your assembled mousse cups and place them in the refrigerator. Let them chill for at least two hours before serving, though overnight delivers even better results.
This resting time lets the flavors meld together and allows the mousse to firm up slightly. Skipping this step leaves you with something closer to soft pudding than proper mousse.
If you’re prepping for a party, this make-ahead quality is genuinely a lifesaver. I often assemble mine the night before so I’m not stuck in the kitchen during the actual event.
Serving Tips
Serve your mousse straight from the fridge for the best texture and cleanest presentation. It holds its shape well and looks stunning in clear glassware.
Pair it with grilled chicken, lemony seafood, or any heavier main course. The lightness of this mousse works beautifully as a palate cleanser after a rich meal.
Have you ever noticed how the right dessert can completely change how a meal ends? This one does exactly that, every single time I serve it.
Storage and Leftovers
Store any leftover mousse covered in the fridge for up to three days. The graham cracker layers soften slightly over time but still taste great.
Honestly, leftovers rarely happen in my house. This mousse disappears fast once people realize how light and refreshing it tastes compared to heavier desserts.
Fun Variations to Try
Once you’ve made the classic version, there’s plenty of room to experiment. Here are some easy swaps worth trying on your next batch:
- Swap crushed pineapple for diced mango or fresh strawberries
- Use crushed nuts instead of coconut for a different crunch
- Add a splash of rum extract for a pina colada-inspired twist
- Top with toasted coconut flakes instead of raw shredded coconut
Frequently Asked Questions
Can I make no-bake pineapple cheesecake mousse ahead of time? Yes, and it actually tastes better after chilling overnight. Assemble it up to a day in advance for the best flavor and texture.
Why is my mousse runny instead of fluffy? This usually happens from underwhipped cream or pineapple that wasn’t drained thoroughly. Both steps directly affect how well the mousse holds its shape.
Can I use canned pineapple instead of fresh? Canned crushed pineapple works perfectly for this recipe. Just make sure to drain it well, pressing out as much liquid as possible before adding it in.
How long does this mousse last in the fridge? Stored covered, it stays fresh for about three days. The graham cracker layers soften over time but the flavor remains just as good.
Can I make this recipe without coconut? Absolutely. Simply leave it out or replace it with crushed nuts or extra graham crackers for texture without the coconut flavor.
Is this recipe gluten-free? Swap the graham crackers for a gluten-free alternative and the rest of the recipe remains naturally gluten-free as written.
Wrapping This Up
No-bake pineapple cheesecake mousse proves that impressive desserts don’t require an oven or hours of effort. A handful of ingredients and some patience get you there.
Next time summer heat has you avoiding the kitchen, whip up a batch of this instead. Trust me, once your guests taste it, they’ll be asking for the recipe too.



