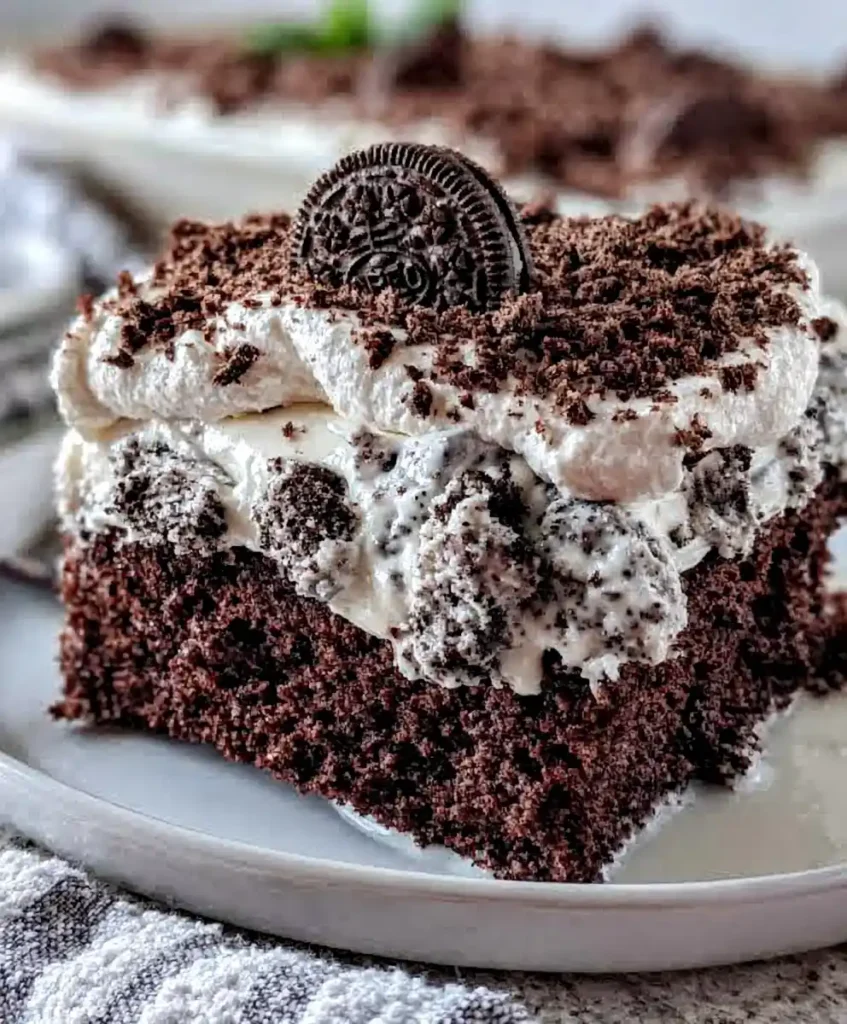
Poke cake is one of those desserts that never goes out of style. Poking holes into a freshly baked cake allows every bite to soak up extra flavour and moisture. This Oreo Poke Cake takes that simple idea to the next level. Sweetened condensed milk and a cookies-and-cream filling seep into the cake, creating delicious swirls in every slice.
I first made this for a birthday party because I needed a dessert I could prepare ahead of time. It chilled beautifully, sliced neatly, and was easy to serve. By the end of the evening, the pan was empty. Since then, it’s become one of my favourite make-ahead desserts. Despite its simple preparation, it always gets more compliments than desserts that take twice as much effort.
Have you ever made something that required mostly box mix ingredients and had it receive from-scratch praise? This is that recipe. Let us make it properly.
Why the Poke Cake Technique Produces Something Better Than Regular Cake
Standard cake is moist and flavourful. Poke cake is moist throughout in a fundamentally different way — the holes allow liquid to penetrate from the surface all the way to the bottom of the cake, creating a network of sweetened, flavoured channels that run through the entire crumb rather than moisture existing only at the surface level. Every bite from the top to the bottom of a slice contains the infused liquid rather than just the cake crumb.
Standard Chocolate Cake
Moisture exists in the baked crumb but not in any additional infused form. The flavour is uniform throughout — chocolate cake with frosting on top, two distinct layers.
Oreo Poke Cake
The condensed milk fills the holes and creates sweet, creamy tunnels throughout the cake. The pudding topping fills the remaining surface and seeps into the holes. Every bite contains multiple flavour elements simultaneously.
The sweetened condensed milk is the specific liquid choice that makes Oreo Poke Cake work so distinctively well. Sweetened condensed milk is ideal for poke cakes because its thick consistency settles into the holes instead of soaking through the entire cake. It also adds rich sweetness without overpowering the chocolate flavour. That’s what gives each bite a distinct, creamy layer. Among all poke cake variations, this ingredient delivers some of the most consistently delicious results, and Oreo Poke Cake is one of the best examples.
What You Need
Six ingredients including the Oreos. The cake mix does most of the heavy lifting in this recipe. The extra ingredients and techniques are what transform it into a truly memorable dessert. Choose a chocolate cake mix with a flavour you already enjoy, as it forms the base of the entire cake. For an even richer result, use a devil’s food cake mix. Its deeper chocolate flavour pairs especially well with the sweetened condensed milk and Oreo filling.
- 1 box (about 432g / 15.25oz) chocolate cake mix, plus the ingredients listed on the package (typically 3 eggs, 1/3 cup vegetable oil, and 1 cup water). A devil’s food cake mix is an excellent choice if you prefer a deeper chocolate flavour.
- 1 can (397g / 14oz) sweetened condensed milk. Pour in the entire can after baking. Do not substitute evaporated milk, as it is unsweetened and too thin to create the same rich, moist texture.1 package (96g / 3.4oz) instant cookies and cream pudding mix, used dry. Instant vanilla pudding also works if you’d like a more subtle cookies-and-cream flavour.
- 1 cup (240ml) cold whole milk for preparing the pudding. Using cold milk helps it thicken quickly and creates a smooth, creamy filling.
- 1 container (225g / 8oz) whipped topping, such as Cool Whip, fully thawed before folding into the pudding mixture.
- 25 Oreo cookies, divided. Finely crush about 10 cookies to mix into the filling, then roughly crush the remaining 15 to sprinkle over the finished cake for extra crunch and a classic cookies-and-cream finish.
Mastering the Condensed Milk Soak
The soaking step is what gives a poke cake its signature texture, so it’s worth taking your time. For the best results, let the cake cool completely before poking the holes. A warm cake is more likely to crumble, making it difficult for the filling to settle neatly inside.
Next, pour the sweetened condensed milk slowly instead of all at once. Aim for the holes rather than flooding the entire surface. This gives the thick milk time to soak into the cake instead of collecting on top. Once all the condensed milk has been added, let the cake rest for about 5 minutes. That short wait allows the liquid to absorb fully before you spread on the cookies-and-cream filling.
How to Make Oreo Poke Cake Step by Step
Seven stages: bake the cake, cool the cake, poke the holes, pour and absorb the condensed milk, make and apply the filling, add the Oreo topping, and chill before serving. The active work takes about 45 minutes. The refrigerator handles the rest. The most important variable is time — every chilling stage requires proper duration to produce the intended result.
Step 1: Bake the Chocolate Cake
Preheat the oven to the temperature specified on the chocolate cake mix box — typically 175°C (350°F). Grease and flour a 9×13-inch (23x33cm) baking pan, or spray with baking spray that contains flour. Prepare the cake batter according to the box instructions, adding the specified eggs, oil, and water. Mix as directed — typically 2 minutes on medium speed — until smooth and lump-free.
Pour the batter into the prepared pan and smooth the top with a spatula. Bake on the centre rack for the time specified on the box — typically 28–32 minutes for a 9×13 format. At the minimum time, insert a toothpick into the very centre of the cake. If it comes out clean or with just one or two moist crumbs, the cake is done. If wet batter remains on the toothpick, continue baking in 2-minute increments until clean. Remove from the oven and allow to cool in the pan on a wire rack.
Step 2: Cool the Cake Completely
Allow the baked cake to cool in the pan for a full 30 minutes minimum, and ideally until it reaches room temperature — about 45–60 minutes. The complete cooling step is the most frequently skipped and most consequential preparation decision in this recipe. A warm cake crumbles around poked holes rather than forming clean channels, and condensed milk poured on a warm cake absorbs unevenly because the warm steam rising from the cake pushes back against the liquid trying to sink in. Use this cooling time productively — crush the Oreos and prepare the filling components so everything is ready to go the moment the cake reaches room temperature.
Step 3: Poke the Holes
Once the cake is completely cool, take the handle end of a wooden spoon — approximately 1.5–2cm in diameter. Insert the handle into the cake and push all the way to the bottom of the pan, then pull straight back out. Repeat this across the entire surface of the cake at approximately 2–3cm intervals, creating a grid of holes that covers the full cake surface from edge to edge. Work deliberately rather than randomly — a systematic grid pattern ensures even condensed milk distribution throughout the cake.
The holes should look clean — defined circles rather than ragged tears. If the holes look ragged or the cake crumbles around them, the cake was not fully cooled. Continue poking regardless — the condensed milk will fill and set these channels during the chilling period and the final result will not be affected by slight surface irregularity around the holes.
Step 4: Pour the Sweetened Condensed Milk
Open the can of sweetened condensed milk and transfer it to a measuring jug with a pour spout, or use the can directly. Begin pouring the condensed milk slowly and deliberately over the poked cake — direct the pour over the holes rather than between them. Work systematically across the cake, giving each section of holes time to absorb before moving on. The condensed milk is thick and absorbs gradually — pouring too quickly produces a pool on the surface that the holes cannot absorb fast enough.
Use all of the condensed milk — the full can goes on the cake. After pouring, allow the cake to sit for 5 minutes while the condensed milk continues absorbing into the holes. During this time you may see the milk gradually disappearing into the holes as it soaks through the crumb. After 5 minutes, any remaining surface milk will have mostly been absorbed. Set the pan aside and move to making the filling.
Step 5: Make the Cookies and Cream Filling
Crush 10 Oreo cookies into fine crumbs — place them in a zip-lock bag and roll firmly with a rolling pin until the cookies become a fine, uniform crumb without large chunks. In a large bowl, combine the dry instant cookies and cream pudding mix with the 1 cup of cold whole milk. Whisk vigorously for 2 minutes until the pudding thickens — it should look like a loose, soft-set pudding.
Add the fully thawed whipped topping to the thickened pudding mixture. Fold together gently with a rubber spatula using large, sweeping strokes from the bottom of the bowl upward until the whipped topping is fully incorporated and the filling looks uniformly pale and airy. Fold in the finely crushed Oreos. The finished filling should look like cookies and cream ice cream — speckled with dark cookie crumbs throughout a pale, fluffy base.
Step 6: Spread the Filling and Add the Oreo Topping
Spoon the cookies and cream filling over the condensed milk-soaked cake. Spread it from edge to edge using an offset spatula or the back of a spoon, creating an even layer that covers the entire surface. The filling layer should be approximately 1–1.5cm thick across the whole cake — not so thin that it looks sparse and not so thick that there is more filling than cake in each bite.
Crush the remaining 15 Oreo cookies to a rougher crumb than the ones mixed into the filling — you want a mix of larger pieces and finer crumbs that create textural variation across the top of the finished Oreo Poke Cake. Scatter them generously across the entire surface of the filling, pressing very gently so they adhere to the surface rather than sliding off when the cake is sliced and served.
Step 7: Chill and Serve
Cover the assembled cake loosely with cling film and refrigerate for a minimum of 1 hour, ideally 4 hours, ideally overnight. During refrigeration the filling continues to firm, the condensed milk continues to integrate with the cake crumb, the crushed Oreos in the filling soften slightly and blend into the creamy base, and the top Oreo crumbles settle into the filling surface. The overnight version tastes noticeably more cohesive and deeply flavoured than the 1-hour version. Slice cold into 12–16 squares and serve directly from the pan.
Variations Worth Making
Mint Oreo Poke Cake
Use Mint Oreos throughout the recipe in place of original Oreos — in the filling and on top. Add 1/2 teaspoon of pure peppermint extract to the filling mixture alongside the whipped topping. The mint-chocolate combination against the condensed milk-soaked chocolate cake produces an intensely cool, refreshing flavour profile that suits Christmas and winter gatherings beautifully. Garnish with a few whole Mint Oreos balanced along the top before serving.
Peanut Butter Oreo Poke Cake
Add 3 tablespoons of smooth peanut butter to the whipped topping before folding it into the pudding mixture. The peanut butter disperses through the airy whipped topping and produces a slightly denser, more flavourful filling with a clear peanut butter note that pairs with the cookies and cream pudding in a peanut-butter-cookie direction. Use Peanut Butter Oreos as the top garnish for an even stronger peanut butter presence throughout the finished cake.
Storage Tips
Store Oreo Poke Cake covered in the refrigerator for up to 4 days. The quality actually improves from day one to day two as the flavours continue to develop and the condensed milk integrates more thoroughly into the cake crumb — many people find the day-two version more flavourful than the just-chilled version. The Oreo crumbs on top soften gradually with each day from crunchy to chewy to soft — a texture progression that some people enjoy and others prefer avoiding by adding fresh Oreo crumbs just before serving.
This cake does not freeze well once assembled — the whipped topping filling breaks down and becomes grainy after freezing and thawing. The baked chocolate cake layer alone freezes for up to 2 months if wrapped well and thawed before the poke and fill stages. For most occasions, make the full assembled cake 1–2 days ahead and refrigerate rather than freezing.
Frequently Asked Questions
Can I use homemade chocolate cake instead of box mix?
Yes — any chocolate cake recipe that produces a standard 9×13 quantity of batter works identically with this technique. The box mix recommendation is purely for convenience, not flavour superiority. A scratch-made chocolate cake using buttermilk and Dutch-process cocoa produces a deeper, richer base that makes the condensed milk soaking and Oreo filling even more impressive by contrast. Use whichever approach suits your available time and preference. The technique, soaking, and filling are identical regardless of whether the base cake comes from a box or scratch.
What can I substitute for the cookies and cream pudding mix?
Instant vanilla pudding (same 96g / 3.4oz quantity) is the most common substitute and produces a slightly less cookie-forward filling that still tastes excellent with the crushed Oreos mixed in. Instant chocolate pudding produces a deeper, more intensely chocolate filling — less cookies-and-cream in character but genuinely delicious for confirmed chocolate enthusiasts. French vanilla pudding provides a richer, egg-custard quality to the filling. All three substitutes use the same cold milk quantity and same folding technique with the whipped topping.
Can I substitute the whipped topping with real whipped cream?
Yes. Whip 1 cup of cold heavy cream with 3 tablespoons of powdered sugar to stiff peaks, then fold into the pudding mixture. Fresh whipped cream produces a richer, less sweet filling than commercial whipped topping, which many people prefer flavour-wise. However, fresh whipped cream is significantly less stable — the filling will start to weep and deflate within 24–48 hours, while commercial whipped topping holds for 4 days. For same-day serving or 24-hour service, fresh whipped cream is excellent. For longer make-ahead periods, commercial whipped topping is the more practical choice.
How far ahead can I make Oreo Poke Cake?
The optimal make-ahead window is 24–48 hours before serving. At 24 hours, the condensed milk has fully integrated, the filling has set, and the flavours have developed significantly beyond the just-assembled version. At 48 hours, the flavour is at peak development — possibly the best the cake will taste across its full storage life. Beyond 48 hours, the top Oreo crumbs begin softening noticeably and the filling may start to weep slightly at the edges. If you want maximum Oreo crunch on top, refrigerate the assembled cake without the top Oreo garnish and add fresh crushed Oreos just before serving.
Can I make this into cupcakes instead of a sheet cake?
Yes, with technique adjustments. Bake the chocolate cake batter in 24 standard muffin cups, filling each two-thirds full, for 18–20 minutes. Once fully cooled, use a skewer or chopstick to poke 3–4 holes in the top of each cupcake. Use a small squeeze bottle to inject a small amount of condensed milk into each hole — approximately 1 teaspoon per cupcake total across all holes. Spoon the cookies and cream filling generously over each cupcake. Top with crushed Oreos and refrigerate. The cupcake version is even more portable and individually pre-portioned, which suits parties and gatherings particularly well.
Final Thoughts
This Oreo Poke Cake earns its position as one of the most consistently crowd-pleasing, practically made, genuinely delicious desserts available from a mostly box-mix ingredient list. The poke technique fills the cake with sweetened condensed milk that makes every bite extraordinarily moist. The cookies and cream filling turns the top layer into something that tastes like the inside of an Oreo cookie in cake form. And the crushed Oreo topping provides the visual and textural cue that tells everyone what flavour experience they are about to have.
Cool the cake completely before poking. Pour the condensed milk slowly and directly into the holes. Fold the filling gently. Add the Oreo topping immediately before refrigerating. Chill overnight for the best possible result. These five decisions produce the Oreo Poke Cake that gets a recipe request at every table it appears on.
Make it the evening before the event. Serve it from the pan at room temperature after 10 minutes of counter time. Accept the compliments with appropriate grace and the knowledge that the hardest part was waiting for the cake to cool before poking holes in it. FYI — that wait is the most genuinely challenging element of this entire recipe, and it is also completely necessary.
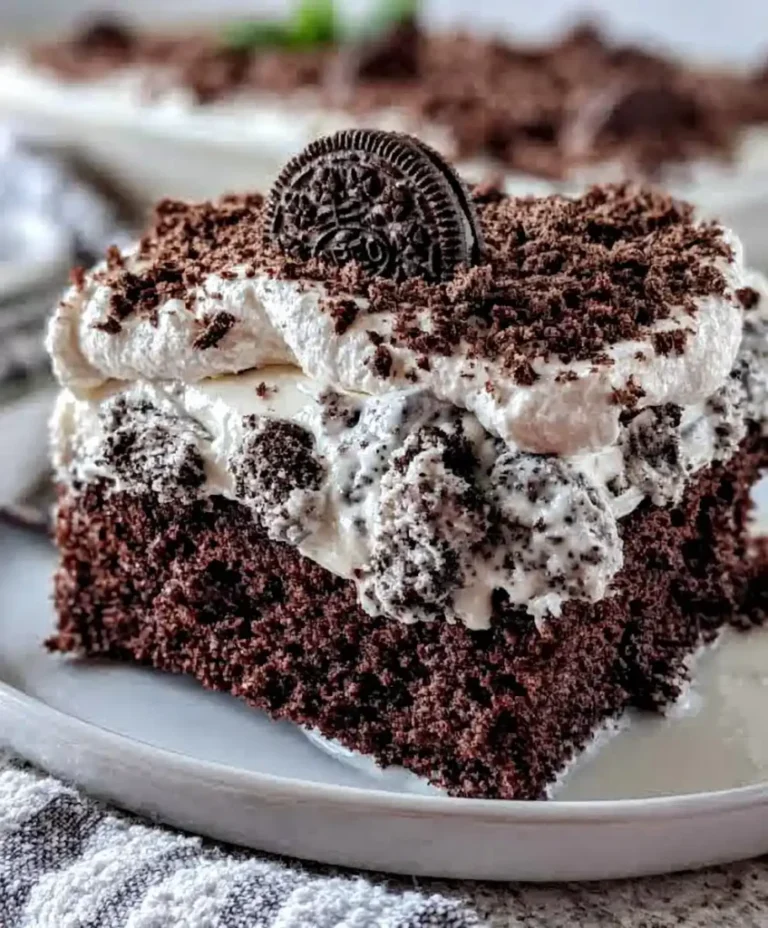
Oreo Poke Cake
Ingredients
Method
- Preheat the oven to 175°C (350°F). Grease and flour a 9x13-inch baking pan.
- Prepare the cake batter according to box instructions and pour into the prepared pan.
- Bake for 28-32 minutes or until a toothpick comes out clean. Allow to cool in the pan.
- Let the cake cool for 30-60 minutes until it reaches room temperature.
- Once the cake is cool, use the handle end of a wooden spoon to poke holes in a grid pattern across the cake.
- Pour sweetened condensed milk slowly over the holes in the cake, allowing it to soak in.
- Let the cake rest for 5 minutes to absorb the milk.
- Crush 10 Oreo cookies into fine crumbs.
- Mix the pudding mix with the cold milk and whisk until thickened, then fold in the whipped topping and crushed Oreos.
- Spread the cookies and cream filling evenly over the cake and top with the remaining crushed Oreos.
- Cover with cling film and refrigerate for at least 1 hour, ideally overnight before serving.



