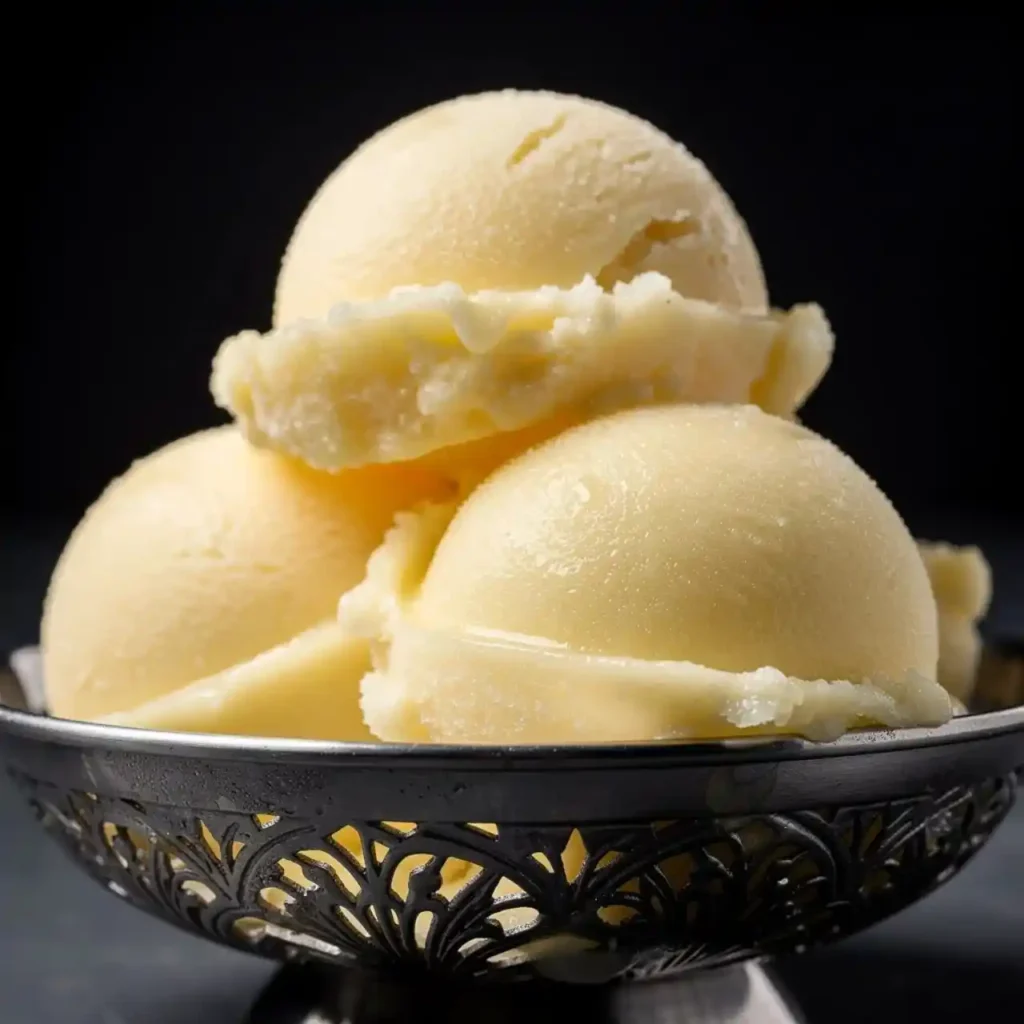
Servings: 4 servings Prep Time: 10 minutes Total Time: 2 hours 10 minutes (includes freezing)
Hot day, empty freezer, zero patience for turning on the oven. Sound familiar? Pineapple Sorbet fixes all three problems with four ingredients and almost no effort on your part.
I made this the first time on a whim with a pineapple that was about to go bad. Best kitchen accident of my life, honestly. Let’s get into how you can make it too.
Why Pineapple Makes the Best Sorbet
Pineapple brings natural sweetness and a sharp tang that most fruits just can’t match. That combo means you barely need added sugar to get a bold, punchy flavor. Ripe pineapple basically does half the work for you.
Have you ever noticed how pineapple tastes even better frozen? There’s something about the cold that intensifies that tropical flavor. IMO, it’s the most underrated fruit for sorbet, hands down.
What You’ll Need
Here’s the full ingredient list. Short, simple, and probably already sitting in your kitchen right now.
- Fresh pineapple chunks – 4 cups
- Granulated sugar – 1/2 cup, or to taste
- Lime juice – 1 tablespoon
- Water – 1/4 cup
Four ingredients, one seriously refreshing dessert. You really don’t need more than this.
Let’s Make This Sorbet, Step by Step
Step One: Pick a Ripe Pineapple
Start by choosing a pineapple that smells sweet at the base and gives slightly when you press it. A ripe pineapple makes a huge difference in the final flavor. Skip anything that smells sour or feels rock hard.
Fresh pineapple beats canned every time here. Canned pineapple often carries extra syrup, which throws off the sweetness balance you’re trying to control.
Step Two: Peel and Chop the Pineapple
Slice off the top and bottom of the pineapple first, then stand it upright on a cutting board. Carefully slice away the outer skin in strips, following the curve of the fruit. Cut around any brown spots or eyes as you go.
Chop the flesh into rough one-inch chunks. You don’t need perfect cubes here since everything gets blended smooth anyway, so don’t stress over precision.
Step Three: Load Up the Blender
Add your pineapple chunks, sugar, lime juice, and water into a blender. Make sure the pineapple goes in first so it doesn’t get stuck under the blades. This order genuinely makes blending smoother and faster.
Secure the lid tightly before you start. Nobody wants a pineapple explosion all over their kitchen ceiling.
Step Four: Blend Until Smooth
Blend on high speed until the mixture turns completely smooth, usually around 45 seconds to a minute. Stop halfway through and scrape down the sides if needed. You’re aiming for a silky, pourable consistency with zero chunks left behind.
Your kitchen should smell incredible right about now. That tropical aroma alone makes this recipe worth making on a random Tuesday.
Step Five: Taste and Adjust the Sweetness
Dip a spoon in and taste the mixture before freezing it. If your pineapple wasn’t super ripe, add a bit more sugar to balance things out. If it’s already plenty sweet, feel free to skip additional sugar entirely.
This step matters more than people think. Sweetness levels vary a lot depending on how ripe your pineapple actually was.
Step Six: Pour Into a Shallow Dish
Pour the blended mixture into a shallow, freezer-safe dish rather than a deep container. A wider surface area means faster, more even freezing. This small detail makes a real difference in the final texture.
Spread the mixture out evenly with a spatula. An even layer freezes more consistently than one with uneven, thick spots.
Step Seven: Freeze Until Firm
Place the dish in the freezer for about 1 to 2 hours, or until the mixture firms up completely. Check it around the one-hour mark since freezer temperatures vary. This waiting period is honestly the hardest part of the whole process.
Set a timer so you don’t forget about it. FYI, an overfrozen sorbet turns rock hard and becomes annoying to scoop later.
Step Eight: Scrape and Fluff
Once firm, pull the dish out and scrape the surface with a fork. This breaks up the ice crystals and creates that classic light, fluffy sorbet texture. Work in small sections, scraping from one edge to the other.
Keep scraping until the entire surface looks light and snowy. This step is what separates sorbet from a boring pineapple ice block.
Step Nine: Serve Right Away
Scoop the sorbet into bowls immediately after fluffing for the best texture. Sorbet melts faster than ice cream, so don’t let it sit out too long. Top with fresh mint or a drizzle of coconut cream if you’re feeling fancy.
Getting the Texture Just Right
Texture really is everything with sorbet. Freeze it too long without scraping, and you’ll end up with a solid, icy block that fights back against your spoon. Nobody enjoys wrestling with dessert.
Scraping with a fork at the right moment is the secret trick here. It breaks the ice into small, light crystals instead of one solid mass, giving you that classic fluffy sorbet texture people love.
A Few Fun Variations to Try
This recipe is a great starting point once you’ve got the basic version down. Here are a few twists worth experimenting with.
- Add coconut milk for a creamier, richer texture
- Blend in mango or banana for a tropical fruit mashup
- Top with chopped mint for a fresh, cooling finish
- Swap lime juice for a splash of rum for an adult-only version
Each variation takes this simple base somewhere new. That flexibility is exactly what makes this recipe worth keeping around.
Storing Leftovers
If you somehow have leftovers, which rarely happens in my house, transfer the sorbet into an airtight container. This keeps ice crystals from taking over and ruining that fluffy texture you worked for.
Stored properly, pineapple sorbet keeps well in the freezer for about a week. Let it sit out for a few minutes before scooping if it’s frozen solid.
Frequently Asked Questions
Can I make Pineapple Sorbet without an ice cream maker? Yes, this recipe doesn’t require one at all. Freezing the mixture in a shallow dish and scraping it with a fork gives you the same fluffy texture.
Can I use canned pineapple instead of fresh? Canned pineapple works in a pinch, but drain it well first to avoid excess syrup. Fresh pineapple still gives you the brightest, most natural flavor.
Why is my sorbet too icy instead of fluffy? This usually happens when the sorbet freezes too long without being scraped. Check it around the one-hour mark and scrape with a fork before it turns rock solid.
How long does homemade Pineapple Sorbet last in the freezer? It stays fresh for about a week when stored in an airtight container. After that, the texture starts to decline even though it’s still safe to eat.
Can I make this sorbet without added sugar? Yes, if your pineapple is very ripe and naturally sweet, you can skip the sugar entirely. Taste the blended mixture first and adjust from there.
Do I need lime juice, or can I skip it? Lime juice balances the sweetness and brightens the overall flavor, so it’s worth including. Lemon juice works as a substitute if that’s what you have on hand.
Wrapping It Up
Pineapple Sorbet proves that a great dessert doesn’t need a long ingredient list or fancy equipment. Just ripe pineapple, a blender, and a little patience in the freezer get you there. Make a batch this week, and don’t be shocked when it disappears faster than you expected.



