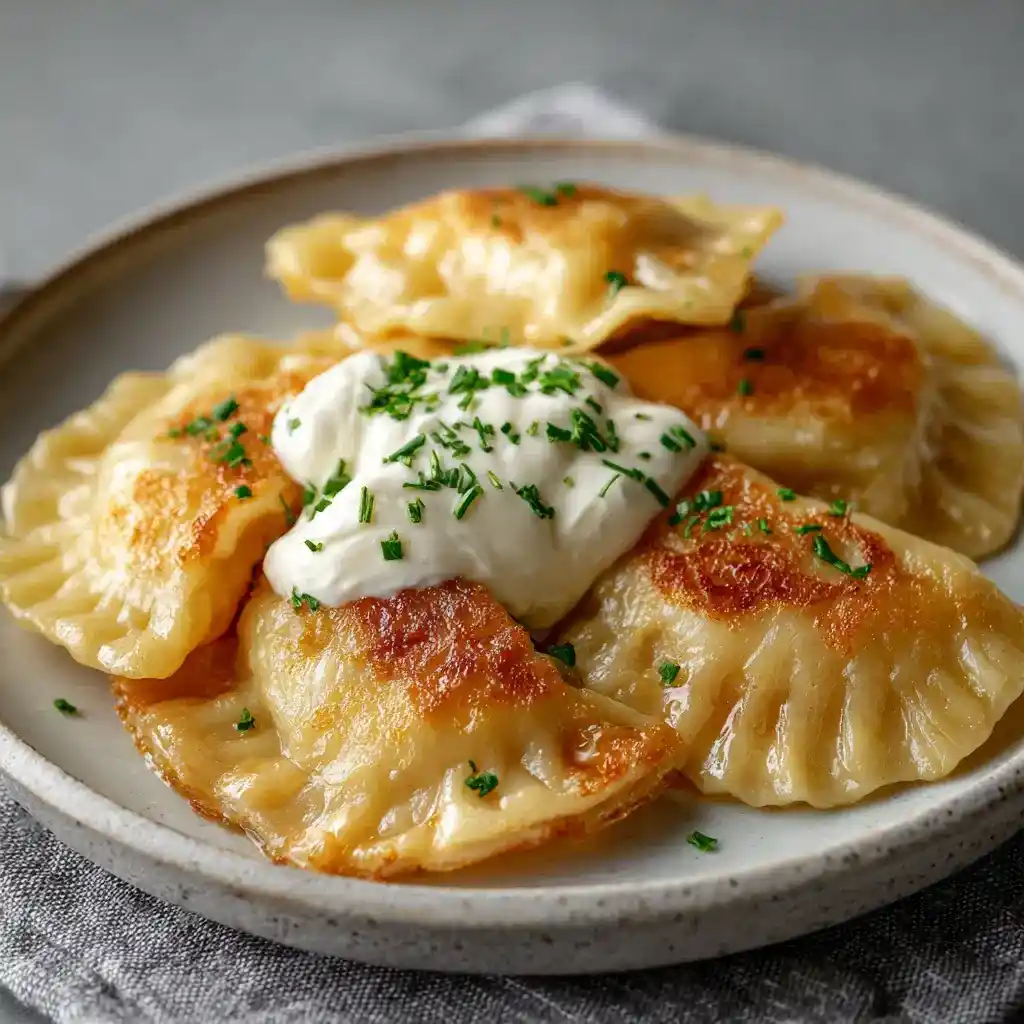
Servings: Makes about 30 pierogi (serves 6) Prep time: 45 minutes Rest time: 30 minutes Cook time: 30 minutes Total time: About 1 hour 45 minutes
Soft dough, creamy potato filling, and that unmistakable tang from farmer’s cheese. That’s what a proper Polish Pierogi Ruskie recipe delivers, and honestly, nothing store-bought comes close. Have you ever had a frozen pierogi and thought, “this is fine, but it’s missing something”?
I learned this recipe from watching family fold dozens of these by hand during holiday gatherings, and I’ve been making them ever since. There’s something genuinely satisfying about pinching that dough closed yourself. IMO, homemade pierogi ruskie beats every grocery store version, no contest.
Why Pierogi Ruskie Deserves a Spot on Your Table
Not every traditional dish holds up generation after generation, but pierogi ruskie absolutely does. Here’s why this recipe keeps earning its spot at family dinners:
- Creamy potato and cheese filling that feels rich without being heavy
- Soft, tender dough that holds its shape but never turns tough
- Versatile cooking methods — boil them, fry them, or do both
- Freezer-friendly, so you can stock up for busy weeknights
- Endlessly customizable filling, from mushroom to sweet cheese versions
Have you ever wondered why this humble dumpling became a cornerstone of Polish home cooking? One bite answers that question pretty quickly.
What You Need for Polish Pierogi Ruskie
This recipe breaks into three parts: the dough, the filling, and what you serve alongside it.
For the dough:
- 4 cups all-purpose flour, plus extra for dusting
- 1/2 teaspoon salt
- 1 cup boiling water
- 3 tablespoons clarified butter
- 1 large egg, room temperature
For the filling:
- 1 1/2 pounds russet potatoes
- 1 1/4 cups twaróg, also known as quark cheese
- 1 large onion, finely chopped
- 2 tablespoons clarified butter
- Salt, to taste
- Fine black pepper, to taste
For serving:
- 4 tablespoons unsalted butter
- Sour cream
- Caramelized onions
Nothing on this list requires a specialty import shop, aside from maybe tracking down twaróg, which most well-stocked grocery stores or European delis carry these days.
How to Make Polish Pierogi Ruskie
Let’s slow this down into manageable steps, because rushing dumpling dough is exactly how you end up with tough, cracked pierogi.
Step 1: Mix the Dough Base
Sift your flour into a large mixing bowl and stir in the salt. In a separate bowl, combine the melted clarified butter with the boiling water, whisking briefly so they blend together smoothly. This hot liquid base is what gives pierogi dough its signature soft, pliable texture.
Step 2: Bring the Dough Together
Gradually pour the hot butter and water mixture into your flour, stirring constantly as you go. Once everything looks roughly combined, crack in the egg and mix until a shaggy dough forms. Don’t worry if it looks messy at this stage; that’s completely normal.
Step 3: Knead Until Smooth
Transfer your dough onto a floured surface and knead it by hand for about 8 to 10 minutes. Keep pressing, folding, and turning until the dough transforms from rough and sticky into smooth and elastic. Cover it with a clean towel and let it rest for 30 minutes.
Step 4: Boil and Mash the Potatoes
While your dough rests, peel your potatoes and boil them in salted water for about 20 minutes, until they turn completely soft. Drain them thoroughly and mash until smooth, with no lumps remaining. Let the mashed potatoes cool completely before moving forward, since warm potatoes turn your filling gluey.
Step 5: Sauté the Onions
Heat butter in a pan over medium heat and add your finely chopped onion. Sauté for 7 to 10 minutes, stirring occasionally, until the onion turns a deep golden color and smells sweet rather than sharp. Set the onions aside to cool before mixing them into the filling.
Step 6: Combine the Filling
In a large bowl, mix your cooled mashed potatoes, twaróg cheese, sautéed onions, salt, and black pepper together. Stir until everything blends into one smooth, well-seasoned filling. Taste it here and adjust the seasoning, since this is your only chance before it gets sealed inside the dough.
Step 7: Roll Out the Dough
Divide your rested dough into four equal portions, keeping the ones you’re not using covered so they don’t dry out. Roll one portion out thin, about 2 millimeters thick, on a lightly floured surface. Thinner dough means more tender pierogi once cooked.
Step 8: Cut and Fill
Using a glass or round cutter, cut circles roughly 3 inches across from your rolled dough. Place a spoonful of filling into the center of each circle, being careful not to overfill. Overfilled pierogi tend to burst open during cooking, and nobody wants filling floating loose in their pot.
Step 9: Fold and Seal
Fold each circle in half to form a half-moon shape, then pinch the edges tightly together to seal in the filling. Press along the seam a second time to make sure nothing leaks out during cooking. This double-seal step genuinely matters, so don’t skip it.
Step 10: Boil the Pierogi
Bring a large pot of salted water to a boil and drop your pierogi in, working in batches so they don’t overcrowd the pot. Once they float to the surface, let them cook for 1 to 2 more minutes. Remove them with a slotted spoon and set them aside.
Step 11: Fry for Extra Flavor
This step is optional, but trust me, it’s worth it. Melt butter in a skillet and fry your boiled pierogi until golden on both sides, about 2 minutes per side. The crispy edges add a texture contrast that plain boiled pierogi just can’t match.
Step 12: Serve and Enjoy
Serve your pierogi hot, topped with a generous dollop of sour cream and a spoonful of caramelized onions. Have you ever noticed how the simplest toppings somehow make the biggest difference? That’s exactly the case here.
Tips for the Best Polish Pierogi Ruskie
Want these to turn out perfectly every single time? These small details make a genuine difference in the final result.
- Let potatoes cool completely before mixing into the filling
- Don’t overfill your dough circles, or they’ll burst while boiling
- Seal edges twice for extra insurance against leaks
- Boil first, then fry for the best texture combination
- Freeze uncooked pierogi on a tray before bagging them for storage
Skipping the double-seal step is basically asking your filling to escape mid-boil :/
Fun Variations to Try
Once you’ve mastered the classic potato and cheese version, why not branch out? Here are some variations worth trying next.
- Mushroom Pierogi — replace the potato filling with sautéed mushrooms, garlic, and onions
- Sauerkraut Pierogi — use fermented sauerkraut mixed with mushrooms for a tangy version
- Sweet Cheese Pierogi — add sugar and vanilla to the cheese filling for a dessert twist
- Bacon and Potato Pierogi — fold crispy bacon bits into the potato filling
- Spinach and Ricotta Pierogi — swap potatoes for spinach and ricotta for a lighter option
FYI, the sweet cheese version tastes shockingly close to dessert dumplings.
Frequently Asked Questions
Can I freeze pierogi ruskie? Yes, freeze them uncooked on a tray until firm, then transfer them into freezer bags for storage up to a couple of months.
Do I need to boil pierogi before frying them? Yes, always boil them first, since frying alone won’t fully cook the dough or filling properly.
Why does my dough turn out too hard? This usually happens from adding too much flour or over-kneading, so stick to the timing and measurements closely.
Can I use regular cheese instead of twaróg? Yes, ricotta or farmer’s cheese both work well as substitutes and give a similar creamy, tangy result.
How do I prevent my pierogi from opening while cooking? Seal the edges firmly, press them a second time, and avoid overfilling each dumpling with too much mixture.
Wrapping It Up
This Polish Pierogi Ruskie recipe combines soft, tender dough with a rich potato and cheese filling that genuinely earns its place as a comfort food classic. Whether you boil them, fry them, or do both, every batch delivers that satisfying homemade texture nothing frozen can replicate.
So grab your rolling pin, fold up a batch, and see why this dish has stuck around for generations. Once you taste your own homemade pierogi ruskie, that freezer aisle version starts looking pretty sad in comparison.



