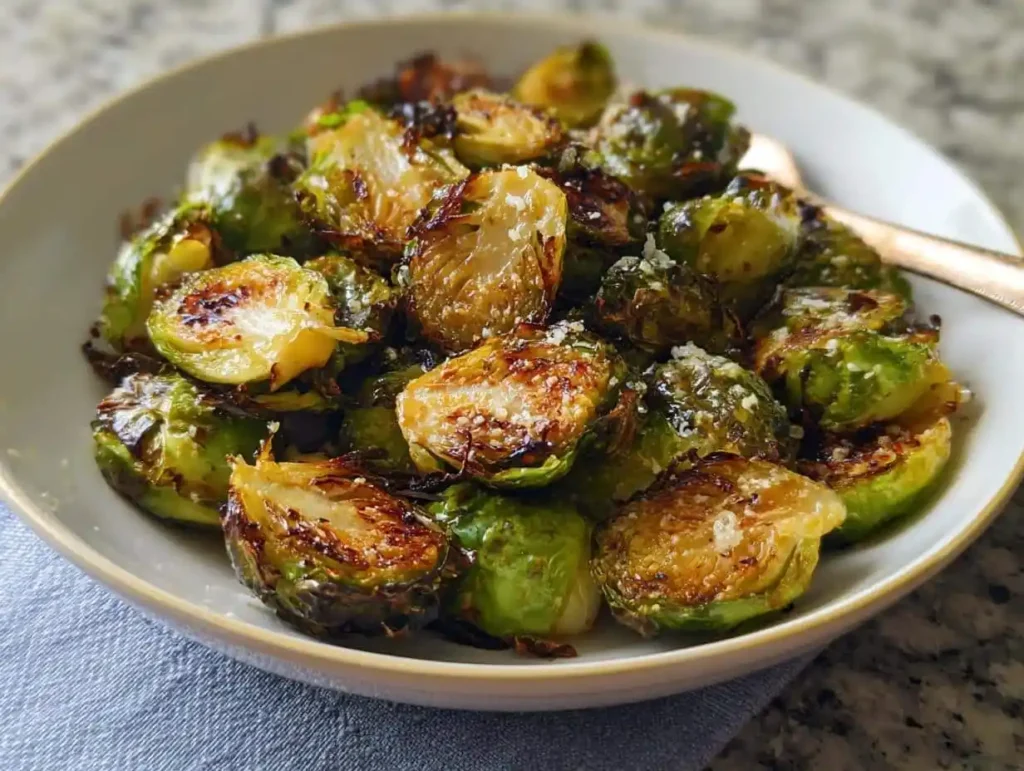
Servings: 4 | Prep Time: 10 minutes | Cook Time: 20-25 minutes | Total Time: About 35 minutes
Crispy, caramelized, and somehow the vegetable everyone fights over at dinner. That’s roasted Brussels sprouts done right, and once you taste them this way, boiled sprouts start feeling like a genuine crime.
I avoided Brussels sprouts for years, convinced they were mushy and bitter. Then I roasted them properly for the first time, and honestly, I felt a little betrayed by every bad version I’d eaten before.
Ready to convert every sprout skeptic at your table? Let’s get roasting.
Why This Roasted Brussels Sprouts Recipe Works So Well
Plenty of people write off Brussels sprouts before giving them a fair shot. That’s usually because someone boiled them into oblivion at some point in their life.
Roasting changes everything. High heat caramelizes the natural sugars in the sprouts, creating crispy, browned edges while the inside stays tender. It’s basically the vegetable equivalent of a glow-up.
Have you ever tasted a genuinely good Brussels sprout? If not, this recipe is about to change your entire opinion on the matter.
Roasted Brussels Sprouts Ingredients
Six ingredients, most of which you probably already own. This recipe doesn’t ask much of you, which is exactly why it works so well on busy weeknights.
- 1 pound Brussels sprouts, trimmed and halved
- 2 tablespoons olive oil
- ½ teaspoon salt
- ¼ teaspoon black pepper
- 1 tablespoon balsamic vinegar (optional)
- ¼ cup grated parmesan cheese (optional)
That’s the whole list. Everything else is just technique and a hot oven doing what it does best.
How to Make Roasted Brussels Sprouts, Step by Step
The process itself is simple, but a handful of small details separate soggy sprouts from genuinely crispy ones. Let’s walk through each step carefully so yours turn out perfect.
Step One: Preheat Your Oven
Set your oven to 400°F and let it fully preheat before you do anything else. This step matters more than people realize, since a properly hot oven is what creates that crispy exterior everyone actually wants.
Starting with a lukewarm oven means your sprouts steam instead of roast, and steamed sprouts are exactly the sad, mushy vegetable that gave this dish a bad reputation in the first place.
Step Two: Trim and Halve the Sprouts
While your oven heats up, grab your Brussels sprouts and get them ready. Cut off the tough stem end from each sprout, then peel away any loose or yellowing outer leaves.
Slice each sprout in half through the stem. Halving isn’t optional here, since it creates a flat surface that caramelizes beautifully and helps the sprouts cook through evenly instead of staying raw in the center.
If you spot any unusually large sprouts in the bunch, quarter those instead of halving them. Keeping the pieces roughly the same size ensures everything finishes cooking at the same time.
Step Three: Toss With Oil and Seasoning
Transfer your halved sprouts into a large mixing bowl. Drizzle the olive oil over them generously, then sprinkle in the salt and pepper.
Toss everything together using your hands or a large spoon, making sure every single sprout gets evenly coated. This is where the actual flavor development starts, so don’t rush through it with a quick half-hearted stir.
Take an extra moment here to check that no sprouts are clumped together with dry, unseasoned spots. Even coating now means even flavor later.
Step Four: Arrange in a Single Layer
Spread the seasoned sprouts across a large baking sheet, cut-side down whenever possible. Cut-side down contact with the hot pan is what produces those deeply caramelized, almost blackened edges people go crazy for.
Give the sprouts space to breathe. Overcrowding the pan is the single biggest mistake people make with this recipe, since sprouts packed too tightly release steam and end up soft instead of crisp.
Parchment paper makes cleanup easier, though it’s not strictly necessary. Use it if you have it on hand.
Step Five: Roast Until Golden and Crispy
Slide the baking sheet into your preheated oven and roast for 20 to 25 minutes. Give the pan a good shake around the halfway mark so all sides get exposure to that direct heat.
Start checking around the 18-minute mark, since ovens vary quite a bit in actual temperature. You’re looking for deep golden-brown edges, some slightly charred spots, and a fork-tender center throughout.
Step Six: Add Your Finishing Touches
Once the sprouts come out of the oven, this is where you can elevate them further. Drizzle balsamic vinegar over the top for a tangy contrast, or sprinkle on grated parmesan while they’re still hot enough to let it melt slightly.
Both additions are optional, but honestly, trying them at least once feels like a requirement. The balsamic adds brightness, while the parmesan brings a salty, savory finish that ties the whole dish together.
Serve immediately while everything is still hot and at peak crispiness. Roasted Brussels sprouts lose some of their crunch as they cool, so timing genuinely matters.
Tips for Perfectly Crispy Roasted Brussels Sprouts
A few small habits make the difference between good roasted Brussels sprouts and the version people specifically request at every holiday dinner from now on.
- Cut sprouts to a uniform size. Uneven pieces cook unevenly, leaving some mushy and others still firm.
- Never overcrowd the pan. Give sprouts breathing room, or use two baking sheets if needed.
- Roast cut-side down. This maximizes surface contact with the pan for deeper caramelization.
- Check for doneness early. Ovens vary, so start peeking around 18 minutes rather than waiting the full time.
- Shake the pan halfway through. This promotes even browning across every sprout instead of just one side.
Fun Variations on Roasted Brussels Sprouts
Once the basic recipe becomes second nature, start playing around. Brussels sprouts handle bold flavors surprisingly well, making this dish endlessly customizable.
- Garlic lovers: Toss in three minced garlic cloves during the final five minutes of roasting to avoid burning.
- Spicy kick: Add a quarter teaspoon of red pepper flakes to the oil mixture before roasting.
- Bacon upgrade: Roast chopped bacon on the sheet pan first, then toss the sprouts in the rendered fat instead of olive oil.
- Sweet and savory: Drizzle with honey before roasting, or toss with dried cranberries and pecans afterward for a holiday-ready twist.
What to Serve With Roasted Brussels Sprouts
These sprouts pair beautifully with almost anything, making them one of the most versatile side dishes in regular rotation. Here are a few of my favorite combinations.
- Serve alongside roasted chicken or a seared steak for an easy, balanced dinner.
- Toss with pasta and a bit of lemon zest for a quick, satisfying meal.
- Fold into grain bowls with quinoa, chickpeas, and a tangy dressing.
- Add to a holiday spread next to mashed potatoes and gravy.
- Eat them straight from the pan as a snack, because honestly, that happens more often than I’d admit.
Storing and Reheating Roasted Brussels Sprouts
Leftovers keep reasonably well, though they rarely stick around long in my house. Store cooled sprouts in an airtight container in the fridge for up to three days.
To reheat, spread them on a baking sheet and warm at 375°F for five to ten minutes until the crispy texture returns. Microwaving works in a pinch, but it softens the exterior considerably.
IMO, cold leftover sprouts tossed into a salad the next day taste almost as good as fresh ones. No reheating required, and the crunch holds up surprisingly well.
Roasted Brussels Sprouts FAQs
Why do my roasted Brussels sprouts turn out soggy? Overcrowding the pan is almost always the culprit. Give sprouts plenty of space in a single layer, and double-check that your oven is actually reaching the full 400°F.
Can I use frozen Brussels sprouts instead of fresh? Technically yes, though fresh sprouts crisp up noticeably better. If using frozen, pat them thoroughly dry before roasting and expect to add a few extra minutes of cook time.
What’s the correct way to trim Brussels sprouts? Cut off the tough stem end and remove any loose or yellowing outer leaves. Slicing each sprout in half afterward helps them cook evenly and develop crispy edges.
Can I prep these ahead of time? Absolutely. Trim and halve the sprouts up to a day in advance and store them in the fridge. Toss with oil and seasoning right before roasting for the best results.
What’s the best method for reheating leftover sprouts? The oven wins every time here. Reheat at 375°F for five to ten minutes to restore crispiness, since the microwave tends to leave them noticeably softer.
Do I really need to halve the sprouts before roasting? Yes, and it’s not a step worth skipping. Halving creates a flat surface that caramelizes beautifully and ensures the sprouts cook through evenly instead of staying raw inside.
Final Thoughts on Roasted Brussels Sprouts
This roasted Brussels sprouts recipe transforms a vegetable with a genuinely rough reputation into something people actively request. Crispy edges, tender centers, and endless variations make it worth keeping in your regular side-dish rotation.
Have you ever changed your mind about a vegetable after just one good recipe? That’s exactly what’s about to happen here, and there’s no going back once it does.
Give this one a try this week. Even the sprout skeptics at your table won’t see it coming.



