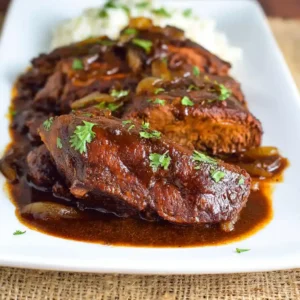
Some weeknights just need a win, and Sheet Pan Lemon Pepper Chicken is exactly that. One pan, one oven, and dinner practically makes itself while you sit down for five minutes.
Servings: 4 servings Prep Time: 15 minutes Cook Time: 25 minutes Total Time: 40 minutes
I started making this on Tuesdays specifically because Tuesdays feel like the longest day of the week. Now it’s become the meal my family requests more than anything else.
Why Sheet Pan Lemon Pepper Chicken Works So Well
Have you ever noticed how one-pan dinners just feel less stressful than everything else? There’s something about tossing chicken and vegetables onto a single sheet that takes the pressure off cooking entirely.
Here’s why this recipe earns a permanent spot in your rotation:
- One pan, minimal cleanup — the oven handles almost everything
- Crispy panko coating — no soggy chicken here, ever
- Built-in veggie side — roasted vegetables cook right alongside the chicken
- Bright, zesty flavor — lemon pepper cuts through richness without heaviness
Ingredients You’ll Need
Here’s everything on your shopping list for Sheet Pan Lemon Pepper Chicken.
- 1½ pounds boneless, skinless chicken breast tenders
- 1 large egg
- 1 cup panko breadcrumbs
- 2 tablespoons olive oil
- 2 cups broccoli florets
- 2 cups cauliflower florets
- 1 cup baby carrots
- 1 tablespoon lemon pepper seasoning
- ½ teaspoon garlic powder
- Salt and black pepper, to taste
- Lemon wedges, for serving
Nothing exotic here. Just a solid lineup that turns into a full dinner in under an hour.
How to Make Sheet Pan Lemon Pepper Chicken
Let’s go through each stage carefully, because a few small details separate crispy chicken from sad, soggy chicken.
Step 1: Preheat Your Oven
Set your oven to 400 degrees Fahrenheit and let it fully heat before anything goes inside. A properly preheated oven cooks chicken evenly and gives your vegetables that golden roasted edge. Skipping this step usually leads to uneven cooking, so don’t rush past it.
While the oven heats, this is your moment to prep everything else. Multitasking here saves real time later in the process. IMO, this small window is what makes weeknight cooking actually manageable.
Step 2: Set Up Your Baking Sheet
Grab a large, rimmed baking sheet and line it with aluminum foil. Foil makes cleanup almost effortless, which matters a lot on a night when you’d rather be doing anything but scrubbing pans. Lightly coat the foil with cooking spray so nothing sticks once it’s roasting.
Having your pan ready before you start coating chicken keeps the whole process moving smoothly. There’s nothing worse than sticky hands and no clean surface to set things down on.
Step 3: Coat the Chicken in Egg
Crack your egg into a medium bowl and whisk it until it turns smooth and slightly frothy. Add the chicken tenders directly into the bowl, turning each piece so it gets fully coated. This egg layer is what helps the breadcrumbs cling properly instead of falling right off.
Let any excess egg drip back into the bowl before moving each piece forward. Too much extra egg makes the breadcrumb coating clump instead of forming that even, crispy shell you’re after.
Step 4: Bread the Chicken with Panko
Pour your panko breadcrumbs into a large resealable plastic bag. Drop the egg-coated chicken tenders in a few at a time, seal the bag, and shake gently until each piece is fully covered. This bag method keeps breadcrumbs contained instead of scattering across your entire counter.
Once coated, lay each tender directly onto your prepared baking sheet. Space them out with a little room between pieces, since crowding the pan traps steam and softens that crispy coating you worked for.
Step 5: Add and Season the Vegetables
Scatter your broccoli, cauliflower, and baby carrots around the chicken on the same sheet. Drizzle the vegetables with olive oil, then toss them gently right on the pan so every piece gets coated. This step is where the whole meal comes together as one cohesive dish.
Sprinkle the lemon pepper seasoning generously over both the chicken and vegetables. Add the garlic powder along with a pinch of salt and black pepper across everything. Don’t hold back on seasoning here, since it’s what gives this dish its signature zesty punch.
Step 6: Bake Until Golden and Cooked Through
Slide the baking sheet into your preheated oven and bake for 20 to 25 minutes. Flip the chicken tenders halfway through if you want extra crispiness on both sides. The chicken is done once it reaches 165 degrees Fahrenheit internally and the coating turns a deep golden brown.
Pull the pan out and let it rest for a couple of minutes before serving. This short rest keeps the chicken juicy instead of drying out the moment you cut into it. Squeeze fresh lemon wedges over the top right before bringing it to the table.
Tips for the Best Sheet Pan Lemon Pepper Chicken
A few things that make a real difference every single time I make this.
- Space everything out evenly on the pan so steam can escape properly
- Use fresh vegetables in season for the best flavor and texture
- Don’t skimp on the lemon pepper seasoning, since it’s the whole point
- Flip the chicken halfway through baking for even crispiness on both sides
- Use a convection setting if your oven has one, for extra-crisp results
Equipment You’ll Need
Nothing fancy required, just a handful of kitchen basics.
- Large rimmed baking sheet — a sturdy one prevents warping under high heat
- Medium mixing bowl — for the egg wash
- Large resealable plastic bag — for coating chicken with minimal mess
- Meat thermometer — to confirm chicken hits a safe internal temperature
Fun Variations to Try
Once you’ve mastered the basic version, these twists keep dinner interesting.
- Citrus boost: add orange or lime zest alongside the lemon pepper seasoning
- Spicy version: sprinkle red pepper flakes over the chicken before baking
- Herb-forward take: toss in fresh thyme, rosemary, or parsley
- Vegetable swap: try asparagus, bell peppers, or zucchini instead
- Gluten-free option: use gluten-free breadcrumbs or crushed cornflakes
Serving Suggestions
Round out this meal with a few simple pairings.
- Serve over fluffy rice or quinoa for a heartier plate
- Add a side salad with lemon vinaigrette for extra brightness
- Pair with crusty bread to soak up any pan juices
- Garnish with extra lemon wedges and fresh herbs before serving
Frequently Asked Questions
Can I use chicken thighs instead of chicken breast? Yes, chicken thighs work well and stay especially juicy. Just add a few extra minutes to your cooking time, since thighs are slightly thicker and take a bit longer to fully cook through.
What vegetables work best in this recipe? Broccoli, cauliflower, and carrots hold up great to roasting, but asparagus, bell peppers, and zucchini all work too. Just keep an eye on cooking times, since softer vegetables cook faster than dense ones.
Can I prep Sheet Pan Lemon Pepper Chicken ahead of time? Absolutely. Coat the chicken and cut your vegetables the night before, then store everything separately in the fridge. This cuts your active prep time down significantly on the night you actually cook it.
How do I store and reheat leftovers? Keep leftovers in an airtight container in the fridge for up to three days. Reheat in the oven at 350 degrees Fahrenheit to keep the coating crispy, since microwaving tends to soften it.
What can I use instead of panko breadcrumbs? Regular breadcrumbs work fine in a pinch, and crushed crackers or rolled oats make solid substitutes too. Each option gives a slightly different texture, so pick whichever crunch you’re in the mood for.
Is this recipe good for meal prep? Yes, it holds up well for meal prep. Portion the chicken and vegetables into containers once cooled, and they’ll stay fresh in the fridge for several days without losing much texture.
Final Thoughts on Sheet Pan Lemon Pepper Chicken
Sheet Pan Lemon Pepper Chicken turns a hectic weeknight into something that actually feels manageable. One pan handles the protein and the vegetables, and cleanup takes about two minutes once dinner’s done.
Give this recipe a spot in your weekly rotation and watch how fast it becomes a household favorite. Preheat that oven, grab your ingredients, and let tonight’s dinner practically cook itself.