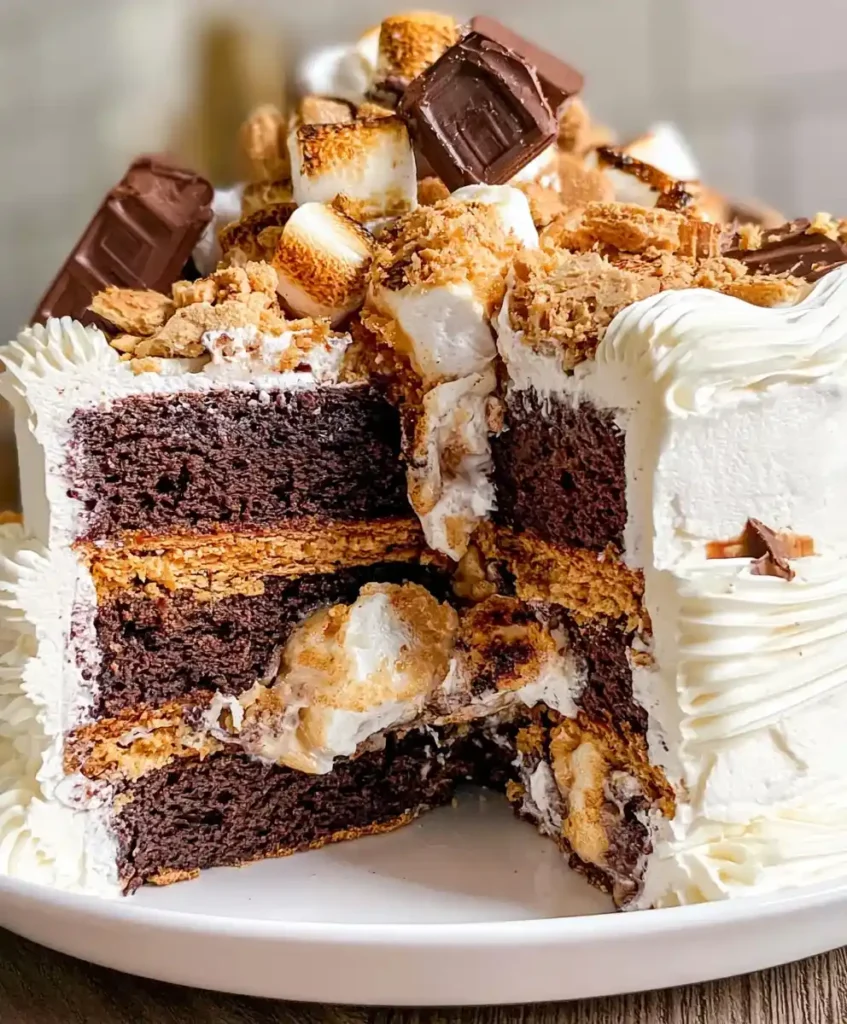
Campfire nostalgia meets serious layer-cake ambition here. Smores Cake takes everything you love about toasted marshmallows and melty chocolate and turns it into a dessert worthy of its own spotlight. I made this for a backyard birthday last summer, and people are still asking me for the recipe.
Servings: 12 slices Prep Time: 40 minutes Bake Time: 15 minutes Chill/Assembly Time: 30 minutes Total Time: 1 hour 25 minutes
Why You’ll Love This Smores Cake Recipe
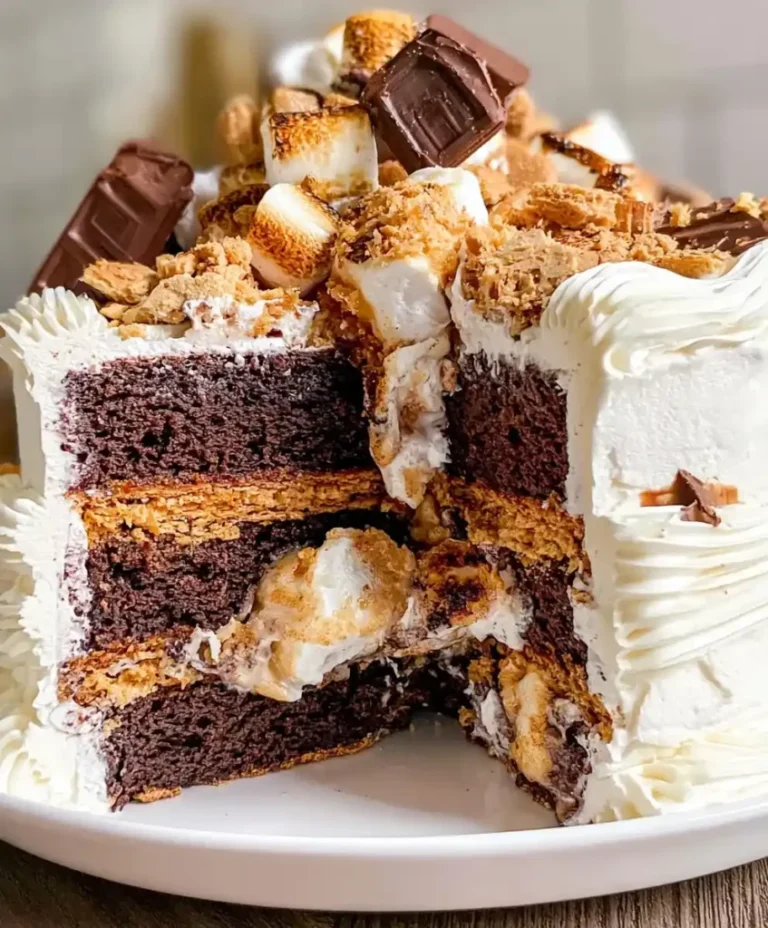
This cake stacks rich chocolate layers, a crunchy graham cracker crust, and fluffy marshmallow buttercream into one showstopping dessert. Ever taste something that instantly transports you back to childhood? That’s exactly what this cake does, minus the mosquito bites and sticky fingers.
It looks impressive, but honestly, none of the steps are difficult. Smores Cake just requires a little patience while things bake and chill. IMO, that trade-off is more than worth it once you take that first bite.
What You’ll Need: Smores Cake Ingredients
This recipe has three parts: the chocolate cake, the graham cracker crust, and the marshmallow buttercream. Here’s everything broken down with exact amounts.
Chocolate Cake Layers
- 2 cups all-purpose flour
- 3/4 cup unsweetened cocoa powder
- 2 teaspoons baking soda
- 1 teaspoon baking powder
- 1 teaspoon salt
- 2 cups granulated sugar
- 3 large eggs
- 1 cup buttermilk
- 1 cup vegetable or canola oil
- 2 teaspoons vanilla extract
- 1 cup hot water
Graham Cracker Crust
- 2 cups crushed graham crackers
- 1/4 cup granulated sugar
- 1/4 cup light brown sugar
- 3/4 cup unsalted butter, melted
Marshmallow Buttercream and Toppings
- 2 cups unsalted butter, softened
- 4 cups powdered sugar
- 1 (7-ounce) jar marshmallow fluff
- 1 teaspoon vanilla extract
- 1/2 cup crushed graham crackers, for layering
- Homemade marshmallows, optional, for topping
- 1 cup Hershey’s mini chocolate bars, for topping
Yes, it’s a longer list. But every ingredient earns its spot, and none of it requires a special trip to some obscure specialty store.
Equipment You’ll Need
- 8-inch round cake pans (three): Nine-inch pans work too, though bake time may shift slightly.
- Mixing bowls: A large one for wet ingredients, a medium one for dry.
- Whisk and electric mixer: The whisk handles the batter, the mixer handles the buttercream.
- Measuring cups and spoons: For getting your quantities precise.
- Cooling rack: A flat platter works in a pinch if you don’t own one.
How to Make Smores Cake
Let’s walk through every stage carefully, since this cake rewards patience far more than speed.
Step 1: Preheat and Prep Your Pans
Preheat your oven to 350 degrees Fahrenheit and let it fully heat before anything goes in. Line the bottoms of three 8-inch round cake pans with parchment paper, then spray the sides and bottoms with baking spray. This double layer of prep keeps your cakes from sticking and tearing when you flip them out later, so don’t skip it.
Step 2: Whisk the Dry Ingredients
In a medium bowl, combine the flour, cocoa powder, baking soda, baking powder, and salt. Whisk everything together thoroughly, making sure the leavening agents distribute evenly throughout the mixture. This step matters more than people realize, since clumped baking soda leads to uneven rising and weird pockets in your finished cake.
Step 3: Combine the Wet Ingredients
In a separate large bowl, whisk the granulated sugar and eggs together until fully combined and slightly pale in color. Add the buttermilk, oil, and vanilla extract, then whisk again until the mixture turns smooth and glossy. These wet ingredients bring moisture and richness, so take your time blending them fully before moving forward.
Step 4: Build the Batter
Gradually pour the dry mixture into the wet ingredients, stirring gently as you go. Mix just until combined, since overmixing here leads to a dense, tough cake instead of a tender one. Finally, pour in the hot water and whisk until the batter turns thin and silky. Don’t panic at how loose it looks; that thinness is exactly what gives this cake its soft, moist texture.
Step 5: Bake the Cake Layers
Divide the batter evenly among your three prepared pans, using a kitchen scale if you want perfectly even layers. Bake for 13 to 16 minutes, checking doneness by inserting a toothpick into the center of each layer. You’re looking for moist crumbs clinging to the toothpick, not wet batter and not a completely dry, crumb-free stick. Let the layers cool in their pans for 10 minutes, then transfer them to a cooling rack to finish cooling completely.
Step 6: Make the Graham Cracker Crust
While your cakes cool, combine the crushed graham crackers, granulated sugar, and light brown sugar in a bowl. Pour in the melted butter and stir until the mixture looks like damp sand, holding together when pressed. Line your empty cake pans with plastic wrap, then press the graham mixture evenly into the bottom of each one. Freeze these crusts for 20 minutes so they firm up enough to handle during assembly.
Step 7: Whip the Marshmallow Buttercream
Using an electric mixer, beat the softened butter on medium speed until light and fluffy, roughly 2 to 3 minutes. Gradually add the powdered sugar, mixing on low speed first to avoid a sugar cloud all over your kitchen. Once combined, beat in the marshmallow fluff and vanilla extract until the buttercream turns smooth, glossy, and genuinely irresistible.
Step 8: Layer the Cake
Place one graham cracker crust on your serving plate, then top it with a chocolate cake layer. Spread a generous layer of marshmallow buttercream over the cake, then sprinkle a little crushed graham cracker on top for crunch. Repeat this layering process with the remaining crusts, cake layers, and buttercream, finishing with your final cake layer on top.
Step 9: Crumb Coat and Chill
Apply a thin layer of buttercream around the entire cake to seal in any loose crumbs, working quickly and smoothly. This crumb coat doesn’t need to look perfect, since its whole job is prepping the surface for your final layer. Refrigerate the cake for 20 minutes, letting this coat firm up before you move on.
Step 10: Final Frosting and Decoration
Remove the chilled cake and apply your final, generous layer of marshmallow buttercream, smoothing the sides and top as evenly as possible. Decorate with buttercream dollops, extra crushed graham crackers, and toasted marshmallows if you’re using them. Finish by pressing Hershey’s mini chocolate bars into the top for that classic finishing touch. Have you ever stared at a finished cake and felt genuinely proud? This is one of those moments.
Tips for Success
- Measure your ingredients accurately, especially the flour and cocoa powder.
- Let the cake layers cool completely before stacking to avoid melted buttercream.
- Use room temperature butter and eggs for a smoother, more stable batter.
- Chill your buttercream slightly if it feels too soft to spread cleanly.
- Try different chocolate bars on top for a fun flavor twist.
Variations
- Gluten-Free: Swap the all-purpose flour for a gluten-free flour blend.
- Dairy-Free: Use almond or coconut milk instead of buttermilk, and dairy-free butter throughout.
- Nutty Flavor: Fold crushed almonds or walnuts into the cake batter for crunch.
- Chocolate Lovers: Add chocolate chips directly into the batter for extra richness.
- Fruit Twist: Layer fresh raspberries or strawberries between the cake layers for a fruity contrast.
Serving Suggestions
- Pair with a scoop of vanilla ice cream for a warm-and-cold contrast.
- Drizzle chocolate syrup over each slice on the plate.
- Serve alongside cold milk or hot cocoa to round out the s’mores theme.
- Garnish with extra marshmallows or fresh berries for a striking presentation.
FAQs About Smores Cake
Can I make this Smores Cake ahead of time? Yes, bake the cake layers a day ahead and store them wrapped tightly in the fridge. Assemble everything right before serving for the freshest result.
What can I substitute for buttermilk? Mix one cup of regular milk with a tablespoon of vinegar or lemon juice, then let it sit for 5 to 10 minutes before using.
Can I use store-bought marshmallow fluff? Definitely. Store-bought fluff saves time and still delivers that classic gooey sweetness the buttercream needs.
What’s the best way to toast the marshmallows on top? A kitchen torch gives the most control. Hold it a few inches away and keep it moving, since marshmallows go from golden to burnt fast.
How should I store leftovers? Keep the cake in an airtight container in the fridge for up to three days, though it rarely lasts that long in my house.
Can I freeze the finished cake? It’s better to freeze the unfrosted cake layers instead. Wrap them tightly and freeze for up to two months, then thaw before assembling and frosting.
Final Thoughts
Smores Cake takes a beloved campfire treat and turns it into a genuine centerpiece dessert, layer by delicious layer. The chocolate cake, crunchy crust, and fluffy buttercream all work together to create something that tastes like nostalgia on a plate. Whether it’s a birthday, a holiday, or just a random Saturday craving, this cake delivers every time. Grab your ingredients, set aside an afternoon, and let this one become your new signature bake.
Smores Cake
Ingredients
Method
- Preheat your oven to 350 degrees Fahrenheit and prepare three 8-inch round cake pans by lining them with parchment paper and spraying with baking spray.
- In a medium bowl, whisk together the flour, cocoa powder, baking soda, baking powder, and salt.
- In a large bowl, whisk the granulated sugar and eggs until combined. Add the buttermilk, oil, and vanilla, whisking until smooth.
- Gradually add the dry mixture to the wet ingredients, stirring gently until combined. Finally, whisk in the hot water.
- Divide the batter among the prepared pans and bake for 13 to 16 minutes, checking for doneness with a toothpick. Let the layers cool in the pans for 10 minutes before transferring them to a cooling rack.
- In the meantime, make the graham cracker crust by combining crushed graham crackers, granulated sugar, brown sugar, and melted butter. Press this mixture into the bottoms of lined pans and freeze for 20 minutes.
- Beat the softened butter until fluffy, then add powdered sugar gradually. Mix in marshmallow fluff and vanilla extract until smooth.
- Start layering with the graham cracker crust, followed by a layer of chocolate cake, a layer of marshmallow buttercream, and a sprinkle of crushed graham crackers. Repeat until you reach the last layer.
- Apply a thin crumb coat of buttercream around the cake and chill for 20 minutes.
- Finally, frost the outside with the remaining buttercream and decorate with additional toppings.



