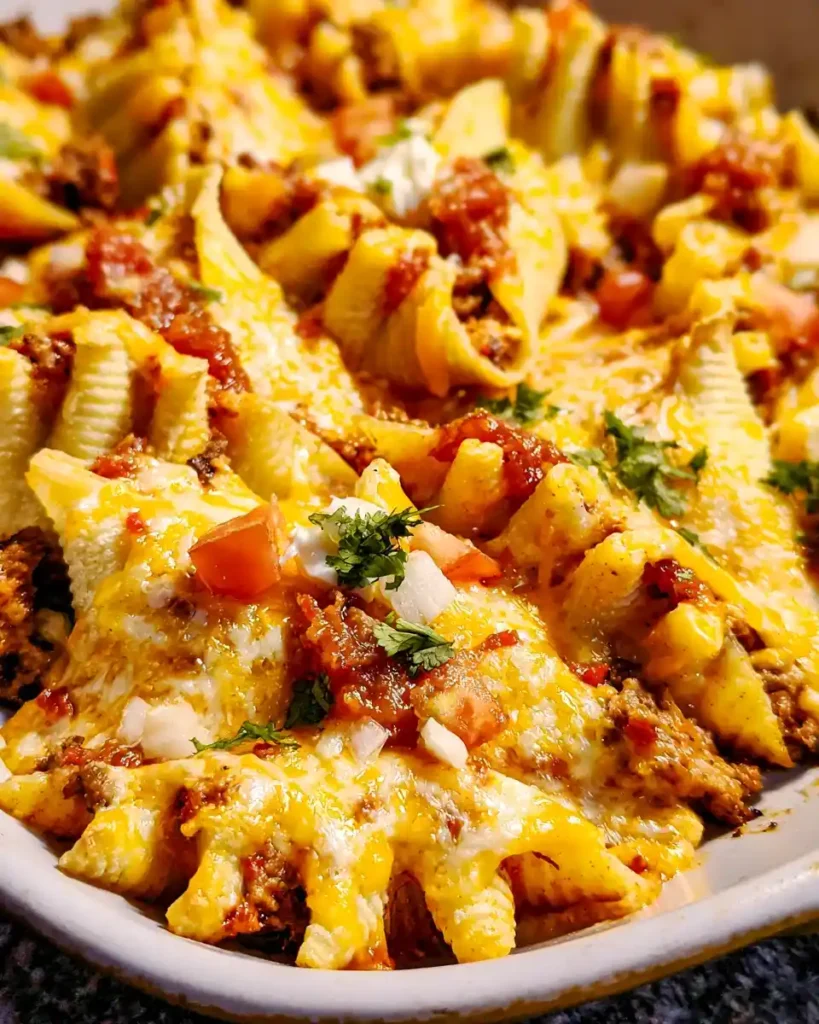
Can’t decide between taco night and pasta night? Stop choosing. These Taco Stuffed Shells smash both cravings into one cheesy, satisfying dinner.
Servings: 6 Prep time: 20 minutes Cook time: 25 minutes Total time: 45 minutes
I made these the first time I couldn’t decide what to cook, and they became an instant repeat. My family requests them more than actual tacos now.
Why This Recipe Works So Well
This isn’t just tacos thrown into pasta shells for the sake of novelty. It genuinely improves both dishes, and here’s exactly why.
- Best of both worlds — taco flavor with a cozy pasta texture
- Great for leftovers — tastes just as good the next day
- Freezer-friendly — make a batch now, thank yourself later
- Crowd-pleaser — kids and adults both go back for seconds
Have you ever noticed how combining two comfort foods somehow makes both better? This dish is proof that mashups can actually work.
Ingredients You’ll Need
Simple, everyday ingredients that pack a serious flavor punch.
- 20 jumbo pasta shells
- 1 pound ground beef
- 1 packet taco seasoning (about 1 ounce)
- 2/3 cup water
- 2 cups salsa, divided
- 2 cups shredded Mexican cheese blend, divided
- Optional garnishes: diced tomatoes, sour cream, chopped cilantro, diced onion
That’s the whole shopping list. FYI, swapping in ground turkey works great if you want a slightly leaner filling.
How to Make Taco Stuffed Shells
Let’s slow this down and walk through each step, so nothing gets rushed or overlooked along the way.
Step 1: Preheat the Oven and Prep Your Dish
Start by preheating your oven to 350°F. While it heats, lightly spray a 9×13-inch baking dish with non-stick spray. This small step prevents sticking later and saves you from scrubbing baked-on cheese off the dish afterward.
Set the dish aside once it’s ready. You’ll come back to it once your filling and shells are prepped.
Step 2: Boil the Pasta Shells
Bring a large pot of water to a rolling boil. Add your jumbo pasta shells and cook them until al dente, following the timing on the package. Overcooking here leads to shells that tear apart when you try to stuff them, so keep an eye on the clock.
Once they’re done, drain the shells in a colander and rinse gently under cool water. This stops the cooking process immediately and keeps the shells from sticking together while you prep the filling. Set them aside in a single layer.
Step 3: Brown the Beef and Build the Filling
Heat a skillet over medium heat and add your ground beef. Cook it, breaking it apart as it browns, until no pink remains. Drain off any excess grease before moving forward, since a greasy filling makes for a soggy final dish.
Sprinkle in the taco seasoning and pour in the water. Stir everything together and let it simmer for about 5 minutes, until the liquid mostly evaporates and the seasoning coats every bit of meat.
Once that’s done, stir in 1 cup of salsa and 1 cup of shredded cheese. Mix until the cheese melts slightly into the meat, creating a filling that’s rich, saucy, and packed with flavor. IMO, this step is where the entire dish earns its name.
Step 4: Stuff Each Shell Generously
Grab a spoon and start filling each cooked shell with the taco meat mixture. Don’t be shy here—pack each shell generously so every bite delivers plenty of flavor. As you go, arrange the stuffed shells upright in your prepared baking dish.
Standing the shells upright instead of laying them flat helps them hold their filling and lets sauce settle evenly around each one. Continue until every shell finds its place in the dish, fitting them snugly together.
Step 5: Top With Salsa and Cheese
Pour the remaining cup of salsa evenly over the top of all the stuffed shells. Make sure every shell gets some coverage, since this keeps the pasta from drying out during baking. Sprinkle the remaining shredded cheese generously across the top.
Cover the entire dish tightly with aluminum foil. This traps steam and heat, helping everything warm through evenly without the cheese burning before the inside heats up.
Step 6: Bake Until Bubbly
Place the covered dish in your preheated oven and bake for 20 to 25 minutes. Check around the 20-minute mark, since oven temperatures vary and you don’t want to overbake the shells into mush.
You’ll know it’s ready when the cheese turns fully melted and bubbly around the edges. Pull the foil back carefully, since trapped steam escapes fast and it’s genuinely hot.
Step 7: Rest, Garnish, and Serve
Let the dish rest for a few minutes once it comes out of the oven. This gives the filling a chance to set slightly, so it doesn’t slide out the moment you serve it.
Top with your favorite garnishes right before serving. Diced tomatoes, a dollop of sour cream, and fresh cilantro all add color and a fresh contrast to the rich, cheesy shells underneath.
Tips for Getting It Right Every Time
A handful of small habits separate an okay batch from a genuinely great one.
- Don’t overcrowd the baking dish—give each shell room to heat evenly
- Cook shells just to al dente so they don’t tear while stuffing
- Prep the taco meat a day ahead to speed up assembly later
- Swap in pepper jack cheese if you want extra heat
- Use gluten-free jumbo shells for an easy dietary swap
Fun Variations to Try
Once you’ve nailed the classic version, these twists keep dinner interesting.
- Protein swap — use ground turkey, chicken, or seasoned tofu instead of beef
- Extra hearty — stir black beans or corn into the meat mixture
- Spicy kick — add diced jalapeños or green chilies to the filling
- Lighter option — use whole wheat jumbo shells instead of regular pasta
- Extra creamy — mix a few tablespoons of cream cheese into the taco filling
Why settle for the same recipe every time when five variations keep taco night from ever feeling repetitive? Rotate them and see which one wins over your table.
What to Serve With It
Round out this meal with a few simple sides that complement all that cheesy, zesty flavor.
- A side of fresh guacamole for a creamy contrast
- A simple green salad with a zesty vinaigrette
- A chilled margarita or Mexican soda alongside dinner
- Extra cilantro and diced tomato for a colorful garnish
FAQs About Taco Stuffed Shells
Can I make Taco Stuffed Shells ahead of time? Yes. Assemble the entire dish, cover it tightly, and refrigerate. Bake straight from the fridge, adding a few extra minutes to the cook time.
What can I use instead of ground beef? Ground turkey or shredded chicken both work well. For a vegetarian version, try black beans, lentils, or a hearty vegetable mix instead.
Can I freeze Taco Stuffed Shells? Absolutely. Cover the assembled dish tightly with plastic wrap and foil, then freeze. Thaw overnight in the fridge before baking as directed.
How can I make this dish spicier? Add diced jalapeños to the meat mixture or reach for a spicier salsa. A pinch of cayenne pepper in the taco seasoning also does the trick.
What’s the best way to store leftovers? Keep leftovers in an airtight container in the fridge for 3 to 4 days. Reheat individual portions in the microwave or the whole dish in the oven.
Final Thoughts
Taco Stuffed Shells bring together two comfort-food favorites without asking you to choose sides. It’s cheesy, zesty, and genuinely satisfying, whether it’s a random Tuesday or a dinner with guests.
Give this recipe a try this week and watch how fast the dish empties out. Once your family tastes that taco-loaded filling tucked into a pasta shell, don’t be shocked when they ask for it by name every week.



