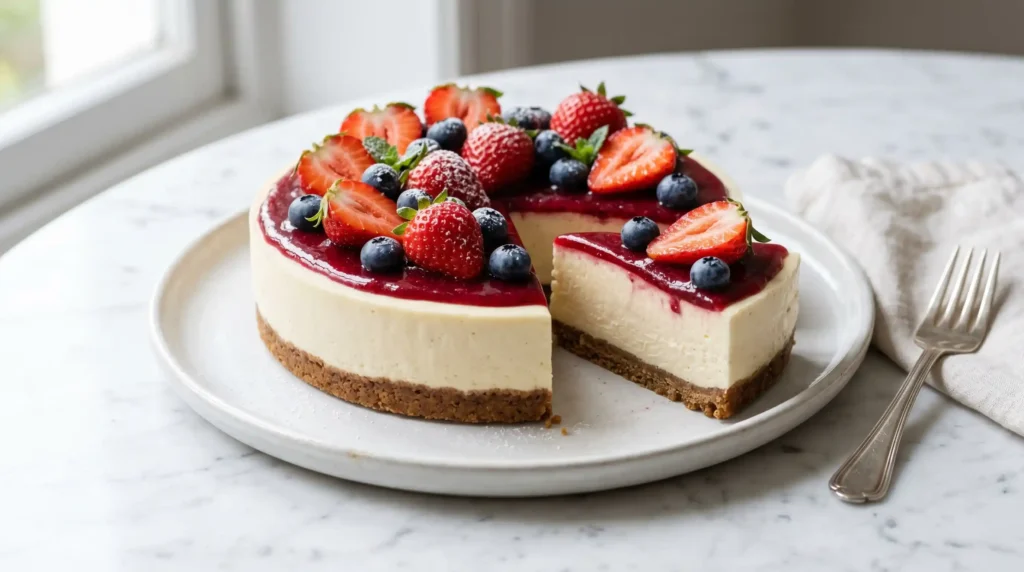
You don’t need a water bath, a springform pan, or three hours of your life to make an incredible cheesecake. This No-Bake Cheesecake comes together with six ingredients, zero baking, and a fridge that does all the hard work for you.
I made this for a summer dinner party when my oven decided to die mid-afternoon. Everyone thought I planned it that way. I did not.
Servings: 8 slices Prep Time: 15 minutes Chill Time: 4 hours minimum (overnight recommended) Total Time: 4 hours 15 minutes (mostly hands-off)
Why No-Bake Cheesecake Beats the Baked Version
Have you ever cracked a baked cheesecake right down the middle after spending three hours on it? It’s a special kind of heartbreak. The no-bake version skips all that anxiety entirely.
No-bake cheesecake doesn’t crack, doesn’t need a water bath, and doesn’t require precise temperature monitoring. You mix it, pour it, and let the refrigerator handle everything else. The result is a smooth, creamy dessert that looks and tastes like you put in far more effort than you actually did.
IMO, the no-bake version is genuinely superior for casual home baking.
Ingredients You’ll Need
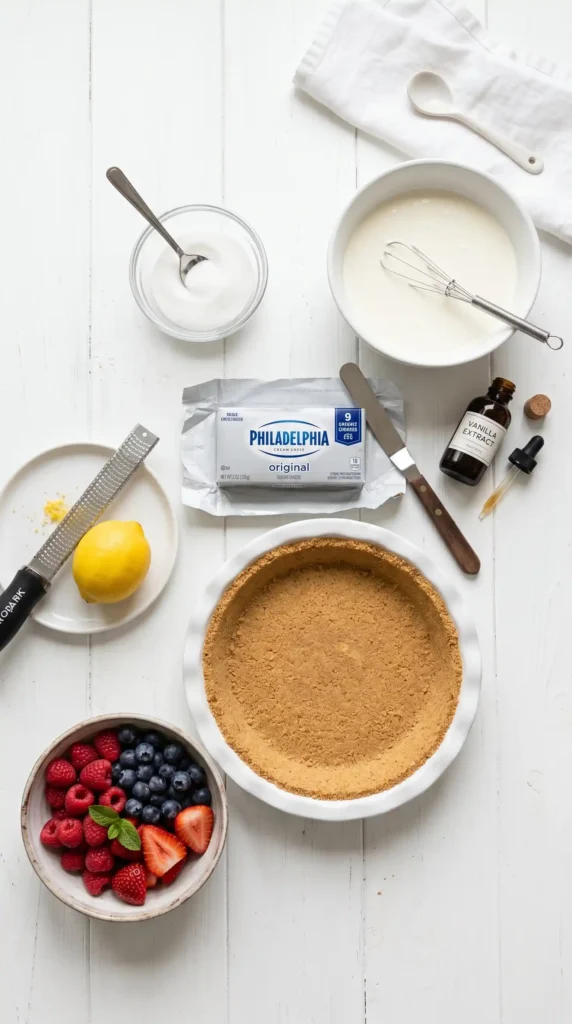
Six ingredients. That’s it. Everything on this list is easy to find at any grocery store.
For the Cheesecake Filling:
- 1 (8-ounce) package cream cheese, at room temperature
- 1/3 cup granulated sugar
- 3/4 cup heavy cream, at room temperature
- 1 teaspoon vanilla extract
- 2 teaspoons fresh lemon juice (optional, but recommended)
For the Crust:
- 1 (9-inch) prepared graham cracker crust
Optional Toppings:
- Fresh strawberries, blueberries, or raspberries
- Cherry pie filling
- Whipped cream
- Caramel or chocolate drizzle
- Lemon curd
How to Make No-Bake Cheesecake (Detailed Step by Step)
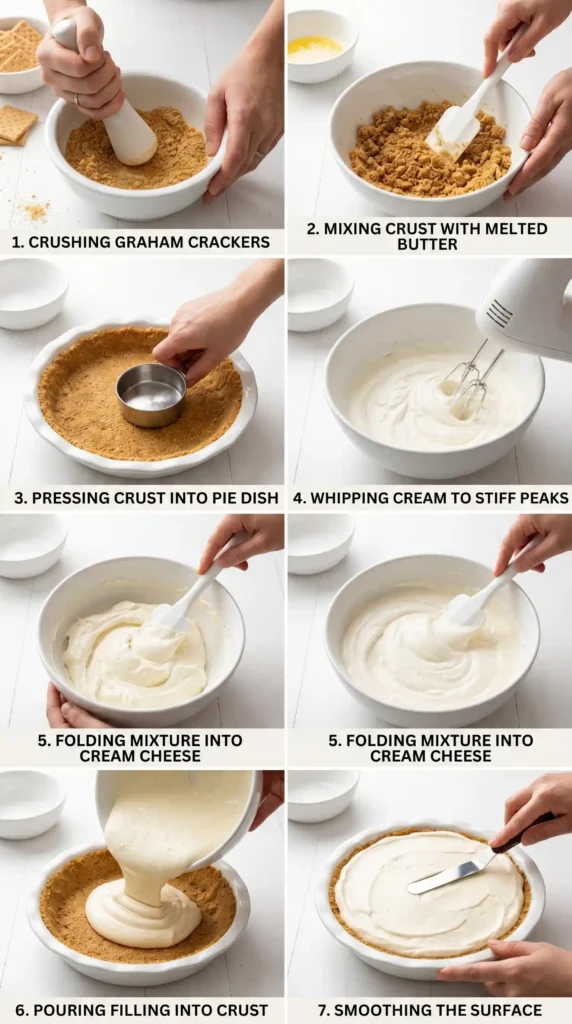
Step 1: Bring Your Ingredients to Room Temperature
This step matters more than most people realize. Pull the cream cheese and heavy cream out of the refrigerator at least 30–45 minutes before you start mixing. Cold cream cheese creates lumps that no amount of mixing will fully smooth out.
Room temperature cream cheese blends into a silky, lump-free filling with minimal effort. Room temperature heavy cream still whips — it just takes slightly longer than cold cream. Give everything time to warm up and the entire process becomes dramatically easier.
Don’t rush this step. Set a timer, go do something else, and come back when everything feels properly soft to the touch.
Step 2: Beat the Cream Cheese Until Completely Smooth
Add the full 8-ounce package of room temperature cream cheese to a large mixing bowl. Using a hand mixer or a stand mixer fitted with a paddle attachment, beat the cream cheese on medium speed for about 2 minutes until it becomes completely smooth and fluffy.
Stop the mixer and scrape down the sides and bottom of the bowl with a rubber spatula. Any unmixed cream cheese clinging to the bowl will create lumps in your final filling. Scraping mid-mix is a small step that makes a big difference in texture.
Beat for another 30 seconds after scraping. Your cream cheese should look light, pale, and completely uniform at this point — no streaks, no chunks.
Step 3: Add the Sugar and Mix
Add 1/3 cup of granulated sugar to the beaten cream cheese. Mix on medium speed for about 1 minute until the sugar fully incorporates and the mixture looks smooth and glossy.
The sugar doesn’t just sweeten the cheesecake — it also helps stabilize the filling’s texture as it chills. Don’t add more sugar than the recipe calls for without adjusting the other elements, as too much sugar can prevent the cheesecake from setting firmly.
Taste the mixture at this stage. It should taste lightly sweet with a rich cream cheese base. If it tastes too plain, your vanilla extract in the next step will round everything out beautifully.
Step 4: Add Vanilla and Lemon Juice
Add 1 teaspoon of vanilla extract directly to the cream cheese and sugar mixture. If you’re using lemon juice — and I genuinely recommend you do — add 2 teaspoons of fresh lemon juice now as well.
The lemon juice isn’t just for flavor. Its mild acidity brightens the entire filling and cuts through the richness of the cream cheese in a way that makes every bite taste cleaner and fresher. It’s subtle, but the difference between a batch with and without it is noticeable.
Mix on low speed for 30 seconds until both ingredients fully combine. Scrape the bowl once more before moving to the next step.
Step 5: Whip the Heavy Cream Separately
In a separate clean bowl, pour 3/4 cup of heavy cream. Using clean beaters, whip the cream on medium-high speed until it forms stiff peaks. Stiff peaks mean the cream holds its shape firmly when you lift the beaters — it doesn’t droop or fall over.
This step usually takes about 3–4 minutes with a hand mixer. Watch carefully as the cream thickens — it moves through stages quickly near the end. Stop as soon as you reach stiff peaks. Overwhipped cream turns grainy and starts moving toward butter, which is a place no cheesecake wants to go
Keep the whipped cream cold. If your kitchen runs warm, put the bowl back in the fridge while you finish with the cream cheese base.
Step 6: Fold the Whipped Cream Into the Cream Cheese Base
This is the step that gives your No-Bake Cheesecake its light, mousse-like texture. Add the whipped cream to the cream cheese mixture in two additions — not all at once.
Add the first half of the whipped cream and fold gently using a rubber spatula. Use slow, sweeping motions from the bottom of the bowl up and over the top. Folding instead of stirring preserves the air you whipped into the cream, and that air is what makes the finished cheesecake feel light rather than dense and heavy.
Once the first addition fully incorporates, add the remaining whipped cream and fold again until the mixture looks completely smooth and uniform. The final texture should feel thick, creamy, and just slightly airy.
Step 7: Fill the Graham Cracker Crust
Spoon the cheesecake filling directly into the prepared 9-inch graham cracker crust. Use a rubber spatula or the back of a large spoon to spread the filling evenly all the way to the edges of the crust.
Smooth the top as flat as possible. A flat surface makes the cheesecake look clean and professional, and it also gives your toppings a proper platform to sit on. If you plan to add fruit or sauce after chilling, a smooth top shows them off much better than an uneven one.
Tap the pie dish gently on the countertop a few times to settle the filling and release any air bubbles trapped near the surface.
Step 8: Chill Until Set
Cover the cheesecake loosely with plastic wrap, making sure the wrap doesn’t press directly onto the filling surface. Place it in the refrigerator and let it chill for a minimum of 4 hours. Overnight chilling — 8 hours or more — produces the best possible texture.
The cold temperature firms up the cream cheese and sets the whipped cream structure, transforming the soft filling into a sliceable, stable cheesecake. Pulling it out at the 3-hour mark and hoping for the best always ends the same way: a filling that slides instead of slices.
Patience here genuinely pays off.
Step 9: Add Toppings and Serve
Once the cheesecake has fully chilled and set, remove it from the refrigerator. Add your chosen toppings right before serving for the freshest look and best texture. Fresh berries, a drizzle of caramel, or a spoonful of cherry pie filling all work beautifully here.
Cut with a clean, sharp knife, wiping the blade between each slice for clean, neat cuts. Serve directly from the pie dish, or use a thin spatula to lift individual slices onto plates.
Tips for the Best No-Bake Cheesecake
A few details that consistently make the difference between good and great:
- Use full-fat cream cheese. Low-fat versions contain more water and the filling may not set firmly. Full-fat is non-negotiable here.
- Don’t skip bringing ingredients to room temperature. Cold cream cheese is the number one cause of lumpy filling.
- Fold, don’t stir. Stirring deflates the whipped cream and produces a denser texture.
- Chill overnight when possible. Four hours works, but overnight is genuinely better for flavor and texture.
- Add toppings just before serving. Juicy fruit toppings release liquid over time and can make the crust soggy if added too early.
No-Bake Cheesecake vs. Baked Cheesecake: The Honest Comparison
Both versions have their place, but they serve different purposes. Here’s a quick breakdown:
- Texture: Baked cheesecake has a denser, more custard-like texture. No-bake cheesecake feels lighter and more mousse-like.
- Effort: No-bake requires far less skill and equipment. Baked needs precise oven temperature and careful monitoring.
- Time: No-bake prep takes 15 minutes. Baked versions often need 1–2 hours of oven time plus cooling.
- Risk: No-bake never cracks. Baked cheesecake cracks if you look at it wrong.
- Flavor: Both taste excellent. No-bake has a fresher, lighter flavor profile.
For ease, speed, and reliability, no-bake wins every time. For a formal dinner or a deeply dense, custard-style slice, baked has its edge.
Topping Ideas to Try
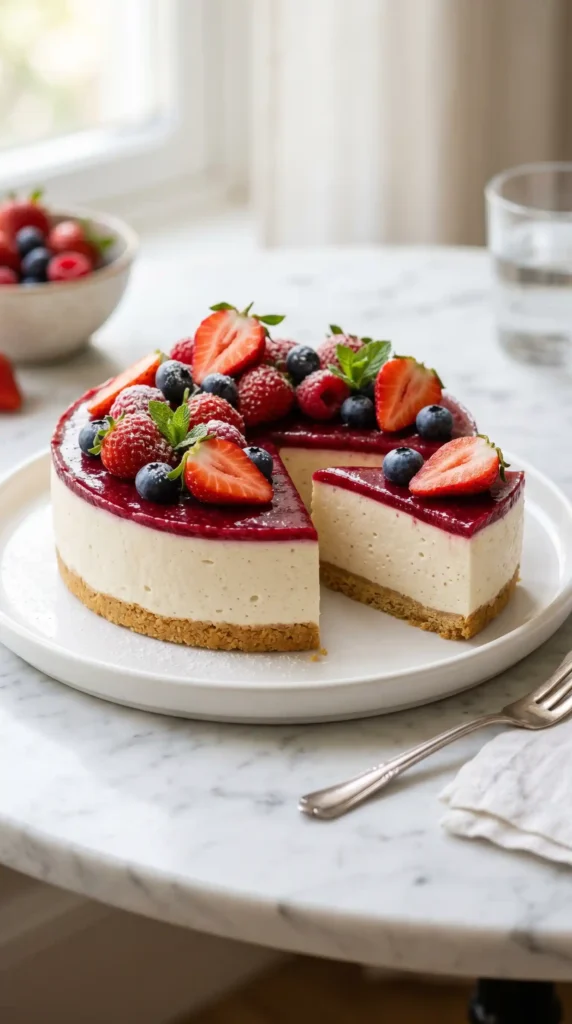
Don’t limit yourself to plain cheesecake. These topping combinations all work exceptionally well:
- Classic strawberry: Fresh sliced strawberries tossed with a tablespoon of sugar
- Blueberry lemon: Fresh blueberries with a drizzle of lemon curd
- Salted caramel: Store-bought or homemade caramel sauce with flaky sea salt
- Oreo crumble: Crushed Oreos scattered over whipped cream
- Tropical: Diced mango and pineapple with a squeeze of lime
FYI, the topping really does transform the overall experience. Don’t skip it.
Storage Tips
Cover any leftover cheesecake with plastic wrap and refrigerate for up to 5 days. The crust softens slightly as it sits, which most people actually enjoy — it becomes almost cake-like in texture by day two.
This cheesecake also freezes well. Wrap individual slices in plastic wrap, then foil, and freeze for up to 1 month. Thaw overnight in the refrigerator before serving. Add fresh toppings after thawing.
FAQs About No-Bake Cheesecake
Q1: Why didn’t my no-bake cheesecake set properly? The most common cause is insufficient chilling time. Four hours is the absolute minimum — overnight is better. Other causes include using low-fat cream cheese, under-whipped heavy cream, or not fully incorporating the ingredients. Make sure everything reaches room temperature before mixing.
Q2: Can I use a homemade graham cracker crust instead of store-bought? Absolutely. Combine 1 1/2 cups of graham cracker crumbs with 1/3 cup of melted butter and 3 tablespoons of sugar. Press firmly into a 9-inch pie dish and refrigerate for 30 minutes before filling. It tastes better than store-bought and costs less too.
Q3: Can I make no-bake cheesecake without heavy cream? You can substitute full-fat coconut cream for a dairy-free version. Chill the can overnight, scoop out the solid cream portion, and whip it the same way. The flavor differs slightly but the texture works well. Avoid using milk or half-and-half — neither whips.
Q4: How do I know when the cheesecake is fully set? Gently touch the center of the filling — it should feel firm and not leave a fingerprint. You can also give the pan a gentle shake; the center should barely move. If it jiggles like liquid, it needs more time in the refrigerator.
Q5: Can I add gelatin to help it set faster? Yes — dissolve 1 teaspoon of unflavored gelatin in 2 tablespoons of cold water, then warm until fully dissolved. Stir into the cream cheese mixture before folding in the whipped cream. Gelatin gives you a firmer set in about 2–3 hours, but the texture becomes slightly more dense.
Q6: Can I make this recipe ahead of time for a party? This is actually the perfect make-ahead dessert. Make it the night before, cover it, and refrigerate until your guests arrive. Add fresh toppings right before serving. It holds its texture well for up to 2 days in the refrigerator.
The Bottom Line
This No-Bake Cheesecake is the kind of recipe that earns you compliments way out of proportion to the actual effort involved. Six ingredients, 15 minutes of active work, and a few patient hours in the fridge. The result tastes creamy, rich, and genuinely impressive.
Make it this weekend. Let the fridge do its thing. Then accept the compliments graciously and tell everyone it was very complicated. You deserve it
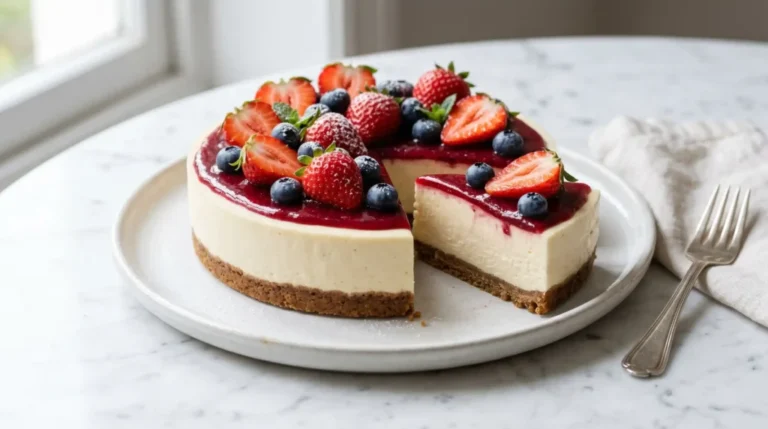
No-Bake Cheesecake
Ingredients
Method
- Pull the cream cheese and heavy cream out of the refrigerator at least 30–45 minutes before mixing.
- In a large mixing bowl, beat the room temperature cream cheese using a hand mixer on medium speed for about 2 minutes until smooth and fluffy.
- Scrape down the sides of the bowl and beat for another 30 seconds until uniform.
- Add 1/3 cup granulated sugar and mix on medium speed for about 1 minute.
- Add 1 teaspoon of vanilla extract and 2 teaspoons of fresh lemon juice (if using), mixing on low speed until combined.
- In a separate bowl, whip 3/4 cup heavy cream on medium-high speed until stiff peaks form.
- Gently fold the whipped cream into the cream cheese mixture in two additions until smooth.
- Spoon the cheesecake filling into the prepared graham cracker crust, smoothing the top.
- Cover loosely with plastic wrap and chill in the refrigerator for at least 4 hours, preferably overnight.
- Before serving, add toppings of your choice.