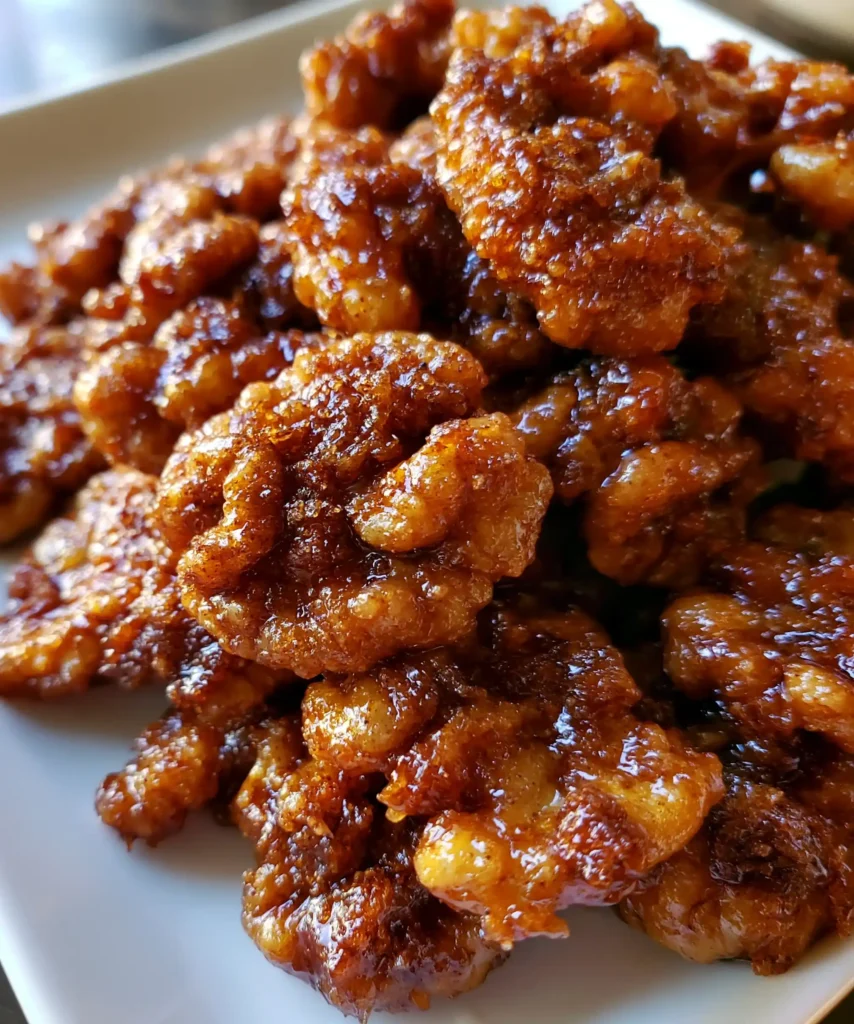
Crunchy walnuts coated in a sweet, caramelized toffee shell — that’s the whole appeal of Toffee Candied Walnuts. I still remember the first batch I made, when the smell filled my kitchen so fast that my family started sneaking pieces before they even finished cooling. They’ve been on my snack rotation ever since.
Prep time: 10 minutes Bake time: 25 minutes Total time: 35 minutes Servings: Makes about 2 cups (6 to 8 servings)
Why You’ll Love This Toffee Candied Walnuts Recipe
This recipe turns plain walnuts into something genuinely snackable in well under an hour. IMO, that’s the whole point of a good candied nut recipe — minimal effort, maximum crunch. You get that sweet, caramelized toffee coating without needing a candy thermometer or any complicated technique.
They’re also incredibly versatile once they’re done. Have you ever needed a snack that works equally well straight out of the bowl or scattered over a salad? These candied walnuts do exactly that, and they make an easy homemade gift too.
Ingredients for Toffee Candied Walnuts
Here’s exactly what you need, with amounts included so nothing’s left to guesswork:
- Walnut halves — 2 cups
- Brown sugar — 1/2 cup
- Salt — 1/4 teaspoon
- Egg white — 1 large
- Vanilla extract — 1 teaspoon
- Cinnamon — 1/2 teaspoon, optional
- Cayenne pepper — 1/8 teaspoon, optional
Seven ingredients, most of which are already sitting in your pantry. Nothing here requires a specialty store run.
Equipment You’ll Need
- A baking sheet
- Parchment paper for lining
- A small mixing bowl for the sugar mixture
- A large mixing bowl for the egg white mixture
- A whisk, though a fork works in a pinch
That’s the entire setup. This recipe doesn’t ask much of your kitchen.
How to Make Toffee Candied Walnuts
Step 1: Preheat the Oven
Start by preheating your oven to 325°F. This slightly lower temperature matters quite a bit here, since it lets the sugar caramelize slowly without burning before the walnuts finish toasting. Higher heat might feel faster, but it usually leads to scorched sugar and bitter-tasting nuts.
Line a baking sheet with parchment paper while the oven heats up. This small step saves you a genuinely frustrating cleanup later, since melted sugar sticks to bare metal in a way that’s hard to scrub off.
Step 2: Mix the Sugar Coating
In a small mixing bowl, combine the brown sugar and salt. Whisk them together until the mixture looks evenly blended with no visible clumps of sugar. This dry mixture is exactly what creates that signature toffee flavor once it bakes onto the walnuts.
Set this bowl aside once mixed. You’ll come back to it shortly, but getting it ready now keeps the rest of the process moving smoothly.
Step 3: Whisk the Egg White Mixture
In a separate large mixing bowl, whisk together the egg white and vanilla extract. Whisk steadily until the mixture turns frothy and slightly thickened, but stop well before it reaches stiff peaks. This frothy texture is exactly what you want, since it’s thin enough to coat every walnut evenly.
This egg white mixture acts as the glue that holds your sugar coating in place. Skipping proper whisking here usually means a patchy, uneven coat once the sugar goes on.
Step 4: Coat the Walnuts in Egg White
Add your walnut halves directly into the bowl with the whisked egg white mixture. Toss them gently but thoroughly, making sure every single walnut gets coated on all sides. Take your time with this step, since uneven coating leads to some walnuts turning out sweeter than others.
Use a spoon or your hands to fold the walnuts through the mixture rather than stirring aggressively. Gentle handling here keeps the walnut halves intact instead of breaking them into smaller pieces.
Step 5: Add the Sugar Mixture
Sprinkle your brown sugar and salt mixture directly over the egg-coated walnuts. Toss everything together gently, making sure the sugar sticks evenly across every walnut half. You’re looking for a fully coated, slightly clumpy texture rather than dry pockets of walnut peeking through.
If you’re adding cinnamon or cayenne pepper, sprinkle them in at this stage along with the sugar mixture. Toss once more to distribute the spices evenly throughout the batch.
Step 6: Bake Until Golden and Fragrant
Spread the coated walnuts out in a single, even layer on your prepared baking sheet. Avoid piling them up, since overlapping walnuts steam instead of caramelizing properly in the oven. Place the sheet in your preheated oven and bake for 20 to 25 minutes total.
Stir the walnuts once around the halfway mark, redistributing them across the pan as you go. This stirring step matters a lot, since it ensures even baking and prevents one side of the pan from burning while the other stays underdone.
Step 7: Cool Completely Before Serving
Once the walnuts look golden brown and smell deeply toasty, remove the baking sheet from the oven. Resist the urge to touch or taste them right away, since they’re still soft and sticky at this stage. Let them cool completely on the baking sheet, which usually takes about 15 to 20 minutes.
As they cool, the sugar coating hardens into that satisfying, crackly toffee shell. This waiting period is genuinely the hardest part of the whole recipe, but it’s exactly what gives you that signature crunch.
Tips for Success
- Use fresh walnuts for the best flavor, since stale nuts turn bitter when toasted
- Whisk the egg white thoroughly so the sugar coating sticks evenly to every walnut
- Adjust the brown sugar to your taste, using less for a subtler bite or more for sweeter walnuts
- Stir the walnuts halfway through baking to prevent uneven browning
- Let the walnuts cool completely before storing to lock in that crunchy texture
Variations Worth Trying
- Maple glazed: Swap the brown sugar for maple syrup for a warm, autumn-inspired flavor
- Chocolate drizzle: Drizzle melted dark chocolate over the cooled walnuts for extra richness
- Spicy blend: Increase the cayenne pepper for a smokier, spicier contrast to the sweetness
- Herbed version: Toss in fresh rosemary before baking for a savory, aromatic twist
- Extra crunch: Mix in chia seeds or pumpkin seeds for added texture and nutrition
Serving Suggestions
Scatter these candied walnuts over a fresh green salad for an easy sweet-and-crunchy contrast. They also shine on a charcuterie board alongside sharp cheeses and crackers. A scoop of vanilla ice cream topped with warm walnuts makes for a genuinely satisfying dessert.
FAQs About Toffee Candied Walnuts
Can I use different nuts for this recipe? Yes, pecans, almonds, or cashews all work well in place of walnuts. Each nut brings a slightly different flavor and crunch to the final result.
How long do these candied walnuts stay fresh? Stored in an airtight container, they stay fresh for up to two weeks. Just make sure they’re fully cooled before sealing them, since trapped moisture softens that crisp coating.
Can I make these ahead of time for a party? Absolutely. They keep well for up to two weeks, making them an easy make-ahead snack or party treat.
What’s the best way to serve toffee candied walnuts? They’re delicious on their own, but they also work beautifully in salads, on cheese boards, or scattered over desserts like ice cream.
Can I adjust how sweet these turn out? Yes, easily. Use about 1/3 cup of brown sugar for a lighter sweetness, or increase it to a full 1/2 cup for a more indulgent, sugary crunch.
Why didn’t my sugar coating stick properly? This usually happens when the egg white isn’t whisked frothy enough before coating. Make sure it looks light and slightly foamy before adding the walnuts.
Final Thoughts
Toffee Candied Walnuts prove that a handful of simple pantry ingredients can turn into a genuinely addictive homemade snack. Between the caramelized sugar shell and that deep, toasty walnut flavor, this recipe delivers way more satisfaction than its short ingredient list suggests. Preheat your oven, grab your walnuts, and let this one become your new favorite thing to snack on.



