Servings: 36 squares | Prep Time: 20 minutes | Chill Time: 2.5–3 hours | Total Time: ~3 hours | No baking required
Most fudge recipes have a reputation for being finicky — sugar thermometers, soft-ball stages, timing precision. This White Chocolate Fudge recipe throws all of that out. You melt, you stir, you chill, and you end up with something that genuinely looks and tastes like it came from a candy shop.
I started making this version a few years back when I needed a holiday treat that didn’t require turning the oven on in the middle of summer. Three ingredients per layer, no candy thermometer, and the results are consistently smooth, creamy, and rich. It’s become my go-to for gifting, parties, and honestly just keeping in the fridge for myself.
Why White Chocolate Fudge Works So Well
White chocolate fudge hits differently from traditional fudge because the base is already sweet and creamy without needing to cook sugar to a precise temperature. Sweetened condensed milk does the heavy lifting — it provides the sugar, the dairy, and the thick consistency all at once.
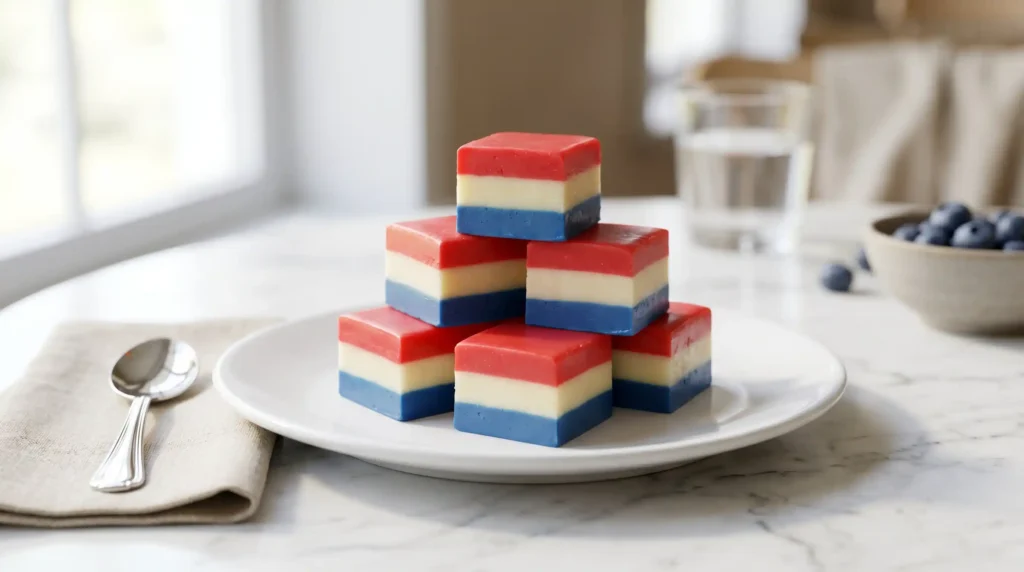
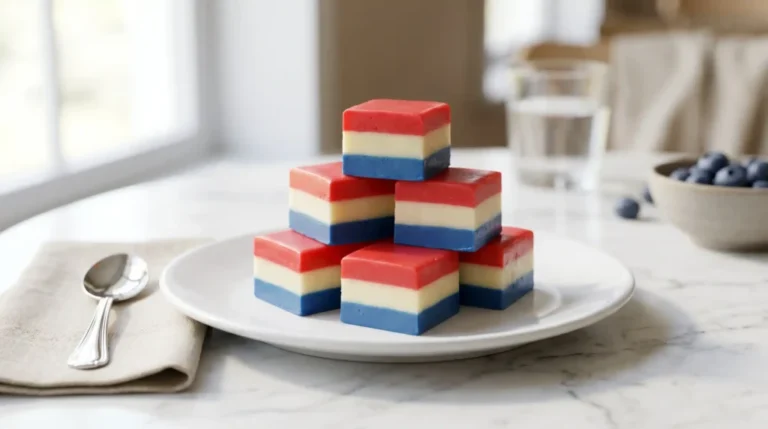
The white chocolate melts into the condensed milk and sets into a firm, sliceable slab as it chills. You get a buttery, vanilla-forward flavor that’s rich without being overwhelming. And because the base is white, you can add color to it easily — which is exactly what makes the layered patriotic version so stunning for holidays and celebrations.
Ingredients You’ll Need
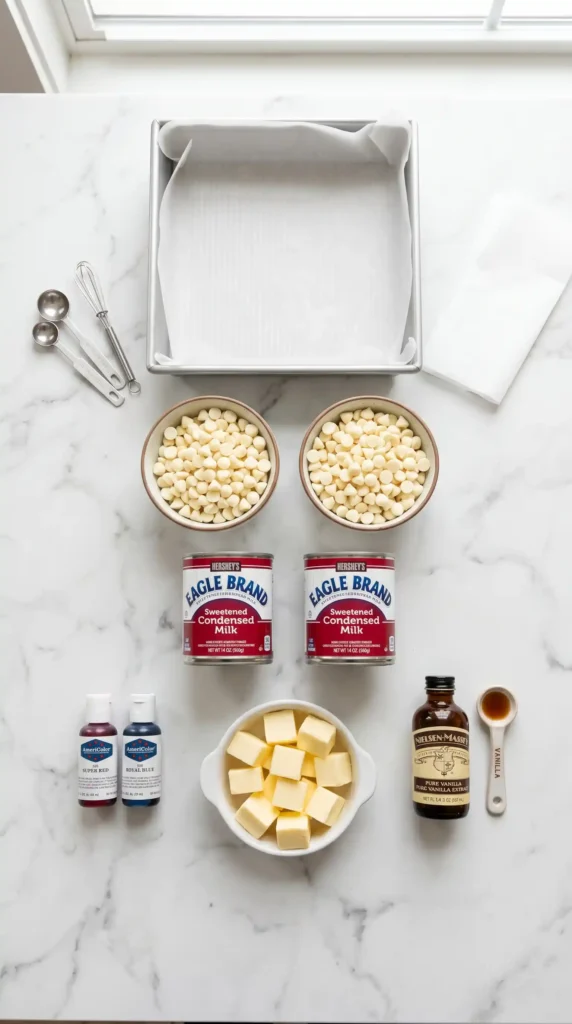
Here’s everything required for a full 9×9 inch pan of layered White Chocolate Fudge, yielding 36 squares:
For the Blue Layer:
- 2 cups white chocolate chips
- 1/2 cup sweetened condensed milk
- 1 tablespoon unsalted butter
- 1/2 teaspoon vanilla extract
- Blue gel food coloring (3–5 drops, or to desired shade)
For the White Layer:
- 2 cups white chocolate chips
- 1/2 cup sweetened condensed milk
- 1 tablespoon unsalted butter
- 1/2 teaspoon vanilla extract
For the Red Layer:
- 2 cups white chocolate chips
- 1/2 cup sweetened condensed milk
- 1 tablespoon unsalted butter
- 1/2 teaspoon vanilla extract
- Red gel food coloring (3–5 drops, or to desired shade)
A few important notes on ingredients: use gel food coloring, not liquid. Liquid food coloring adds extra moisture that can affect how the fudge sets and makes the colors look washed out. Gel coloring gives you vivid, saturated color with just a few drops.
Also, use real white chocolate chips or a quality white chocolate bar — not “white baking chips,” which are often palm oil-based and don’t melt or set the same way. The quality of the chocolate is the single biggest variable in how your fudge turns out.
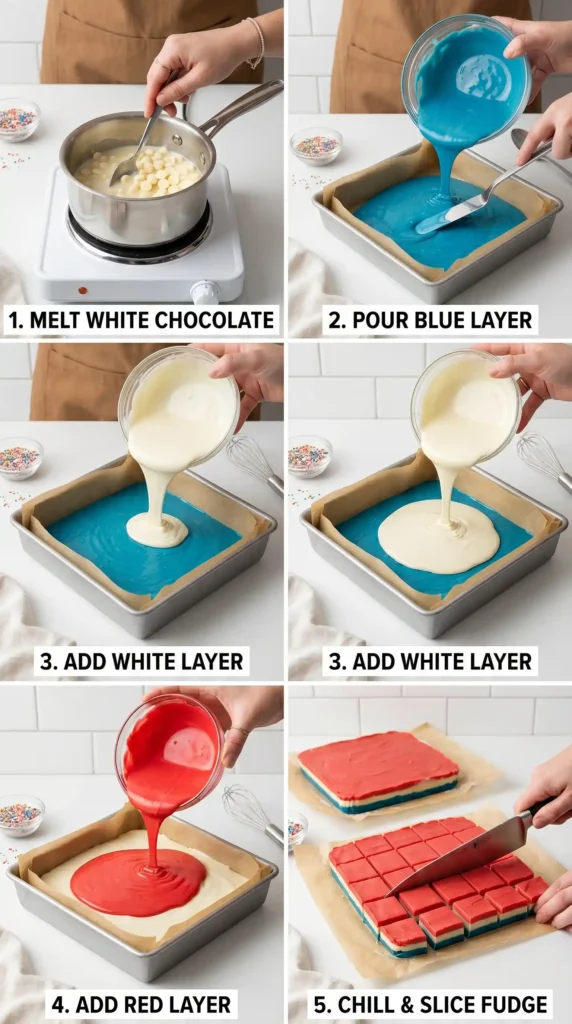
How to Make White Chocolate Fudge
Step 1: Prepare the Pan
Line an 8×8 or 9×9-inch square baking pan with parchment paper. Pull the parchment up over all four sides and press it into the corners so it sits flat against the pan. Leave a couple of inches of overhang on at least two opposite sides.
That overhang is your handle — when the fudge is fully set, you’ll lift it straight out of the pan using the parchment without needing to wrestle it out or risk breaking your layers. A well-lined pan is the single easiest thing you can do to guarantee clean, even slices at the end.
Set the pan aside while you start on your first layer.
Step 2: Make and Set the Blue Layer
In a medium saucepan, combine 2 cups of white chocolate chips, 1/2 cup of sweetened condensed milk, and 1 tablespoon of unsalted butter. Set the heat to low — genuinely low, not medium-low. White chocolate scorches faster than you’d expect, and burned chocolate is grainy and bitter with no fixing it.
Stir the mixture constantly with a rubber spatula, scraping the bottom and sides of the pan as you go. After 3 to 5 minutes, everything should melt into a smooth, glossy mixture with no lumps remaining. Pull the pan off the heat immediately once it reaches that smooth consistency — you don’t want to overcook it.
Stir in 1/2 teaspoon of vanilla extract and mix well. Add 3 to 5 drops of blue gel food coloring and stir until the color distributes evenly through the entire mixture. Hold the spatula up — if the color looks streaky, keep stirring. You want a completely uniform blue.
Pour the blue mixture into the prepared pan and spread it into an even layer using your spatula. Tap the pan gently on the counter a couple of times to release any air bubbles and level the surface. Place the pan in the refrigerator and chill for 20 to 25 minutes, until the layer feels firm and set when you lightly press the center with one finger.
Don’t rush this step. If the blue layer is still soft when you pour the white layer on top, the two will mix together and your clean color separation disappears.
Step 3: Make and Set the White Layer
Once the blue layer is fully set, start the white layer. Clean out your saucepan — any remaining blue coloring in the pan will tint your white layer. In the clean pan, combine another 2 cups of white chocolate chips, 1/2 cup of sweetened condensed milk, and 1 tablespoon of unsalted butter over low heat.
Repeat the same process: stir constantly, keep the heat low, and remove from heat the moment the mixture becomes completely smooth. Stir in 1/2 teaspoon of vanilla extract. No coloring this time — the natural ivory-white of the melted white chocolate is your white layer.
Let the mixture cool for 2 to 3 minutes off the heat before pouring. Pouring it too hot directly onto the set blue layer can soften the surface underneath and cause mixing at the border. A short rest cools it down enough to be safe.
Pour the white mixture slowly and carefully over the chilled blue layer. Use your spatula to spread it evenly all the way to the edges without pressing down hard — you want to cover the blue layer completely without disturbing it.
Return the pan to the refrigerator for another 20 to 25 minutes until the white layer is firm to the touch.
Step 4: Make and Set the Red Layer
Clean the saucepan again. Combine the final 2 cups of white chocolate chips, 1/2 cup of sweetened condensed milk, and 1 tablespoon of unsalted butter over low heat. Stir constantly until melted and smooth, then remove from heat.
Stir in 1/2 teaspoon of vanilla extract and 3 to 5 drops of red gel food coloring. Mix until completely uniform — stop and check by holding the spatula sideways to look at the color. No streaks means you’re ready.
Let it rest for 2 to 3 minutes off the heat before pouring, exactly as you did with the white layer. Then pour slowly over the set white layer and spread to the edges with your spatula.
Return the pan to the refrigerator for the final and most important chill: at least 2 hours, preferably 3. The whole three-layer slab needs to firm up completely before you cut it. Cutting early means soft layers, squished edges, and a sad-looking slice. IMO, leaving it overnight in the fridge gives the absolute best results — clean layers, firm texture, perfect squares.
Step 5: Slice and Serve
Pull the pan from the refrigerator. Grip the parchment overhang on both sides and lift the entire fudge slab straight up and out of the pan. Set it on a cutting board.
Fill a tall glass or measuring cup with hot water. Dip a sharp knife into the water for 10 seconds, then dry it with a paper towel. Use that warm knife to slice the fudge in one smooth downward motion — don’t saw back and forth. Rewarm and dry the knife between every single cut. This is the difference between clean, sharp edges and squished, dragged cuts.
Slice into a 6×6 grid to get 36 even squares. Or go bigger for 16 larger pieces if you’re serving this as a dessert rather than a candy portion.
Plate them with the layers facing out so guests can see all three colors in every piece.
Tips for Getting It Right
- Low and slow on the heat. White chocolate burns at a lower temperature than dark or milk chocolate. Keep the heat on low and never walk away while stirring.
- Cool slightly before pouring each layer. Two to three minutes off heat prevents the new layer from melting into the set one below it.
- Fully chill each layer before adding the next. The 20 to 25 minute minimum is real — test it with your fingertip before moving forward.
- Gel coloring only. Liquid coloring is a moisture risk that can make fudge grainy or prevent it from setting cleanly.
- Hot knife for clean cuts. Skipping this step leaves you with ragged edges and smeared layers. FYI, a knife dipped in hot water and dried between each cut is genuinely a game-changer.
Variations Worth Making
Sprinkles or crushed candy: Press festive sprinkles into the top layer before it sets for a decorative finish that doesn’t require extra work.
Cranberry or dried fruit: Fold 1/4 cup of dried cranberries or chopped dried apricots into the white layer for a fruity contrast against the richness.
Single color or no color: Skip the food coloring entirely and make all three layers the natural white for an elegant, minimalist look. The flavor is identical.
Nutty version: Stir 1/4 cup of finely chopped toasted pecans or macadamia nuts into any layer before pouring. The crunch plays nicely against the smooth fudge
Mint flavor: Replace the vanilla extract in the white layer with 1/4 teaspoon of peppermint extract. Mint and white chocolate are a seriously underrated combination.
Frequently Asked Questions
How long does White Chocolate Fudge last? Stored in an airtight container in the refrigerator, it stays fresh and firm for up to two weeks. Let individual pieces sit at room temperature for 5 minutes before eating for the best texture — straight from the fridge it can be quite firm.
Can I freeze White Chocolate Fudge? Yes. Wrap the uncut slab or individual squares tightly in plastic wrap, then place them in a freezer-safe container. It keeps well for up to three months. Thaw in the refrigerator overnight — don’t thaw at room temperature or condensation can form on the surface.
Why did my fudge turn out grainy? Grainy white chocolate fudge almost always comes from overheating the chocolate. White chocolate seizes and becomes gritty when it gets too hot too fast. Use low heat, stir constantly, and remove from heat the moment it’s smooth. There’s no coming back from scorched chocolate, so prevention is everything.
Can I make this without food coloring? Absolutely. Skip the color entirely and make all three layers plain white — it looks clean and elegant. Or color all three layers different pastel shades for Easter, or red and green for Christmas. The base recipe works for any occasion.
What if my layers mix together when I pour? This happens when the bottom layer isn’t fully chilled before you add the next one. The fix for next time is straightforward: wait the full 20 to 25 minutes and do the fingertip test before pouring. Also, let the new layer cool a couple of minutes off the heat before pouring slowly over the surface.
Final Thoughts
White Chocolate Fudge is one of those recipes that looks far more impressive than the effort it actually requires. Three ingredients per layer, no oven, no candy thermometer, and the result is a glossy, creamy, perfectly layered confection that genuinely looks professional.
Make it once and it’ll become your go-to for holidays, gifts, potlucks, or just a personal treat sitting in the back of your fridge. Once you nail the technique — low heat, full chill between layers, hot knife for cutting — it’s repeatable every single time.
Go grab those white chocolate chips. Your fridge is waiting.
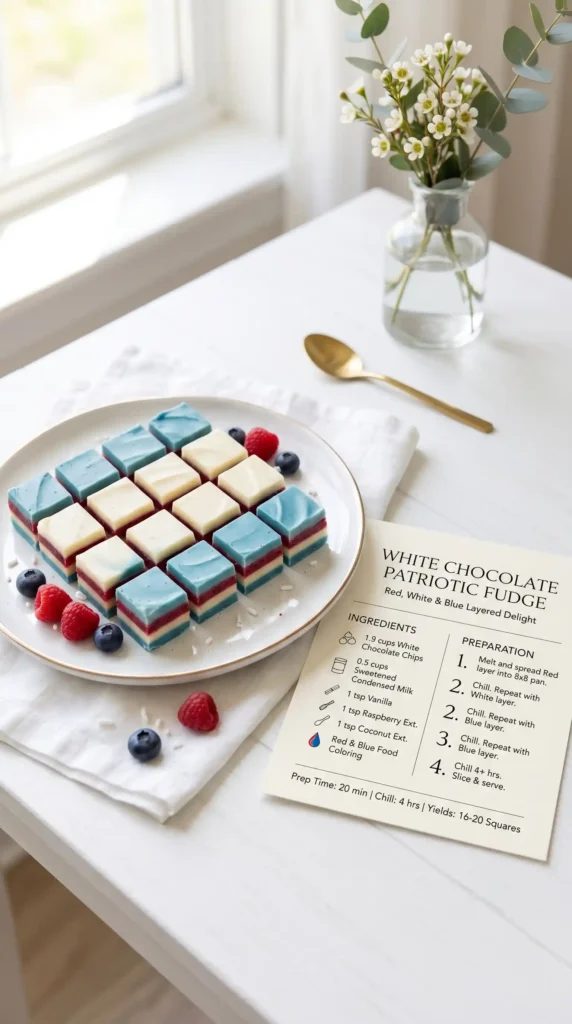
Layered White Chocolate Fudge
Ingredients
Method
- Line an 8x8 or 9x9-inch square baking pan with parchment paper, leaving a couple of inches of overhang.
- Combine blue layer ingredients in a medium saucepan over low heat, stirring constantly until smooth.
- Add blue gel food coloring and stir until evenly distributed.
- Pour into the prepared pan and spread evenly. Chill for 20-25 minutes.
- Clean the saucepan and combine white layer ingredients over low heat, stirring until smooth.
- Let cool for 2-3 minutes before pouring over the blue layer. Spread evenly and chill for 20-25 minutes.
- Clean the saucepan and combine red layer ingredients over low heat, stirring until smooth.
- Let cool for 2-3 minutes before pouring over the white layer. Spread evenly and chill for at least 2 hours.
- Lift the fudge from the pan using the parchment overhang and slice with a hot, dry knife.
- Slice into a 6x6 grid for 36 squares or larger pieces if desired.


