Prep Time: 20 minutes | Bake Time: 30-35 minutes | Soak/Chill Time: 1 hour | Total Time: About 2 hours | Servings: 12-15 slices
Okay, Let’s Talk About This Cake
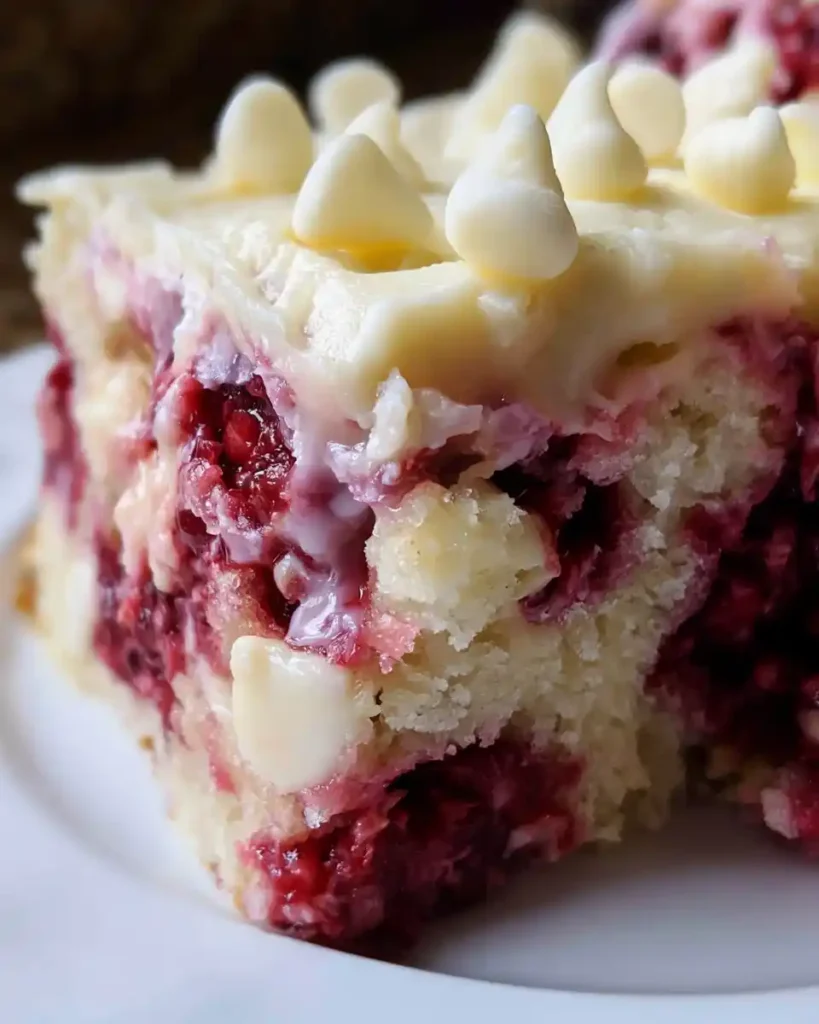
Some desserts just show up and steal the whole party. That’s exactly what a White Chocolate Raspberry Poke Cake does. I made this for a random Wednesday dinner once and my family acted like I’d hired a pastry chef.
Have you ever made something so simple that people refuse to believe it wasn’t hard? That’s this cake. It looks fancy, tastes like a bakery splurge, and takes zero advanced skills to pull off.
This isn’t just another poke cake recipe floating around the internet. It’s the version I actually make on repeat, tweaked until it stopped being “pretty good” and became “why is there none left.”
Why This White Chocolate Raspberry Poke Cake Works So Well
The magic here is balance. White chocolate brings sweetness and creaminess, while raspberry cuts through with a tart little punch. Neither one overpowers the other, and that’s IMO the whole secret.
It’s also incredibly forgiving. Cake mix does the heavy lifting, so you’re not fussing over creaming butter or sifting flour for twenty minutes. Even a first-time baker can nail this on attempt one.
And honestly, poke cakes are just fun. Watching syrup disappear into all those little holes feels oddly satisfying, like a science experiment that ends in dessert.
What You’ll Need: Ingredients
Here’s everything the recipe calls for, with exact amounts so you’re not guessing:
- White cake mix, 1 box (15.25 oz)
- Egg whites, 4 large
- Water, 1 1/3 cups
- Vegetable oil, 1/3 cup
- Raspberry syrup or thinned raspberry preserves, 1 cup
- Sweetened condensed milk, 1 can (14 oz)
- White chocolate chips, 1 cup total, divided
- Buttercream frosting, 2 cups (or 8 oz whipped topping as a lighter swap)
- Fresh raspberries, a small handful, for garnish (optional)
Nothing exotic, nothing you need a specialty store for. That’s part of why this cake earns a permanent spot in the rotation.
How to Make White Chocolate Raspberry Poke Cake
Making this cake happens in clear stages: bake, poke, soak, frost. Take it slow through each one and you’ll get a bakery-level result without any bakery-level stress.
Step 1: Mix the Batter the Right Way
Preheat your oven to whatever the cake mix box says, usually 350°F. In a large bowl, combine the cake mix, egg whites, water, and oil. Whisking with only egg whites keeps the crumb pale and gives the cake a lighter, softer bite than a recipe using whole eggs.
Mix on medium speed for about two minutes, just until smooth. Overmixing builds gluten and toughens the cake, so stop as soon as the lumps disappear. Scrape the bowl once halfway through so nothing hides at the bottom unmixed.
Step 2: Load In Some White Chocolate
Grease a 9×13 pan well, including the corners where cake loves to stick. Scatter half a cup of white chocolate chips evenly across the bottom before the batter goes anywhere near it. As the cake bakes, those chips melt into little pockets of gooey flavor tucked inside every slice.
Step 3: Bake It Low and Slow-ish
Pour the batter over the chips and smooth the top with a spatula. Bake for 30 to 35 minutes, checking at the 28-minute mark since ovens vary more than people admit. A toothpick inserted in the center should come out clean or with just a few moist crumbs.
Let the cake rest in the pan for about 10 minutes once it’s out of the oven. This short rest firms up the structure just enough that poking holes later won’t collapse the cake.
Step 4: Poke All the Holes
Grab the round end of a wooden spoon, or a chopstick works too. Poke holes across the entire surface, spacing them about an inch apart. Go all the way down without hitting the pan, since these tunnels are where all that raspberry flavor is headed next.
Step 5: Flood It With Raspberry Syrup
Slowly pour the raspberry syrup over the whole cake, letting it pool and sink into the holes. Go slow here rather than dumping it all at once, so the syrup has time to travel down instead of just running off the top. Let it sit and soak in for about 15 minutes before moving to the next step.
Step 6: Whip Up the White Chocolate Ganache
Melt the remaining half cup of white chocolate chips in the microwave in 20-second bursts, stirring between each one so it doesn’t scorch. Once smooth, stir in the sweetened condensed milk until fully combined and glossy. This ganache is thick, rich, and about to make the cake dangerously good.
Step 7: Pour, Soak, Repeat
Spoon the ganache over the cake, again focusing on those poked holes. Let the whole thing sit in the refrigerator for at least 30 minutes, though an hour gets even better results. This chilling time is where the cake actually becomes a poke cake instead of just a cake with toppings.
Step 8: Frost Like You Mean It
Once fully chilled, spread the buttercream frosting evenly across the top. Work in gentle strokes from the center outward so you don’t drag up cake crumbs into your frosting. If the frosting feels stiff, let it sit at room temperature for a few minutes first.
Step 9: Finish It Off
Scatter the last of the white chocolate chips over the frosted top, then add fresh raspberries if you’re using them. Slice, serve, and try to look humble when everyone asks for the recipe.
Pro Tips for the Best Results
- Use room-temperature eggs and oil so the batter blends smoothly without overworking it
- Never skip the resting step before poking holes, or the cake can sink in the middle
- Chill the cake fully before frosting so the buttercream doesn’t slide right off
- Make it the night before an event, since the flavor genuinely deepens overnight
- Store leftover ganache separately if you’re prepping ahead, then pour just before serving
Fun Variations Worth Trying
- Swap the white cake mix for chocolate cake mix for a deeper, richer contrast
- Trade raspberry syrup for strawberry or blueberry for a seasonal spin
- Use a gluten-free cake mix and confirm every other ingredient is certified gluten-free
- Go dairy-light by swapping buttercream for a whipped coconut cream topping
- Fold crushed pistachios or almonds into the batter for texture
What to Serve Alongside It
A cold glass of iced tea or lemonade balances the cake’s sweetness nicely. Fresh raspberries or a small scoop of vanilla ice cream on the side never hurts either. For a dinner party, a mint sprig on each plate adds a touch of polish without any extra effort.
Storage and Make-Ahead Notes
Cover the cake tightly and refrigerate it for up to 4 days, though it rarely lasts that long in my house. For longer storage, wrap fully cooled, unfrosted cake in plastic wrap and foil, then freeze for up to 2 months. Thaw in the fridge overnight before frosting and serving.
FAQs About White Chocolate Raspberry Poke Cake
Can I make this cake a day ahead of time? Yes, and honestly it’s better that way. The syrup and ganache need time to fully settle into the cake, so overnight in the fridge only improves the flavor.
What can I use instead of buttercream frosting? Whipped topping or lightly sweetened whipped cream both work well. They’re lighter and still hold up fine on a chilled cake.
How long does the cake stay fresh? Covered and refrigerated, it holds up for about 3 to 4 days. Just keep it sealed so the cake doesn’t dry out or pick up fridge odors.
Can this cake be frozen? Yes, though freeze it before frosting for best texture. Wrap it well, freeze for up to 2 months, then thaw in the fridge before adding frosting.
Is there a way to make it less sweet? Swap the buttercream for whipped cream and use a lower-sugar raspberry syrup. Both changes cut the sweetness noticeably without changing the texture.
Final Thoughts
This White Chocolate Raspberry Poke Cake earns its spot as a go-to dessert because it’s simple, forgiving, and genuinely delicious. Every step, from poking holes to pouring ganache, adds another layer of flavor that makes the wait worth it. FYI, leftovers rarely survive past day two in most households, mine included.
Bake it once and you’ll understand why people ask for the recipe before they’ve even finished their slice.
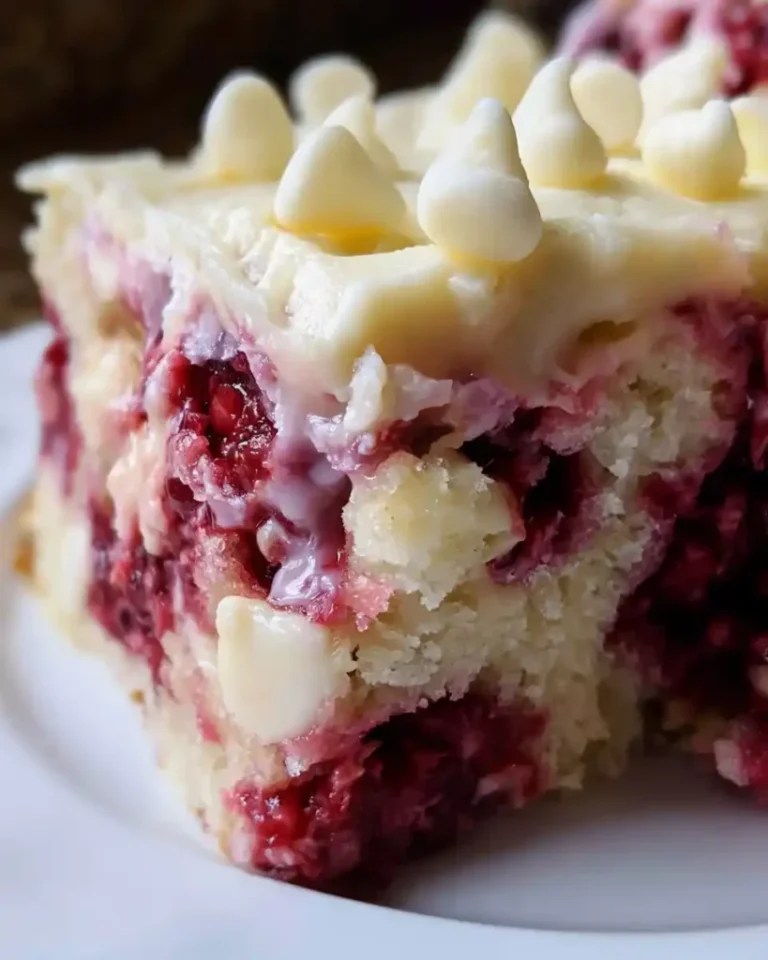
White Chocolate Raspberry Poke Cake
Ingredients
Method
- Preheat your oven according to the cake mix box instructions, usually 350°F.
- In a large bowl, combine the cake mix, egg whites, water, and vegetable oil. Mix on medium speed for about two minutes until smooth.
- Grease a 9×13 pan well, and scatter half a cup of white chocolate chips evenly across the bottom.
- Pour the batter over the chips and bake for 30 to 35 minutes, checking for doneness at 28 minutes with a toothpick.
- Let the cake rest in the pan for about 10 minutes once baked.
- Poke holes across the entire surface of the cake using the round end of a wooden spoon.
- Slowly pour the raspberry syrup over the cake, allowing it to soak in for about 15 minutes.
- Melt the remaining half cup of white chocolate chips in the microwave in 20-second bursts. Stir in the sweetened condensed milk until smooth.
- Spoon the ganache over the cake, focusing on the poked holes. Refrigerate for at least 30 minutes.
- Once chilled, spread the buttercream frosting evenly over the top.
- Top with the remaining white chocolate chips and fresh raspberries if desired.
- Slice, serve, and enjoy the cake!



