Summer heat plus a hungry crowd plus zero desire to bake — that’s exactly where the Ice Cream Sandwich steps in and saves the day. This recipe requires no oven, no stand mixer, and no pastry skills whatsoever. Just good ingredients, a freezer, and about 15 minutes of your life.
I made these for the first time at a Fourth of July cookout a few years back. I expected people to be polite about them. Instead, my brother-in-law asked for three. That’s basically a five-star review in our family.
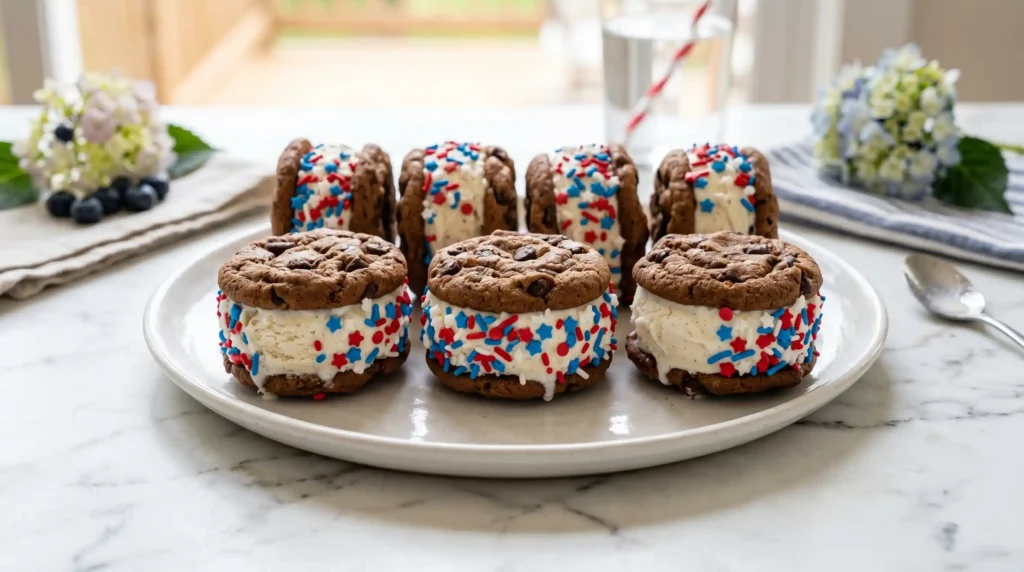
The concept is simple — classic ice cream sandwiches rolled in festive red, white, and blue sprinkles, then refrozen until firm. The result looks like something you’d buy at a gourmet dessert shop, which is deeply satisfying considering how little effort it takes.
Why This Ice Cream Sandwich Recipe Works
Store-bought ice cream sandwiches already have a great texture balance — soft cookie exterior, creamy filling. Your job is to add a festive coating and make them look intentional. That’s genuinely the whole recipe. Surprisingly effective, right?
The sprinkle coating serves two purposes. It adds a slight crunch and sweetness to every edge bite. And visually, it transforms a plain rectangular sandwich into something that looks party-ready. Have you ever noticed how much presentation affects how food tastes? This recipe exploits that fact completely.
IMO, this recipe also wins on flexibility. You can use any ice cream flavor, any sprinkle combination, and adjust the quantity to fit any crowd. Six sandwiches for a small gathering. Double it for a bigger one. No complicated math involved.
Ingredients for the Perfect Ice Cream Sandwich

The ingredient list here is refreshingly short. Every item on it pulls its weight. Here’s exactly what you need to make 6 festive ice cream sandwiches.
Main Ingredients
- 6 classic rectangular ice cream sandwiches (store-bought, your favorite flavor)
- 1 cup red, white, and blue sprinkles (mix of star-shaped and round confetti styles)
Optional Add-Ons
- 1/4 cup mini chocolate chips (for extra texture on edges)
- 1/4 cup crushed graham crackers (for a cookie-crust coating)
- Fresh strawberries and blueberries (for serving)
FYI — vanilla ice cream sandwiches give you the most neutral base, which means the sprinkles really pop visually. But mint chocolate chip, cookies and cream, or strawberry all work beautifully if you want to get creative.
Equipment You Need
Nothing specialized here. These are things most kitchens already have sitting in a drawer or cabinet.
- Shallow plate or rimmed baking sheet — For spreading and pressing the sprinkles. Wide and flat works best.
- Cutting board or large plate — For unwrapping and working with each sandwich.
- Freezer-safe container or tray — For the brief refreeze after coating.
- Parchment paper — Optional, but makes cleanup about 80 percent easier.
How to Make a 4th of July Ice Cream Sandwich
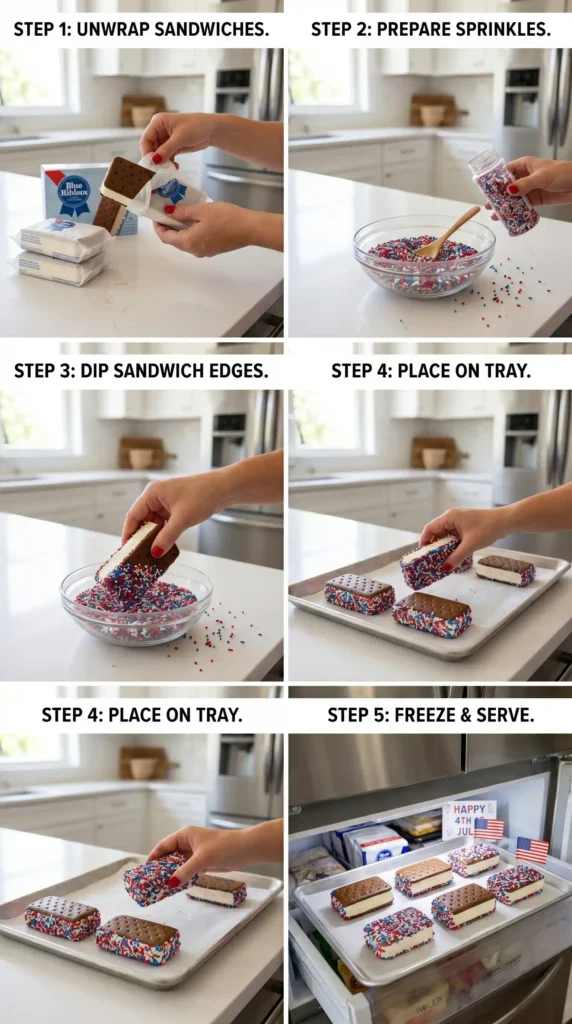
Five steps. That’s all this takes. Each one is quick, clear, and hard to mess up. Let’s walk through the entire process so you know exactly what to expect before you start.
Set Up Your Work Station
Before you open a single ice cream sandwich, get your station ready. Pull out a large shallow plate or rimmed baking sheet and spread your sprinkles across it in an even layer. The layer should be about 1/4 inch deep — deep enough that the sandwich edges sink in properly when you press.
Line a separate tray or flat container with parchment paper and set it near your freezer. You’ll transfer each finished sandwich directly onto this tray. Having everything ready before the sandwiches come out of the freezer is the single most important thing you can do to keep this process clean and fast. Ice cream sandwiches do not wait for you to find the right plate.
If you’re making these with kids, this is a great moment to let them set up the sprinkle station. It keeps little hands busy while you handle the unwrapping.
Unwrap the Ice Cream Sandwiches
Take your ice cream sandwiches out of the freezer and unwrap them one at a time. Work quickly but carefully. The wrapper tends to stick slightly in spots — peel it back slowly from one corner to avoid tearing the cookie layer underneath.
Place each unwrapped sandwich on your cutting board. You want the sandwiches cold and firm, not soft. If you notice the ice cream starting to look glossy or the sandwich feels squishy when you pick it up, stop immediately. Place all the sandwiches back in the freezer for 5 minutes, then try again.
A firm sandwich holds its shape during the coating process and gives the sprinkles something solid to stick to. A soft sandwich bends, loses its clean edges, and makes the whole process messier than it needs to be. Temperature control here makes or breaks the finished look.
Press and Coat the Edges in Sprinkles
This is the most satisfying step. Pick up one ice cream sandwich with both hands and hold it by the flat top and bottom surfaces — avoid gripping the edges since those are the surfaces you’re about to coat.
Press one long edge of the sandwich firmly into the sprinkle plate. Rock it gently back and forth twice to embed the sprinkles into the soft ice cream layer along the edge. Lift it and check. You want full, even coverage with no visible gaps. If a section looks sparse, press that spot back into the sprinkles and rock again.
Rotate the sandwich 90 degrees and repeat on the next edge. Then the two short ends. Work your way around all four edges until the entire perimeter of the sandwich looks completely covered in color. The top and bottom cookie surfaces stay bare — those already look great on their own.
As you finish each sandwich, transfer it directly to your parchment-lined tray. Work steadily and don’t let any finished sandwiches sit on the counter. They go straight to the tray, and the tray goes straight to the freezer as soon as all six are coated.
Refreeze Until Firm
Slide the tray of coated sandwiches into the freezer and let them chill for at least 10 minutes. This brief refreeze does two things. It sets any ice cream that softened slightly during the coating process, and it locks the sprinkles in place so they don’t slide around when you pick up the finished sandwich to eat it.
If you made these ahead of time, you can leave them in the freezer for several hours or overnight. Just cover the tray loosely with plastic wrap after the first 15 minutes so the sandwiches don’t pick up any freezer odors.
Do not skip this step :/ The sandwiches technically look finished after coating, but they need that brief re-chill to hold together properly when serving. Ten minutes is genuinely all it takes.
Arrange and Serve
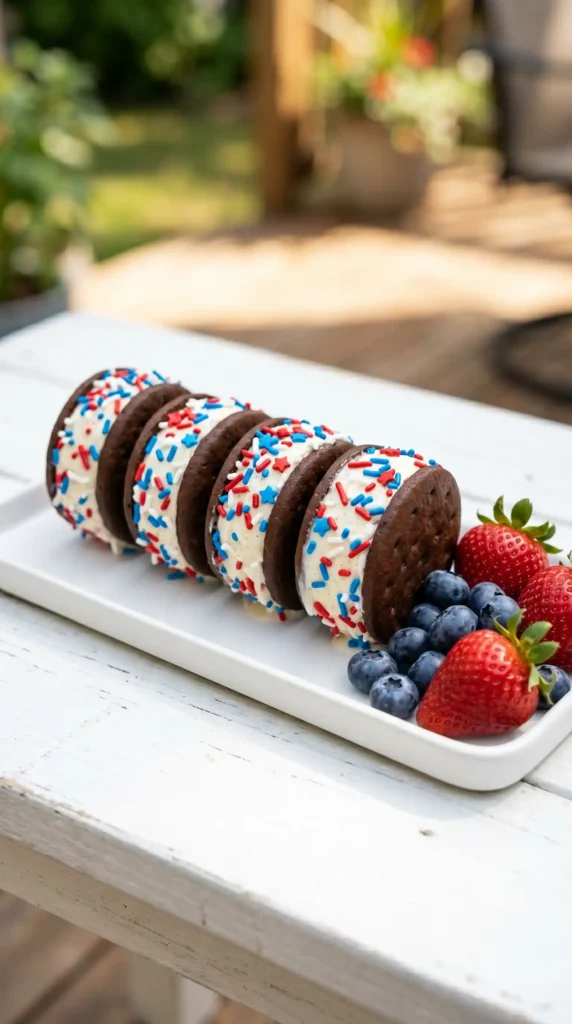
Pull the tray out of the freezer right before you’re ready to serve. Arrange the sandwiches on a flat platter in a single layer so guests can easily grab one without disturbing the others. A white or black platter makes the red, white, and blue sprinkles pop visually.
Add a small bowl of fresh strawberries and blueberries alongside the platter for a simple patriotic touch that also gives people a refreshing palate cleanser between bites.
Serve immediately. These are at their best right out of the freezer, when the ice cream is firm and the cookie exterior has that satisfying slightly-soft chew. Plan to serve within 5 to 8 minutes of pulling them from the freezer on a hot day — they’ll start softening quickly in summer heat.
Tips for Getting the Best Results
- Work in small batches if your kitchen is warm. Coat 2 to 3 sandwiches at a time, return them to the freezer, then coat the next batch. This prevents any sandwiches from softening too much mid-process.
- Mix sprinkle types for more visual interest. Stars, round confetti, and long jimmies layered together create more texture and depth than one style alone.
- Press firmly but don’t squeeze. You want the sprinkles embedded in the ice cream edge, not the sandwich crushed flat. Light-to-medium pressure is all you need.
- Store finished sandwiches in a freezer-safe airtight container with parchment paper between layers. They keep well for up to one week.
- Mini chocolate chips or crushed graham crackers mixed into the sprinkles add interesting texture variation and make each bite slightly different.
Variations Worth Trying
The base recipe is endlessly adaptable. Once you nail the core technique, the variations become really fun to experiment with. Have you thought about how many different coating combinations are possible?
- Cookies and cream: Use cookies and cream ice cream sandwiches and coat the edges in crushed Oreo pieces mixed with white sprinkles.
- Tropical twist: Mango or coconut ice cream sandwiches coated in toasted coconut flakes and yellow sprinkles.
- Chocolate lover’s version: Chocolate ice cream sandwiches with edges rolled in mini chocolate chips and dark cocoa nibs.
- Strawberry shortcake: Strawberry ice cream sandwiches rolled in crushed freeze-dried strawberries and white sprinkles.
Frequently Asked Questions
How far in advance can I make these ice cream sandwiches?
You can make them up to 5 days ahead. Once coated and refrozen, transfer them to an airtight freezer container with parchment paper between layers. Pull them out right before serving so they stay firm for as long as possible.
What if my ice cream sandwiches soften too much while I’m coating them?
Stop immediately and put everything back in the freezer for 5 minutes. Trying to coat a soft sandwich just creates a mess and uneven coverage. Work fast, and always prioritize getting them back to cold before the ice cream starts losing its structure.
Can I use homemade ice cream sandwiches instead of store-bought?
Absolutely. Homemade ones work great as long as you freeze them fully solid before attempting to coat the edges. They need to be just as firm as store-bought sandwiches straight from the freezer, otherwise the coating process gets messy fast.
Do the sprinkles stay attached after freezing?
Yes, once you refreeze the coated sandwiches, the sprinkles set firmly into the ice cream edge and don’t fall off easily. Don’t skip the 10-minute refreeze step — that’s what locks everything in place and gives you a clean, firm edge when you bite in.
Can I make these for a large group?
Easily. Just scale the quantity up. The technique stays identical whether you’re making 6 or 60. Set up an assembly line with one person unwrapping, one coating, and one transferring to the freezer tray. It turns into a genuinely fun group activity.
What flavors of ice cream sandwich work best for this recipe?
Vanilla gives you the most neutral base that lets the sprinkles stand out visually. But any flavor works — strawberry, mint chocolate chip, and cookies and cream all produce great results. Pick whatever flavor your guests will love most.
Final Thoughts
The Ice Cream Sandwich recipe proves that a genuinely impressive party dessert doesn’t require hours in the kitchen. Fifteen minutes of active prep, a 10-minute refreeze, and you have something that looks festive, tastes great, and makes every guest reach for seconds.
The technique scales up effortlessly, works for any flavor preference, and turns into a fun activity when you involve everyone in the sprinkle-coating step. It’s one of those rare recipes where the effort-to-reward ratio is completely unfair in your favor.
Make a batch this week and see for yourself. Just set up your sprinkle station before you open the freezer, work fast, and don’t let anyone steal one before the refreeze is done. That last part is harder than it sounds. You’ve been warned.


