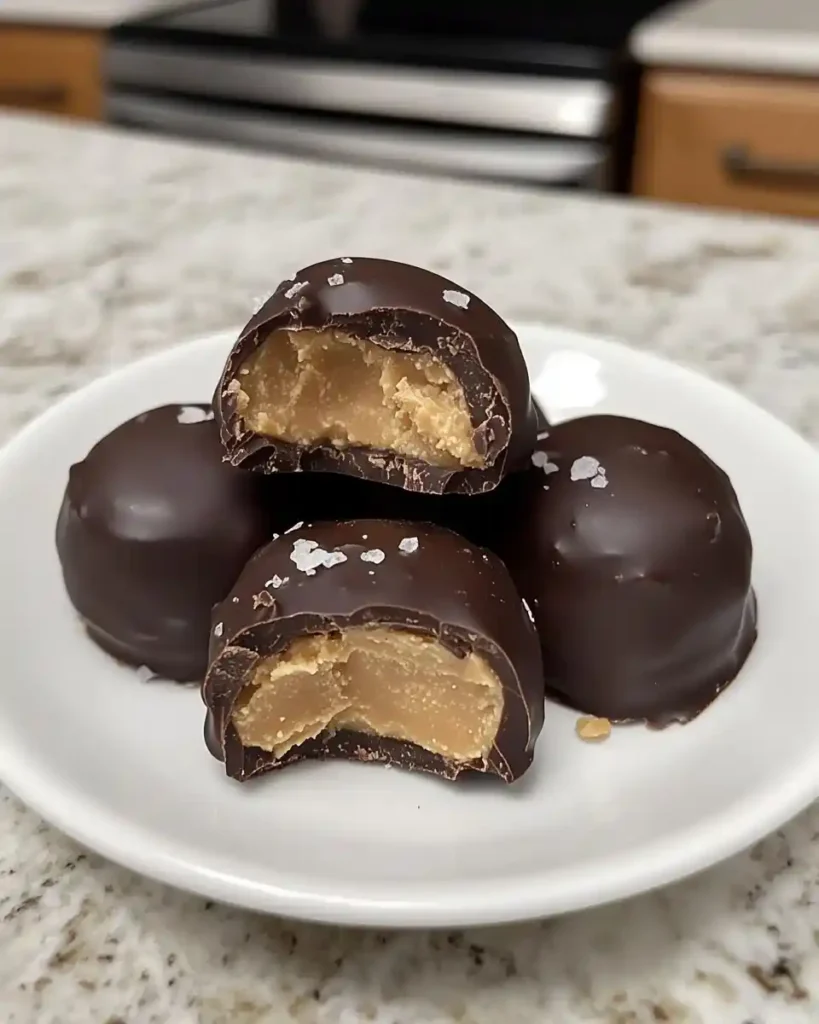
Craving something sweet, creamy, and dangerously easy to make? These peanut butter truffles hit that spot every single time. No oven, no fancy skills, just a bowl, some chocolate, and five minutes of patience. I make these constantly.
Servings: 20 truffles Prep time: 15 minutes Chill time: 30 minutes Total time: 45 minutes
I first made these on a lazy Sunday when I wanted dessert but refused to turn on the oven. One bite in, and I knew this recipe was staying in my rotation forever. Have you ever had a dessert that just clicks like that?
Why You’ll Love These Truffles
These truffles combine creamy peanut butter filling with a rich chocolate shell. No baking required, which means fewer dishes and way less waiting around. The texture alone makes this recipe worth trying.
IMO, no-bake desserts don’t get enough credit. They’re forgiving, quick, and nearly impossible to mess up. Plus, kids love rolling the filling into balls, which makes this a genuinely fun kitchen activity for everyone involved.
Have you ever noticed how peanut butter and chocolate just work? It’s a classic pairing for a reason. The salty-sweet peanut butter balances the rich chocolate coating in a way that feels indulgent without being overwhelming.
Ingredients You’ll Need
Here’s everything required to make these truffles from scratch. Simple pantry staples, nothing complicated, and probably half of it is already sitting in your kitchen right now.
- Creamy peanut butter – 1 cup
- Unsalted butter, softened – 4 tablespoons
- Vanilla extract – 1/2 teaspoon
- Powdered sugar – 1 1/2 cups
- Semi-sweet or dark chocolate, chopped – 8 ounces
- Coconut oil – 1 teaspoon
- Sea salt flakes – a pinch, for topping
Optional extras include crushed peanuts for crunch, melted white chocolate for drizzling, and sprinkles if you want them to look extra festive. Get creative with whatever you’ve got on hand.
How To Make Peanut Butter Truffles
This process breaks down into four manageable stages. None of it is complicated, but taking your time at each step genuinely makes a noticeable difference in the final texture and flavor.
Step 1: Mix The Peanut Butter Filling
Grab a large mixing bowl and add the peanut butter, softened butter, and vanilla extract. Beat everything together using a hand mixer until fully smooth. A sturdy whisk works too if you want a mini arm workout.
Gradually add the powdered sugar in small batches, mixing thoroughly after each addition. This prevents a sugar cloud from taking over your kitchen. Keep mixing until the filling turns thick, smooth, and holds together well.
If the mixture feels too stiff to work with, add a small splash of milk to loosen it slightly. Do this one teaspoon at a time so you don’t accidentally turn your filling into soup.
Step 2: Shape The Truffles
Once your filling reaches the right consistency, it’s time to roll it into balls. Use a small cookie scoop for evenly sized truffles, or just eyeball it with a spoon if precision isn’t your thing.
Roll each scoop between your palms into a smooth one-inch ball. Wetting your hands slightly beforehand keeps the mixture from sticking to your skin. Place each finished ball onto a parchment-lined baking tray as you go.
Try to keep the sizes consistent so they all set and coat evenly later. If you end up with leftover filling that won’t quite form a ball, just roll it anyway. Nobody’s judging your truffle shapes here.
Step 3: Chill Until Firm
Transfer the tray of shaped truffles into the freezer for about 30 minutes. This step matters more than it seems since firm truffles hold their shape far better once dipped into warm melted chocolate.
While you wait, use this time to clean up your mixing bowl or sneak a bite of leftover filling. I won’t tell anyone. Chilling also helps the peanut butter flavor settle and intensify slightly before coating.
Skipping this step leads to truffles that fall apart in the chocolate, which is genuinely frustrating after all your hard work. Thirty minutes feels long when you’re craving dessert, but trust the process here.
Step 4: Coat In Chocolate
Add the chopped chocolate and coconut oil to a microwave-safe bowl. Microwave in 30-second bursts, stirring between each round, until the mixture turns fully smooth and glossy. The coconut oil helps the chocolate set with a nice shine.
Using a fork or toothpick, dip each chilled truffle into the melted chocolate, turning it gently to coat all sides. Let the excess chocolate drip off before setting the truffle back onto the parchment paper.
Work quickly through this step since the chocolate starts firming up as it cools. If it thickens too much before you finish, pop it back in the microwave for another ten seconds and keep going.
Sprinkle a few sea salt flakes on top while the chocolate is still wet so they actually stick. Let the truffles sit at room temperature for about fifteen minutes, or pop them in the fridge to set faster.
Tips For Making These Even Better
Want to push this recipe further? These small tweaks add variety without complicating the process, and they’re all things I’ve genuinely tried and enjoyed in my own kitchen.
- Add crunch: Mix mini chocolate chips into the filling itself.
- Go tropical: Roll finished truffles in shredded coconut flakes.
- Bring heat: A pinch of cayenne in the filling surprises people 🙂
- Try nuts: Chopped almonds add texture and a nutty bite.
I tried the cayenne version once for a party, and people genuinely couldn’t stop asking what made the flavor so interesting. Small tweaks like that go a long way.
Storage And Reheating
These truffles store beautifully, which makes them a great make-ahead treat for parties or gifting. Keep them in an airtight container in the fridge once the chocolate coating has fully set.
Refrigerated truffles stay fresh for up to two weeks, though they rarely last that long in my house. For longer storage, freeze them in a single layer, then transfer to a container with parchment between layers.
Frozen truffles keep well for up to three months. Let them thaw in the fridge for about twenty minutes before serving so the texture returns to that perfect creamy consistency you’re after.
What To Serve Alongside Them
These truffles work wonderfully on their own, but a few pairings elevate the whole experience. Simple additions round out a dessert spread without stealing the spotlight from the truffles themselves.
- A hot cup of coffee or espresso
- Fresh strawberries or banana slices on the side
- A drizzle of melted white chocolate over the top
- A dusting of cocoa powder for presentation
Frequently Asked Questions
Can I use crunchy peanut butter instead of creamy? Yes, crunchy peanut butter works fine and adds a nice bit of texture. The filling won’t be quite as smooth, but the flavor stays just as good.
How long do these truffles last in the fridge? Stored in an airtight container, they stay fresh for up to two weeks. Freezing extends that to about three months if you want to make a big batch ahead of time.
Can I make these truffles vegan? Absolutely. Swap the butter for a plant-based alternative and use dairy-free chocolate for coating. The rest of the recipe stays exactly the same.
What can I use instead of coconut oil? Vegetable shortening works as a solid substitute for helping the chocolate set smoothly. You can also skip it entirely, though the coating won’t be quite as glossy.
Why did my chocolate coating turn out too thick? This usually means the chocolate cooled too much while dipping. Gently reheat it in short bursts and stir in a touch more coconut oil until it thins back out.
Final Thoughts
Peanut butter truffles prove that dessert doesn’t need an oven or hours of effort to genuinely impress people. Creamy, rich, and endlessly customizable, this recipe earns its spot as a go-to sweet treat.
Give these a try next time you want dessert without the fuss. Roll up your sleeves, grab that peanut butter jar, and let the chocolate do the rest of the talking.
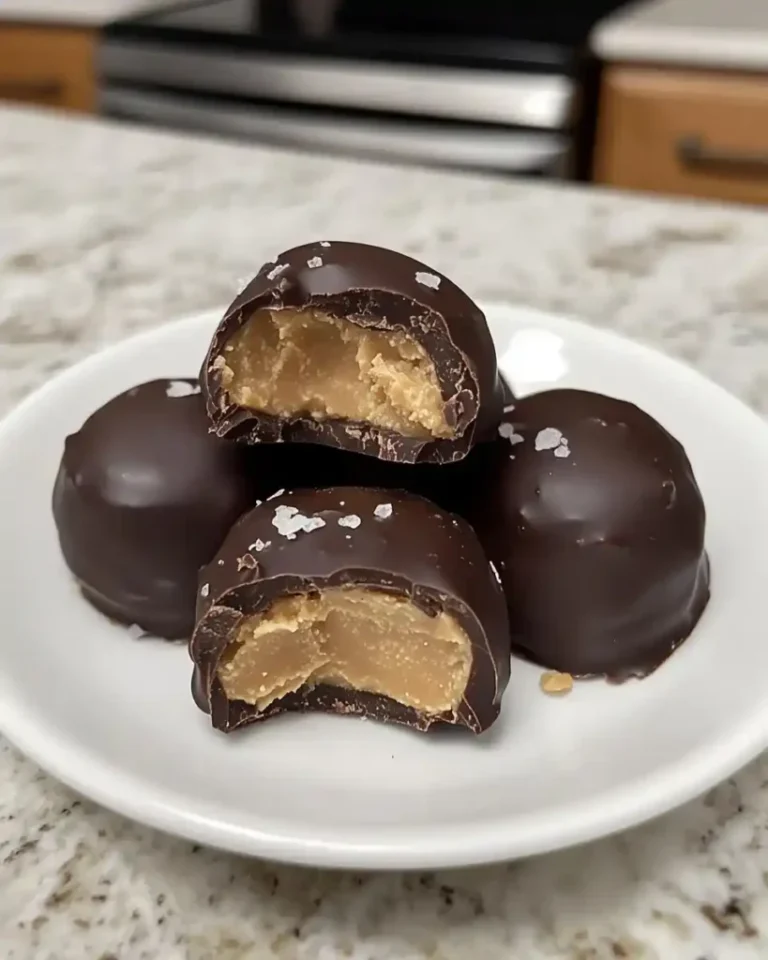
Peanut Butter Truffles
Ingredients
Method
- In a large mixing bowl, combine the creamy peanut butter, softened butter, and vanilla extract. Beat until smooth using a hand mixer or whisk.
- Gradually add the powdered sugar in small batches, mixing thoroughly until the filling is thick and holds together. Add a splash of milk if too stiff.
- Roll the filling into one-inch balls using a cookie scoop or spoon. Wet your hands slightly to prevent sticking.
- Place the truffles on a parchment-lined baking tray.
- Transfer the tray of truffles to the freezer and chill for about 30 minutes to firm up.
- Melt the chopped chocolate and coconut oil in a microwave-safe bowl in 30-second bursts until smooth.
- Dip each chilled truffle into the melted chocolate, allowing excess to drip off before placing back on parchment.
- Sprinkle sea salt flakes on top while the chocolate is still wet, then let set at room temperature or in the fridge.