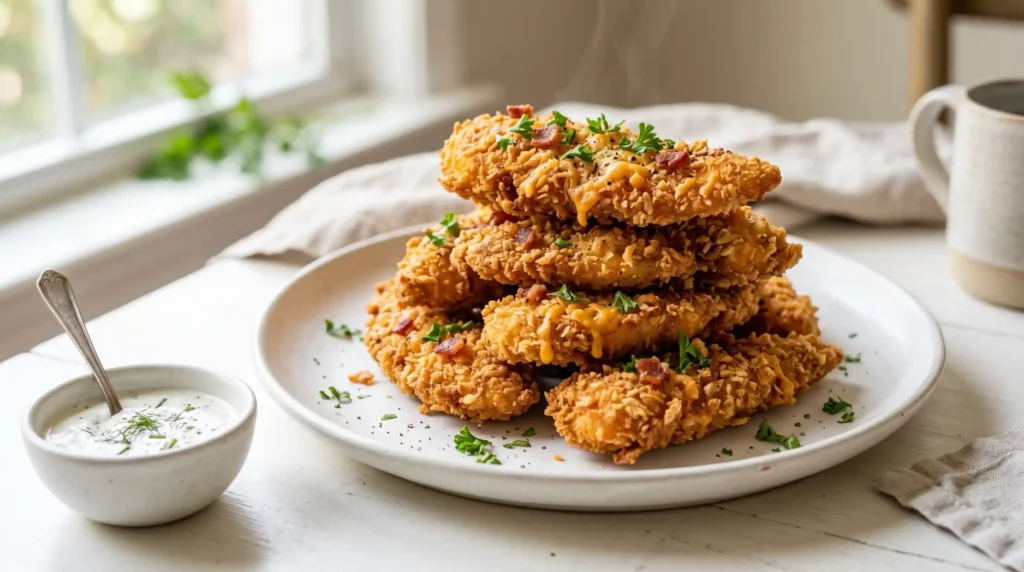
The name “crack chicken” gets thrown around a lot. But these Crack Chicken Tenders actually earn it. The combination of ranch seasoning, sharp cheddar, crispy bacon, and a perfectly crunchy coating produces a chicken tender that makes every other version taste like it was not even trying. Once you make these, regular chicken tenders feel like a let-down.
I made these for dinner on a night when I expected polite enthusiasm. Instead, I got a table of four adults eating in near-silence, occasionally making appreciative sounds, and immediately asking when I was making them again. I have made them every week since. That is the kind of recipe worth writing about.
Have you ever tasted something and immediately wondered where it had been your whole life? These tenders do that. Let us make them from scratch, properly.
Why These Tenders Are Called “Crack” Chicken and Why the Name Fits
The “crack” in crack chicken refers to the addictive quality that comes from combining ranch seasoning, cream cheese, cheddar, and bacon — a combination so reliably crowd-pleasing that it has spawned dozens of recipe variations across the internet. In tender form, that flavour combination gets pressed into a crispy coating that delivers the entire experience in one bite-sized, handheld package.
The ranch seasoning provides herby, slightly tangy notes. The cheddar adds sharp, salty richness. The bacon contributes smokiness and crunch. The buttermilk marinade underneath keeps the chicken itself juicy while the coating crisps up dramatically around it. Every flavour note hits a different part of your palate and none of them overstay their welcome. That is why these work so consistently well.
IMO, this is also the most effective way to get children, picky eaters, and adults who claim not to like cooking to eat enthusiastically without any effort on your part. Put a plate of these on the table and watch every reservation disappear.
What You Need
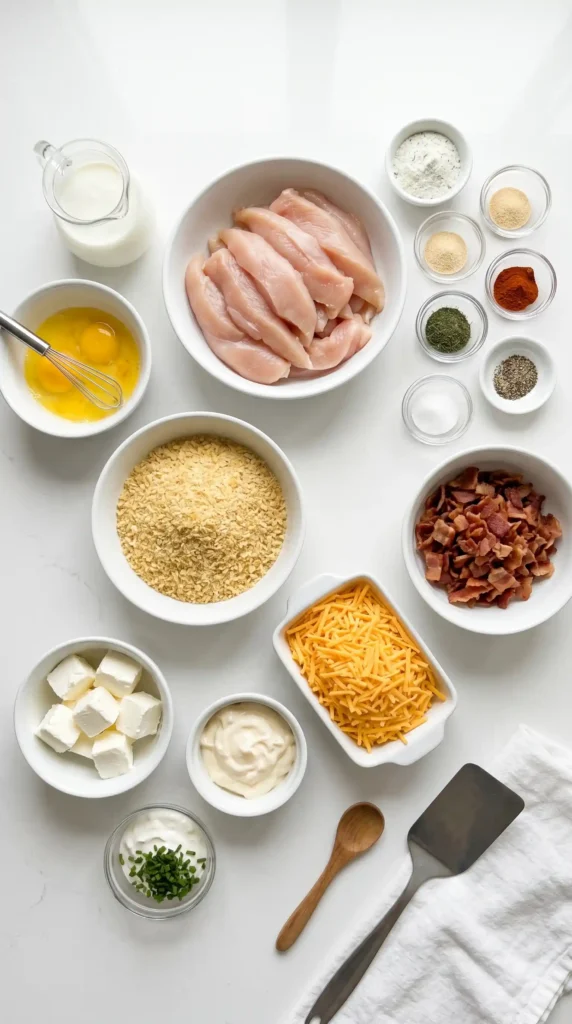
The ingredient list is approachable and mostly pantry-based. The cream cheese might seem unusual in a chicken tender coating — it is not a mistake. It adds richness and moisture to the filling layer beneath the crispy crust and is central to the “crack” flavour profile. Do not skip it and do not substitute it with anything else.
For the Buttermilk Marinade
- 700g (about 1.5 lbs) chicken tenders or boneless chicken breasts cut into strips of roughly 2cm wide and 10–12cm long
- 1 cup (240ml) buttermilk
- 1 tablespoon ranch seasoning mix (from a packet or homemade)
- 1/2 teaspoon garlic powder
- 1/2 teaspoon onion powder
- 1/2 teaspoon salt
- 1/4 teaspoon black pepper
For the Crack Coating
- 115g (4oz) full-fat cream cheese, softened to room temperature
- 1 cup (100g) panko breadcrumbs
- 1/2 cup (55g) sharp cheddar cheese, finely shredded
- 6 strips of cooked bacon, finely crumbled (about 1/2 cup crumbled)
- 2 tablespoons ranch seasoning mix
- 1 teaspoon smoked paprika
- 1/2 teaspoon garlic powder
- 1/2 teaspoon onion powder
- 1/4 teaspoon cayenne pepper (optional)
- 1/2 teaspoon salt
- 1/4 teaspoon black pepper
- 2 tablespoons neutral oil (for drizzling over tenders before baking, or for frying)
Now For the Dipping Sauce
- 1/2 cup (115g) sour cream or mayonnaise
- 2 tablespoons ranch seasoning mix
- 1 tablespoon fresh chives or spring onion, finely sliced
- 1 tablespoon fresh lemon juice
- Salt and pepper to taste
Cook the Bacon Before You StartCook your bacon first so it is completely cool and crispy by the time you build the coating. Warm or soft bacon does not crumble properly and adds moisture to the breadcrumb mixture, which prevents the coating from crisping up cleanly during baking. Bake the bacon strips on a foil-lined tray at 200°C for 12–15 minutes until deeply crispy, then cool completely before crumbling. FYI — this is also the easiest way to cook bacon without standing over a skillet the entire time.
How to Make Crack Chicken Tenders Step by Step
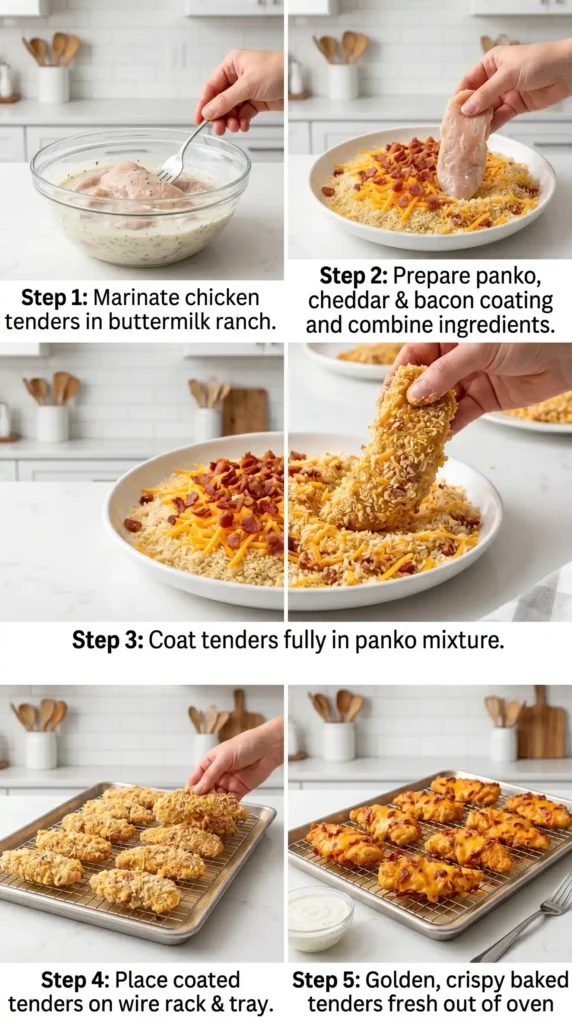
This recipe runs in four stages: marinate the chicken, prepare the coating components, assemble and coat the tenders, then bake or pan-fry. The marinade step takes only five minutes of active work but delivers the most flavourful, juicy chicken as the base. Do not skip it even if you are in a hurry — the buttermilk tenderises the chicken during the soak and makes a real difference to the finished texture.
Step 1: Marinate the Chicken
Cut the chicken breasts into strips if using whole breasts — aim for pieces roughly 2cm wide and 10–12cm long, which is the ideal size for a tender that cooks through evenly and fits comfortably in one or two bites. If using pre-cut chicken tenders, they are already the right size and just need the marinade.
In a large zip-lock bag or a bowl, combine the buttermilk, ranch seasoning, garlic powder, onion powder, salt, and pepper. Whisk or squeeze to combine, then add the chicken pieces. Make sure every piece gets fully submerged in the marinade. Seal the bag or cover the bowl with cling film and refrigerate for a minimum of 30 minutes, though 2 hours gives significantly better results. The buttermilk breaks down surface proteins in the chicken, tenderising it while the ranch seasoning flavours it all the way through rather than just on the surface.
Step 2: Preheat and Prepare Your Baking Setup
Preheat your oven to 220°C (425°F). Line a large baking sheet with parchment paper and place a wire rack on top of the parchment. The wire rack elevates the tenders off the baking sheet surface, allowing hot air to circulate underneath each one during baking — this produces a crispy bottom as well as a crispy top, which you simply cannot achieve by placing the tenders directly on a flat tray where the bottom steams rather than crisps.
Spray the wire rack lightly with cooking oil spray so the tenders do not stick. If you plan to pan-fry instead of bake, skip the rack setup and heat about 2cm of neutral oil in a heavy skillet to 180°C (350°F). Both methods work well — baking is easier for a larger batch while pan-frying produces a slightly more dramatic crust.
Step 3: Prepare the Cream Cheese Layer
Remove the softened cream cheese from the fridge and place it in a small bowl. Add one tablespoon of ranch seasoning to the cream cheese and beat with a fork until fully combined and smooth. This seasoned cream cheese acts as a binding adhesive layer between the marinated chicken and the crunchy exterior coating. It holds the breadcrumb mixture in place during baking and adds richness and flavour to every bite beneath the outer crust.
The cream cheese needs to be at room temperature before mixing — cold cream cheese is stiff and lumpy and will not spread evenly over the wet chicken surface. If you forgot to soften it in advance, microwave it for 10–15 seconds, stir thoroughly, and repeat until it becomes spreadable without being melted or liquid.
Step 4: Make the Crack Coating Mixture
In a wide, shallow dish, combine the panko breadcrumbs, finely shredded cheddar cheese, crumbled crispy bacon, remaining ranch seasoning, smoked paprika, garlic powder, onion powder, cayenne, salt, and pepper. Toss everything together with your fingers or a fork until the cheddar and bacon distribute evenly throughout the breadcrumbs. The mixture should look and smell extraordinary at this point — the combination of ranch, cheddar, bacon, and smoked paprika creates an aroma that signals exactly how good the finished tenders will taste.
Panko breadcrumbs are the correct choice here rather than regular breadcrumbs. Panko is drier, coarser, and larger-flaked than standard breadcrumbs, which means it crisps up more dramatically in the oven and produces that distinctive shattering crunch when bitten into. Regular breadcrumbs produce a denser, softer crust that is less satisfying and less visually striking. Use panko and do not substitute.
Step 5: Coat the Tenders
Remove the marinated chicken from the fridge. Working one tender at a time, lift it from the buttermilk marinade and allow the excess to drip off for a couple of seconds. Using a spoon or your fingers, spread a thin, even layer of the seasoned cream cheese over the entire surface of each tender — covering all sides including the edges. Think of this layer as the glue that holds your coating in place.
Immediately press the cream-cheese-coated tender into the panko mixture, pressing firmly on all sides to create a thick, even coating that covers every surface. Use your hands to press the coating in firmly rather than just rolling the tender through it — pressing builds a more compact, adherent crust that holds together during baking rather than falling off in patches. Place each coated tender onto the prepared wire rack as you work through all of them.
Once all the tenders are coated and arranged on the rack, drizzle or spray the tops lightly with the neutral oil. This oil contact on the exterior coating surface is what enables the panko to turn golden and crispy in the oven — uncoated dry panko goes from pale to slightly golden at best, but even a light coat of oil produces a dramatically deep, amber-gold crust. Do not skip this step and do not use too much — a light, even coat is all you need.
Step 6: Bake to Golden Perfection
Slide the rack into the preheated oven on the upper-middle rack position. Bake for 18–22 minutes until the coating looks deeply golden-amber and feels genuinely crispy when tapped lightly with a finger. Do not flip the tenders during baking — the wire rack handles the underside cooking and flipping risks knocking the coating off. Check the internal temperature at the thickest part of the largest tender at 18 minutes — it should read 74°C (165°F).
If the coating looks golden but the chicken has not reached temperature, reduce the oven to 190°C and continue baking for another 3–5 minutes. The lower temperature prevents the coating from burning while the interior catches up. Remove from the oven and rest for 2 minutes before serving — the interior is very hot and resting briefly lets the juices redistribute so the first bite does not burn your mouth.
Air Fryer Method — Faster and Just as CrispyPlace the coated tenders in a single layer in the air fryer basket with at least 2cm of space between each one. Spray lightly with cooking oil. Air fry at 200°C (400°F) for 12–15 minutes, flipping once halfway through. The air fryer produces an exceptionally crispy exterior in less time than the oven and requires no preheating wait. Work in batches for the best results — overcrowding the basket produces steamed rather than crispy tenders. :/
Variations Worth Making

Spicy Crack Chicken Tenders
Double the cayenne in the coating and add a tablespoon of hot sauce — Frank’s RedHot works beautifully — into the buttermilk marinade. The heat builds slowly through the ranch and cheddar flavours and hits on the finish rather than immediately, which makes it genuinely compelling rather than just punishing. Serve with a cool blue cheese dipping sauce instead of ranch to balance the heat.
No-Bacon Version
Replace the crumbled bacon with finely chopped sun-dried tomatoes and an extra tablespoon of smoked paprika. The sun-dried tomatoes add a concentrated, slightly sweet-acidic note and the additional paprika compensates for the smoky depth the bacon would have provided. This version works well for anyone who does not eat pork while maintaining most of the bold flavour profile that makes these tenders so distinctive.
Gluten-Free Crack Chicken Tenders
Use certified gluten-free panko breadcrumbs — several brands make excellent versions that crisp up just as well as regular panko. Confirm that your ranch seasoning packet is certified gluten-free, as some blends contain maltodextrin derived from wheat. Swap the buttermilk with a mixture of full-fat coconut milk and a tablespoon of apple cider vinegar if you need a dairy-free marinade as well. The coating texture stays impressively crunchy throughout.
Storage and Reheating
Store leftover Crack Chicken Tenders in an airtight container in the fridge for up to 3 days. Reheat in an oven at 190°C (375°F) for 8–10 minutes on a wire rack, or in an air fryer at 180°C for 5–6 minutes. Both methods restore most of the crunchy exterior that the fridge softens. The microwave is technically an option but produces a limp, sad coating that disrespects the effort that went into making these crispy in the first place.
These also freeze well before baking. After coating the tenders, arrange them on a parchment-lined tray and freeze until solid — about 2 hours. Transfer to a zip-lock freezer bag and store for up to 2 months. Bake directly from frozen at 220°C for 25–28 minutes, or until the internal temperature reaches 74°C. The coating crisps up nearly identically to the fresh version, making this an excellent make-ahead option for busy weeks.
Frequently Asked Questions
What exactly is “crack chicken” and what makes it different from regular chicken?
Crack chicken refers to a specific combination of ranch seasoning, cream cheese, cheddar, and bacon that became famous for its deeply addictive flavour profile. The combination appeared originally as a slow cooker dish and has since spread across dozens of recipe formats. In tender form, these elements are incorporated into the marinade and coating rather than the filling, which distributes the flavour throughout every layer of the finished chicken rather than just the interior.
Can I skip the cream cheese in the coating?
The cream cheese serves two essential functions: it acts as an adhesive that holds the panko coating to the wet marinated chicken, and it contributes the creamy richness that is central to the crack chicken flavour profile. Without it, the coating falls off during baking and the flavour loses a significant layer of depth. If dairy is an issue, a thick plant-based cream cheese works as a substitute — the adhesive function stays intact and the flavour difference is minimal.
How do I make my own ranch seasoning if I do not have a packet?
Mix together: 1 tablespoon dried parsley, 1 teaspoon garlic powder, 1 teaspoon onion powder, 1 teaspoon dried dill, 1/2 teaspoon dried chives, 1/2 teaspoon salt, and 1/4 teaspoon black pepper. This makes approximately 3 tablespoons of ranch seasoning — enough for both the marinade and the coating in this recipe. Store any leftover mix in an airtight container and use it in salad dressings, dips, or as a general seasoning for roasted vegetables.
Why are my tenders not getting crispy in the oven?
Four common causes: the oven was not fully preheated before the tenders went in, the tenders sat directly on the baking sheet rather than on a wire rack (which traps steam underneath), the oil drizzle on top was skipped or insufficient, or the tenders were too wet from the marinade when coated. Ensure the oven reaches full 220°C, always use a wire rack, oil the surface lightly but thoroughly, and let the excess marinade drip off each tender for several seconds before applying the cream cheese layer.
Can I make Crack Chicken Tenders ahead of time for a party?
Yes. The chicken can marinate in the buttermilk mixture for up to 24 hours in the fridge — longer marinating produces even more tender, flavourful chicken. The coated but unbaked tenders can be arranged on a tray, covered with cling film, and refrigerated for up to 4 hours before baking. Bake them fresh at the party, adding 3–4 extra minutes to account for the colder starting temperature. Serve directly from the oven for maximum crunch impact.
Final Thoughts
These Crack Chicken Tenders earn every bit of the name they carry. The ranch seasoning, the cream cheese adhesive layer, the cheddar-bacon panko coating, and the juicy buttermilk-marinated chicken inside all combine into a tender that delivers more flavour in a single bite than most chicken recipes manage across an entire meal.
Thirty-five minutes. Four servings. The most requested recipe in your household starting from the first time you make them. That is a reliable outcome that very few recipes can honestly promise — and this one delivers on it consistently.
Marinate that chicken tonight. Crumble that bacon while it is cool and crispy. Press that coating in firmly. And then watch a plate of twelve tenders disappear before you have even sat down properly. You were warned.

Crack Chicken Tenders
Ingredients
Method
- Cut the chicken breasts into strips if using whole breasts — aim for pieces roughly 2cm wide and 10–12cm long.
- In a large zip-lock bag or a bowl, combine the buttermilk, ranch seasoning, garlic powder, onion powder, salt, and pepper. Whisk or squeeze to combine, then add the chicken pieces.
- Seal the bag or cover the bowl with cling film and refrigerate for a minimum of 30 minutes, though 2 hours gives significantly better results.
- Preheat your oven to 220°C (425°F). Line a large baking sheet with parchment paper and place a wire rack on top.
- Spray the wire rack lightly with cooking oil spray.
- Remove the softened cream cheese from the fridge and mix with ranch seasoning.
- Combine panko breadcrumbs, cheddar cheese, crumbled bacon, remaining ranch seasoning, smoked paprika, garlic powder, onion powder, cayenne, salt, and pepper in a shallow dish.
- Remove marinated chicken and spread a thin layer of cream cheese over each tender.
- Press into the panko mixture to coat evenly.
- Place both coated tenders on the prepared wire rack and drizzle with oil.
- Bake for 18–22 minutes until golden amber and crispy.
- In a bowl, mix sour cream or mayonnaise with ranch seasoning, chives, lemon juice, salt, and pepper.


