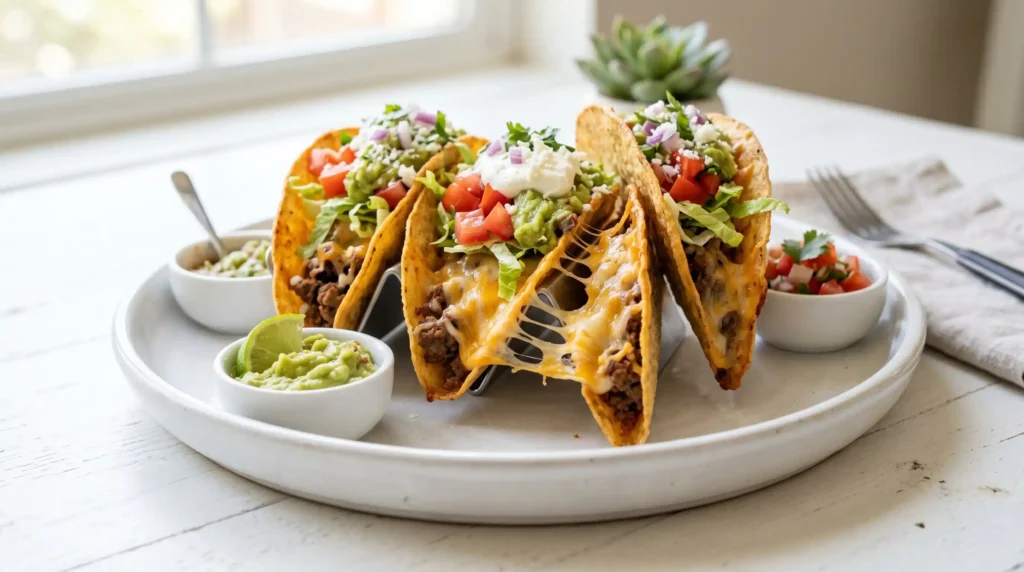
Regular tacos require you to stand over a stove, fill each shell individually, and serve them before the toppings make everything soggy. Cheesy oven-baked tacos require you to do almost none of that. You fill a pan, cover everything in cheese, put it in the oven, and pull out twelve perfectly assembled, hot, crispy, melty Cheesy Oven-Baked Tacos all at the same time. It is a system improvement that nobody questioned until someone tried it and then refused to go back.
I made these on a Thursday evening when I needed something that fed six people quickly, required minimal active cooking, and produced the kind of result that made everyone briefly forget their devices. The pan came out of the oven, the cheese was stretching, the shells were crackling, and the entire table lost their minds. That happens every single time. The oven does not lie.
Have you ever found a cooking method that makes an already great recipe dramatically easier and somehow even better? This is that method. Let us walk through it properly.
Why Baking Tacos in the Oven Changes Everything
The most frustrating part of serving tacos to a group is the timing problem. You can only fill a few shells at a time, the first ones are cold before the last ones are ready, the shells shatter when you load them, and the whole thing requires your presence at the stove throughout. The oven method solves all four problems simultaneously with zero compromise on quality.
Packing the filled shells tightly together in a baking dish before they go in the oven serves two functions. The shells support each other upright so nothing flops over. The close packing also traps heat around each shell during baking, which crisps the shell more evenly than any stovetop method. You get a uniformly crunchy, golden shell that holds its shape through filling, topping, and eating.
The cheese layer baked over the top is the element that elevates this beyond any standard taco. As it melts down into each filled shell, it seals the beef in place and adds an extra layer of flavour that binds every component together. IMO, a taco that has been baked under a blanket of melted cheese is categorically better than a taco assembled cold. The data is the taste test.
What You Need
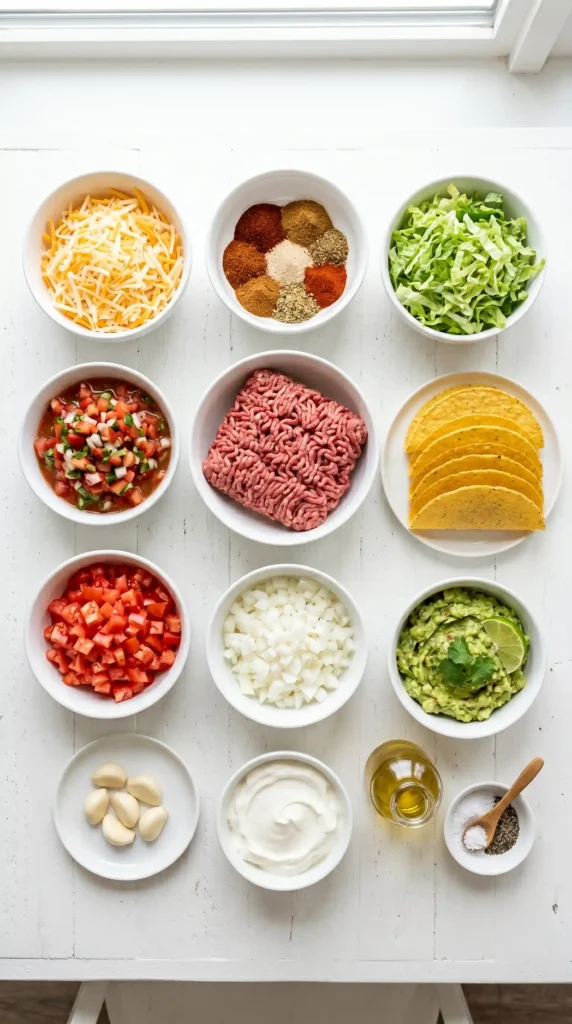
Everything here comes from a standard grocery store. The refried beans in the filling are not optional — they add moisture to the beef mixture that prevents the shells from drying out during baking, and they stretch the filling without compromising flavour or texture. If you have tried a version without them, you will notice the difference immediately when you try this one.
For the Beef Filling
- 500g (about 1 lb) lean ground beef (85/15 works best — enough fat for flavour, not so much the shells go greasy)
- 1 medium yellow onion, finely diced
- 3 garlic cloves, finely minced
- 1 packet (28g / 1oz) taco seasoning — or 2 tablespoons homemade blend
- 1/3 cup (80ml) beef broth or water
- 1 can (400g / 14oz) refried beans
- 2 tablespoons tomato paste
- Salt and pepper to taste
For the Taco Build
- 12 hard taco shells (standard stand-and-stuff size)
- 2 cups (225g) shredded Mexican cheese blend or a mix of Monterey Jack and mild cheddar
- 1/2 cup (120ml) salsa — poured around the base of the shells in the baking dish before baking
Now For the Toppings
- 1 cup shredded iceberg or romaine lettuce
- 1 cup (150g) cherry tomatoes, halved, or 2 medium tomatoes, diced
- 1/2 cup (115g) sour cream
- 1/2 cup (120g) guacamole or 2 ripe avocados, sliced
- 1/3 cup (80ml) salsa or pico de gallo for serving
- Fresh cilantro, pickled jalapeños, hot sauce — to taste at the table
The Salsa at the Base of the Pan — Do Not Skip ThisBefore placing the taco shells in the baking dish, pour about 1/2 cup of salsa across the base of the dish. As the tacos bake, the shells sit in this salsa, which steams the lower portion of the shells from the inside and keeps the taco shells from drying out and becoming too brittle. The salsa also adds flavour to the base of each taco that works its way up into every bite. FYI — this is the single most underrated step in the entire recipe.
How to Make Cheesy Oven-Baked Tacos Step by Step
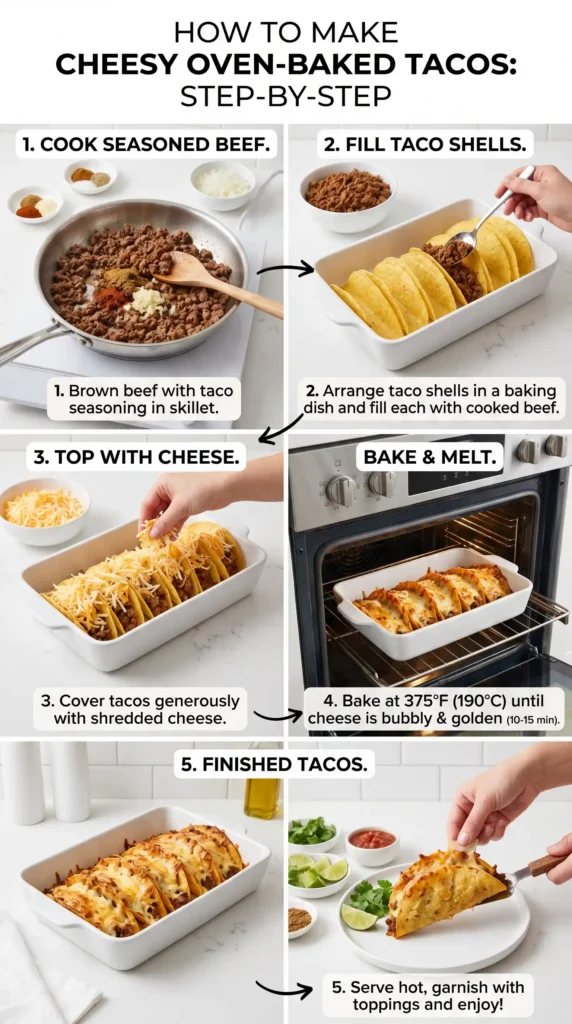
Three stages: cook the beef filling, assemble the tacos in the baking dish, then bake and top. Each stage is straightforward and the total active time is 15 minutes. The oven handles the rest. Understanding why each step matters will help you get the best result consistently, so let us walk through each one in proper detail.
Step 1: Make the Seasoned Beef Filling
Heat a large skillet over medium-high heat. Add the ground beef and diced onion at the same time. This saves time and helps the onion soften as the beef cooks. Break the beef apart with a wooden spoon and keep stirring. Cook for 4–5 minutes until the beef is no longer pink and the onion is soft and translucent.
Next, add the minced garlic and stir for about 60 seconds until fragrant. Drain most of the excess fat, but leave about a teaspoon for flavor. This prevents the tacos from becoming greasy or soggy. Then add the taco seasoning and mix until the beef is evenly coated. The spices should look dry and aromatic.
Pour in the beef broth or water and stir well. This helps the seasoning blend into the meat and keeps the filling moist. Add the tomato paste and mix until fully combined. It deepens the color and adds a richer flavor.
Finally, add the refried beans and stir until everything is well mixed. The mixture will be thick at first, then smooth out as it heats. Cook for about 2 minutes until hot and cohesive. Taste and adjust seasoning if needed. The filling should be bold in flavor since the shells and toppings will balance it later.
Step 2: Set Up the Baking Dish
Preheat your oven to 190°C (375°F). Take a 9×13-inch (23x33cm) baking dish and pour the 1/2 cup of salsa evenly across the base, tilting the dish to spread it in a thin layer. This salsa base serves as both flavour foundation and moisture source during baking — it prevents the shell bases from drying and cracking while adding a subtle tomato-spice note to the bottom of every taco.
Stand the 12 hard taco shells upright in the baking dish, fitting them snugly side by side in two rows of six. They should lean slightly against each other and hold themselves upright without falling over — the tight packing keeps them supported. If any shells refuse to stay upright due to their shape, nestle them more tightly against neighbouring shells or prop them against the sides of the baking dish.
Step 3: Fill the Taco Shells
Using a spoon, fill each upright taco shell with the beef and bean mixture. Aim for a generous spoonful in each one, filling them about three-quarters full. Do not overfill the shells to the top. Leave a little space so the cheese can melt properly instead of sitting on top of an overflowing filling. A generous filling works best, but overstuffing will push the cheese off during baking.
Once all 12 shells are filled, sprinkle the shredded cheese evenly over the top. Cover each taco well and also fill the gaps between them. This creates a continuous layer of cheese that melts together in the oven. It helps hold the tacos in place and makes them easier to serve while ensuring every bite is cheesy.
Step 4: Bake the Tacos
Slide the baking dish into the preheated oven on the centre rack. Bake for 15–18 minutes until the cheese has melted completely and looks deeply golden in spots, the shell edges visible above the cheese line have turned a deeper amber-gold colour, and the salsa at the base of the dish is visibly bubbling. Pull the dish at 15 minutes and check the cheese — if it looks melted but not yet golden, give it 2–3 more minutes.
The taco shells will feel firm and crispy at the top edges but remain slightly softer at the base where they sat in the salsa — this difference is intentional and desirable. The crispy top gives you the satisfying crunch. The softened base prevents the shell from shattering completely under the weight of the filling when you pick it up. The baking method produces this textural contrast naturally and it makes these Cheesy Oven-Baked Tacos significantly easier to eat than fully crispy shells that break apart on first contact.
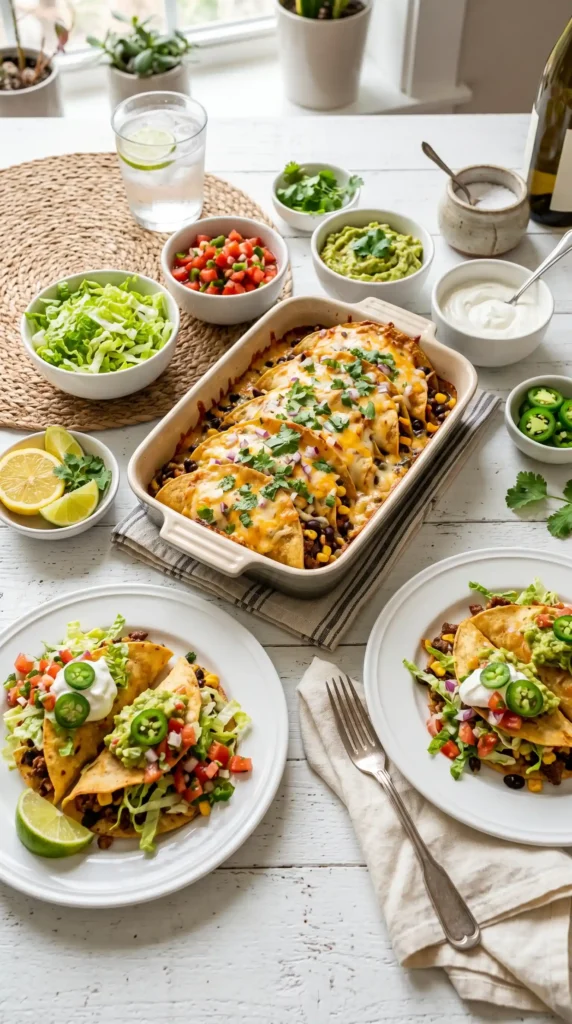
Step 5: Top and Serve
Remove the baking dish from the oven and allow it to rest for 2 minutes — the filling and cheese are extremely hot immediately out of the oven and a brief rest prevents burned fingers and mouths. Set out all the fresh toppings in individual bowls: shredded lettuce, diced tomatoes, sour cream, guacamole, salsa, cilantro, jalapeños, and hot sauce. Let everyone top their own tacos at the table — this interactive element makes the meal feel celebratory and casual at the same time, which is exactly the energy tacos produce at their best.
Variations Worth Making
Chicken Cheesy Oven-Baked Tacos
Replace the ground beef with 2 cups of shredded rotisserie chicken tossed with all the taco seasonings, tomato paste, and refried beans in the same proportions. Rotisserie chicken saves significant prep time — shred it directly from the store-bought bird and season it in the skillet with the onion, garlic, and spice blend for 3–4 minutes before combining with the beans. The chicken version is lighter, slightly milder, and just as crowd-pleasing as the beef version.
Vegetarian Black Bean Version
Replace the ground beef entirely with a filling of two drained and rinsed cans of black beans combined with diced bell pepper, corn kernels, the full taco spice blend, and the refried beans. Cook the vegetables for 4–5 minutes before adding the beans and seasoning. This version is genuinely satisfying — the black beans provide enough protein and substance that nobody misses the meat. Add a tablespoon of smoked paprika for extra depth.
Spicy Chorizo Version
Swap half the ground beef for Mexican chorizo — remove the chorizo from its casing and crumble it into the pan with the beef. The chorizo renders its own highly seasoned fat as it cooks, which carries through into every part of the filling. Reduce the additional taco seasoning by half since chorizo is already strongly seasoned. This version produces a deeply smoky, spicy filling that pairs extraordinarily well with a cool sour cream and guacamole topping combination.
Storage and Reheating
The baked cheesy tacos taste best immediately out of the oven — the shells stay crispy for about 15–20 minutes before the moisture from the filling begins to soften them. If you have leftovers, store the taco shells and filling separately. The beef and bean filling keeps in an airtight container in the fridge for up to 4 days and reheats perfectly in a skillet or microwave. Reassemble and rebake in a fresh dish for 10 minutes at 190°C for the best reheated result.
The filling freezes well for up to 3 months — thaw overnight in the fridge and reheat in a skillet before using. This makes it practical to batch-cook the filling on weekends and use it through the week for quick baked taco nights that require only 20 minutes of active prep on the day.
Frequently Asked Questions
Can I use soft flour tortillas instead of hard shells for oven-baked tacos?
Yes, with a slight adjustment to the technique. Warm the flour tortillas briefly so they are pliable, fill them, and stand them folded in the baking dish the same way as hard shells — propped upright and packed tightly together. They will not crisp the same way hard shells do, but the filling and cheese bake together beautifully. Add a tablespoon of butter brushed over the top of the folded tortillas before baking to encourage some golden colour on the surface.
Why are my taco shells getting soggy on the bottom?
Some softening at the base is intentional — the salsa at the base of the dish creates steam that softens the shell base slightly. If they are becoming fully soggy throughout rather than just softer at the base, the filling may be too wet. Cook the beef filling until most of the liquid has absorbed before adding the beans, and ensure you drain the beef fat thoroughly before seasoning. Over-wet filling releases moisture into the shells before the cheese crust forms to protect them.
What cheese melts best for oven-baked tacos?
A Mexican cheese blend — typically a combination of Monterey Jack, cheddar, asadero, and queso quesadilla — melts smoothly and delivers the most balanced flavour for this application. Monterey Jack alone is the single best melting cheese for this recipe — mild, creamy, and it forms a golden, bubbly surface without becoming greasy. Avoid pre-shredded cheese if possible since it contains anti-caking agents that make it slightly less fluid when melted. A block of cheese freshly shredded melts noticeably better.
Can I prepare the filling ahead of time?
Yes, and this is one of the most useful aspects of this recipe. Make the full beef and bean filling up to 3 days in advance and store it covered in the fridge. On the night of serving, reheat the filling briefly in a skillet or microwave until hot throughout, then assemble and bake the tacos as directed. Having the filling ready ahead of time reduces the total evening prep to under 10 minutes, making this one of the most genuinely practical weeknight dinners available.
How do I keep the taco shells from falling over in the baking dish?
Two strategies work reliably. First, pack them as tightly together as your baking dish allows — tacos leaning against each other stay upright better than tacos with space between them. Second, fill each shell before placing it in the dish — the weight of the filling makes the shell more stable than an empty shell. If shells still lean too far, crumple a small piece of aluminium foil and use it as a wedge between any unstable shells and the side of the baking dish to hold them in position until the cheese bakes them in place.
Final Thoughts
These Cheesy Oven-Baked Tacos earn their place as the most reliable, most requested weeknight taco recipe in existence. Boldly seasoned beef and bean filling, crispy shells, bubbling melted cheese, and all your favourite fresh toppings — assembled in one pan, baked in 15 minutes, and served simultaneously without anyone having to stand at a stove managing individual shells. The oven did what the stove could not.
They work for family dinners, for gatherings, for meal prep, and for those evenings when taco craving hits hard but patience for complicated cooking runs low. That is an extraordinarily versatile recipe and it delivers on every occasion.
Preheat that oven. Brown that beef properly. Pack those shells tight. Pile on the cheese. And then stand back from the oven door because twelve perfectly assembled, bubbling, golden tacos coming out all at once is a genuinely thrilling sight. You have been warned — make extra.

Cheesy Oven-Baked Tacos
Ingredients
Method
- Heat a large skillet over medium-high heat. Add the ground beef and diced onion.
- Break the beef apart with a wooden spoon and cook for 4–5 minutes until the beef is no longer pink and the onion is soft.
- Add the minced garlic and stir for about 60 seconds until fragrant.
- Drain most fat, leaving a teaspoon for flavor. Add taco seasoning and mix until beef is coated.
- Pour in beef broth or water, stir well, then add tomato paste and refried beans. Cook until hot.
- Preheat your oven to 190°C (375°F).
- Pour the 1/2 cup of salsa evenly across the base of a 9x13-inch baking dish.
- Stand taco shells upright in the baking dish packed tightly together.
- Using a spoon, fill each taco shell with the beef and bean mixture, filling them about three-quarters full.
- Sprinkle the shredded cheese evenly over the top of all shells.
- Bake in the preheated oven for 15–18 minutes until cheese is melted and golden.
- Check after 15 minutes; if cheese isn't golden, bake for additional 2-3 minutes.
- Remove from oven and let rest for 2 minutes before serving.
- Set out fresh toppings in individual bowls for everyone to customize their tacos.


