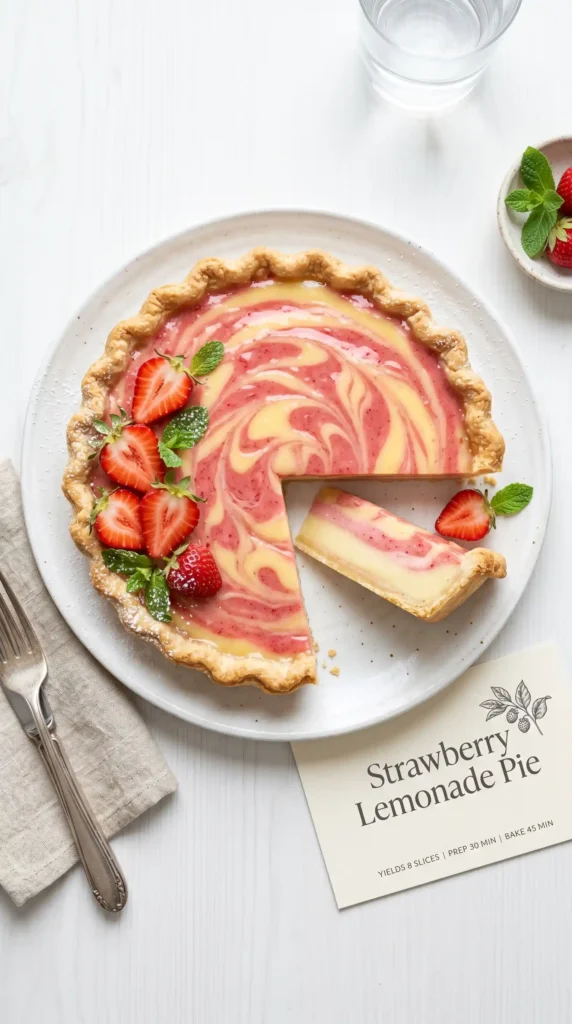
Servings: 8 slices | Prep Time: 20 minutes | Freeze Time: 4 hours minimum | Total Time: ~4 hours 20 minutes
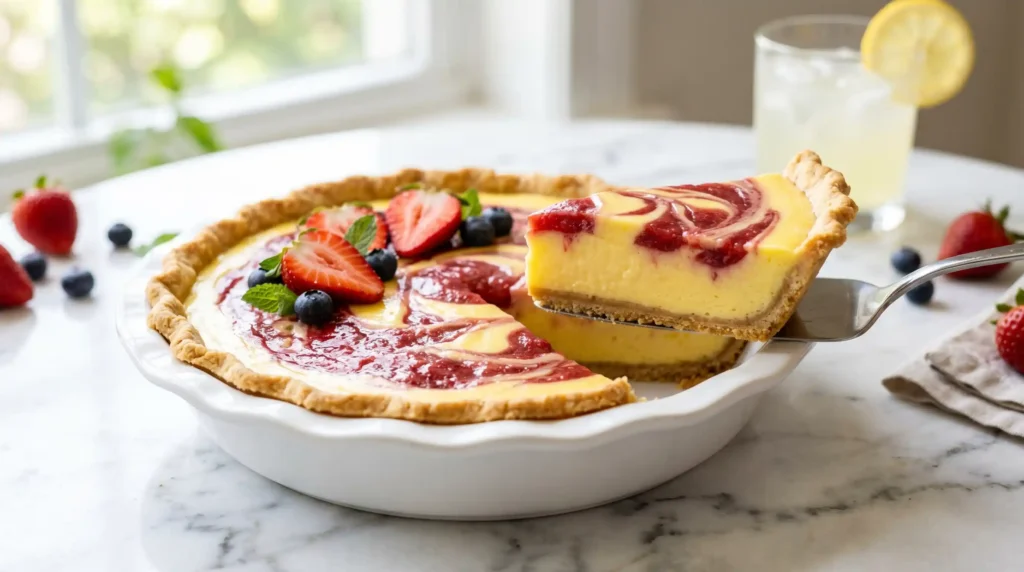
Some desserts are built for summer. This Strawberry Lemonade Pie is exactly that — no oven, no stress, just a creamy, tangy, strawberry-packed pie that you can pull together in about 20 minutes of actual effort. I first made this for a backyard cookout when it was way too hot to turn on the oven, and it’s been on repeat ever since.
Why This Pie Works So Well
The flavor combination here is genuinely smart. Sweet strawberries and tart lemonade balance each other out in a way that neither one overwhelms the other. You get the fruity brightness upfront and the citrus tang right behind it.
The no-bake format also makes this completely beginner-friendly. No temperature monitoring, no water bath, no worrying about a cracked top. You mix, layer, freeze, and serve. That’s the whole process.
Ingredients You’ll Need
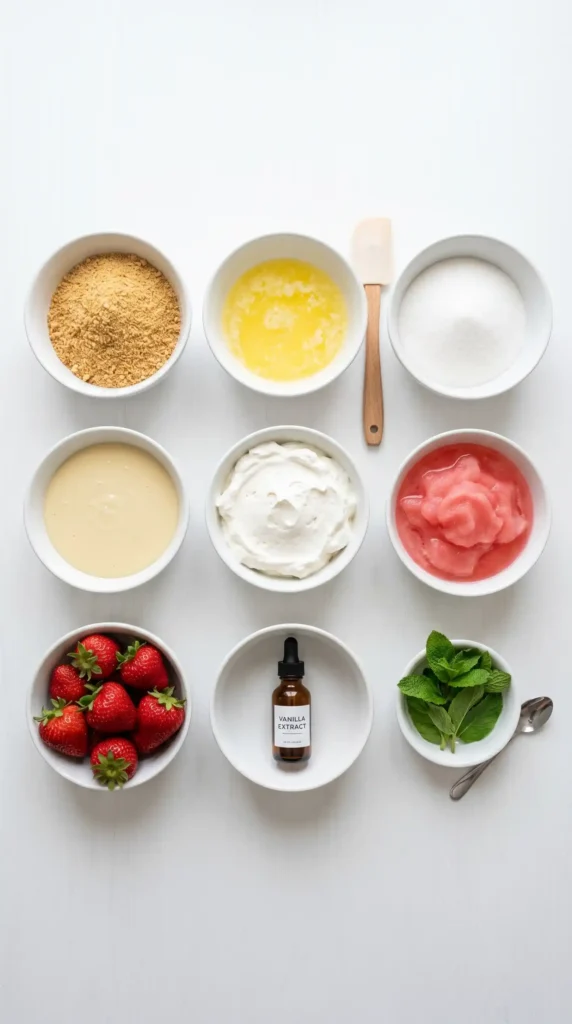
Here’s the complete list with quantities so you can shop and prep without guessing.
For the Graham Cracker Crust:
- 1 1/2 cups graham cracker crumbs
- 1/3 cup unsalted butter, melted
- 3 tablespoons granulated sugar
For the Lemonade Filling:
- 1 (14-ounce) can sweetened condensed milk
- 1 (8-ounce) container frozen whipped topping, thawed
- 1/2 cup frozen lemonade concentrate, thawed
Now For the Strawberry Mixture:
- 1 1/2 cups fresh strawberries, chopped
- 2 tablespoons granulated sugar
- 1 teaspoon vanilla extract
- 2 tablespoons water
Optional Garnishes:
- Whipped cream
- Fresh sliced strawberries
- Fresh mint leaves
What Every Ingredient Does Here
Before you start, it helps to understand what each component contributes. That understanding is what separates a good pie from a great one.
The Crust
- Graham cracker crumbs provide a lightly sweet, slightly crunchy base that holds together without baking.
- Melted butter binds the crumbs and gives the crust its firm, pressed texture.
- Granulated sugar adds just enough sweetness to make the crust taste intentional rather than bland.
The Lemonade Filling
- Sweetened condensed milk is the creamy backbone of the filling. It adds richness, sweetness, and body all at once. Don’t substitute it — nothing else replicates the same texture here.
- Frozen whipped topping (thawed) lightens the filling and gives it that airy, mousse-like quality. Make sure it’s fully thawed before mixing, or it won’t incorporate smoothly.
- Frozen lemonade concentrate delivers the citrus punch. Concentrated lemon flavor is more intense than fresh juice, which keeps the tartness from getting lost in the sweet filling. IMO, this is the ingredient that makes the whole pie pop.
The Strawberry Mixture
- Fresh strawberries add color, flavor, and a fruity brightness that fresh berries handle better than frozen ones here.
- Granulated sugar draws out the strawberry juices and balances any bitterness from underripe fruit.
- Vanilla extract rounds out the berry flavor and adds subtle warmth.
- Water helps the blender process the strawberries into a smooth, pourable mixture.
How to Make Strawberry Lemonade Pie
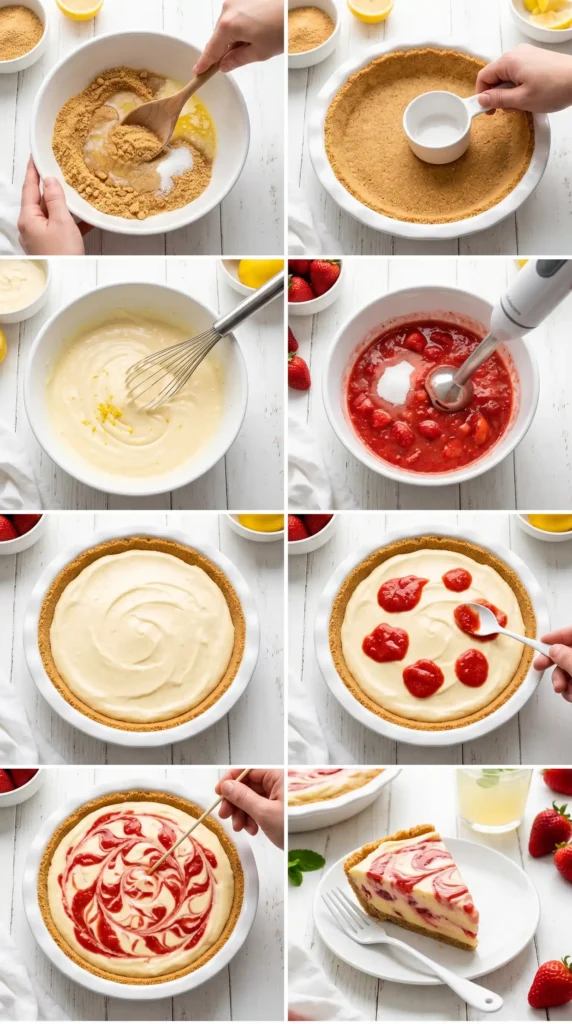
Step 1 — Make the Graham Cracker Crust
Start by melting 1/3 cup of unsalted butter in a medium mixing bowl. Add 1 1/2 cups of graham cracker crumbs and 3 tablespoons of granulated sugar. Stir everything together until the crumbs look evenly coated — the texture should resemble damp sand.
Pour the mixture into a standard 9-inch pie pan. Use your fingers or the flat bottom of a measuring cup to press the crumbs firmly and evenly across the bottom and up the sides of the pan.
Press firmly and evenly — a loose, crumbly crust won’t hold its shape when you slice the pie. Work it up the sides to create a proper crust wall that contains the filling.
Place the crust in the refrigerator while you make the filling. The cold firms up the butter and sets the crust structure so it doesn’t shift when you add the layers.
Step 2 — Make the Lemonade Filling
In a large mixing bowl, combine the full 14-ounce can of sweetened condensed milk, the entire 8-ounce container of thawed whipped topping, and 1/2 cup of thawed frozen lemonade concentrate.
Whisk everything together until the mixture is completely smooth and uniform. It should look creamy and pale yellow, with no streaks of whipped topping or pockets of condensed milk still visible.
Taste the filling at this point. Does it need more lemon? Add another tablespoon of concentrate. The balance between sweet and tart should feel bright, not cloying. Adjust before moving on — once it’s layered in the pie, you can’t change it.
Set the filling aside while you prepare the strawberry mixture.
Step 3 — Blend the Strawberry Mixture
Add 1 1/2 cups of chopped fresh strawberries, 2 tablespoons of granulated sugar, 1 teaspoon of vanilla extract, and 2 tablespoons of water to a blender or food processor.
Blend on high until the mixture is completely smooth and bright red. Stop the blender and scrape the sides down halfway through to make sure all the chunks break down. You want a pourable, liquid-smooth strawberry puree — not a chunky mixture.
Taste it. Sweet enough? If your strawberries were on the less-ripe side, add another teaspoon of sugar and blend again briefly. The strawberry mixture should taste vibrant and jammy before it goes into the pie.
Step 4 — Layer and Assemble the Pie
Pull the chilled pie crust out of the refrigerator. Pour half of the strawberry mixture evenly across the bottom of the crust. Tilt the pan gently side to side to spread it into an even layer that covers the crust completely.
Now carefully spoon the entire lemonade filling over the strawberry layer. Use a spatula to spread it gently and evenly across the top — work carefully to avoid mixing the two layers together at this stage.
Pour the remaining strawberry mixture across the surface of the lemonade filling in a few large dollops or in a thin, even drizzle. This is your decorative layer, so spread it however you like.
Step 5 — Create the Swirl
Here’s the fun part. Grab a toothpick, skewer, or the tip of a butter knife. Drag it through the strawberry-topped surface in slow, sweeping figure-eight or S-shaped motions.
The goal is a swirled, marbled pattern where the red strawberry mixture and the pale lemon filling weave together visually. Don’t over-swirl — too many passes turns the whole surface a muddy orange-pink instead of the clean red-and-yellow pattern you want.
Five to eight passes across the surface usually produces a beautiful result. Step back and look at it from above before you stop — if it looks good from that angle, it’ll look great on the table.
Step 6 — Freeze the Pie
Place the assembled pie flat in the freezer. Freeze for a minimum of 4 hours. Overnight is even better.
The freezing step is non-negotiable here. It firms the filling, sets the layers so they hold their distinct positions when sliced, and turns the texture from soft and creamy to something closer to frozen yogurt — dense, scoopable, and incredibly refreshing on a hot day.
Don’t try to rush this with the refrigerator instead of the freezer. The fridge doesn’t get the filling firm enough to slice cleanly. You’ll end up with a runny, messy pie that falls apart on the plate.
Step 7 — Slice and Serve
When you’re ready to serve, pull the pie from the freezer and let it sit at room temperature for 5 to 10 minutes. This brief rest softens the surface just enough to cut through cleanly without the knife dragging.
Run a sharp knife under warm water, dry it off, then slice. Wipe the blade between cuts for clean, distinct slices. The layers should be visible — red strawberry at the base, pale lemon in the middle, swirled top.
Garnish with a small dollop of whipped cream, a fresh strawberry slice, or a sprig of mint right before serving. FYI, the garnish takes about 30 seconds and makes the presentation look completely intentional.
Tips for the Best Strawberry Lemonade Pie
- Thaw the whipped topping completely before mixing — partially frozen topping creates lumps in the filling.
- Use fresh strawberries over frozen for the best color and flavor in the blended mixture.
- Press the crust firmly up the sides of the pan so it holds its shape during freezing and slicing.
- Don’t over-swirl the top — a few deliberate passes produce cleaner visual contrast.
- Freeze overnight if you have the time — the texture and flavor both improve significantly.
Variations Worth Trying
This recipe is flexible. Here are a few directions to explore once you’ve made the original version:
- Mixed Berry Version: Swap strawberries for a blend of blueberries and raspberries. The filling turns a beautiful deep purple.
- Citrus Upgrade: Add a tablespoon of orange juice to the lemonade filling for a rounder, less sharp citrus flavor.
- Gluten-Free: Replace graham crackers with gluten-free graham-style crackers or a mixture of almond flour and crushed gluten-free cookies.
- Dairy-Free: Use coconut whipped cream and dairy-free sweetened condensed milk. The flavor shifts slightly tropical, which actually works beautifully with the strawberry.
- Lower Sugar: Substitute the granulated sugar in the crust and strawberry mixture with honey or agave. The sweetness level stays similar, just less processed.
Serving Suggestions
Strawberry Lemonade Pie works best served straight from the freezer with a short rest. Pair it with:
- Iced tea or sparkling lemonade — doubles down on the summer vibe
- A light green salad with citrus dressing — the freshness complements the richness
- Vanilla ice cream on the side for people who want an extra cold, creamy element
Storage Instructions
Freezer: Cover tightly with plastic wrap or foil and store for up to 2 weeks. Wrap it well to prevent freezer burn — exposed edges dry out and lose their texture.
Refrigerator: Not recommended for long-term storage. The filling softens too much in the fridge and won’t hold its shape for more than a few hours.
Frequently Asked Questions
Q: Can I make Strawberry Lemonade Pie a day ahead? Yes — and you should. Making it the night before gives the pie a full overnight freeze, which improves both the texture and the way the flavors meld together. It also removes all the day-of stress, which is a solid bonus for entertaining.
Q: Can I use fresh lemon juice instead of frozen lemonade concentrate? You can substitute 1/4 cup of fresh lemon juice plus an extra 2 tablespoons of powdered sugar to approximate the same tartness and sweetness. The flavor will be slightly less intense since the concentrate is more concentrated, but it still works well.
Q: Why is my filling not setting firmly? Almost always this comes down to not freezing long enough or using whipped topping that wasn’t fully thawed before mixing (which affects how it incorporates). Make sure the pie freezes for the full 4 hours minimum — ideally longer.
Q: Can I use frozen strawberries instead of fresh? You can — thaw and drain them thoroughly first. Frozen strawberries release a lot of liquid when they thaw, and excess water in the mixture makes the filling too loose. Pat them dry before blending.
Q: How do I get clean slices without the filling sticking to the knife? Let the pie rest at room temperature for 5 to 10 minutes before slicing. Run your knife under warm water and dry it before each cut. Wipe the blade clean between every slice. These three steps produce the cleanest cuts consistently.
Q: How long does the pie last in the freezer? Properly covered, it stays good for up to 2 weeks. After that, the texture starts to suffer and the flavors dull slightly. For the best experience, eat within the first week.
Final Thoughts
Strawberry Lemonade Pie earns its reputation as the ultimate no-bake summer dessert. You get big, bright flavor with minimal actual effort — about 20 minutes of hands-on work and a freezer doing the rest for you.
Make it this weekend, freeze it overnight, and bring it out when the weather’s warm and the crowd is hungry. You’ll be glad you did.

Strawberry Lemonade Pie
Ingredients
Method
- Melt 1/3 cup of unsalted butter in a medium mixing bowl.
- Add 1 1/2 cups of graham cracker crumbs and 3 tablespoons of granulated sugar, stirring until evenly coated.
- Press the mixture firmly into a 9-inch pie pan.
- Refrigerate the crust while preparing the filling.
- In a large mixing bowl, combine the sweetened condensed milk, thawed whipped topping, and thawed frozen lemonade concentrate.
- Whisk until completely smooth and uniform.
- Taste and adjust lemon flavor as needed.
- In a blender, combine the fresh strawberries, sugar, vanilla extract, and water, then blend until smooth.
- Adjust sweetness if needed.
- Pour half of the strawberry mixture into the chilled pie crust.
- Spread the lemonade filling carefully over the strawberry layer.
- Top with the remaining strawberry mixture.
- Use a toothpick or knife to swirl the strawberry mixture into the top of the lemonade filling.
- Place the pie in the freezer for at least 4 hours, preferably overnight.
- Let the pie sit at room temperature for 5-10 minutes before slicing.
- Clean the knife between cuts for neat slices.
- Garnish as desired before serving.


