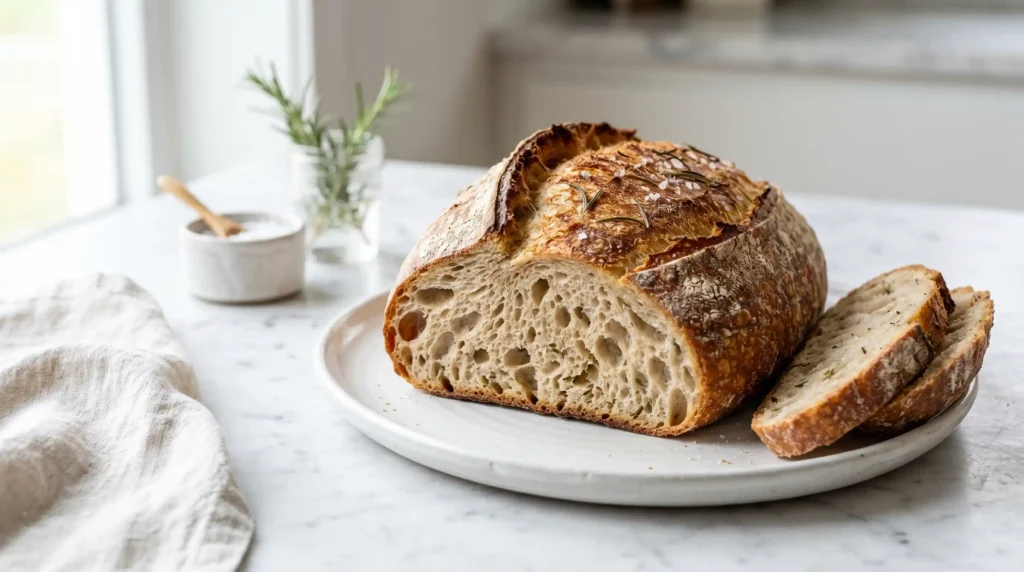
That smell. You know the one. Fresh bread baking with herbs, curling through every room in the house. The first time I made Aromatic Rosemary Sourdough Bread, I ate half the loaf standing at the counter before it even cooled. Zero regrets.
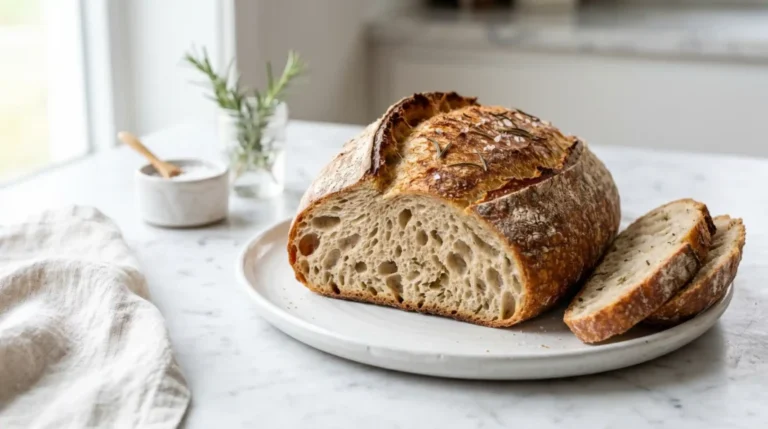
This bread sounds intimidating, and honestly, sourdough has a reputation for being fussy. But once you understand what’s happening at each stage, it’s actually very forgiving. And the payoff — a crackly crust, open chewy crumb, and rosemary threading through every bite — is absolutely worth the patience.
Have you ever pulled a loaf out of your own oven and felt genuinely proud of yourself? That’s what this recipe does. Let’s get into it.
Why Aromatic Rosemary Sourdough Bread Is Worth Making at Home
Store-bought sourdough is fine. This is not fine — this is exceptional. The difference comes down to time, a live starter, and real rosemary instead of whatever dried herb sits forgotten in a jar at the supermarket.
Fresh rosemary changes everything. It softens as the dough ferments, releasing its oils into the crumb. By the time the loaf bakes, the herb is woven into the bread’s character rather than sitting on top as an afterthought.
IMO, this is also the most impressive thing you can bring to a dinner party that takes zero actual skill to pull off. You just need to follow the steps and trust the process.
Ingredients for Aromatic Rosemary Sourdough Bread
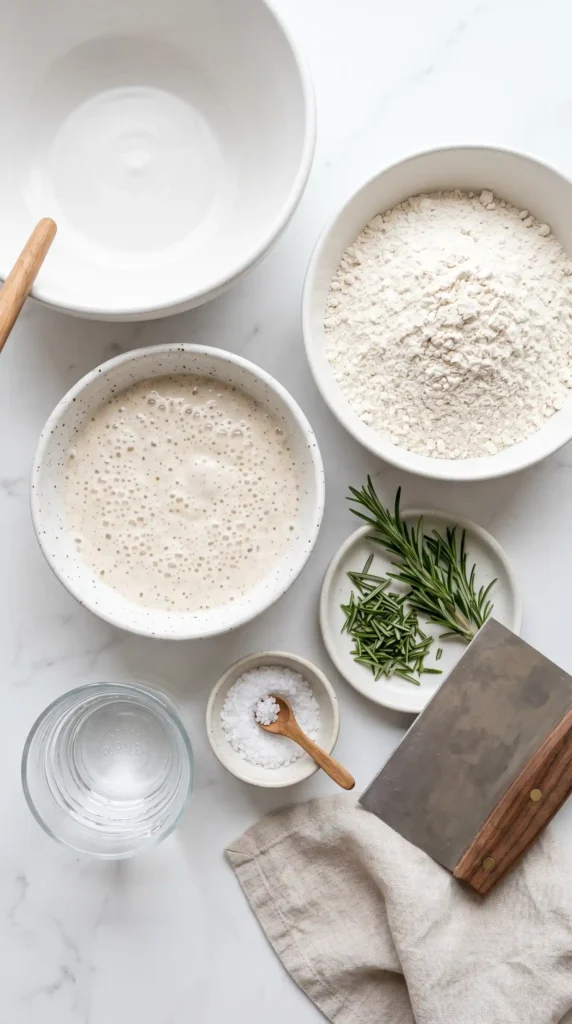
Short list, big flavor. You only need five ingredients to make this loaf, and every one of them does serious work. Here’s exactly what to gather before you start:
Ingredients (Makes 1 loaf — 8 to 10 slices)
- 450g (3.5 cups) all-purpose flour
- 325ml (1.5 cups) filtered water, room temperature
- 100g (0.5 cup) active sourdough starter
- 10g (2 teaspoons) fine sea salt
- 2 tablespoons fresh rosemary, finely chopped
- Extra flour for dusting surfaces
- Optional: 1 tablespoon olive oil for the crust
- Optional: flaky salt for topping
A Note on Each Ingredient
Your flour forms the structure of the loaf. All-purpose works beautifully here, but if you want a nuttier, denser crumb, swap half with whole wheat flour. Either way, weigh your flour — cup measurements for flour are notoriously unreliable.
Filtered water matters more than most people think. Tap water with high chlorine content can actually slow down your starter. Room temperature water also helps your dough ferment evenly rather than fighting against cold or hot spots.
Your sourdough starter is the engine of this entire recipe. It needs to be active and bubbly — meaning fed within 4 to 8 hours before you use it. A sluggish starter produces a flat, dense loaf. There’s no shortcut here. FYI, if your starter floats in water, it’s ready to go.
How to Make Aromatic Rosemary Sourdough Bread — Step by Step
The process spans about 20 hours, but your hands-on time is only around 45 minutes. The rest is the dough doing its thing. Here’s a detailed walkthrough of every stage.
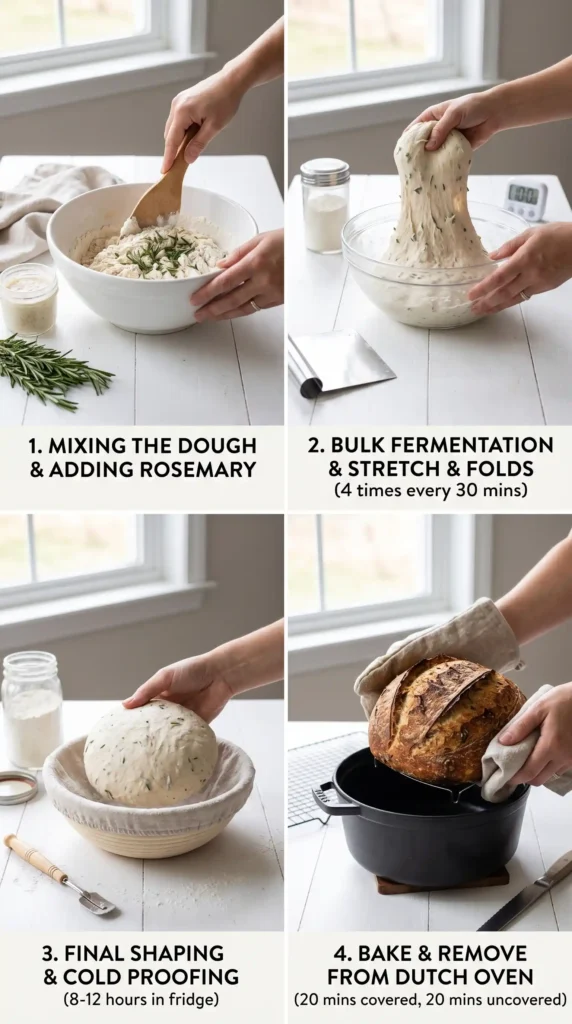
Mix the Dough (Autolyse First)
In a large mixing bowl, combine 450g flour with 290ml of the water (hold back 35ml for later). Stir until no dry flour remains. Cover the bowl with a damp towel and let it rest for 30 to 45 minutes. This resting period is called autolyse — it gives the flour time to fully hydrate and begins building gluten structure before you add anything else. You’ll notice the dough already feels less shaggy when you return to it.
Add the Starter and Salt
After the autolyse, add your 100g of active sourdough starter to the bowl. Drizzle in the remaining 35ml of water and squish everything together using your fingers — yes, it gets messy, and yes, that’s exactly right. Work the starter fully into the dough until nothing looks streaky or separate. Then sprinkle in your 10g of salt and continue working it in for another two to three minutes. Salt strengthens gluten and controls fermentation speed, so don’t skip or reduce it.
Add the Rosemary
Scatter your finely chopped fresh rosemary over the dough and fold it in gently. Don’t over-work it at this stage — you just want the herb distributed through the dough, not beaten into submission. The rosemary will continue to incorporate during the stretch and fold stages. Cover the bowl again and let the dough rest for 30 minutes at room temperature before the first fold.
First Stretch and Fold
Wet your hand slightly to prevent sticking. Reach under one side of the dough, stretch it upward as far as it will comfortably go without tearing, then fold it over the center. Rotate the bowl 90 degrees and repeat — stretch and fold, stretch and fold — working all four “sides” of the dough. This entire set takes about 30 seconds. Cover and rest for another 30 minutes. This action builds gluten strength without any kneading. The dough will feel noticeably more elastic after each set.
Second and Third Stretch and Fold
Repeat the stretch and fold process two more times, with 30-minute rests in between. By the third set, your dough should feel smooth, hold its shape when you lift it, and show some surface tension. If it tears easily, give it another 30 minutes of rest before folding again. After the final fold, let the dough rest uncovered for 10 minutes, then cover it and begin bulk fermentation. Leave it at room temperature for 3 to 4 hours, until it has grown by about 50 to 75 percent in size.
Shape the Dough
Lightly flour your work surface and gently tip the dough out — don’t punch it down or press out air. Using a bench scraper or your hands, fold the edges of the dough toward the center, then flip it seam-side down. Cup your hands around the dough and drag it gently toward you across the surface, building tension on the outer skin. Do this a few times until you have a tight, round boule shape. Let it rest uncovered for 20 minutes — this relaxes the gluten and makes final shaping much easier.
Final Shape and Cold Fermentation
Dust your banneton basket (or a bowl lined with a floured kitchen towel) generously with flour. Re-shape the dough one more time using the same drag technique, then place it seam-side up into the basket. Dust the exposed surface with a little more flour and cover loosely with a towel or plastic wrap. Place it in the refrigerator for a minimum of 8 hours, up to 72 hours. Cold fermentation develops complexity in the flavor of your Aromatic Rosemary Sourdough Bread that room-temperature proofing simply cannot replicate. Longer is genuinely better here.
Preheat and Score
About an hour before you want to bake, place your Dutch oven (lid on) inside your oven and preheat to 500°F (260°C). This high heat is what produces that bakery-quality crust. When the oven reaches temperature, remove the dough from the fridge — straight from cold to hot oven is exactly what you want. Tip the dough gently onto a piece of parchment paper. Using a sharp knife, razor blade, or bread lame, score the top of the loaf in one confident motion — a single arc about half an inch deep. The score controls where the bread opens as it expands in the oven.
Bake the Bread
Carefully lower the dough (on the parchment) into the preheated Dutch oven. Place the lid on and bake for 27 minutes. The trapped steam from the dough itself creates a humid environment that keeps the crust soft during oven spring, letting the loaf expand fully. After 27 minutes, remove the lid, reduce the oven temperature to 450°F (230°C), and bake for a further 18 to 20 minutes until the crust is deeply golden and the loaf sounds hollow when you tap the bottom. Do not cut into it for at least 45 minutes — the interior crumb is still setting as it cools.
Tips for a Better Loaf Every Time
- Feed your starter 6–8 hours before mixing. A starter at peak activity gives the most reliable rise.
- Use a kitchen scale. Bread baking rewards precision; volume measurements for flour vary too much.
- Don’t skip the full cold ferment. Eight hours is the floor, not the target. 16 to 24 hours produces noticeably better flavor.
- Score confidently. A hesitant score tears the dough; a single, swift cut produces a clean ear.
- Cool completely before slicing. Slicing hot sourdough causes the crumb to compress and turn gummy. It’s worth the wait.
Variations Worth Trying
Once you have this base recipe down, experimenting becomes genuinely fun. Here are a few directions that work especially well with the rosemary base:
Garlic and Rosemary
Add 4 cloves of roasted garlic (mashed to a paste) alongside the rosemary in step 3. Roasted garlic is mellow and sweet rather than sharp, so it blends into the crumb beautifully without overpowering the herb notes. This is arguably the best version of this loaf. Arguably.
Rosemary and Parmesan
Fold in 60g (about half a cup) of finely grated Parmesan during the second stretch and fold. The cheese melts into pockets throughout the crumb and creates a slightly crispy, salty crust. Serve this version with tomato soup and genuinely question every life choice that delayed you from making it sooner.
Olive and Rosemary
Roughly chop 80g of Kalamata olives and add them with the rosemary. The brine from the olives adds a pleasant saltiness throughout, so consider reducing the added salt by about a third. This combination leans Mediterranean and pairs beautifully with hummus or soft cheese.
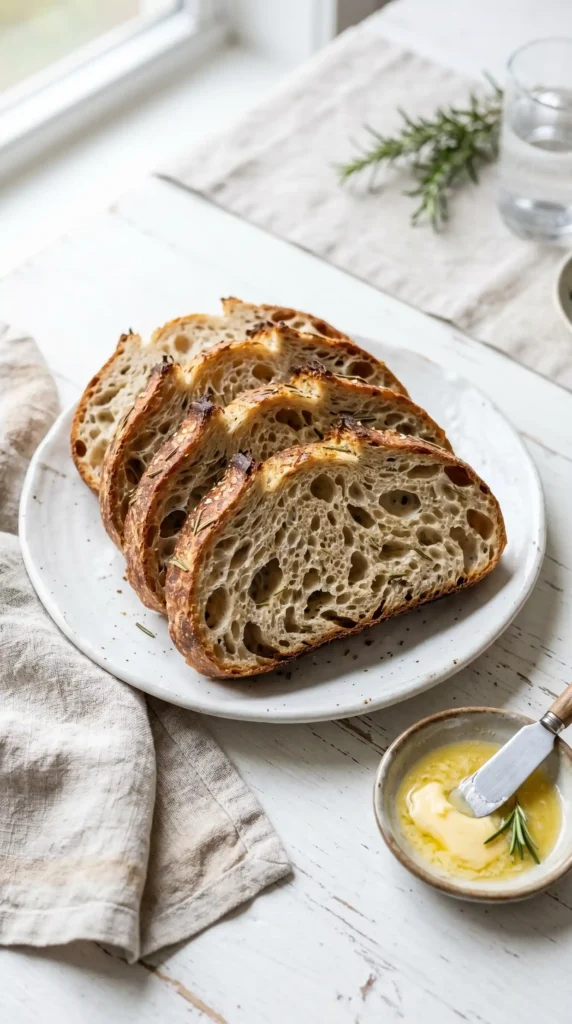
How to Serve Aromatic Rosemary Sourdough Bread
This loaf is confident enough to stand alone with just good butter. But it also plays well with others. Here are the pairings that actually work:
- Thick slices alongside a bowl of roasted tomato or lentil soup
- Toasted with smashed avocado, lemon, and flaky salt for breakfast
- Served on a board with aged cheddar, prosciutto, and a drizzle of honey
- Grilled in olive oil and rubbed with a raw garlic clove as bruschetta
- Torn into hunks alongside a slow-cooked lamb or beef stew
Storing and Freezing Your Loaf
Store the cooled loaf cut-side down on a wooden board or in a paper bag at room temperature. It stays good for 3 to 4 days, and the crust actually improves on day two. Never store sourdough in a plastic bag at room temperature — it turns the crust soft and rubbery fast.
To freeze, slice the entire loaf first, then wrap slices in pairs in parchment and freeze in a zip bag for up to 3 months. Toast directly from frozen — no thawing required. This is honestly one of the best meal-prep tricks for having good bread available every morning.
Frequently Asked Questions
Do I need a Dutch oven to bake sourdough?
A Dutch oven is the most reliable option because it traps steam during the first phase of baking, which is what creates the blistered, crackly crust. If you don’t have one, you can use a heavy oven-safe pot with a lid. Alternatively, place a pan of water in the bottom of your oven while baking on a preheated sheet pan to simulate steam.
How do I know if my sourdough starter is active enough?
Drop a small spoonful into a glass of water. If it floats, your starter is active and ready. You should also see visible bubbles throughout the starter and notice it has roughly doubled in size since its last feeding. A starter that smells like nail polish remover (acetone) is over-fermented — feed it again and wait a few more hours.
Why is my Aromatic Rosemary Sourdough Bread flat and dense?
The most common cause is an underactive starter. A weak starter cannot produce enough gas to lift the dough. The second most common cause is cutting the bulk fermentation short — the dough needs enough time to develop strength and rise. Check that your room temperature is at least 70°F (21°C) during bulk fermentation, as cold environments significantly slow the process.
Can I use dried rosemary instead of fresh?
You can, but the result will be noticeably different. Dried rosemary is more concentrated and can taste slightly medicinal compared to the floral, fresh flavor of the real thing. If you use dried, cut the quantity to 1 tablespoon and rub it between your palms before adding it to the dough to release more of its oils.
How long should I cold ferment the dough?
A minimum of 8 hours produces a decent loaf, but 16 to 24 hours produces a significantly better one. The cold environment slows fermentation dramatically, allowing organic acids to develop slowly. This is what gives sourdough its characteristic tang and complexity. You can safely leave the dough in the fridge for up to 72 hours if needed.
Can I make this recipe without a banneton basket?
Absolutely. Line a medium-sized bowl with a clean kitchen towel and dust it very generously with flour — use more than you think you need. The towel prevents sticking and the bowl holds the dough’s shape during the cold proof. Just make sure the towel covers the entire surface so no dough sticks to bare cloth.
Final Thoughts
Aromatic Rosemary Sourdough Bread asks for time, not talent. You do not need to be a skilled baker to pull off a genuinely great loaf. You need a healthy starter, a plan, and the patience to let the process unfold at its own pace.
Every loaf you bake teaches you something about your starter, your kitchen temperature, and your hands. Your third loaf will be better than your first. Your tenth will be better still. Have you ever had a kitchen project that actually gets more enjoyable the more you do it? This is that project.
Get the starter going, clear a day, and make the bread. The smell alone is worth it. And the first slice, still slightly warm, with cold butter melting into that crumb — that’s the whole point.
Aromatic Rosemary Sourdough Bread
Ingredients
Method
- In a large mixing bowl, combine 450g flour with 290ml of the water. Stir until no dry flour remains. Cover with a damp towel and let rest for 30 to 45 minutes.
- After the autolyse, add your 100g of active sourdough starter to the bowl. Drizzle in the remaining 35ml of water and squish everything together using your fingers.
- Work the starter fully into the dough and sprinkle in your 10g of salt, continuing to work it in for another 2-3 minutes.
- Scatter your finely chopped fresh rosemary over the dough and fold it in gently. Cover the bowl again and let rest for 30 minutes.
- Wet your hand slightly. Stretch the dough upward, fold it over the center, rotate the bowl 90 degrees, and repeat for all four sides. Cover and rest for another 30 minutes.
- Repeat the stretch and fold process two more times, with 30-minute rests in between.
- Lightly flour your work surface and gently tip the dough out. Fold the edges toward the center and flip seam-side down. Drag gently to create a tight round boule shape. Let rest uncovered for 20 minutes.
- Dust a banneton basket with flour. Re-shape the dough using the drag technique, then place it seam-side up into the basket. Cover loosely and refrigerate for 8 to 72 hours.
- One hour before baking, preheat your Dutch oven to 500°F (260°C). Remove the dough from the fridge and score the top of the loaf.
- Lower the dough into the preheated Dutch oven and bake for 27 minutes. Remove the lid, reduce temperature to 450°F (230°C), and bake for an additional 18-20 minutes until golden brown.
- Do not cut into it for at least 45 minutes.


