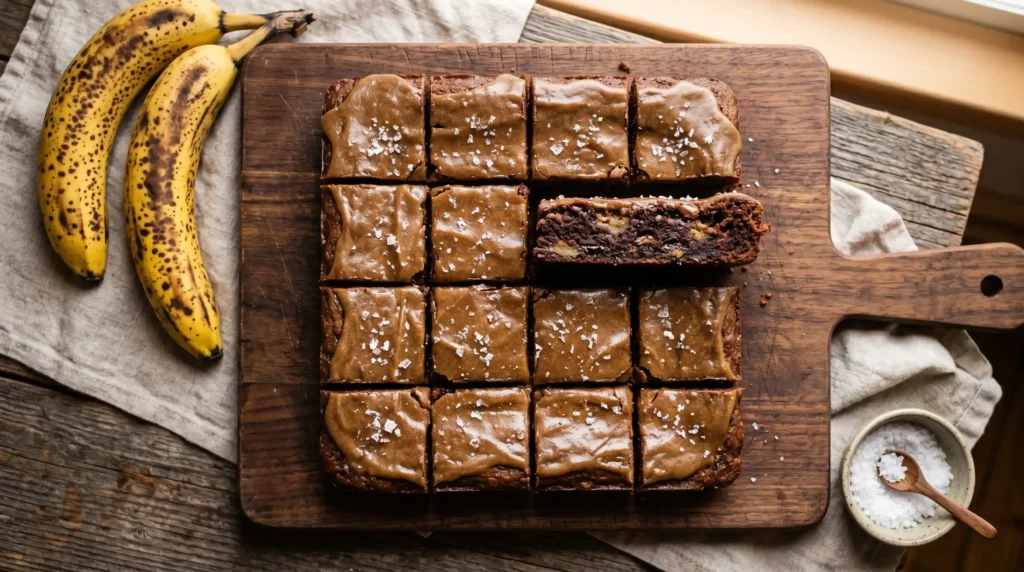
Prep: 15 min Bake: 25–30 min Total: ~50 min Servings: 16 bars Difficulty: Easy
You know those bananas sitting on your counter that are two days past their best — the ones that are very black, slightly sad-looking, and absolutely perfect for baking? Those are exactly what you need for Banana Bread Brownies. And if you have never made these before, prepare for a serious upgrade to your overripe banana game.
I made these for the first time when I had four extremely ripe bananas, no loaf tin, and a genuine craving for something dense and sweet. Banana bread brownies were the answer. The result was so good that I made them again the following week on purpose — not out of desperation, but out of actual enthusiasm. That is a meaningful distinction in baking.
Have you ever eaten something and immediately thought, why did nobody show me this sooner? That is the exact reaction these produce. Let us make them properly.
What Makes Banana Bread Brownies So Special
Standard banana bread is wonderful but tall, airy, and cake-like. Standard brownies are dense, fudgy, and intensely chocolatey. These land perfectly between the two. The banana provides natural sweetness and moisture that creates a fudgy interior without needing chocolate. The brownie technique — minimal mixing, more fat than flour — locks in that dense, chewy texture that banana bread alone cannot achieve.
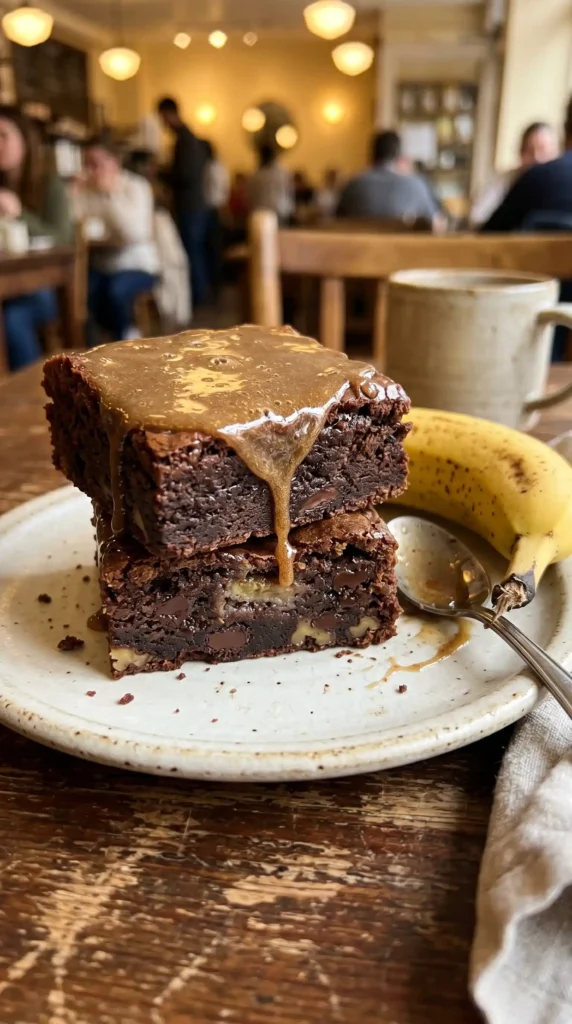
The brown butter glaze is what elevates these from very good to genuinely remarkable. Brown butter tastes nutty, caramel-like, and complex in a way that plain butter simply does not. Poured warm over the freshly baked bars, it soaks slightly into the surface and creates a glossy, flavour-packed top layer that makes every single bite taste intentional and layered.
IMO, this is also the smartest use of overripe bananas you will ever find. Better than banana bread — which you have probably made a dozen times. Better than banana muffins. These taste like a decision, not a workaround.
What You Need

One bowl, simple pantry ingredients, zero fancy equipment. The bananas need to be very ripe — we are talking heavily spotted or almost entirely black. Under-ripe or just-yellow bananas do not mash smoothly and lack the intense sweetness this recipe needs. Do not try to rush this with barely ripe fruit. 🙂
For the Banana Bread Brownie Base
- 3 large very ripe bananas (about 1 and 1/4 cups / 300g mashed)
- 1/2 cup (113g) unsalted butter, melted and slightly cooled
- 3/4 cup (150g) granulated white sugar
- 1/4 cup (50g) packed light brown sugar
- 2 large eggs, room temperature
- 2 teaspoons pure vanilla extract
- 1 and 1/4 cups (160g) all-purpose flour
- 1/2 teaspoon baking powder
- 1/4 teaspoon baking soda
- 1/2 teaspoon ground cinnamon
- 1/4 teaspoon salt
- 1/2 cup (85g) semi-sweet chocolate chips or chopped walnuts (optional)
For the Brown Butter Glaze
- 3 tablespoons (42g) unsalted butter
- 1 and 1/2 cups (180g) powdered sugar, sifted
- 3–4 tablespoons (45–60ml) whole milk
- 1/2 teaspoon pure vanilla extract
- Pinch of salt
The Riper the Better — SeriouslyBlack-spotted or mostly-black bananas are not past their prime for baking — they are at their absolute peak. Overripe bananas contain significantly more natural sugar than fresh ones, mash to a completely smooth puree, and deliver that deep, caramel-like banana flavour that gives these brownies their signature taste. FYI, you can freeze ripe bananas and thaw them specifically for recipes like this — they mash even more easily after freezing.
How to Make Banana Bread Brownies
Two stages: make the brownie base, bake it, then make the glaze while the bars are still warm and pour it on. The whole process is genuinely simple. There is no creaming, no folding, no complicated technique. If you can mash a banana and stir a bowl, you can make these perfectly on the first attempt.
Step 1: Prepare Your Pan and Preheat
Preheat your oven to 175°C (350°F) and grease a 9×13-inch (23x33cm) baking pan with butter or cooking spray. Then line the pan with a sheet of parchment paper, leaving an overhang on two opposite sides. The overhang acts as handles — once the bars are baked and cooled, you lift the whole slab out of the pan cleanly using the parchment edges, which makes slicing dramatically easier and neater than cutting around the pan sides.
Press the parchment flat against the greased base and sides of the pan so it does not shift during baking. The grease holds it in place. Set the prepared pan on your counter within reach before you start mixing so you can transfer the batter quickly once it is ready.
Step 2: Mash the Bananas
Peel the three overripe bananas and place them in a large mixing bowl. Using a fork, mash them thoroughly until no large lumps remain and the texture looks like a smooth, slightly wet puree. Press the fork back and forth firmly across the bottom of the bowl rather than just poking down — the back-and-forth motion breaks down the banana fibres faster and more completely than stabbing motions. Properly mashed banana should hold no chunks and look almost liquid in consistency.
Take a moment to taste the mashed banana. It should taste intensely sweet, with an almost caramel-like depth that fresh banana does not have. That sweetness is what replaces the need for chocolate in this recipe. If the banana tastes mild and starchy, it was not ripe enough and the finished brownies will taste flat. When in doubt, leave your bananas on the counter for another day.
Step 3: Make the Batter
Add the melted butter, granulated white sugar, and packed brown sugar to the mashed banana. Whisk everything together for about 30 seconds until the sugars begin to dissolve and the mixture looks cohesive and slightly glossy. Using both white and brown sugar is deliberate — white sugar drives the crispy edges and structure, while brown sugar adds moisture and a subtle molasses note that deepens the banana flavour considerably.
Add the eggs and vanilla extract to the banana mixture and whisk again for another 30–45 seconds until the eggs fully incorporate and the batter looks smooth and slightly thick. The mixture should feel noticeably heavier after the eggs go in — that density is what will give your finished brownies their fudgy, satisfying chew rather than a light, airy crumb.
Now add the flour, baking powder, baking soda, cinnamon, and salt to the wet mixture all at once. Switch from the whisk to a rubber spatula and fold the dry ingredients in using gentle, circular strokes. Stop mixing the moment no dry flour streaks remain. Overmixing activates the gluten in the flour and turns your dense, fudgy brownie into a tough, bread-like bar. A few gentle folds — never vigorous stirring — is all this batter needs. If you are adding chocolate chips or walnuts, fold them in with the final two strokes.
Step 4: Bake the Brownies
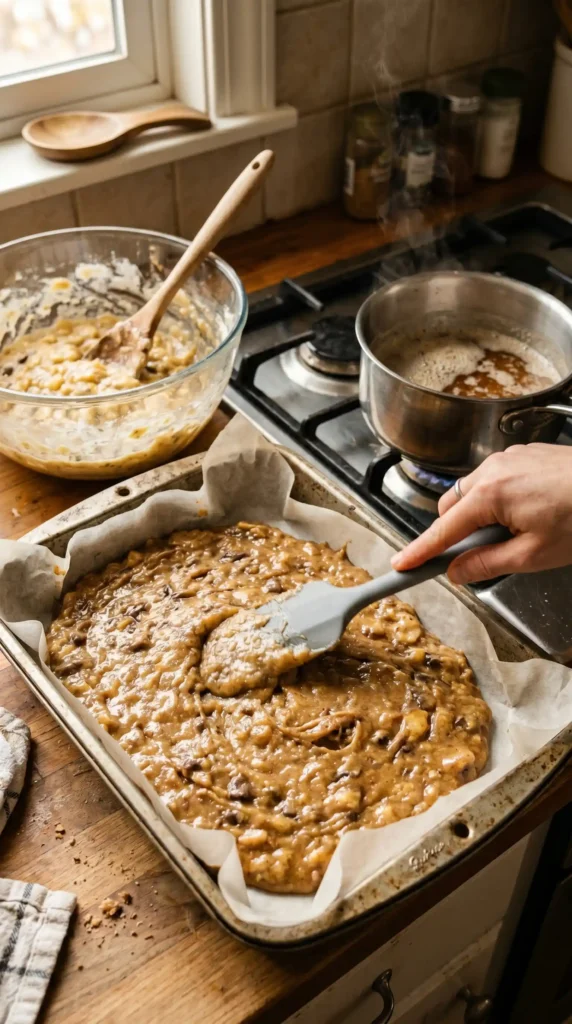
Pour the batter into your prepared pan and spread it evenly using the rubber spatula, pushing it into the corners and smoothing the top into a flat, even layer. The batter will look thinner than you might expect for a brownie — this is normal. The banana provides significant moisture and the bars will look almost liquid before baking. They set up and firm beautifully in the oven.
Slide the pan onto the centre rack of your preheated oven. Bake for 25–30 minutes. At the 20-minute mark, check the edges — they should look golden-brown and set. The centre should look mostly set with just a very slight residual wobble when you gently shake the pan. Do not wait for the centre to look completely firm before pulling them out. The bars continue cooking from residual heat for several minutes after leaving the oven, and over-baked banana bread brownies turn dense and dry rather than fudgy and moist.
Insert a toothpick into the centre at the 25-minute mark. It should come out with a few moist crumbs attached — not completely clean (that means over-baked) and not with wet batter (that means under-baked). A few moist crumbs is the correct result. Remove the pan from the oven and place it on a wire rack immediately.
Step 5: Make the Brown Butter Glaze
Start the glaze while the brownies are still warm in the pan — you want to pour it on while there is still residual heat. Place the 3 tablespoons of butter in a small saucepan over medium heat. Let it melt, then continue cooking, swirling the pan occasionally, for about 3–4 minutes. Watch it closely. The butter will foam, then the foam will subside, and then the milk solids at the bottom of the pan will start turning golden-brown and the butter will smell nutty and deeply caramel-like.
The moment the butter turns a medium amber colour and smells like toasted hazelnuts, remove the pan from the heat immediately. Brown butter goes from perfect to burnt very quickly — keep your eyes on it and do not walk away during those final 90 seconds. Pour the browned butter into a medium bowl right away to stop the cooking process. Let it cool for 2 minutes.
Add the sifted powdered sugar, vanilla extract, and a pinch of salt to the browned butter. Add 3 tablespoons of milk and whisk vigorously until the glaze is smooth, glossy, and pourable. It should flow freely from the whisk in a thin, steady stream. If it looks too thick, add the remaining tablespoon of milk. If it looks too thin and watery, add a tablespoon of additional powdered sugar. Taste it — the nutty, caramel notes from the brown butter should come through clearly beneath the sweetness.
Step 6: Glaze, Cool and Slice
Pour the warm brown butter glaze directly over the Banana Bread Brownies while they are still in the pan and still warm. Use a spatula to spread it evenly across the entire surface, making sure it reaches the edges and corners. The glaze will soak very slightly into the warm bars as it sits, creating a thin, flavour-packed layer that melds with the brownie surface rather than sitting on top like a separate frosting.
Allow the glazed bars to cool in the pan for a full 30 minutes before slicing. The glaze needs this time to set from liquid to a soft, matte finish. Cutting too early means the glaze runs off the cut edges and the bars pull apart messily. After 30 minutes, use the parchment overhang to lift the entire slab out of the pan and onto a cutting board. Slice into 16 even bars using a sharp knife, wiping the blade clean between cuts for the neatest results.
Slice Cleanly Every TimeFor the cleanest bars, refrigerate the fully glazed and cooled slab for 20 minutes before slicing. The slight chill firms both the brownie and the glaze, which means the knife cuts through cleanly rather than dragging. Run your knife under hot water, dry it, then slice — the warm blade glides through without tearing the glaze surface.
Variations Worth Trying
Chocolate Swirl Banana Bread Brownies
Melt 1/3 cup of semi-sweet chocolate chips with a teaspoon of neutral oil until smooth. Pour the banana brownie batter into the pan, then drizzle the melted chocolate over the top in lines. Use a toothpick to drag through the chocolate in a figure-eight pattern to create a marbled swirl. Bake as directed. The chocolate adds intensity without replacing the banana flavour — both come through in every bite. :/
Peanut Butter Banana Bread Brownies
Reduce the butter in the batter to 1/4 cup and replace the other 1/4 cup with smooth peanut butter. The peanut butter adds a rich, nutty depth that pairs with banana the way it does in a classic sandwich — completely naturally and deeply satisfying. Swirl a tablespoon of extra peanut butter through the top of the batter before baking for a visible peanut butter marbling effect.
Gluten-Free Version
Substitute the all-purpose flour with a certified gluten-free 1:1 baking flour blend. The banana provides so much of the structure and moisture in this recipe that the texture changes very minimally — the bars stay fudgy and moist with a barely perceptible difference in crumb. Confirm your baking powder and chocolate chips are also certified gluten-free before proceeding, as cross-contamination is common with these ingredients.
Storage and Make-Ahead Tips
Store Banana Bread Brownies in an airtight container at room temperature for up to 3 days. The brown butter glaze keeps the surface from drying out and actually improves in flavour on day two as the glaze melds further into the bar. For longer storage, refrigerate for up to 6 days — bring to room temperature before eating so the texture softens back to fudgy rather than firm and cold.
These freeze exceptionally well. Slice the bars, wrap each one individually in cling film, then place in a zip-lock freezer bag and freeze for up to 3 months. Thaw at room temperature for an hour or warm in a low oven at 150°C for 8 minutes. The brown butter glaze may look slightly dull after freezing and thawing but the flavour stays completely intact.
Frequently Asked Questions
Can I use frozen bananas for this recipe?
Yes, and frozen-then-thawed bananas actually work brilliantly here. Freezing breaks down the cell structure of the banana, which makes the flesh collapse completely when thawed and produces a smooth, very wet mash with no lumps at all. Thaw frozen bananas in their skins at room temperature or overnight in the fridge. Drain any excess liquid that releases after thawing before measuring and using — too much liquid can make the batter too thin to set properly.
Why are my banana bread brownies cakey instead of fudgy?
Cakey texture usually means the batter was overmixed, the eggs were beaten too long, or the bars were overbaked. Overmixing develops gluten which creates structure and airiness — the exact opposite of fudgy. Beat the eggs just enough to incorporate them, fold the flour in with minimal strokes, and pull the bars from the oven when a toothpick shows moist crumbs rather than waiting for it to come out completely clean. Each of these factors independently affects the final texture.
Can I make these without the brown butter glaze?
Yes, the bars taste very good on their own without the glaze. They are moist, dense, and deeply banana-flavoured straight from the pan. The brown butter glaze is a significant upgrade in both flavour and presentation, but it is optional. If you skip it, consider dusting the warm bars with a light layer of powdered sugar or drizzling them with regular melted butter mixed with powdered sugar for a simpler finishing touch that still adds a bit of sweetness to the top.
Can I make these in a smaller 8×8 pan?
You can, but the bars will be significantly thicker and will need more time to bake through — add 10–15 minutes to the baking time and check carefully with the toothpick test. Thicker bars are more prone to being undercooked in the centre while the edges over-bake. If you use an 8×8 pan, reduce the oven temperature slightly to 165°C (325°F) and extend the time, checking every 5 minutes after the 30-minute mark. The 9×13 pan gives the most reliable, even bake.
How ripe do the bananas really need to be?
The riper the better — this is not an exaggeration. Bananas with fully black or heavily spotted skins contain significantly more sugar and produce a much deeper, more caramel-like flavour than yellow or lightly spotted bananas. Yellow bananas with small spots will produce a pleasant but noticeably milder result. If your bananas are not ripe enough yet, you can accelerate ripening by placing them unpeeled on a baking tray in an oven at 150°C for 15–20 minutes until the skins turn completely black.
Final Thoughts
These Banana Bread Brownies solve two problems at once: they give your overripe bananas a dramatically better destiny than a standard loaf, and they deliver a fudgy, dense, flavour-packed bar that outperforms both banana bread and plain brownies in the same bite. The brown butter glaze is the kind of finishing touch that takes something good and makes it genuinely great.
They work for dessert, for lunchboxes, for afternoon snacking, or for that specific Tuesday when you need to bake something and want the result to impress people disproportionately to the effort involved. That is the sweet spot this recipe lives in permanently.
Go find your ripest, blackest bananas. Melt the butter. Brown it. Make these today. And let those sad bananas on your counter finally have their moment.

Banana Bread Brownies
Ingredients
Method
- Preheat your oven to 175°C (350°F) and grease a 9×13-inch (23x33cm) baking pan with butter or cooking spray.
- Line the pan with parchment paper, leaving an overhang on two opposite sides to act as handles.
- Mash the ripe bananas until smooth in a large mixing bowl.
- Add the melted butter, granulated sugar, and brown sugar; whisk to combine.
- Whisk in the eggs and vanilla extract until smooth.
- Fold in the flour, baking powder, baking soda, cinnamon, and salt until just combined.
- If using, fold in chocolate chips or walnuts.
- Pour the batter into the prepared pan and smooth the top.
- Bake for 25-30 minutes, checking for doneness with a toothpick.
- While the brownies are baking, make the glaze by browning butter in a saucepan over medium heat.
- Once the butter is golden and smells nutty, remove from heat and let cool slightly.
- Add sifted powdered sugar, vanilla, and milk to the browned butter and whisk until smooth.
- Pour the warm glaze over the brownies while still in the pan and let cool for about 30 minutes.
- Use the parchment overhang to lift the cooled brownies out of the pan and cut into 16 bars.