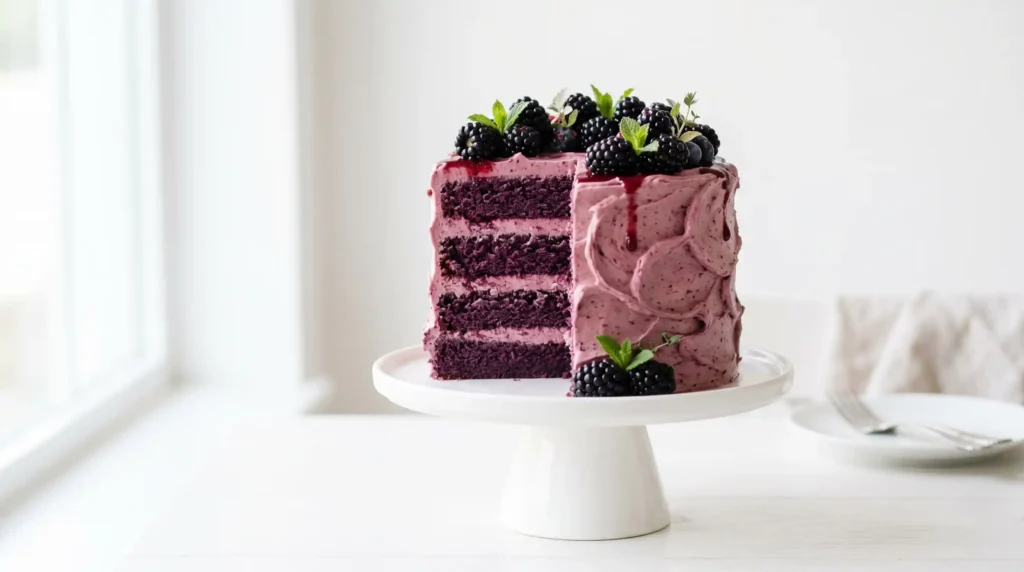
Some cakes are fine. They show up, do their job, and get politely applauded. Then there is the Blackberry Velvet Cake — the kind that makes people go quiet for a second before they ask who made it. I first made this for a birthday dinner, half expecting it to go sideways.
It did not go sideways. It absolutely floored everyone at the table. The deep berry color, the velvety soft crumb, the tangy cream cheese frosting swirled with real blackberry puree — it checked every box. And the best part? It is not nearly as complicated as it looks.
This recipe uses fresh blackberry puree twice — once in the cake layers and once in the frosting. That is what gives it real, layered berry flavor instead of that faint artificial hint you get from box mixes. FYI, once you make this from scratch, there is no going back.
Everything You Need: Ingredients List
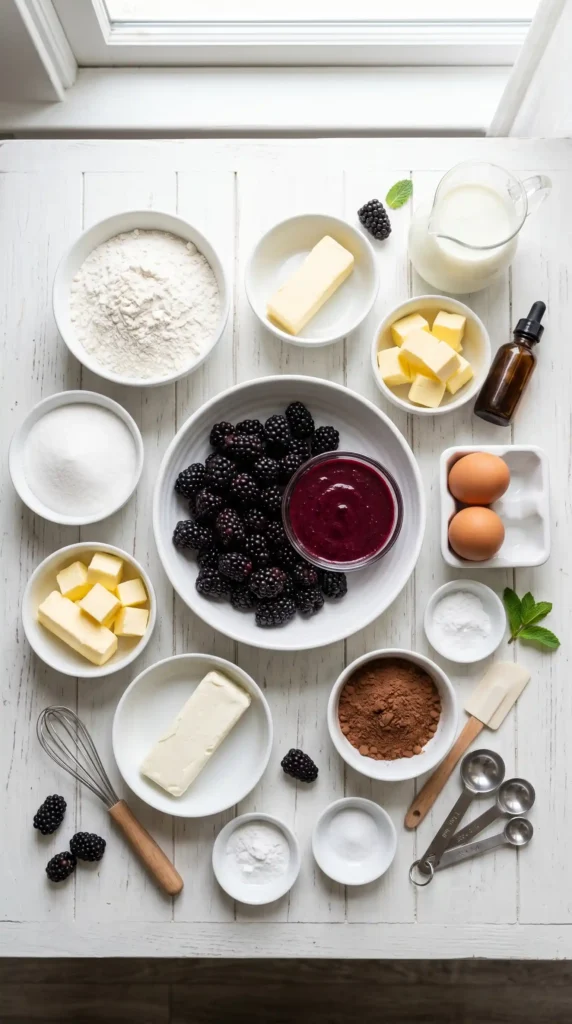
The ingredient list looks long, but most of this is pantry-standard stuff. The only thing you might need to grab specifically is the blackberries for the puree. Fresh or frozen both work here — I have tested both and the difference is minimal in the final bake.
For the Blackberry Cake Layers
- 2 1/2 cups all-purpose flour, spooned and leveled
- 2 1/2 tsp baking powder
- 1/2 tsp baking soda
- 1/2 tsp salt
- 1 cup (2 sticks) unsalted butter, softened to room temperature
- 1 3/4 cups granulated sugar
- 4 large eggs, at room temperature
- 1 tsp pure vanilla extract
- 1 cup buttermilk, at room temperature
- 1 cup blackberry puree (from about 2 cups fresh or frozen blackberries, strained)
For the Blackberry Cream Cheese Frosting
- 2 packages (8 oz each / 16 oz total) cream cheese, softened
- 1/2 cup (1 stick) unsalted butter, softened
- 3 to 4 cups powdered sugar, sifted (adjust to taste)
- 1/4 cup blackberry puree (strained, no seeds)
- 1 tsp pure vanilla extract
Optional Decorations
- Fresh blackberries, piled on top or placed between layers
- Blackberry drizzle (reduced blackberry puree with a touch of sugar)
- White chocolate curls or shavings
On Making the Blackberry Puree
Blend 2 cups of fresh or thawed frozen blackberries until smooth, then strain through a fine-mesh sieve to remove the seeds. You should get about 1 cup of smooth, vibrant puree. Do this step first so the puree has time to cool before it goes into the batter or frosting.
What Makes This Blackberry Velvet Cake Different
Have you ever bitten into a berry cake and gotten almost zero berry flavor? That happens when recipes use artificial flavoring or just toss in a handful of whole berries and call it done. This recipe does it differently.
The blackberry puree in the batter does two things at once. It colors the cake that deep, dramatic purple-black and it saturates every crumb with real fruit flavor. The buttermilk adds a gentle tang and keeps the texture tender — that is the velvet part of Blackberry Velvet Cake.
The frosting carries the berry flavor into the finish line. Cream cheese handles the tang, butter adds body, and the blackberry puree gives it that beautiful natural purple-pink color. IMO, this frosting alone is worth making by the spoonful.
How to Make Blackberry Velvet Cake: Full Step-by-Step
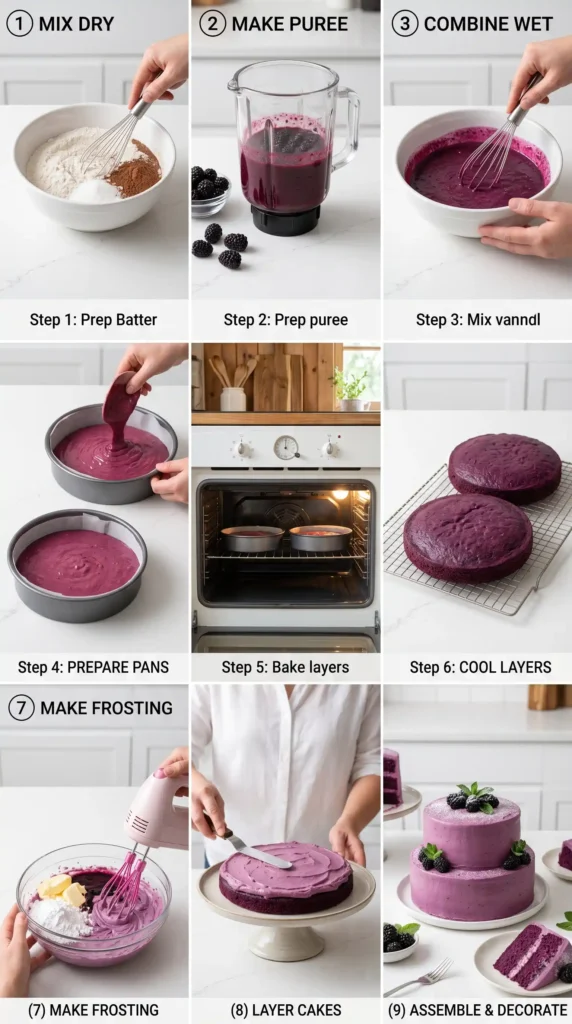
Take your time with this one. It is not hard, but a few of the steps — especially the creaming and the alternating additions — really do matter for texture. Follow these steps in order and you will get a cake that looks and tastes completely professional.
Step 1: Make the Blackberry Puree First
Before anything else, make your puree so it has time to cool down. Blend 2 cups of blackberries (fresh or thawed frozen) in a blender or food processor until completely smooth. Pour the blended mixture through a fine-mesh strainer over a bowl and push the liquid through with a spoon, pressing on the solids to extract as much juice as possible. Discard the seed pulp. You should end up with about 1 full cup of deep, dark puree. Set it aside to cool to room temperature. Warm puree going into batter or frosting causes problems, so patience here pays off.
Step 2: Prepare Your Pans and Preheat the Oven
Preheat your oven to 350°F (175°C). Grease two or three 9-inch round cake pans with butter or baking spray, then line the bottoms with parchment paper circles. Grease the parchment too. This double layer of prep guarantees your cake layers release cleanly without tearing — and nobody wants a torn layer on a cake this pretty. Set the prepared pans aside while you build the batter.
Step 3: Mix the Dry Ingredients
In a medium bowl, whisk together the 2 1/2 cups flour, 2 1/2 tsp baking powder, 1/2 tsp baking soda, and 1/2 tsp salt until evenly combined. Whisking your dry ingredients together before they meet the wet ones ensures even distribution throughout the batter. This prevents little pockets of baking powder or salt that can create uneven rise or flavor. Set the bowl aside.
Step 4: Cream the Butter and Sugar
In a large bowl using a stand mixer or hand mixer, beat the 1 cup softened butter and 1 3/4 cups granulated sugar together on medium-high speed for a full 4 to 5 minutes. The mixture should turn noticeably pale — almost white — and become very light and fluffy. This is not the step to rush. The air you build into the butter and sugar here creates the structure that lifts your cake as it bakes. Scrape down the sides of the bowl halfway through to keep everything even.
Step 5: Add the Eggs and Vanilla
Add the 4 large eggs one at a time, beating well for about 30 seconds after each addition before adding the next. This gradual approach keeps the emulsion you built during creaming from breaking down. After all four eggs are in, add the 1 tsp vanilla extract and mix for another 30 seconds. The batter at this point should look glossy, smooth, and well unified. If it looks slightly curdled around the edges, do not panic — it will smooth out once the dry ingredients come in.
Step 6: Combine the Buttermilk and Blackberry Puree
In a small bowl or measuring jug, stir together the 1 cup buttermilk and 1 cup cooled blackberry puree until combined. This creates your wet mixture for the alternating additions. The color at this point is a stunning deep purple, which means you are doing everything right 🙂 The buttermilk and puree together bring moisture, tenderness, and that deep berry flavor that makes every layer of this cake taste genuinely of blackberry — not just look like it.
Step 7: Alternate Dry and Wet Ingredients
With your mixer on low speed, add the dry ingredient mixture and the blackberry-buttermilk mixture in alternating additions. Start and end with the dry ingredients. The sequence goes: one-third of the dry mix, then half of the wet, then one-third dry, then the remaining wet, then the final dry. Mix just until each addition disappears into the batter — do not overmix. Overmixing develops too much gluten, which turns the soft, velvet crumb you are aiming for into something tough and dense. Stop mixing the moment you no longer see streaks of flour.
Step 8: Divide, Bake, and Check
Divide the batter evenly between your prepared pans. Use a kitchen scale if you want perfectly even layers — each pan should hold about the same weight of batter. Smooth the tops with an offset spatula. Bake at 350°F for 30 to 35 minutes, or until a toothpick inserted into the center of each layer comes out clean or with just a few dry crumbs. The layers will also look set on top and just barely begin to pull away from the edges of the pan. Avoid opening the oven before the 28-minute mark or you risk the layers sinking in the center.
Step 9: Cool the Layers Completely
Let the baked cake layers cool in their pans on a wire rack for 15 minutes. Then run a thin knife around each edge, invert each layer onto the rack, and peel off the parchment paper. Let the layers cool completely — at least 1 full hour at room temperature. If you try to frost a warm cake layer, the frosting will melt, slide, and make you question every decision that led to that moment. Cool layers are non-negotiable here.
Step 10: Make the Blackberry Cream Cheese Frosting
Beat the two packages of softened cream cheese and 1/2 cup softened butter together on medium speed until completely smooth and fluffy — about 2 to 3 minutes. Add the 1/4 cup blackberry puree and 1 tsp vanilla and mix until the color is evenly distributed. Then add the powdered sugar one cup at a time, mixing on low after each addition. Start with 3 cups, then add more to reach your preferred consistency. You want a frosting that holds peaks but still spreads easily — thick enough to stay on the cake but not so stiff it tears the layers.
Step 11: Assemble and Frost the Cake
Place your first cake layer on a cake board or serving plate. Add a generous amount of frosting to the top — about 3/4 cup — and spread it to the edges with an offset spatula. Place the second layer on top, pressing gently to level it. Repeat with frosting if you have a third layer. Apply a thin crumb coat of frosting all over the outside of the cake, covering the sides and top in a thin, even layer. Refrigerate for 20 to 30 minutes to set the crumb coat. Then apply your final, thicker layer of frosting and decorate with fresh blackberries, a drizzle of reduced blackberry puree, or white chocolate curls.
Serving Suggestions and Storage
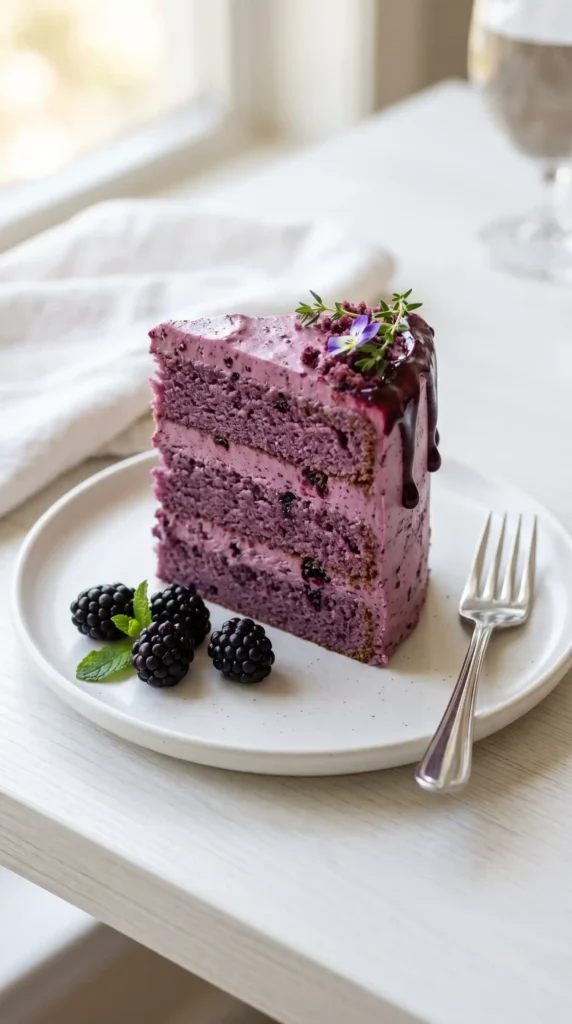
This cake tastes best at cool room temperature — pull it from the fridge about 30 minutes before you plan to serve it. The frosting softens just enough to let the flavors fully bloom. A slice with a handful of fresh berries on the side makes it feel restaurant-worthy.
- Serving temperature: Remove from the fridge 30 minutes before slicing for best flavor and texture
- Pairings: Fresh blackberries, lightly sweetened whipped cream, or a scoop of vanilla bean ice cream
- Refrigerator storage: Store covered in the fridge for up to 5 days — the cream cheese frosting requires refrigeration
- Freezing: Freeze unfrosted layers individually, wrapped tightly in plastic then foil, for up to 2 months. Thaw overnight in the fridge before assembling
- Make-ahead tip: Bake and cool the layers a day ahead. Store wrapped at room temperature. Make the frosting fresh the day you assemble
Frequently Asked Questions
Can I use frozen blackberries instead of fresh ones?
Absolutely. Thaw the frozen blackberries completely first and drain off any excess liquid before blending. The flavor is nearly identical to fresh, and frozen blackberries are available year-round at a fraction of the cost. Just make sure you strain the puree well to remove all seeds before using it in either the batter or frosting.
Why does my Blackberry Velvet Cake turn grayish-brown instead of purple?
This happens when the baking soda reacts with the natural anthocyanins in the blackberries, shifting the color toward gray. To keep the color vibrant and purple, add one tablespoon of fresh lemon juice to your blackberry puree before mixing it into the batter. The acidity stabilizes the color and keeps it a beautiful deep purple-red throughout baking.
My cream cheese frosting turned out too runny. How do I fix it?
Runny frosting usually means either the cream cheese and butter were too warm, or the blackberry puree added too much liquid. Refrigerate the frosting for 20 to 30 minutes to firm it up, then re-beat it. If it is still too soft, add more sifted powdered sugar a quarter cup at a time until it holds its shape. Always use full-fat block cream cheese, never the spreadable kind in a tub.
Can I turn this into cupcakes instead of a layer cake?
Yes, this batter works well as cupcakes. Fill lined cupcake tins about two-thirds full and bake at 350°F for 18 to 22 minutes, checking with a toothpick at the 18-minute mark. This recipe makes about 24 standard cupcakes. Top each one with a swirl of the blackberry cream cheese frosting and a single fresh blackberry for a stunning presentation that takes barely any effort.
What can I substitute for buttermilk if I do not have any?
Make your own in under five minutes. Add one tablespoon of white vinegar or fresh lemon juice to a measuring cup, then fill it to the 1-cup line with whole milk. Stir gently and let it sit for 5 minutes. The milk will curdle slightly — that is exactly right. This DIY buttermilk substitute gives you the acidity and tenderness that the real thing provides, with no special trip to the store.
How far in advance can I make this Blackberry Velvet Cake?
You can bake the layers up to two days ahead and store them well-wrapped at room temperature. Make the frosting up to three days ahead and refrigerate it in an airtight container. Assemble and frost the cake the day before you need it for the best structure, then keep it covered in the fridge. Pull it out 30 minutes before serving and it will taste freshly made.
Make This Cake and Watch It Disappear
The Blackberry Velvet Cake earns its spot as one of the most impressive things you will bake all year. Real blackberry puree in both the cake and frosting, a perfectly tender velvet crumb, and that stunning deep purple color make it a genuine showstopper. Yet the steps are completely manageable — even for an intermediate baker.
Get your blackberries, let your butter soften, and clear some counter space. This cake is about to become the one your people request by name at every single gathering. You are welcome in advance
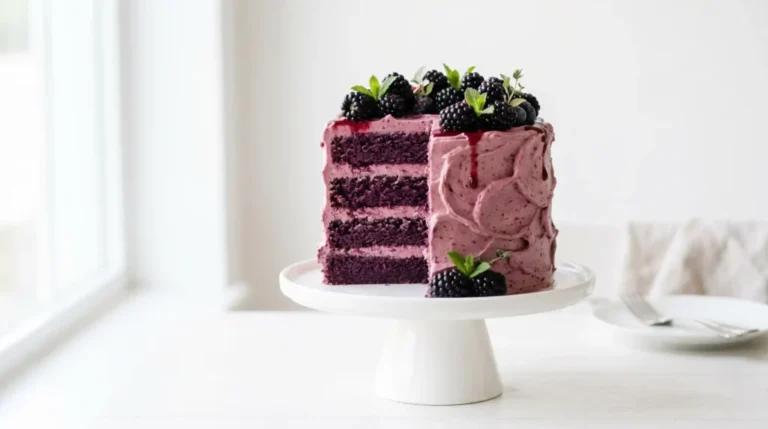
Blackberry Velvet Cake
Ingredients
Method
- Make the blackberry puree first by blending 2 cups of blackberries until smooth and strain through a fine-mesh sieve.
- Preheat your oven to 350°F (175°C) and prepare the cake pans with butter or baking spray and parchment paper.
- In a bowl, whisk together the flour, baking powder, baking soda, and salt.
- In a large bowl, cream the softened butter and granulated sugar for 4 to 5 minutes until pale and fluffy.
- Add eggs one at a time, mixing well after each addition, then add the vanilla extract.
- Combine the buttermilk and blackberry puree and mix.
- Alternately add the dry and wet mixtures to the batter, mixing until just combined.
- Divide the batter between prepared pans and bake for 30-35 minutes.
- Allow the cakes to cool in the pans for 15 minutes, then turn them out to cool completely.
- Beat the cream cheese and butter until smooth, then blend in blackberry puree and powdered sugar.
- Layer and frost the cake, using crumb coat and final frosting layer.
- Decorate with fresh blackberries or optional toppings.