Prep Time: 10 minutes | Bake Time: 55-65 minutes | Total Time: About 1 hour 15 minutes | Servings: 4 baked potatoes
You’ve made baked potatoes a hundred times. You know the drill: potato, oven, done. But have you ever brushed them with buttermilk before baking? Because that one small change transforms a perfectly ordinary baked potato into something genuinely worth talking about.
I started making buttermilk baked potatoes after noticing a bag of buttermilk sitting in my fridge with nothing to do. The result was a potato with a skin so crispy, tangy, and flavorful that I’ve never gone back to the plain oil-and-salt method since.
The whole thing takes just over an hour, requires almost no effort, and produces results that make people ask what your secret is. Let’s break down exactly how to make them perfectly every time.
What Makes Buttermilk Baked Potatoes Different From Regular Baked Potatoes
A standard baked potato gets rubbed with oil and salt before it goes in the oven. That method works perfectly well. But brushing the potato with buttermilk before baking does something fundamentally different to the skin.
Buttermilk is slightly acidic. That acidity breaks down the outer layer of the potato skin during baking, creating a texture that’s uniquely crispy and almost lacquered. The natural sugars in buttermilk also caramelize during the long bake, adding a subtle depth of flavor that plain oil simply cannot replicate.
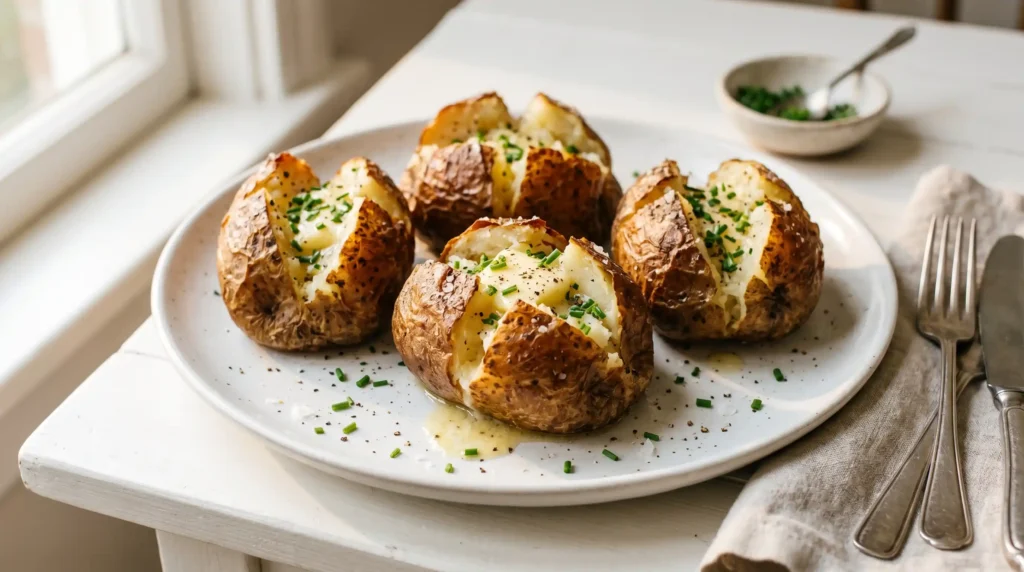
The inside of the potato stays fluffy and tender just like always, but the exterior becomes this golden, crackling shell with a faint tang that makes every bite more interesting. IMO, once you try this method, the plain version starts feeling a little underwhelming.
Ingredients for Buttermilk Baked Potatoes
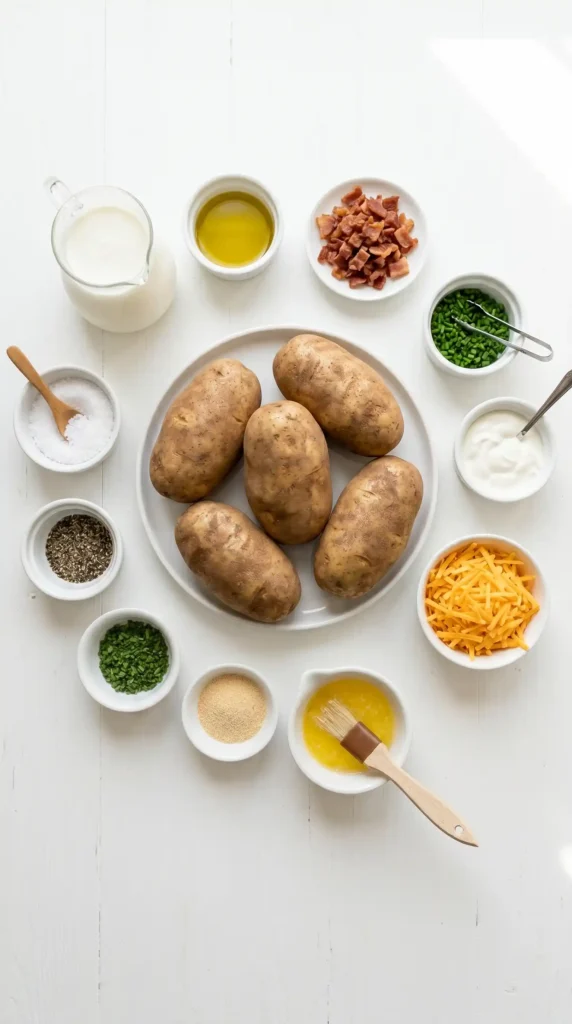
This recipe uses everyday ingredients. The buttermilk is the star, but everything else supports it perfectly. Here’s what you need for 4 baked potatoes:
The Essentials
- 4 large russet potatoes (about 8-10 oz each), scrubbed and dried
- 1/4 cup (60ml) full-fat buttermilk
- 1 tablespoon olive oil
- 1 teaspoon coarse sea salt or kosher salt
- 1/2 teaspoon freshly ground black pepper
- 1/2 teaspoon garlic powder
Optional Toppings
- Sour cream or extra buttermilk for serving
- Shredded cheddar cheese
- Crispy bacon bits
- Sliced chives or green onions
- Unsalted butter
FYI, russet potatoes are the only potato worth using here. Their high starch content and thick skin respond better to the high-heat baking process than waxy potatoes like Yukon Gold or red potatoes, which tend to stay moist on the outside instead of crisping up properly.
How to Make Buttermilk Baked Potatoes Step by Step
The technique here matters as much as the ingredients. Follow each step carefully and you’ll end up with potatoes that have that perfectly crispy buttermilk skin and a fluffy, steaming interior every single time.
Step 1: Preheat the Oven to the Right Temperature
Set your oven to 425 degrees Fahrenheit (220 degrees Celsius). This higher temperature is intentional. Many people bake potatoes at 375 or 400 degrees and then wonder why the skin never gets truly crispy. The extra heat is what drives moisture out of the skin rapidly and creates that crunchy exterior.
Position your oven rack in the center of the oven. This ensures even heat circulation around the potato from all sides. Baking on the bottom rack brings the potato too close to the heat source, which can overcook the bottom while the top stays undercooked.
If you have a convection setting on your oven, use it. Convection fans circulate hot air around the food continuously, which speeds up the baking time slightly and helps the skin crisp even more evenly than standard bake mode.
Step 2: Scrub and Dry the Potatoes Thoroughly
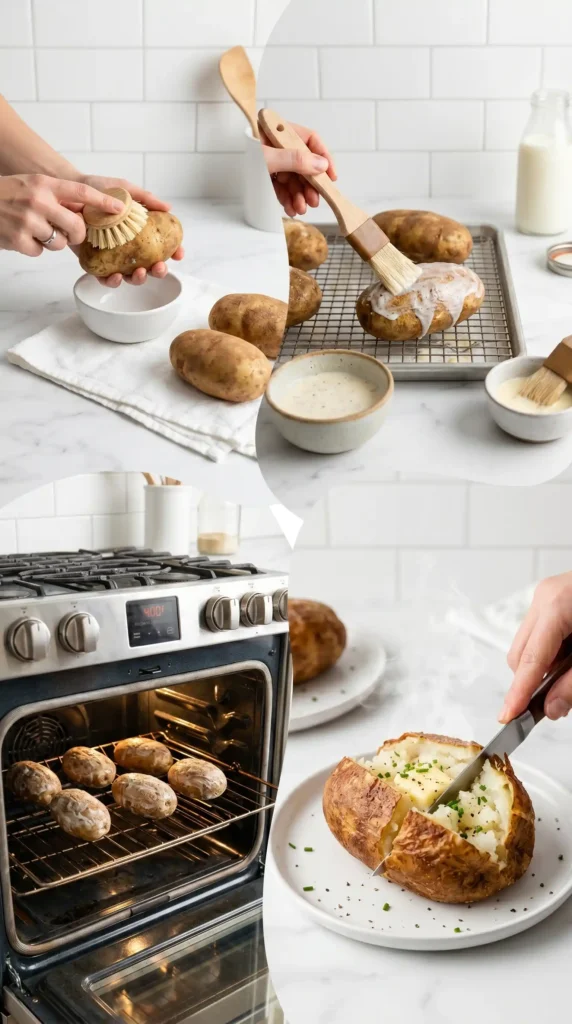
Rinse each russet potato under cold running water and scrub the skin firmly with a vegetable brush or the rough side of a sponge. You’re eating the skin in this recipe, so clean it properly. Pay extra attention to any eyes or dark spots and remove them with a paring knife.
After scrubbing, pat each potato completely dry with a clean kitchen towel or paper towels. This drying step is critical. Any surface moisture left on the potato skin will steam in the oven instead of crisping. You want the skin as dry as possible before you apply the buttermilk coating.
Set the dried potatoes aside on a clean surface while you prepare the buttermilk mixture. Even a few minutes of air drying at room temperature helps remove any remaining surface moisture before baking.
Step 3: Mix the Buttermilk Coating
In a small bowl, stir together the 1/4 cup of buttermilk, 1 tablespoon of olive oil, 1/2 teaspoon of garlic powder, and 1/2 teaspoon of black pepper. The olive oil helps the buttermilk adhere to the potato skin and adds a little extra richness to the finished crust.
Whisk everything together until it looks uniform. The mixture will appear thin and slightly separated because buttermilk and oil don’t fully emulsify together. That’s completely fine. A quick stir right before you brush each potato keeps the mixture evenly combined during application.
Taste the mixture before using it. It should taste tangy from the buttermilk, with a subtle hit of garlic and pepper. If you want a more pronounced garlic flavor, increase the garlic powder to a full teaspoon. If you prefer it more neutral, leave it at the base quantity.
Step 4: Pierce and Coat the Potatoes
Use a fork to pierce each potato 8 to 10 times all over the surface, including the ends. Spacing the holes evenly around the entire potato is important. These holes allow steam to escape during baking. Without them, steam builds up inside the potato and you risk the skin splitting open or, in rare cases, the potato bursting in your oven. 🙂
Place the pierced potatoes on a wire rack set over a baking sheet. The wire rack lifts the potatoes off the pan surface so hot air can circulate underneath each potato, crisping the bottom skin just as effectively as the top and sides.
Using a pastry brush, coat each potato generously with the buttermilk mixture, covering every part of the skin including the ends. Apply a thorough, even layer rather than a light mist. The buttermilk needs to coat the skin completely to do its job properly during the long bake.
Sprinkle each coated potato with the coarse sea salt immediately after brushing. The salt sticks to the wet buttermilk coating and stays on the skin throughout baking, forming that crunchy, flavorful crust that makes the outside of a good baked potato as enjoyable as the inside.
Step 5: Apply a Second Coat Halfway Through Baking
Place the rack and baking sheet into the preheated 425-degree oven. Bake for 30 minutes undisturbed. At the 30-minute mark, remove the potatoes from the oven and brush a second coat of the buttermilk mixture over the skin of each potato.
This second application is what separates a good buttermilk baked potato from a truly great one. The first coat mostly evaporates and seasons the skin during the first half of baking. The second coat creates a fresh layer of buttermilk that caramelizes and crisps up during the second half, building a genuinely substantial crust.
Work quickly when applying the second coat because you don’t want the oven to lose too much heat while the door is open. Brush, sprinkle a tiny pinch more salt if desired, and get the potatoes back in the oven within 2 minutes.
Step 6: Finish Baking and Check for Doneness
Return the potatoes to the oven and continue baking for another 25 to 35 minutes, for a total bake time of 55 to 65 minutes depending on the size of your potatoes. Larger potatoes need more time, while smaller ones may be done closer to the 50-minute mark.
Test for doneness by inserting a thin skewer, cake tester, or sharp paring knife into the thickest part of the potato. It should slide in with almost no resistance, like pushing through soft butter. If you feel any firm resistance at the center, the potato needs more time.
You can also gently squeeze the potato through an oven mitt. A fully cooked potato gives easily when pressed and feels soft throughout. A potato that still feels firm or dense in the middle needs another 10 minutes in the oven regardless of how the outside looks.
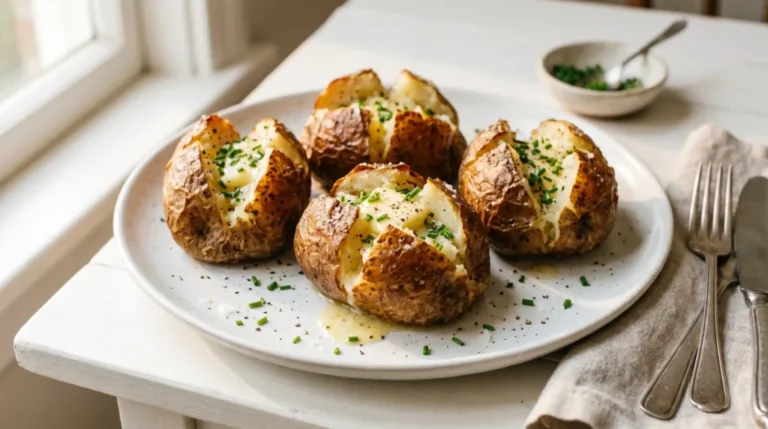
The skin at this stage should look deep golden to medium brown, slightly wrinkled, and feel firm and dry to the touch when you tap it with your fingertip. That’s your cue that the buttermilk has done its job and the crust has formed properly.
Step 7: Rest, Cut, and Serve
Remove the potatoes from the oven and let them rest on the wire rack for 5 minutes before cutting. This brief rest allows the interior steam to redistribute slightly, which makes the flesh fluffier and easier to fluff with a fork when you open the potato.
To open the potato, make a long cut down the center lengthwise, then make a shorter perpendicular cut across the middle. Grip the potato from both ends through an oven mitt and push inward gently to pop the cut open and expose the fluffy interior.
Add your toppings immediately while the potato is still steaming hot. Butter melts beautifully into the hot flesh, sour cream cools each bite slightly, and shredded cheddar softens just enough without becoming completely liquid. The combination with that crispy buttermilk skin creates something genuinely special.
Tips for Perfect Buttermilk Baked Potatoes Every Time
- Choose evenly sized potatoes: If your potatoes vary significantly in size, the smaller ones will finish cooking before the larger ones. Even sizing means everything comes out of the oven at the same time.
- Never wrap in foil: Foil traps steam and prevents the skin from crisping. A great baked potato skin needs direct oven heat and airflow, not a steam bath.
- Use the wire rack: Placing potatoes directly on the oven rack or a flat baking sheet without a rack blocks airflow to the bottom. A rack elevates the potato and crisps all sides evenly.
- Don’t undershoot the temperature: 425 degrees is the minimum for proper skin crisping. Lower temperatures produce soft, leathery skin instead of the crackling crust this recipe delivers.
- Serve immediately: Buttermilk baked potatoes are at their absolute best within 10 minutes of coming out of the oven. The skin softens noticeably as they sit at room temperature.
Fun Variations to Try With This Recipe

Herb Buttermilk Baked Potatoes
Add 1 teaspoon of dried rosemary and 1/2 teaspoon of dried thyme to the buttermilk coating mixture. The herbs crisp along with the skin and infuse the crust with a savory, aromatic flavor that pairs beautifully with steak or roasted chicken as a side dish.
Spicy Buttermilk Baked Potatoes
Add 1/2 teaspoon of smoked paprika and 1/4 teaspoon of cayenne pepper to the buttermilk mixture. The paprika deepens the color of the crust to a gorgeous mahogany, while the cayenne adds a slow, building heat that makes the skin genuinely exciting to eat.
Parmesan Buttermilk Baked Potatoes
After the second buttermilk coat, press a thin layer of finely grated Parmesan cheese onto the wet skin before returning the potatoes to the oven. The Parmesan forms a golden, salty crust on top of the buttermilk base that takes the texture and flavor to another level entirely.
Frequently Asked Questions About Buttermilk Baked Potatoes
Can I substitute regular milk or sour cream for buttermilk?
You can make a quick buttermilk substitute by adding 1 teaspoon of white vinegar or lemon juice to 1/4 cup of regular whole milk and letting it sit for 5 minutes. Sour cream thinned with a little water also works but produces a slightly richer crust. Store-bought buttermilk gives the most consistent results.
Do I really need to apply a second coat of buttermilk?
You don’t have to, but you’ll notice a real difference if you skip it. The single coat produces a nicely seasoned skin that’s a step above plain oil. The double coat creates a visibly thicker, crispier crust with more pronounced flavor. For the full experience, the second coat is worth the extra 2 minutes.
How do I store and reheat leftover buttermilk baked potatoes?
Store leftover potatoes uncovered in the refrigerator for up to 3 days. Reheat in a 375-degree oven for 15 to 20 minutes until the skin crisps back up. Avoid microwaving because it makes the skin rubbery and soft. The oven is the only reheating method that restores the crispy buttermilk crust properly.
Can I make buttermilk baked potatoes in an air fryer?
Yes, and the air fryer actually produces an incredibly crispy skin. Coat the potatoes with the buttermilk mixture as described, then air fry at 400 degrees Fahrenheit for 35 to 45 minutes depending on potato size, flipping once halfway through. Apply the second buttermilk coat at the halfway flip. The result is outstanding.
Why is my potato skin still soft after baking?
Three common causes: the potato wasn’t dried thoroughly before coating, the oven temperature was too low, or the potato sat wrapped or covered after coming out of the oven. Moisture is the enemy of crispy skin at every stage. Dry the potato well, use 425 degrees, and always rest uncovered on a wire rack.
What’s the best potato size for this recipe?
Medium to large russet potatoes weighing between 8 and 10 ounces each give the best results. Smaller potatoes have less skin surface area and finish cooking too quickly for the double coat method to work properly. Larger potatoes over 12 ounces take significantly longer and can dry out before the interior finishes cooking through.
Upgrade Your Next Baked Potato With Buttermilk
Buttermilk baked potatoes take everything you already know about baking a potato and make it genuinely better. The tangy coating, the double-application technique, the blistering 425-degree oven. Every detail contributes to a result that regular baked potatoes just can’t match.
The ingredient list is short, the method is straightforward, and the payoff is a side dish that holds its own against far more complicated recipes. That’s a combination worth locking into your regular rotation.
Grab four russet potatoes and a carton of buttermilk tonight. Your potato game is about to get a permanent upgrade, and honestly it’s about time.
Buttermilk Baked Potatoes
Ingredients
Method
- Preheat the oven to 425 degrees Fahrenheit (220 degrees Celsius) and place the rack in the center of the oven.
- Rinse and scrub the potatoes, then pat them completely dry.
- In a small bowl, mix the buttermilk, olive oil, garlic powder, and black pepper until combined.
- Pierce each potato 8 to 10 times with a fork and place them on a wire rack over a baking sheet.
- Brush each potato with the buttermilk mixture and sprinkle with salt.
- Bake for 30 minutes, then apply a second coat of the buttermilk mixture and a pinch more salt.
- Continue baking for another 25 to 35 minutes until tender.
- Remove from oven, let the potatoes rest for 5 minutes, then cut open and add toppings.


