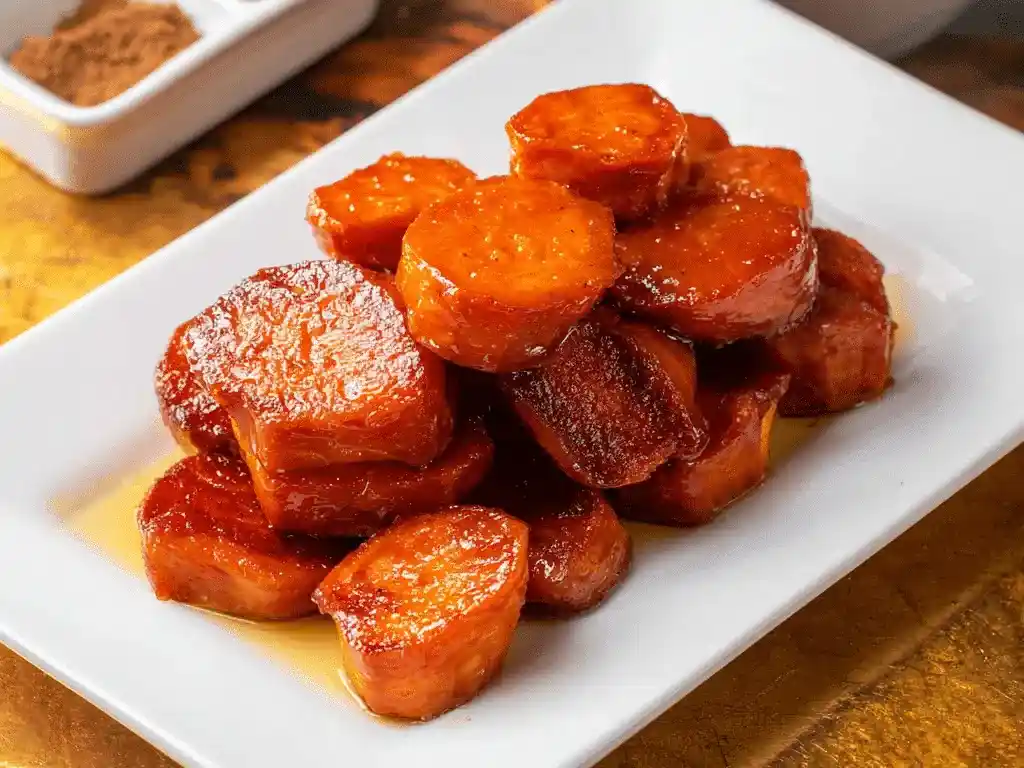
Buttery brown sugar glaze, tender sweet potatoes, and a caramelized finish that makes people forget this is technically a side dish. That’s the whole appeal in one sentence.
I make this every holiday season because someone always asks for it before the table even gets set. It’s basically a requirement at this point, not a suggestion.
Servings: 8 Prep time: 15 minutes Bake time: 45 minutes Total time: Roughly 1 hour
Why Candied Sweet Potatoes Work So Well
Sweet potatoes already bring natural sweetness to the table on their own. Add a buttery brown sugar glaze, and you get something that tastes closer to dessert than a typical side dish.
Have you ever served a side dish that got more attention than the main course? IMO, that’s exactly what happens every time this dish shows up at dinner.
The glaze caramelizes as it bakes, creating that soft, melt-in-your-mouth texture everyone loves. This isn’t just sweet potatoes, it’s sweet potatoes with a serious upgrade.
What You’ll Need
Here’s the short and simple ingredient list:
- Sweet potatoes, cooked
- Unsalted butter
- Brown sugar
- Water
- Salt
Five ingredients, one casserole dish, and a glaze that does all the heavy lifting. That’s basically the entire recipe.
A Quick Note on Choosing Sweet Potatoes
Orange-fleshed sweet potatoes give you the best sweetness and texture for this dish. Look for medium-sized potatoes that feel firm without any soft spots.
Cooking them ahead of time makes the whole process faster later. This is one of those recipes where a little prep upfront saves you time down the line.
How to Make Candied Sweet Potatoes
This recipe comes together fast, but a few small details make sure the glaze turns out perfectly caramelized. Let’s walk through it step by step.
Step 1: Preheat Your Oven
Preheat your oven to 350 degrees Fahrenheit before you start prepping anything else. Getting this step done early means your oven is ready the moment your dish is assembled.
Waiting until the last minute to preheat just adds unnecessary delay. Start this step first, then move on to the rest of the recipe.
Step 2: Slice the Sweet Potatoes
Slice your cooled, cooked sweet potatoes into half-inch rounds. Keeping the slices roughly the same thickness helps everything bake evenly in the oven.
Uneven slices lead to some pieces turning mushy while others stay firm. A few extra seconds with your knife pays off in the final texture.
Step 3: Arrange in the Baking Dish
Arrange your sweet potato slices evenly in a 3-quart casserole dish. Try to layer them so they overlap slightly rather than piling everything into one thick clump.
This even arrangement helps the glaze reach every single piece. Nobody wants a bite of sweet potato that missed out on the good stuff.
Step 4: Make the Glaze
In a small saucepan, combine your butter, brown sugar, water, and salt. Place the saucepan over medium heat and bring the mixture to a boil, stirring frequently the entire time.
Constant stirring keeps the sugar from burning or sticking to the bottom of the pan. This step takes a bit of attention, but it’s over quickly.
Step 5: Boil Until Thickened
Let the glaze boil for about 5 minutes, stirring continuously, until it thickens slightly. You’re looking for a syrupy consistency that coats the back of a spoon.
Have you ever watched a simple mixture transform into something glossy and rich right before your eyes? This step is honestly kind of satisfying to watch.
Step 6: Pour the Glaze Over the Potatoes
Pour your finished glaze evenly over the arranged sweet potato slices. Make sure every piece gets some coverage, tilting the dish slightly if needed to spread it around.
This is the moment where the dish really starts coming together. The glaze will seep down between the layers as it bakes, so don’t stress about perfect coverage right now.
Step 7: Bake Uncovered
Place your dish in the preheated oven and bake uncovered for 45 minutes. Baking without a cover lets the glaze reduce and caramelize properly on top.
Check near the end of baking to make sure the glaze looks bubbly and slightly darker in color. That caramelization is exactly what you’re aiming for here.
Step 8: Serve Hot
Remove your dish from the oven and let it sit for a couple minutes before serving. Serve hot for the best texture and that classic melt-in-your-mouth quality.
Skipping the resting time isn’t the end of the world, but a couple minutes helps the glaze settle slightly. Either way, this dish disappears fast once it hits the table.
Serving Suggestions Worth Trying
This dish pairs beautifully with a handful of classic mains and toppings. A few of my personal favorites:
- Roasted chicken or turkey for a balanced, savory-sweet pairing
- A sprinkle of chopped pecans for added crunch
- A dusting of cinnamon for extra warmth
- A savory main dish to offset the sweetness of the glaze
Serve this at your next holiday dinner and watch the dish empty before anything else. FYI, making a double batch isn’t overkill when this dish is on the table.
Storing and Reheating Leftovers
Refrigerator storage keeps this dish fresh for up to 4 days in an airtight container. Reheat individual portions in the oven at 300 degrees or in the microwave until warmed through.
Freezer storage works well for up to 2 months in a sealed container. Thaw overnight in the refrigerator before reheating for the best texture.
Skip reheating at too high a temperature, since the glaze can scorch fast if you’re not careful. Low and slow keeps everything tasting just as good as the first time :/
Fun Variations to Try
Once you’ve made the classic version, feel free to experiment. A few variations worth trying:
- Marshmallow topping added during the last 10 minutes of baking
- Cinnamon spiced version with cinnamon mixed directly into the glaze
- Maple version replacing half the brown sugar with maple syrup
- Pecan crunch version with chopped pecans sprinkled before baking
Why stick to the classic every time when there’s room to make it your own? Pick a variation based on whatever flavors sound good for your gathering.
Frequently Asked Questions
Can I use raw sweet potatoes instead of cooked? Yes, but you’ll need to pre-cook them first or extend the baking time significantly to get them tender.
How do I know when this dish is fully done? The glaze should look bubbly and the sweet potatoes should feel tender all the way through when pierced with a fork.
Can I make this ahead of time? Yes, assemble everything and refrigerate it, then bake right before serving for the freshest results.
Can I reduce the amount of sugar in the glaze? Yes, you can adjust the sugar to taste without dramatically affecting the overall texture of the dish.
What’s the best type of sweet potato to use? Orange-fleshed sweet potatoes give you the best combination of sweetness and texture for this recipe.
Final Thoughts
Candied Sweet Potatoes bring together simple ingredients and a rich, caramelized glaze to create a side dish that steals the spotlight every time. Sweet, buttery, and comforting, it earns its spot on any holiday table.
Make this dish for your next family dinner and watch it disappear faster than the main course. Just don’t be surprised when people ask for the recipe before dessert even comes out



