Servings: 12 Prep Time: 20 minutes Chill Time: 2 hours Total Time: 2 hours 20 minutes
Need a dessert that looks impressive but takes almost zero baking skill? Classic Cherry Delight delivers exactly that, and I’ve been making this one since it showed up at basically every holiday gathering my family ever hosted.
Nobody in my family actually bakes, yet this dessert somehow made it onto every dinner table growing up. Turns out, no-bake desserts have a way of becoming family legends despite requiring almost no effort.
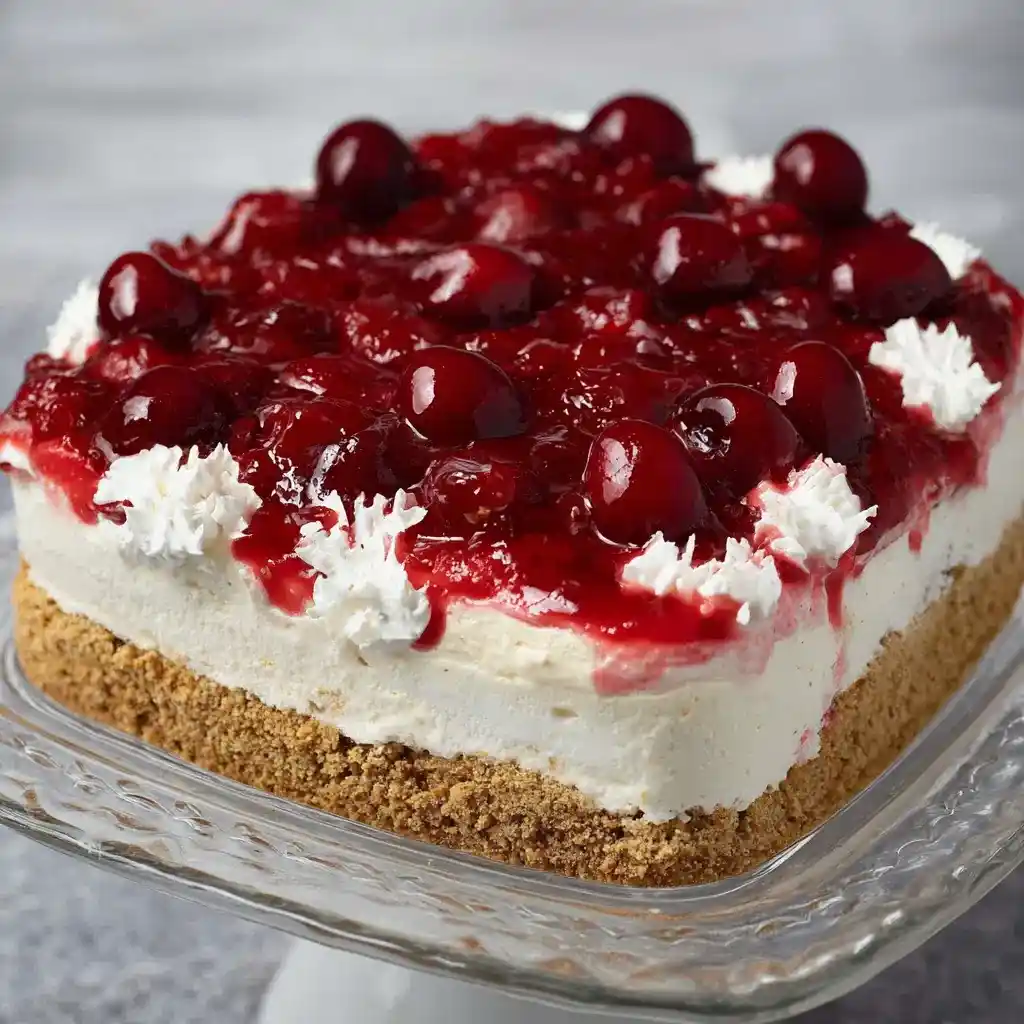
This recipe layers a graham cracker crust, creamy cheesecake filling, sweet cherry topping, and whipped cream into one chilled, no-bake treat. Ever notice how the easiest desserts somehow get the most compliments? This is exactly that kind of recipe.
Why Classic Cherry Delight Works So Well
A lot of desserts require precise baking times and constant oven-checking, right? This one skips the oven entirely, relying on chilling instead to set every layer into place.
The combination of tangy cream cheese and sweet cherry pie filling creates a genuinely satisfying contrast. IMO, that balance between creamy and fruity is exactly what makes this dessert so addictive, bite after bite.
Whipped cream on top adds a light, airy finish that keeps the whole thing from feeling too heavy. Have you ever had a dessert that somehow feels both indulgent and refreshing at the same time? This is that dessert.
What You’ll Need for Classic Cherry Delight
Here’s your full ingredient list. Simple grocery store staples, nothing fancy required.
- 1 ½ cups graham cracker crumbs
- ½ cup unsalted butter, melted
- ¼ cup granulated sugar
- 1 package cream cheese, 8 ounces, softened
- 1 cup powdered sugar
- 1 teaspoon vanilla extract
- 1 can cherry pie filling, 21 ounces
- 1 cup heavy cream
- Chocolate shavings or grated chocolate, optional, for garnish
Eight core ingredients, plus an optional garnish for a little extra flair.
How to Make Classic Cherry Delight
Step 1: Build the Graham Cracker Crust
In a mixing bowl, combine the graham cracker crumbs, melted butter, and granulated sugar. Stir everything together until the crumbs look evenly coated and slightly damp from the butter.
Press this mixture firmly into the bottom of a 9×13-inch baking dish. Use the back of a spoon or the bottom of a measuring cup to pack it down evenly, this creates a sturdy base that holds together once sliced.
Step 2: Make the Cream Cheese Layer
In a separate bowl, beat the softened cream cheese, powdered sugar, and vanilla extract together until smooth and creamy. Use a hand mixer for this step, since whisking by hand can leave frustrating lumps behind.
Keep beating until the mixture looks completely uniform with no visible streaks of cream cheese. FYI, starting with properly softened cream cheese makes this step go way faster and smoother.
Step 3: Spread the Cream Cheese Layer
Spread the cream cheese mixture evenly over the prepared graham cracker crust. Use an offset spatula or the back of a spoon to smooth it out into an even layer, reaching all the way to the corners.
Take your time here, an uneven layer means uneven slices later. This layer forms the creamy foundation that everything else sits on top of.
Step 4: Add the Cherry Pie Filling
Carefully spoon the cherry pie filling over the top of the cream cheese layer. Spread it out evenly across the entire surface, making sure the cherries and syrup cover every corner of the dish.
Have you ever taken a bite of a layered dessert that was missing filling in certain spots? Even distribution here avoids that disappointing experience entirely.
Step 5: Whip the Cream
In another bowl, whip the heavy cream using a hand mixer until firm peaks form. This usually takes a few minutes, so keep mixing until the cream holds its shape when you lift the beaters.
Watch closely toward the end, since overwhipped cream can turn grainy and start separating. IMO, stopping right at that firm peak stage gives you the best texture for spreading.
Step 6: Add the Whipped Cream Layer
Dollop the whipped cream evenly across the top of the cherry filling. Gently spread it out using a spatula, being careful not to press too hard and disturb the cherry layer underneath.
This top layer should look light and fluffy, covering the cherries completely. A gentle hand here keeps the layers distinct instead of swirling everything together.
Step 7: Garnish and Chill
Sprinkle chocolate shavings or grated chocolate over the top if you want an extra elegant touch. This small garnish adds visual appeal and a nice bit of contrast against the whipped cream.
Cover the dish tightly with plastic wrap and refrigerate for at least two hours. This chilling period lets the layers firm up and allows all those flavors to properly meld together.
Step 8: Slice and Serve
Once fully chilled, cut the dessert into squares or slices using a sharp knife. If the layers feel a little soft, dip your knife in hot water and wipe it dry between cuts for cleaner slices.
Serve chilled straight from the fridge for the best texture. IMO, this dessert tastes noticeably better cold, so don’t let it sit out too long before serving.
Tips for the Best Results
- Press the crust firmly to prevent it from crumbling when sliced.
- Use softened cream cheese for a smoother, lump-free filling.
- Don’t overwhip the cream, stop right at firm peaks for the best texture.
- Chill for the full two hours to let the layers properly set.
Storage and Reheating Tips
Store any leftovers in the refrigerator, covered tightly with plastic wrap or foil. It keeps well for up to four days, though it rarely lasts that long in my house.
Freezing is possible if you want to plan further ahead. Wrap it tightly in plastic wrap and foil, then freeze for up to two months, thawing in the refrigerator overnight before serving.
For the freshest texture, add the whipped cream and garnish right before serving if you’re preparing this dessert a day or two in advance.
Fun Variations to Try
Want to switch things up for different occasions? Try one of these:
- Berry delight: Swap the cherry filling for blueberry, raspberry, or mixed berry pie filling.
- Lemon twist: Replace the cherry filling with lemon curd for a tangy, citrusy version.
- Chocolate cherry version: Add a layer of chocolate ganache before the cherry filling.
- Coconut upgrade: Stir shredded coconut into the whipped cream for tropical flavor.
- Pumpkin spice twist: Swap cherries for pumpkin pie filling during the fall season.
Frequently Asked Questions
Can I use a different type of pie filling? Yes, blueberry, raspberry, or apple pie filling all work great as substitutes for cherry.
Can I make this dessert ahead of time? Absolutely, you can prepare it up to two days in advance and keep it refrigerated until serving.
Can I use a different crust? Yes, crushed Oreos or Nilla wafers both make excellent alternatives to graham crackers.
Can I use low-fat cream cheese? Yes, though the texture may turn out slightly different from the original full-fat version.
How do I make this dessert gluten-free? Use gluten-free graham cracker crumbs or another gluten-free cookie option for the crust.
Can I use whipped topping instead of heavy cream? Yes, whipped topping works as a convenient substitute, just spread it the same way over the filling.
Final Thoughts
Classic Cherry Delight proves that a dessert doesn’t need an oven to be genuinely impressive. Creamy, fruity, and just the right amount of crunchy, it’s the kind of treat that disappears fast at any gathering.
Make a batch before your next family dinner and watch how quickly seconds get requested Just be prepared, once people taste it, this dessert tends to become a permanent fixture on your recipe rotation.



