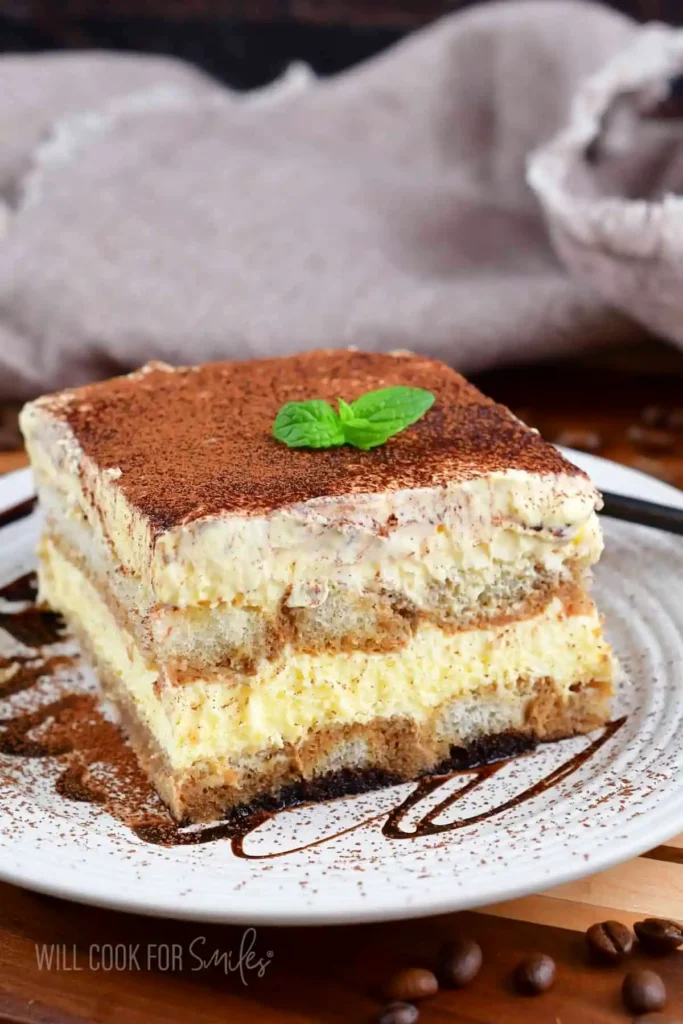
Okay, let’s talk about the dessert that intimidates way more home cooks than it should. Classic Tiramisu sounds fancy, but it’s really just layers of espresso-soaked cookies and creamy mascarpone filling, no baking required.
I fell in love with tiramisu the first time I tried it, and I’ve made it more times than I can count since. Thirty minutes of active prep, then the fridge handles the rest.
Servings: 9 | Prep time: 30 minutes | Chill time: 6 hours or overnight | Total time: 6 hours 30 minutes
Why This Classic Tiramisu Works So Well
Ever wonder why tiramisu translates to “pick me up” in Italian? Bold espresso and lightly sweet mascarpone create an energizing, comforting combination that somehow feels both indulgent and refreshing at once.
Authentic tiramisu also keeps its ingredient list refreshingly simple. No cream cheese, no complicated shortcuts, just genuine mascarpone, real espresso, and delicate ladyfingers that soften perfectly as the dessert chills.
What You’ll Need for Classic Tiramisu
This ingredient list stays true to traditional Italian tiramisu. Every item plays a specific role, so resist the urge to swap in convenient substitutes here.
- Egg yolks – 4 large
- Granulated sugar – 1/2 cup, plus 3 tablespoons, divided
- Mascarpone cheese – 16 ounces, room temperature
- Heavy whipping cream – 1 cup, cold
- Amaretto liqueur – 2 tablespoons (optional)
- Ladyfinger cookies (savoiardi) – 24 to 30 cookies
- Cold brewed espresso – 1 1/2 cups
- Unsweetened cocoa powder – for dusting
Use full-fat mascarpone here; there’s genuinely no good substitute. And skip soft, cake-style ladyfingers in favor of the crisp, traditional kind for the right texture.
How to Make Classic Tiramisu, Step by Step
Let’s slow down and walk through each stage carefully. This dessert has more steps than your average no-bake treat, but none of them are actually difficult once you understand why they matter.
Step 1: Whip the Cream to Stiff Peaks
Using a whisk attachment and a cold mixing bowl, beat your cold heavy whipping cream with three tablespoons of sugar. Whip until stiff peaks form and hold their shape firmly.
Place this whipped cream in the refrigerator until you’re ready for it later. Have you ever tried whipping warm cream? It just won’t cooperate, so keeping everything cold really does matter here.
Step 2: Temper the Egg Yolks Carefully
Set up a double boiler with water heated over medium heat, then reduce to medium-low. Combine your egg yolks and the remaining half cup of sugar in the top bowl, whisking gently to combine.
Continue heating and stirring slowly for about ten minutes, until the mixture reaches 160 to 165°F. This step matters for food safety, so don’t rush it or skip checking the temperature with a thermometer.
Step 3: Add Amaretto and Beat Until Thick
Remove your tempered egg yolk mixture from the heat immediately. Whisk in the amaretto liqueur if you’re using it, then beat the mixture with a whisk attachment until it turns thick and noticeably lighter in color.
This transformation takes a few minutes of steady beating. FYI, this fluffy custard base is exactly what gives tiramisu its signature rich, silky texture that sets it apart from other desserts.
Step 4: Whisk In the Mascarpone
Add your room temperature mascarpone cheese directly into the egg yolk mixture. Whisk gently until everything is fully combined and completely smooth, with no lumps of mascarpone remaining anywhere.
IMO, letting your mascarpone soften to room temperature beforehand makes this step infinitely easier. Cold mascarpone resists blending and often leaves stubborn little lumps throughout the mixture.
Step 5: Fold In the Whipped Cream Gently
This is the part where patience genuinely pays off. Carefully fold your chilled whipped cream into the mascarpone mixture using a spatula, working slowly and gently with each fold.
Folding, rather than stirring, keeps all those air bubbles intact. That’s exactly what gives the finished dessert its light, cloud-like texture instead of something dense and overly heavy.
Step 6: Dip the Ladyfingers in Espresso
Pour your cold espresso into a wide, shallow bowl that comfortably fits the ladyfinger cookies. Dip each cookie briefly, working quickly and avoiding a long soak that would make them fall apart.
Lay each dipped cookie into the corner of your 8×8 baking dish. Repeat with each cookie, laying them side by side until the entire bottom of the dish is fully covered.
Step 7: Layer the Cream and Ladyfingers
Spread half of your mascarpone cream filling evenly over the first layer of dipped cookies. Make sure it reaches every corner of the dish for consistent flavor in every bite.
Add another layer of espresso-dipped ladyfingers on top of the cream. Cover this second cookie layer with the remaining mascarpone cream, spreading it into an even, smooth top layer.
Step 8: Dust with Cocoa and Chill
Dust the top generously with unsweetened cocoa powder using a fine mesh sieve for even coverage. Cover the dish tightly with plastic wrap so it stays fresh in the fridge.
Refrigerate for at least six hours, though overnight chilling gives even better results. Dust with a little extra cocoa powder right before serving for that classic, picture-perfect finish 🙂
Tips for the Best Classic Tiramisu
- Bring mascarpone to room temperature first for smoother, lump-free mixing.
- Keep heavy cream very cold so it whips into proper stiff peaks.
- Give ladyfingers a quick dip only; soaking too long makes them fall apart.
- Chill overnight whenever possible, since flavor genuinely improves after a day or two.
- Store tightly covered in the fridge and enjoy within four to five days.
Easy Variations to Try
- Alcohol-free version: Skip the amaretto entirely without sacrificing much flavor at all.
- Coffee liqueur twist: Use Kahlua in place of amaretto for a different depth.
- Chocolate lover’s version: Add a light chocolate ganache drizzle between the layers.
- Individual servings: Assemble in small glass cups for perfectly portioned party desserts.
- Extra espresso kick: Brew a slightly stronger batch of espresso for bolder coffee flavor.
Which twist sounds most tempting? IMO, the Kahlua version deserves way more attention than it usually gets.
FAQs About Classic Tiramisu
Are there raw eggs in tiramisu? Traditionally yes, but this recipe tempers the egg yolks to a safe 160 to 165°F, eliminating the risk while keeping the texture silky.
Why is my tiramisu runny? This usually happens from under-whipped cream, over-soaked ladyfingers, or not chilling long enough. Give it the full six hours minimum.
Can I make tiramisu without alcohol? Absolutely. Simply omit the amaretto liqueur. The dessert still tastes rich and delicious without it.
Can I make tiramisu without eggs? Some versions skip eggs entirely and rely on extra whipped cream and mascarpone for structure, though the texture turns slightly different.
How long does tiramisu last in the fridge? Stored tightly covered, it stays fresh for four to five days. The flavor actually improves during the first couple of days.
Can I freeze tiramisu? Yes, without the cocoa powder topping. Wrap it tightly and freeze for up to three months, thawing slowly overnight in the fridge.
Final Thoughts
Classic Tiramisu proves that the most beloved desserts don’t need to be complicated to feel special. Bold espresso, silky mascarpone cream, and delicate ladyfingers come together into something that genuinely earns its reputation as an Italian classic.
Make this one ahead for your next gathering and let it chill while you handle everything else. Some recipes just deserve a permanent spot in your rotation, and this one has absolutely earned it.