Servings: 12 cups | Prep Time: 15 minutes | Cook Time: 25 minutes | Total Time: 40 minutes
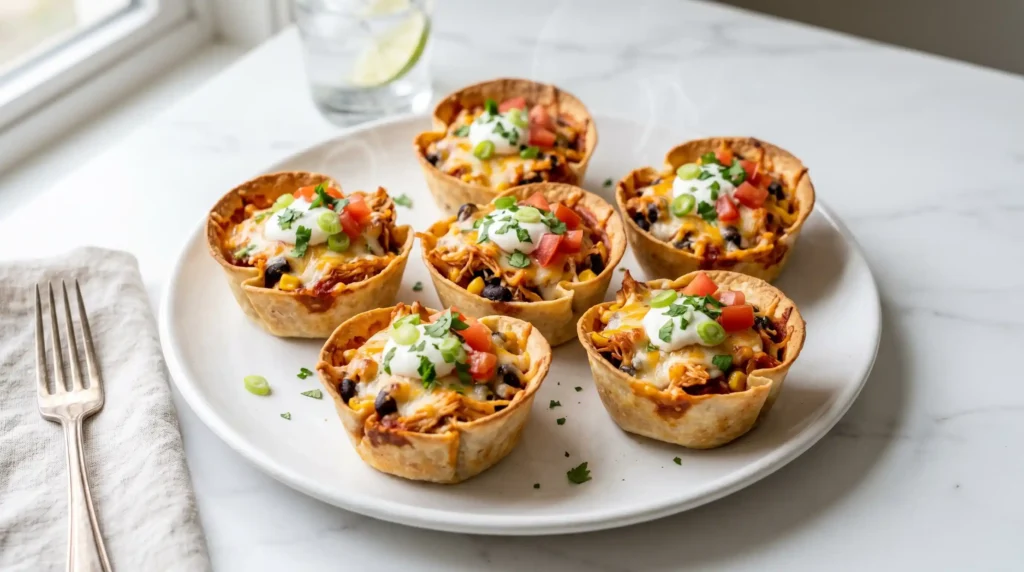
You know those recipes that look complicated but take almost no effort? That is exactly what Enchilada Cups are. I made these for a casual get-together once, set them on the table, and watched them disappear in under ten minutes. No leftovers. Not even one.
If you want something crowd-pleasing, handheld, and genuinely fun to eat, keep reading.
Why Enchilada Cups Are About to Become Your New Favorite
Regular enchiladas are great. But cutting them, serving them, watching them fall apart on the plate — you know how that goes. Enchilada Cups solve all of that. Each one is a self-contained, perfectly portioned little package of everything you love.
Here is what makes them so great:
- Handheld and mess-free
- Ready in about 40 minutes
- Perfect for parties, game days, or weeknight dinners
- Easy to customize for picky eaters
- Kids and adults both go absolutely wild for them
IMO, once you make these, you will never go back to rolling traditional enchiladas again.
Ingredients You Will Need
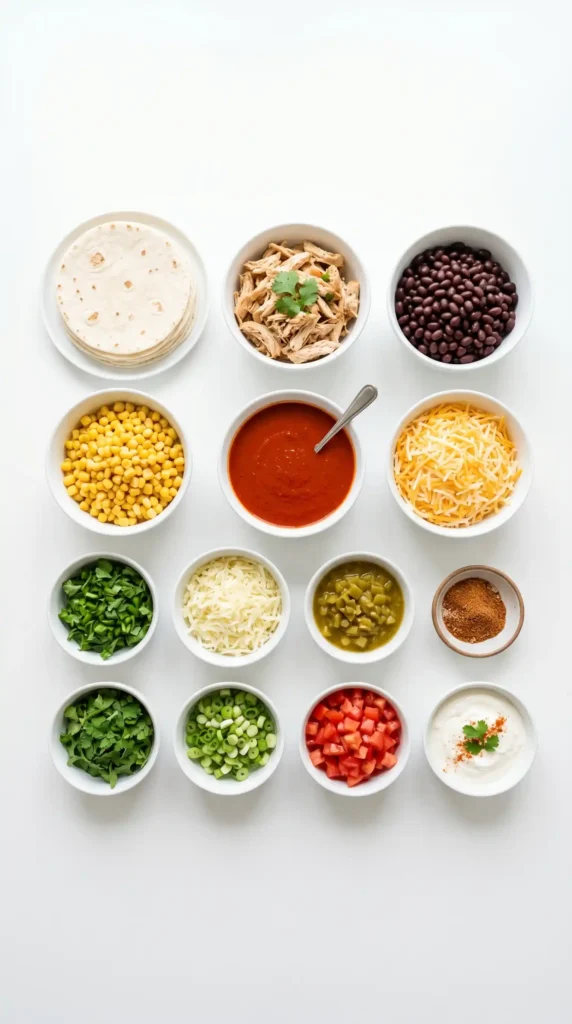
These quantities make 12 enchilada cups. Scale up easily for a bigger crowd — the recipe doubles without any issues.
- 12 small flour tortillas
- 10 ounces red enchilada sauce
- 14 ounces black beans, rinsed and drained
- 4 ounces green chilies
- 2 1/2 cups shredded cooked chicken (rotisserie chicken has extra flavor)
- 3/4 cup corn
- 2 tablespoons taco seasoning
- 1 cup shredded Mexican-blend cheese
- 1/4 cup chopped fresh cilantro
- 1 to 2 green onions, thinly sliced
- 1 Roma tomato, diced small
- Sour cream, optional for topping
- Aluminum foil balls, one for each cup
Quick note on the chicken: Rotisserie chicken genuinely elevates this recipe. The seasoned, slow-roasted flavor seeps into the filling in a way that plain boiled chicken just cannot match. Use it whenever you can.
Equipment You Will Need
Keep it simple — this recipe does not demand fancy gear:
- Standard 12-cup muffin pan
- Large mixing bowl
- Spoon for filling
- Aluminum foil (for shaping the cups)
- Microwave (for warming tortillas)
That is the full setup. Nothing intimidating, nothing obscure.
How to Make Enchilada Cups Step by Step
Step 1: Preheat the Oven
Set your oven to 350 degrees Fahrenheit and let it fully preheat before anything goes in. A properly heated oven is what crisps the tortilla cups evenly on all sides.
While the oven heats, go ahead and tear off small squares of aluminum foil. Roll each piece into a loose ball about the size of a golf ball — one for every cup. You will use these to hold the tortilla shape while baking.
Step 2: Warm the Tortillas
Grab your 12 small flour tortillas and warm them in the microwave for about 30 seconds. You want them soft, pliable, and easy to bend without cracking.
Cold tortillas snap and tear when you try to press them into the muffin tin. Warm ones bend smoothly into shape. This small step saves you from a lot of frustration and a pile of torn tortillas
If you do not have a microwave, wrap the stack in a damp paper towel and warm them in a low oven for a couple of minutes. Same result.
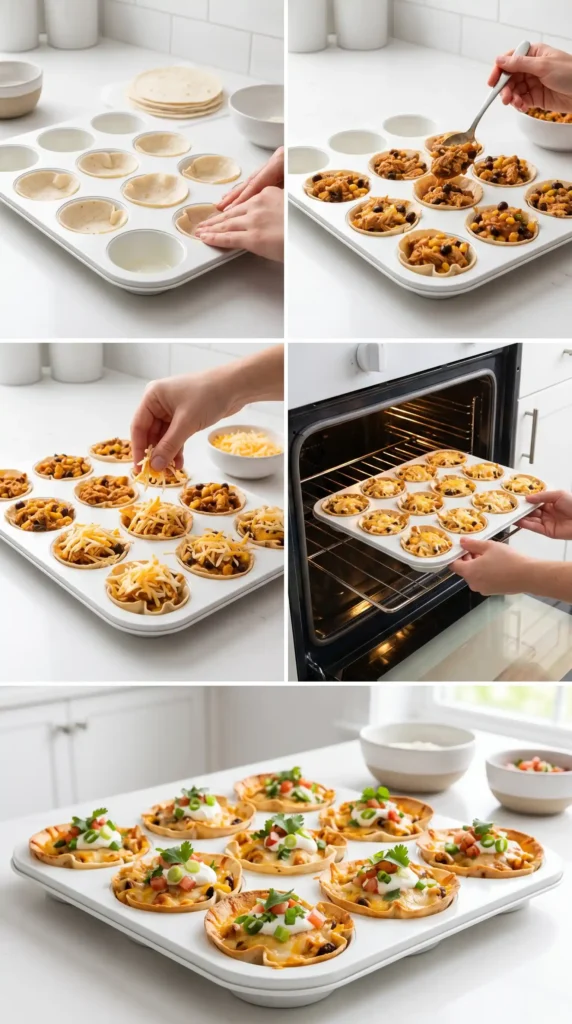
Step 3: Shape the Tortilla Cups
Take your muffin pan and press one warm tortilla gently down into each cup. Use your fingers to push the center down and pleat the sides against the walls of the cup. The tortilla will naturally gather and fold — that is completely fine and part of the look.
Work around the edges, pressing the pleats flat so the tortilla sits snugly against the sides and bottom of the muffin cavity. The cup does not need to be perfect — a little rustic character makes these look homemade in the best possible way.
Once the tortilla sits in the cup, drop one aluminum foil ball lightly into the center. This helps the tortilla hold its shape as it bakes and prevents the sides from collapsing inward. Do not press the foil ball down hard — just let it rest gently inside.
Repeat with all 12 tortillas until every cup in the muffin pan has its tortilla and foil ball in place.
Step 4: Bake the Tortilla Cups
Slide the muffin pan into the preheated oven and bake for 10 to 12 minutes. Check at the 10-minute mark. You want the tortilla cups to look slightly golden and feel firm when you touch the sides — not crunchy, just set enough to hold filling without collapsing.
Pull the pan out of the oven and set it on the stovetop or a heat-safe surface. Carefully remove the foil balls from each cup — they will be warm, so use a spoon or tongs if needed.
Leave the oven on. You will need it again shortly for the second bake.
Let the cups cool in the pan for a few minutes while you prepare the filling. They will continue to firm up slightly as they cool.
Step 5: Make the Enchilada Filling
While the cups bake, grab your large mixing bowl. Add the following:
- 10 ounces of red enchilada sauce
- 14 ounces of rinsed and drained black beans
- 4 ounces of green chilies
- 2 1/2 cups of shredded cooked chicken
- 3/4 cup of corn
- 2 tablespoons of taco seasoning
Stir everything together thoroughly until all the ingredients are fully coated in the enchilada sauce. The filling should look saucy, colorful, and well-seasoned. Taste it at this point — if you want more heat, add a pinch of cayenne or an extra spoonful of taco seasoning.
The taco seasoning brings a bold, smoky, slightly spicy backbone to the filling. The enchilada sauce ties everything together with that classic tangy, chili-forward flavor. Together, they make the filling taste like it has been simmering for hours. Thirty-second mix, zero hours. 🙂
Step 6: Fill the Cups
Use a large spoon to fill each tortilla cup with the chicken and bean mixture. Pack the filling in generously — go right to the top of each cup. These are called Enchilada Cups for a reason. Load them up.
Do not worry if a little filling spills over the sides. That is perfectly fine and honestly looks great when the cups come out of the oven. Just keep the filling off the foil-free bottom of the pan for easier cleanup.
Step 7: Add the Cheese and Bake Again
Sprinkle 1 cup of shredded Mexican-blend cheese evenly across all 12 filled cups. Make sure every cup gets a good layer — the cheese melts down into the filling and across the top, creating that golden, bubbly finish that makes these cups so irresistible.
Slide the pan back into the 350-degree oven for another 10 to 13 minutes. Watch for the cheese to melt completely and begin showing a few golden spots on top. That slight browning on the cheese is exactly what you want.
Pull the pan from the oven and let the cups rest in the pan for 3 to 5 minutes. This resting time helps them firm up fully and makes them much easier to lift out cleanly.
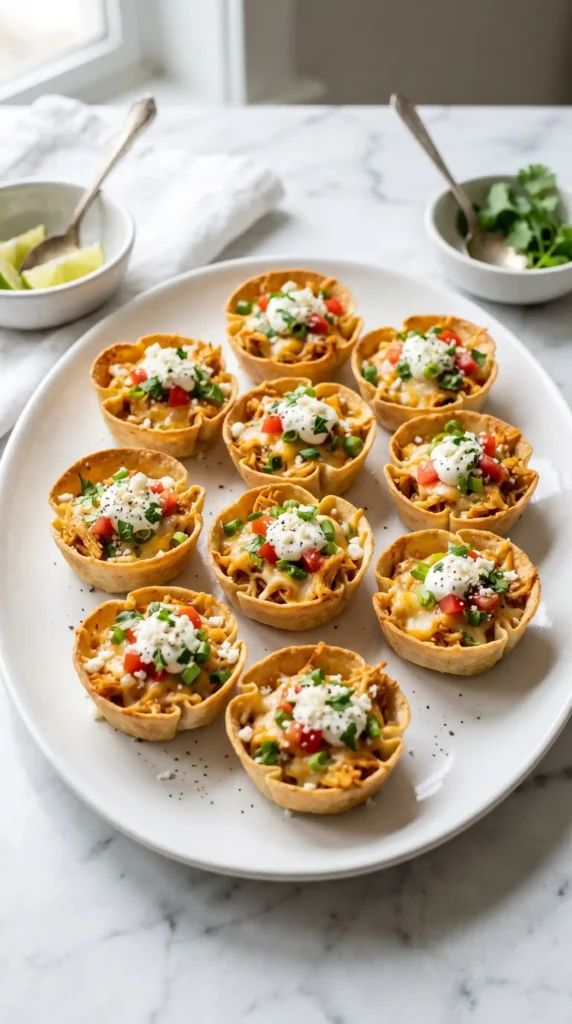
Step 8: Add Toppings and Serve
Use a spoon or butter knife to gently lift each cup out of the muffin pan and arrange them on a serving plate. Now comes the fun part — toppings.
Scatter fresh chopped cilantro and thinly sliced green onions across the tops. Add the diced Roma tomato for a burst of fresh color and brightness. Finish with a small dollop of sour cream on each cup if you enjoy that cool, creamy contrast against the spicy filling.
Serve immediately while the cheese is still melted and the cups are warm. These are best eaten fresh out of the oven.
Best Toppings for Enchilada Cups
The filling handles itself, but the toppings make these cups truly special. Beyond the basics, here are some great additions:
- Sliced avocado or guacamole
- Pickled jalapenos for heat
- A drizzle of hot sauce
- Crumbled cotija cheese
- A squeeze of fresh lime juice
- Shredded lettuce for crunch
Have you ever built a topping station and let guests customize their own cups? It turns dinner into an event.
Make-Ahead and Storage Tips
One of the best things about Enchilada Cups is how well they work for meal prep. Here is how to keep them fresh:
- Refrigerator: Store in an airtight container for up to 3 days
- Freezer: Freeze the baked, unfilled cups separately from the filling for up to 1 month. Assemble and bake with cheese when ready to eat.
- Reheating: Warm in a 325-degree oven for about 8 minutes to restore crispness. The microwave works but softens the tortilla cup.
FYI — making the filling the night before cuts your day-of prep down to about 10 minutes. Worth doing.
Easy Variations to Try
Once you master the base recipe, the variations are endless:
- Beef version: Swap the chicken for seasoned ground beef or shredded beef
- Vegetarian: Skip the chicken and double the beans and corn
- Green enchilada: Use green enchilada sauce instead of red for a different flavor profile
- Spicy version: Add diced jalapenos to the filling and use pepper jack cheese
- Breakfast cups: Fill with scrambled eggs, salsa, and cheese for a morning twist
Frequently Asked Questions
Can I use corn tortillas instead of flour tortillas? You can, but flour tortillas work better for forming the cup shape. Corn tortillas are less pliable and tend to crack more when pressed into the muffin tin, even after warming. If you prefer corn, warm them very well and handle them gently to minimize cracking.
Can I make Enchilada Cups ahead of time? Yes. You can bake the empty tortilla cups and prepare the filling up to 24 hours in advance. Store them separately and refrigerate. When ready to serve, fill the cups, add cheese, and bake as directed. They taste just as good.
Do I have to use rotisserie chicken? No — any shredded cooked chicken works. Poached, baked, or leftover chicken all work fine. That said, rotisserie chicken has more seasoned, roasted flavor that genuinely makes the filling taste better. Use it when you can.
How do I keep the tortilla cups crispy? Two things help most: the aluminum foil balls during the first bake, and avoiding overly wet filling. If your enchilada sauce is very thin, drain a little off before mixing. Serve the cups fresh rather than letting them sit in sauce for too long.
Can I make these in an air fryer? Yes. Press the tortillas into oven-safe ramekins or silicone muffin cups and air fry the empty shells at 325 degrees Fahrenheit for about 5 to 6 minutes until set. Fill, top with cheese, and air fry for another 4 to 5 minutes until the cheese melts.
Final Thoughts
Enchilada Cups deliver everything you love about classic enchiladas in a handheld, portion-perfect format. Bold flavor, melted cheese, crispy tortilla cups, and all your favorite toppings — ready in 40 minutes and gone even faster.
Make them for your next gathering and watch them disappear. Or make them on a Tuesday just because you deserve something fun for dinner. Either way, you win.

Enchilada Cups
Ingredients
Method
- Preheat the oven to 350°F and let it fully preheat before placing anything inside.
- Prepare aluminum foil balls about the size of a golf ball, one for each cup.
- Warm the tortillas in the microwave for about 30 seconds until soft and pliable.
- Press each warm tortilla into a muffin pan cup, pleating the sides as needed.
- Place an aluminum foil ball in each tortilla cup to maintain its shape.
- Bake the tortilla cups for 10 to 12 minutes until slightly golden and firm.
- In a large mixing bowl, combine red enchilada sauce, black beans, green chilies, chicken, corn, and taco seasoning.
- Mix everything thoroughly and adjust seasonings to taste.
- Fill each tortilla cup with the enchilada filling, packing it generously.
- Top each filled cup with shredded cheese and return to the oven for another 10 to 13 minutes until the cheese melts.
- Remove the cups from the oven and let them rest for 3 to 5 minutes before lifting them out.
- Garnish with cilantro, green onions, diced tomato, and a dollop of sour cream.
- Serve warm and enjoy!


