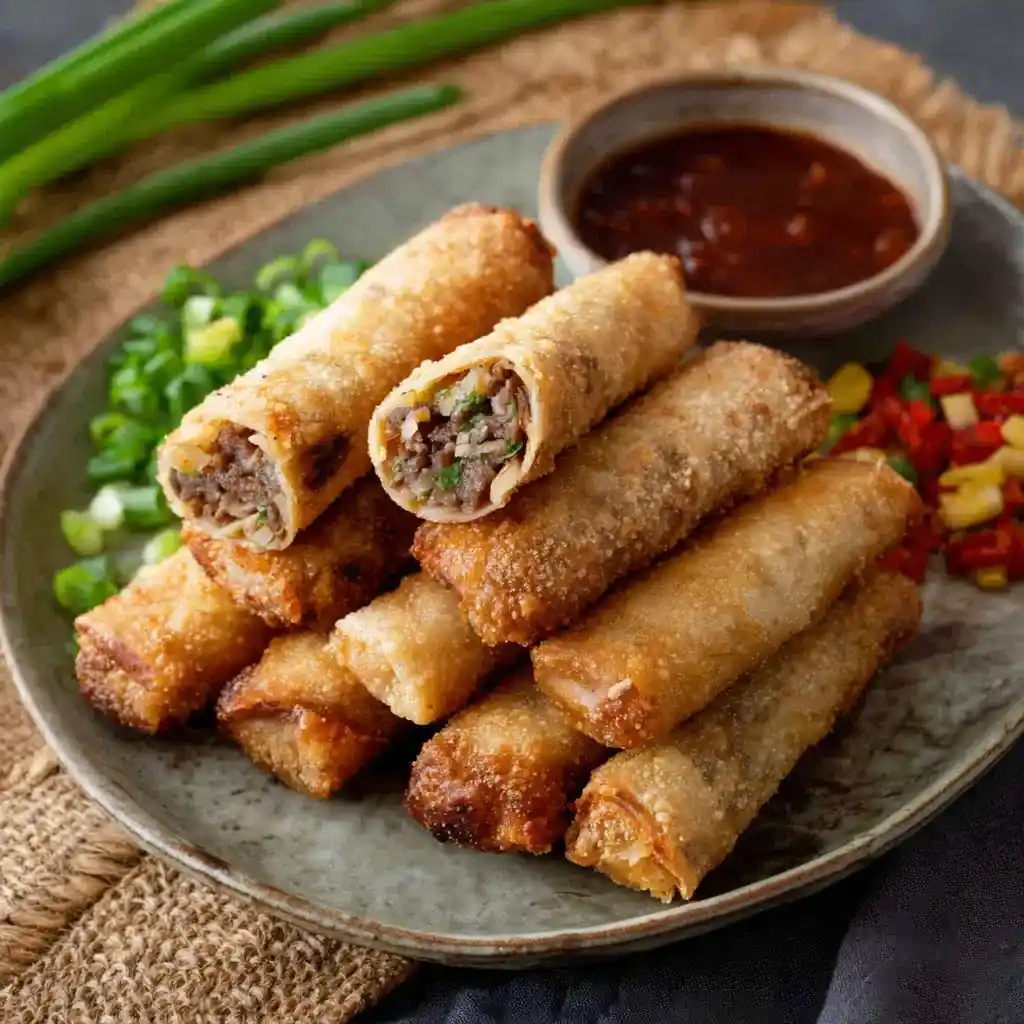
Ever bitten into something so crispy and savory that you immediately reach for a second one? That’s Lumpia for you. I first tried these at a friend’s family party, and I’ve been making them at home ever since.
Servings: 30 lumpia rolls Prep Time: 30 minutes Cook Time: 20 minutes Total Time: 50 minutes
What Exactly Is Lumpia
Lumpia is a Filipino appetizer made from a savory filling wrapped tightly in a thin wrapper, then fried until golden. Think of it as a distant cousin of the spring roll, but with its own personality entirely. Have you ever wondered why party trays of these disappear so fast?
The crunchy exterior paired with a well-seasoned filling makes Lumpia dangerously snackable. IMO, it’s one of those appetizers that never lasts long enough on the plate. Once you make a batch yourself, you’ll understand exactly why.
What You’ll Need
Here’s everything you’ll want ready before you start rolling:
- Sesame oil
- Garlic, minced
- Fresh ginger, minced
- Ground beef
- Green onion, minced
- Carrots, finely minced
- Green cabbage, finely sliced
- Onion powder
- Salt
- Ground black pepper
- Soy sauce
- Lumpia wrappers or egg roll wrappers
- Oil, for frying
- Water, for sealing wrappers
Most of these ingredients hang out in your pantry already, except maybe the wrappers. Find those in the frozen or refrigerated section of most grocery stores, usually near other Asian ingredients.
How to Make Lumpia
Let’s break this down into manageable steps so nothing feels overwhelming, even if you’ve never rolled lumpia before.
Step 1: Build Your Flavor Base
Heat the sesame oil in a pan over medium-high heat until it shimmers slightly. Add the garlic and ginger, stirring constantly for about 20 seconds until the kitchen smells amazing. Don’t walk away here, since garlic burns fast and turns bitter almost instantly.
Step 2: Brown the Ground Beef
Add the ground beef directly into the pan with your garlic and ginger. Break it apart with a spatula as it cooks, stirring occasionally until it’s fully browned throughout. This usually takes several minutes, so be patient and resist the urge to rush it.
Step 3: Add Your Vegetables
Stir in the green onions, carrots, and cabbage once the beef is fully cooked. Cook everything together for two to three minutes, just until the vegetables soften slightly but still hold some texture. Overcooking here makes for a mushy filling, so keep an eye on the clock.
Step 4: Season the Filling
Sprinkle in the salt, black pepper, and onion powder, then pour in the soy sauce. Mix everything together thoroughly so the seasoning distributes evenly throughout the filling. Taste a small bit and adjust the seasoning if it needs a little more punch.
Step 5: Cool the Filling Slightly
Remove the pan from heat and let the filling cool for several minutes before rolling. Hot filling makes the wrappers tear or turn soggy almost instantly. A little patience here saves you a headache later, trust me on this one.
Step 6: Set Up Your Rolling Station
Lay a lumpia wrapper flat on a clean surface, positioned like a diamond in front of you. Keep a small bowl of water nearby for sealing the edges later. Setting everything up beforehand makes the rolling process go much smoother and faster.
Step 7: Fill and Roll
Spoon about one to one and a half tablespoons of filling near the bottom edge of the wrapper. Fold the bottom corner over the filling, then fold in the sides snugly. Roll the wrapper tightly upward into a cylinder shape, keeping everything compact as you go.
Step 8: Seal Each Roll
Dab a little water along the top edge of the wrapper before finishing the roll. Press gently to seal, making sure there are no gaps where filling might leak out during frying. Repeat this entire rolling process until you’ve used up all your filling.
Step 9: Heat the Oil
Pour oil into a deep pan and heat it over medium heat until it reaches frying temperature. Test the oil by dropping in a tiny piece of wrapper, it should sizzle immediately without burning. Rushing this step leads to greasy, undercooked lumpia, so give the oil time.
Step 10: Fry Until Golden
Carefully lower a few lumpia into the hot oil, avoiding overcrowding the pan. Fry until each roll turns golden brown and crispy, flipping occasionally for even color. Remove them with tongs and drain on paper towels to soak up excess oil.
Tips for Perfect Lumpia Every Time
A handful of small habits separate great lumpia from soggy disappointments:
- Don’t overfill the wrappers, since too much filling causes tearing during frying.
- Keep the oil at the right temperature, or the rolls absorb grease instead of crisping up.
- Roll tightly, because loose rolls fall apart the moment they hit hot oil.
- Drain well after frying, keeping them uncovered so steam doesn’t ruin the crunch.
Serving and Storage Tips
Serve Lumpia hot and crispy alongside sweet chili sauce or a vinegar-based dipping sauce. These rolls taste best immediately after frying, when that exterior is at peak crunch. Waiting too long softens the wrapper, and honestly, nobody wants soggy lumpia.
Store leftover lumpia in an airtight container in the fridge for up to three days. Reheat in an oven or air fryer to bring back that crispy texture, since microwaving turns them rubbery :/. Uncooked lumpia freezes well too, and you can fry them straight from frozen whenever cravings hit.
Fun Variations Worth Trying
Once you’ve nailed the classic version, why not switch things up a bit?
- Chicken Lumpia: Swap ground beef for ground chicken for a lighter bite.
- Vegetable Lumpia: Skip the meat entirely and load up on mushrooms and bean sprouts instead.
- Shrimp Lumpia: Add chopped shrimp for a seafood twist on the classic.
- Spicy Lumpia: Mix chopped chili or chili flakes into the filling for extra heat.
- Cheese Lumpia: Tuck small cubes of cheese inside for a melty, creamy surprise.
Each variation keeps that signature crispy exterior while giving you a completely different flavor experience. Have you tried any unusual fillings yourself? There’s really no wrong way to customize this one.
Frequently Asked Questions
Can I bake lumpia instead of frying? Yes, brush the rolls with oil and bake until crispy, though frying still gives the crunchiest texture.
Can I freeze lumpia for later? Absolutely, freeze the rolls uncooked and fry them directly from frozen whenever you’re ready.
What type of oil works best for frying? Neutral oils like vegetable, canola, or sunflower oil work perfectly for frying lumpia.
Why does my lumpia turn out soggy? This usually happens when the oil isn’t hot enough or the rolls are overfilled with filling.
Can I prepare lumpia ahead of time? Yes, roll them a day in advance and keep them refrigerated until you’re ready to fry.
How do I keep the lumpia crispy after frying? Drain them thoroughly on paper towels and avoid covering them right away, since trapped steam softens the wrapper.
Can egg roll wrappers replace lumpia wrappers? Yes, just cut them down to a smaller size for that traditional lumpia shape and texture.
Final Thoughts
Lumpia brings together crispy texture and savory flavor in a package that’s genuinely hard to stop eating. Whether you stick with the classic beef filling or experiment with your own twist, these rolls always deliver. Once you master the rolling technique, you’ll want to make them for every gathering.
So grab your wrappers, get that filling seasoned just right, and give this recipe a shot this weekend. Your friends and family will be asking for the recipe before the plate’s even empty.



