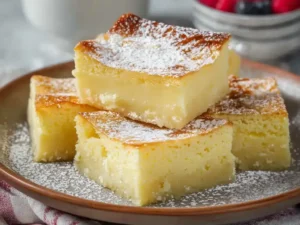
Ever made one simple batter and watched it turn into three completely different layers? That’s Magic Custard Cake, and yes, it’s exactly as cool as it sounds. IMO, this is the closest baking gets to actual sorcery.
I remember my first attempt, convinced I’d messed something up because the batter looked way too thin. Turns out that’s the whole point, and honestly, the payoff is worth the confusion.
Servings: 9 pieces
Prep Time: 20 minutes
Bake Time: 40–50 minutes
Total Time: About 1 hour 10 minutes (plus cooling)
What Makes Magic Custard Cake So Special
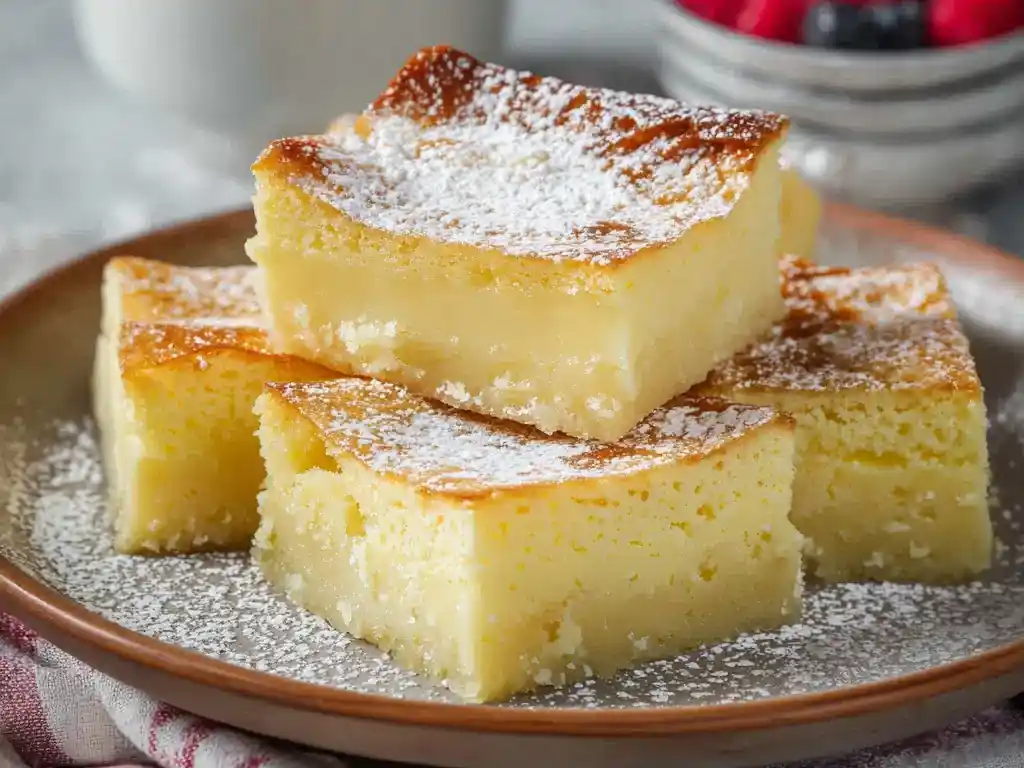
This isn’t your typical cake recipe. One batter separates naturally into a dense base, a creamy custard middle, and a soft sponge top, all without any layering effort on your part.
Here’s what makes it worth the oven time:
- Three distinct layers from a single batter
- Rich custard texture without needing a separate filling
- Simple pantry ingredients you likely already own
- Elegant presentation that looks way harder than it actually is
Have you ever served a dessert that impressed guests despite taking almost no skill? This cake does exactly that.
What You’ll Need
Nothing complicated here—just basics you probably already have stocked. Grab everything ahead of time, since this recipe moves through a few stages quickly.
You’ll need eggs, granulated sugar, unsalted butter, salt, milk, vanilla extract, all-purpose flour, and powdered sugar for dusting on top.
A Quick Note on the Milk
Warm your milk before adding it to the batter. Cold milk shocks the egg yolk mixture and can mess with how the layers eventually separate.
2% milk works great, though whole milk creates an even richer custard center. IMO, whole milk is worth trying at least once.
How to Make Magic Custard Cake (Step-by-Step)
This process has more stages than your average cake, but nothing here requires special skill. Just take your time, and the magic happens on its own.
Step 1: Prep Your Pan and Oven
Preheat your oven to 325 degrees Fahrenheit. While it heats, line an 8×8 inch baking pan with parchment paper, or coat it generously with cooking spray.
Lower oven temps matter here more than usual. This cake bakes slowly, which gives the layers time to properly form instead of rushing into one mushy texture.
Step 2: Whip the Egg Whites
Separate your eggs first, keeping whites and yolks in different bowls. Using a hand mixer, beat the egg whites until stiff peaks form, then set that bowl aside.
Stiff peaks matter here, so don’t rush this part. Under-whipped whites won’t hold their structure, and that’s how you end up with a flat, single-layer cake instead of three.
Step 3: Mix the Egg Yolks
In a separate bowl, beat egg yolks, granulated sugar, melted butter, and salt together. Keep mixing until the mixture turns pale yellow and looks fully combined.
This step builds the flavor base for your custard layers. Don’t rush it, since a properly mixed yolk base sets up everything that happens later.
Step 4: Add the Warm Milk
Slowly drizzle the warmed milk into your egg yolk mixture while mixing on low speed. Pour gradually here, since dumping it all at once can scramble your eggs.
Patience really pays off in this step. A slow, steady stream keeps everything smooth and prevents any weird curdled texture from ruining your batter.
Step 5: Add Vanilla and Flour
Mix in the vanilla extract and flour, stirring just until combined. Overmixing at this stage can actually prevent the layers from forming properly later on.
Why does that matter so much? Overworking the flour develops gluten, which makes the batter too structured to separate into distinct layers while baking.
Step 6: Fold in the Egg Whites
Gently fold your whipped egg whites into the batter in a few additions. Use a light hand here, folding rather than stirring vigorously.
The batter should look thin with visible lumps of egg white throughout. That’s completely normal, so don’t panic and start over thinking you did something wrong.
Step 7: Pour and Bake
Pour your batter into the prepared pan, spreading it gently if needed. Slide it into your preheated oven and bake for 40 to 50 minutes.
Look for a lightly golden top with a slightly jiggly center when it’s done. That jiggle isn’t undercooked—it actually confirms your custard layer set correctly.
Step 8: Cool Completely
Remove your cake from the oven and let it cool fully before doing anything else. Cutting into it while warm ruins the layers and turns everything into a gooey mess.
This waiting period tests your patience, but trust the process. The layers need time to firm up and separate visually once cooled.
Step 9: Dust and Slice
Once completely cooled, dust the top generously with powdered sugar. Slice into nine pieces, and you’ll see those three gorgeous layers staring back at you.
That first slice always feels like a mini victory. Have you ever cut into something and immediately wanted to take a photo before eating it?
Storage and Serving Tips
Serve this cake chilled or at room temperature, depending on your texture preference. Both ways taste great, though chilled slices hold their shape better for serving.
Store leftovers covered in the refrigerator for up to three days. Skip the freezer entirely here, since freezing wrecks that delicate custard texture you worked so hard for.
Pair slices with fresh berries or a small dollop of whipped cream. It’s a simple touch that makes the whole dessert feel a little fancier.
Fun Variations to Try
Once you’ve nailed the base recipe, small tweaks completely shift the flavor without much extra work. Here are a few worth trying.
- Chocolate version: add cocoa powder and reduce the flour slightly
- Lemon twist: mix in lemon juice and zest for brightness
- Espresso kick: dissolve instant espresso powder into the warm milk
- Coconut swap: use coconut milk and top with shredded coconut
Frequently Asked Questions
Why is it called Magic Custard Cake?
Because a single batter separates into three distinct layers during baking, which honestly still feels like magic every time.
Why does my batter look so thin?
That’s completely normal and actually necessary for the layers to properly form while baking.
Do I really need to separate the eggs?
Yes, separating eggs is essential here since the whipped whites create that light sponge layer on top.
Why is the center of my cake jiggly after baking?
A slight jiggle means the custard layer set correctly, so don’t mistake it for underbaking.
Can I double this recipe for a bigger crowd?
Yes, just switch to a 9×13 inch pan and adjust your bake time accordingly.
Final Thoughts
Magic Custard Cake proves that simple ingredients can produce something genuinely impressive. Three layers, minimal effort, and a texture that feels indulgent without being overly heavy.
So next time you want to wow guests without stressing over technique, give this one a shot. Watch their faces when you slice it—that reaction alone makes the whole process worth it.