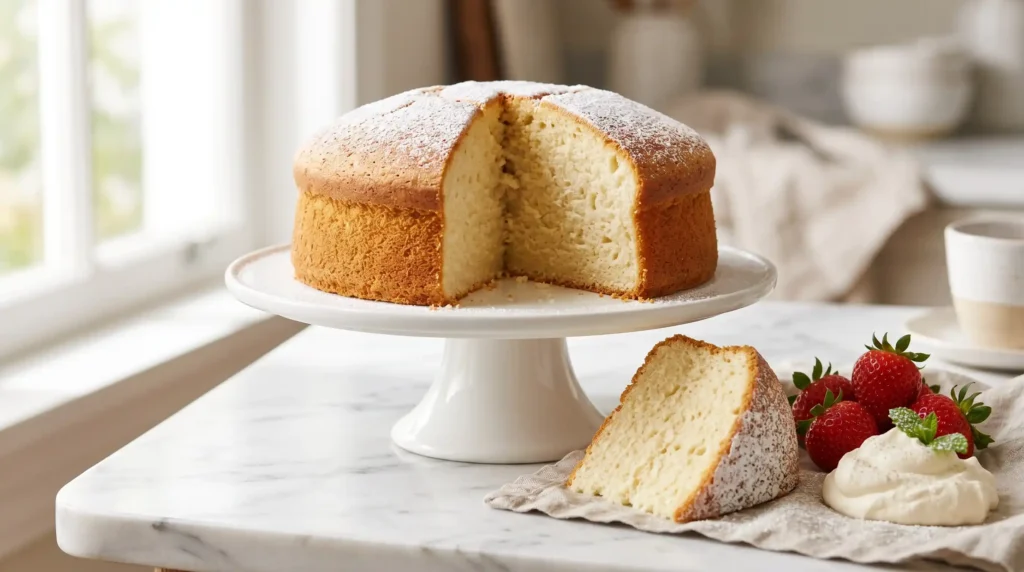
Servings: 8 to 10 slices | Prep Time: 20 minutes | Bake Time: 30 to 35 minutes | Cooling Time: 45 minutes | Total Time: About 1 hour 35 minutes
The One Cake Every Baker Needs to Master
There is a cake that sits at the heart of almost every celebration, every afternoon tea, and every ‘I just felt like baking’ Sunday. That cake is the Vanilla Sponge Cake. It is light, it is fragrant, and when you get it right it has this impossibly soft, springy crumb that makes you wonder how something so simple can taste this good.
I have been making vanilla sponge cakes since I first started baking and I still feel a small rush of satisfaction when I pull one out of the oven and it has that perfect golden dome. Every time. There is something about the smell of warm vanilla and butter that makes a kitchen feel like a genuinely happy place.
This recipe gives you a classic, reliable Vanilla Sponge Cake that bakes up beautifully every time. No fancy equipment required. No hard-to-find ingredients. Just a handful of everyday staples, a bit of technique, and a reliable oven. IMO, once you have this recipe down you will never need another plain cake base.
What Makes a Sponge Cake Different From Other Cakes
Have you ever wondered why sponge cake feels lighter than a regular butter cake even though they use many of the same ingredients? The difference lies in technique. A true sponge gets its lift primarily from eggs that have been beaten to incorporate air rather than relying on large amounts of fat or chemical leaveners.
The beating process is everything in a sponge cake. When you whip eggs and sugar together until thick and pale, you trap thousands of tiny air bubbles in the mixture. Those bubbles expand in the oven heat and push the batter upward. The result is a cake with a fine, delicate crumb and a featherlight texture.
This makes a Vanilla Sponge Cake the perfect base for layered desserts, trifles, and celebration cakes. It absorbs fillings and syrups beautifully without turning soggy. It slices cleanly. And its gentle vanilla flavor pairs with virtually everything without competing for attention. It is genuinely the most versatile cake in any baker’s repertoire.
Ingredients for Vanilla Sponge Cake
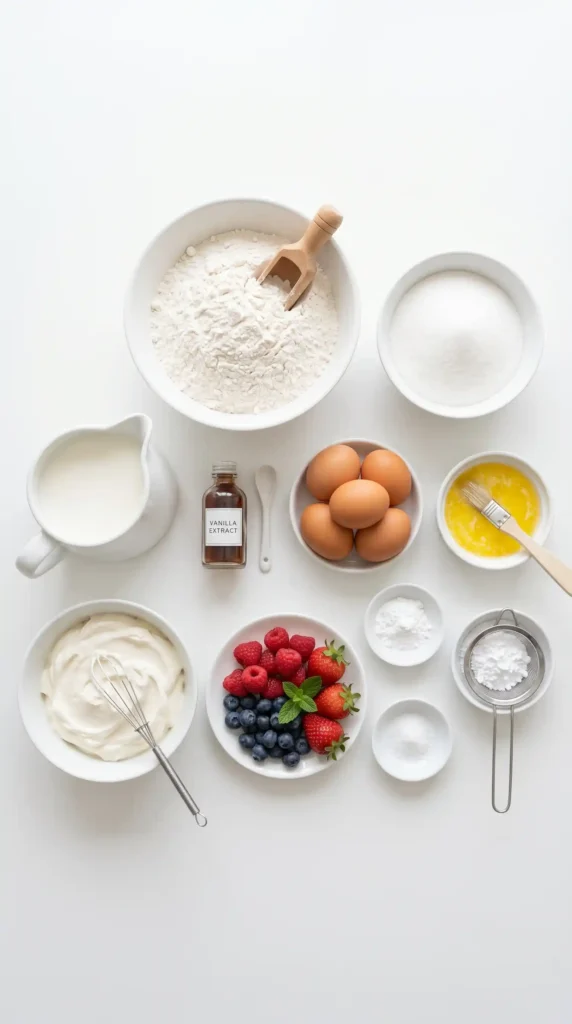
Clean, simple, and probably already in your pantry. Here is what you need to make one 9-inch round sponge cake that serves 8 to 10 people comfortably:
For the Cake
- 4 large eggs, room temperature
- 200 g (1 cup) caster sugar or fine granulated sugar
- 200 g (1 and 2/3 cups) all-purpose flour, sifted
- 200 g (3/4 cup plus 2 tbsp) unsalted butter, melted and cooled slightly
- 2 teaspoons pure vanilla extract
- 2 teaspoons baking powder
- 1/4 teaspoon salt
- 3 tablespoons whole milk, room temperature
Optional Finishing
- Powdered sugar for dusting
- Whipped cream and fresh berries for serving
- Jam for a classic Victoria-style filling if splitting into layers
How to Make Vanilla Sponge Cake: Every Step Explained
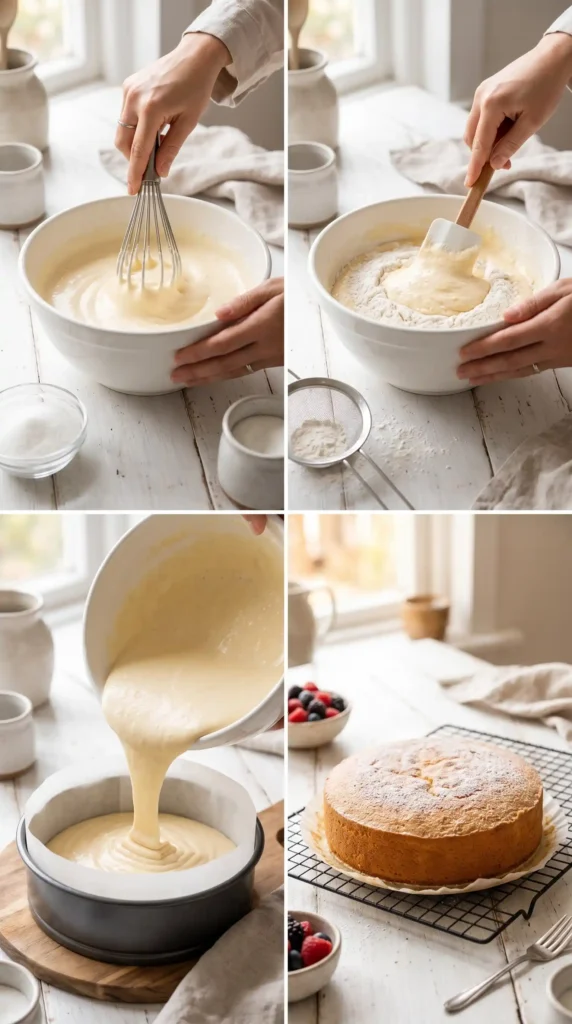
Let us work through this together from start to finish. I am going to be thorough here because a few small decisions at each stage make the difference between a flat, dense sponge and one that springs back beautifully when you press it. Follow closely and you will get it right on your very first try.
Step 1: Prepare Your Tin and Preheat the Oven
Preheat your oven to 175 degrees Celsius or 350 degrees Fahrenheit. Grease a 9-inch round cake tin generously with butter or nonstick spray. Line the bottom with a circle of parchment paper, then grease the parchment too. This double protection ensures the cake releases cleanly without sticking to any surface.
While the oven heats, take your eggs, butter, and milk out of the refrigerator if you have not done so already. Room temperature ingredients blend together more evenly and produce a smoother batter. Cold eggs in particular can cause the batter to split and look curdled, which affects the final texture.
Step 2: Beat the Eggs and Sugar
This is the most important step in the entire recipe. Place the eggs and caster sugar in a large mixing bowl. Use a hand mixer or stand mixer fitted with the whisk attachment and beat on high speed for 6 to 8 full minutes. Yes, that long. Set a timer if you need to.
The mixture is ready when it has tripled in volume, turned very pale and creamy in color, and falls from the beaters in a thick ribbon that holds on the surface for about 3 seconds before sinking back in. This stage is called the ribbon stage and it is your indicator that enough air has entered the mixture.
Do not rush this step by stopping at 3 or 4 minutes. An under-beaten mixture means fewer air bubbles, which means a denser, flatter sponge. The extra time spent here is the single biggest factor in getting that light, cloud-like texture that makes a great Vanilla Sponge Cake so memorable.
Step 3: Add the Vanilla Extract
Add the vanilla extract to the beaten egg and sugar mixture and fold it in gently with a rubber spatula using a single sweeping motion. Do not beat it in with the mixer at this point. The batter is fragile after all that whipping and aggressive stirring can start to knock out the air you just spent 8 minutes building.
Step 4: Sift and Fold in the Flour
Sift the flour, baking powder, and salt together over the beaten egg mixture. Do this in three separate additions rather than all at once. After each addition, fold gently with a large rubber spatula using slow, deliberate strokes that sweep from the bottom of the bowl up and over the top.
The folding motion should be confident but unhurried. Think of it as turning the batter over itself rather than stirring through it. Each fold incorporates the flour while keeping as much of the air intact as possible. After the last addition of flour there should be no visible dry streaks but the batter should still look light and airy, not dense.
Resist the urge to stir aggressively when you spot a flour streak. One or two extra gentle folds will take care of it without deflating the batter. Overmixing at this stage is the most common reason home bakers end up with a Vanilla Sponge Cake that turns out flat and slightly chewy instead of tender.
Step 5: Incorporate the Butter and Milk
Pour the melted, cooled butter around the edge of the batter bowl rather than directly into the center. This helps it incorporate more gently. Fold it in with the same gentle motion, about 8 to 10 slow strokes. Then add the milk and fold again for another 5 or 6 strokes until the batter looks smooth and uniform.
The butter should be completely melted and cooled to just above room temperature before you add it. Hot butter will cook the eggs and deflate the batter immediately. A good test is to dip your wrist near the melted butter — it should feel warm but comfortable, not hot :/
Step 6: Pour the Batter and Bake
Pour the finished batter into the prepared cake tin. Use a spatula to gently guide it toward the edges and smooth the surface level. Tap the tin very lightly on the counter once to settle any large air pockets near the bottom. Do not tap it hard or you knock out the very air you worked so hard to keep.
Slide the tin onto the center rack of your preheated oven and bake for 30 to 35 minutes. Do not open the oven door before the 25-minute mark. Opening it early causes a rush of cold air that can make the sponge sink in the center before it has had a chance to set.
The cake is ready when it looks golden on top, has pulled slightly away from the edges of the tin, and springs back immediately when you press the center gently with one finger. A toothpick inserted into the center should come out completely clean with no wet batter clinging to it.
Step 7: Cool the Cake Properly
Remove the tin from the oven and set it on a wire cooling rack. Leave the cake in the tin for 10 minutes. Then run a thin knife around the edge, place a wire rack on top of the tin, and flip the whole thing over to release the cake. Peel off the parchment paper and flip the cake right-side up again.
Let the Vanilla Sponge Cake cool completely before slicing, filling, or dusting with powdered sugar. Cutting into a warm sponge compresses the crumb and ruins the texture. Wait at least 45 minutes. The patience is genuinely worth it. A fully cooled sponge slices cleanly, holds its shape, and tastes significantly better than one that is still warm inside.
Tips That Make a Real Difference
- Use caster sugar rather than coarse granulated sugar. The finer crystals dissolve faster and produce a smoother batter.
- Sift the flour every single time. Even a small amount of flour clumping together can create dense pockets in the sponge.
- Beat the eggs and sugar next to the clock. Undertiming this step is the most common mistake beginners make.
- Fold, never stir. Every unnecessary stir after the flour goes in costs you air and therefore costs you lift.
- Cool completely before you cut. This is not optional. A warm sponge tears and compresses.
Ways to Serve Your Vanilla Sponge Cake
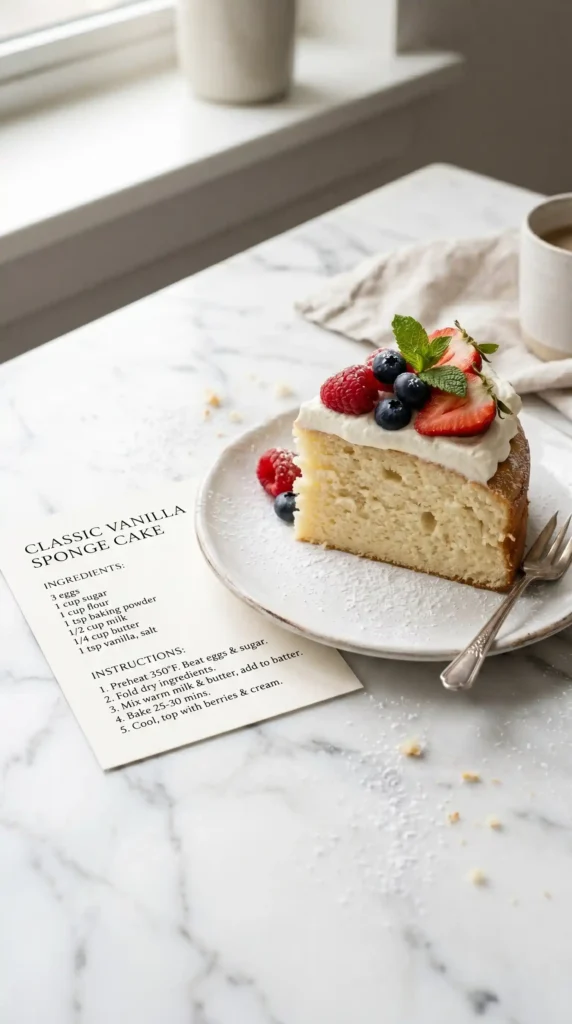
The beauty of a Vanilla Sponge Cake is how many directions you can take it. The cake itself is a blank canvas with enough personality to shine on its own and enough neutrality to carry virtually any topping or filling beautifully.
- Dust with powdered sugar and serve with a bowl of whipped cream and fresh strawberries
- Split the layers and fill with raspberry or strawberry jam plus freshly whipped cream for a classic Victoria sponge
- Top with a simple vanilla buttercream and birthday candles for the most reliable celebration cake in existence
- Slice and layer with pastry cream and fresh fruit for a casual trifle that looks far more impressive than the effort involved
- Serve slightly warm with a drizzle of warm custard for a simple, comforting winter dessert
Why a Well-Made Vanilla Sponge Cake Is So Hard to Resist
Have you ever stopped to think about why vanilla is still the most popular cake flavor despite thousands of alternatives existing? It works because it is familiar in the best possible way. The warm, slightly sweet, floral aroma of pure vanilla extract triggers something genuinely comforting in almost everyone.
Add a light, springy crumb and a golden crust that gives way with almost no resistance when you press it, and you have a sensory experience that richer, more elaborate cakes often fail to deliver. Complexity has its place. But sometimes simplicity done perfectly is the most impressive thing of all.
This is exactly why a great Vanilla Sponge Cake never goes out of fashion. It does not try to do too much. It delivers softness, fragrance, and a gentle sweetness with complete confidence. That restraint is what makes people keep coming back for another slice, and then another.
Frequently Asked Questions
Why did my sponge cake turn out dense and flat?
Dense, flat sponge almost always traces back to one of two causes: the eggs and sugar were not beaten long enough, or the flour was folded in too aggressively. Both reduce the air in the batter. Beat until you hit the ribbon stage, and fold with a light, slow hand every single time.
Can I make this recipe without a mixer?
You can, but it takes serious effort. Beating eggs and sugar to the ribbon stage by hand with a whisk takes 10 to 15 minutes of vigorous whisking. It is completely doable and some bakers prefer it. Just make sure you build genuine volume before you stop, not just a slightly frothy mixture.
Can I use self-rising flour instead of all-purpose?
Yes. If you use self-rising flour, simply omit the baking powder and salt from the recipe since self-rising flour already contains both. FYI, the texture will be very slightly different but the result is still a good sponge. All-purpose flour gives you a bit more control over the final lift.
How do I stop my sponge cake from sinking in the middle?
A sunken center usually means the cake came out of the oven too early or the oven door opened too soon. Always wait until the 25-minute mark before checking. Test with both the spring test and a toothpick before removing. If the toothpick comes out wet, give it 5 more minutes.
How long does Vanilla Sponge Cake stay fresh?
An unfilled vanilla sponge stays fresh at room temperature in an airtight container for up to 3 days. Once filled with cream or jam it should go into the refrigerator and tastes best within 24 hours. You can also freeze unfilled, fully cooled sponge layers for up to 2 months.
Bake It Once and It Becomes Your Go-To
A great Vanilla Sponge Cake is one of those things you make once, get right, and then find yourself making again and again. It fills the house with the best possible smell, produces something genuinely beautiful from a very short ingredient list, and tastes the way a proper homemade cake should.
Once you understand the two key moments — beating the eggs properly and folding the flour carefully — the rest falls into place naturally. The whole process feels intuitive after the first batch. By the third or fourth time you make it, your hands know exactly what the batter should look and feel like at each stage. So preheat that oven, get those eggs to room temperature, and start beating. Your kitchen is about to smell wonderful. And yes, you absolutely deserve a slice while it is still just warm enough to melt a little whipped cream
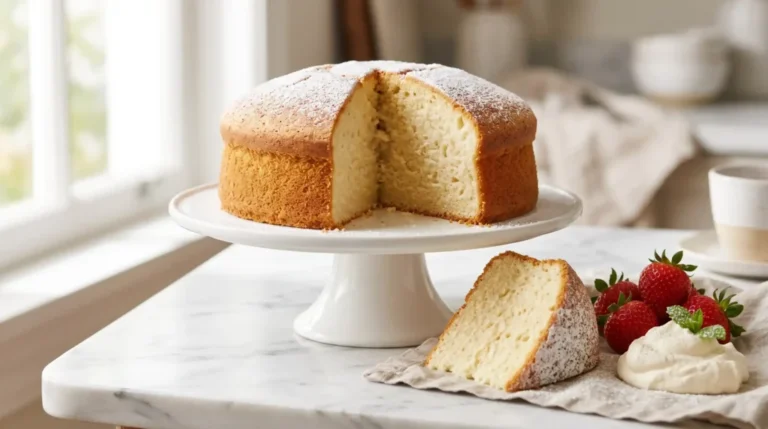
Vanilla Sponge Cake
Ingredients
Method
- Preheat the oven to 175°C (350°F). Grease a 9-inch round cake tin with butter or nonstick spray and line with parchment paper.
- Let your eggs, butter, and milk come to room temperature.
- In a large mixing bowl, beat the eggs and caster sugar on high speed for 6 to 8 minutes until thick and pale.
- Gently fold in the vanilla extract.
- Sift the flour, baking powder, and salt into the mixture in three additions, folding gently after each addition.
- Incorporate the melted butter around the edges of the bowl, followed by the milk, folding gently until smooth.
- Pour the batter into the prepared cake tin, smooth the surface, and tap lightly to remove air pockets.
- Bake for 30 to 35 minutes. Do not open the oven before 25 minutes.
- The cake is done when golden, pulls away from the edges, and springs back when pressed.
- Let the cake cool in the tin for 10 minutes, then transfer to a wire rack to cool completely for at least 45 minutes.



