Store-bought popsicles contain artificial flavors and too much sugar. These Pineapple Coconut Popsicles deliver tropical paradise with real fruit and coconut cream for frozen treats that actually taste like vacation. They’re basically edible sunshine.
I started making these during a brutal heatwave when I wanted something refreshing that wasn’t garbage. Now I keep my freezer stocked because they’re healthier than ice cream and infinitely more delicious than chemical-laden store pops.
Prep Time: 10 minutes
Freezing Time: 4-6 hours
Total Time: 4-6 hours 10 minutes
Servings: 8-10 popsicles
Why This Recipe Works
Here’s what makes these popsicles special—fresh pineapple provides natural sweetness and tropical flavor. No artificial anything needed.
The coconut cream creates creamy texture. Makes these taste indulgent despite being basically fruit.
The combination is classic piña colada without alcohol. Family-friendly tropical treat.
What Makes Homemade Better
Ingredient Control
You decide exactly what goes in. No high-fructose corn syrup or weird stabilizers.
Real fruit provides vitamins and fiber. These actually have nutritional value.
Adjust sweetness to preference. Make them as sweet or tart as you like.
Flavor Quality
Fresh pineapple tastes completely different from artificial pineapple flavor. The difference is staggering.
Coconut cream provides authentic coconut taste. Not the fake coconut of commercial popsicles.
IMO, once you make homemade popsicles, store-bought tastes like flavored ice. There’s no comparison.
Ingredients You’ll Need
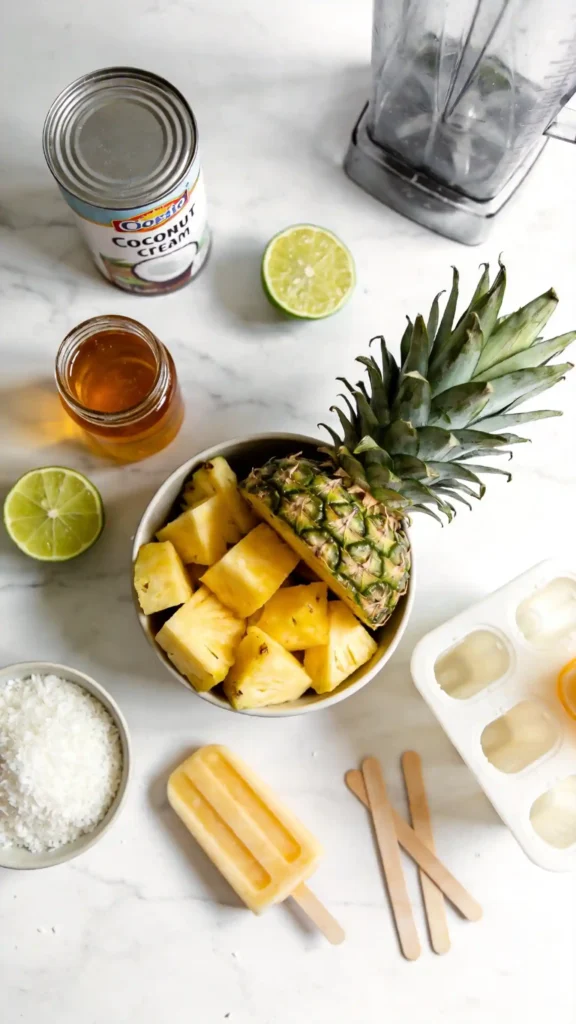
For the Popsicles
These create perfect tropical balance. Fresh pineapple is essential.
- 2 cups fresh pineapple chunks (about 1/2 medium pineapple)
- 1 can (13.5 oz) coconut cream
- 1/4 cup honey or maple syrup
- 1 tablespoon lime juice
- 1/4 cup shredded coconut (optional)
- Pinch of salt
Optional Add-Ins
These variations create different flavors. All work beautifully.
- 1/2 cup mango chunks
- 1/4 teaspoon vanilla extract
- 2 tablespoons rum extract for virgin piña colada flavor
- Fresh mint leaves
Equipment Needed
You need popsicle molds and blender. Simple setup.
- Popsicle molds (8-10 depending on size)
- Popsicle sticks
- Blender
- Measuring cups
- Rubber spatula
- Small funnel (optional but helpful)
Choosing Pineapple
Selecting Ripe Fruit
Choose pineapple that smells sweet at bottom. Strong fragrance indicates ripeness.
The skin should be golden-yellow. Green indicates underripe.
Pull leaf from top. If it comes out easily, pineapple is ripe.
Press gently. Should have slight give without being mushy.
FYI, underripe pineapple creates sour popsicles. Choose wisely.
Fresh vs. Frozen
Fresh pineapple tastes best. The flavor is brighter and more complex.
Frozen pineapple chunks work in pinch. Thaw completely before blending.
Canned pineapple is too watery. Fresh or frozen only.
Preparing Pineapple
Cutting Technique
Cut top and bottom off pineapple. Stand upright on cutting board.
Slice down sides to remove skin. Cut deep enough to remove eyes.
Quarter pineapple lengthwise. Cut out tough core from each quarter.
Chop flesh into chunks. About 1-inch pieces for easier blending.
You need 2 cups chunks total. Save extra for snacking.
Making the Mixture
Blending Base
Place pineapple chunks in blender. Add coconut cream.
The coconut cream should be thick and creamy. Shake can before opening.
Add honey or maple syrup. Start with 1/4 cup—taste and adjust.
Add lime juice and pinch of salt. These enhance flavors.
Blending Process
Blend on high speed until completely smooth. About 30-60 seconds.
Stop and scrape sides halfway through. Ensures everything incorporates.
The mixture should be thick and creamy. Like smoothie consistency.
Taste and adjust sweetness if needed. Add more honey tablespoon at a time.
If too thick, add coconut milk or water tablespoon at a time.
If adding shredded coconut, pulse in at end. Creates texture.
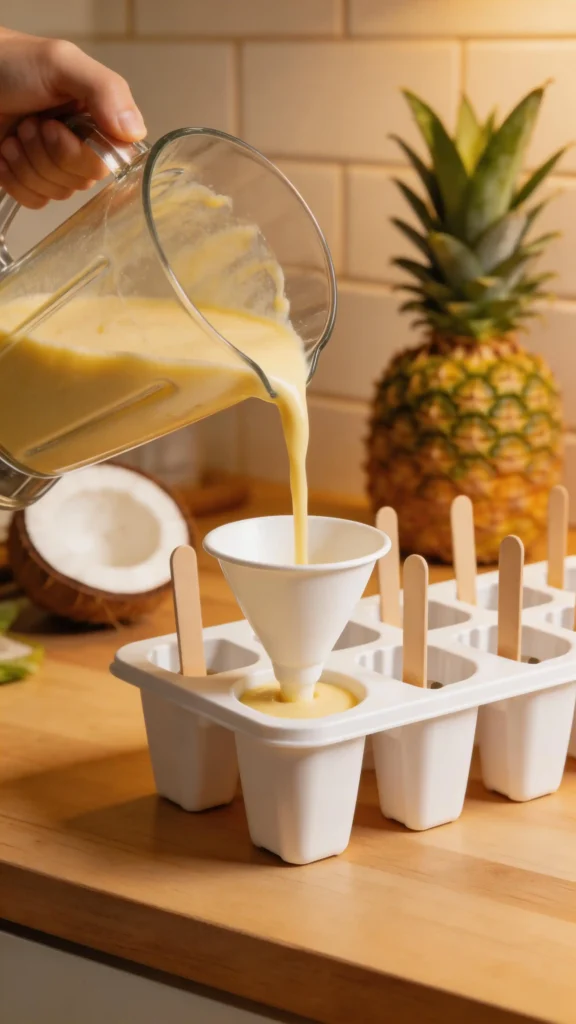
Filling Molds
Pouring Technique
Pour mixture into popsicle molds. Leave 1/4 inch space at top.
Liquid expands when frozen. Too full creates overflow mess.
Use funnel for clean filling. Or pour from measuring cup with spout.
Tap molds on counter gently. Releases air bubbles.
Adding Sticks
Insert popsicle sticks according to mold design. Some molds have tops with stick holes.
If molds don’t have tops, freeze 45 minutes first. Insert sticks when mixture is slushy.
The partially frozen mixture holds sticks upright. Otherwise they float or tip.
Make sure sticks are centered. Crooked sticks create uneven popsicles.
Freezing Process
Initial Freeze
Place filled molds in freezer on flat surface. Keep level to prevent spilling.
Freeze for minimum 4-6 hours until completely solid. Overnight is best.
Don’t open freezer constantly. Temperature fluctuations create ice crystals.
The popsicles should be rock-hard when ready. Slightly soft means not done.
Testing Doneness
Gently pull stick. If popsicle moves, it’s ready to unmold.
If stick comes out without popsicle, needs more freezing time.
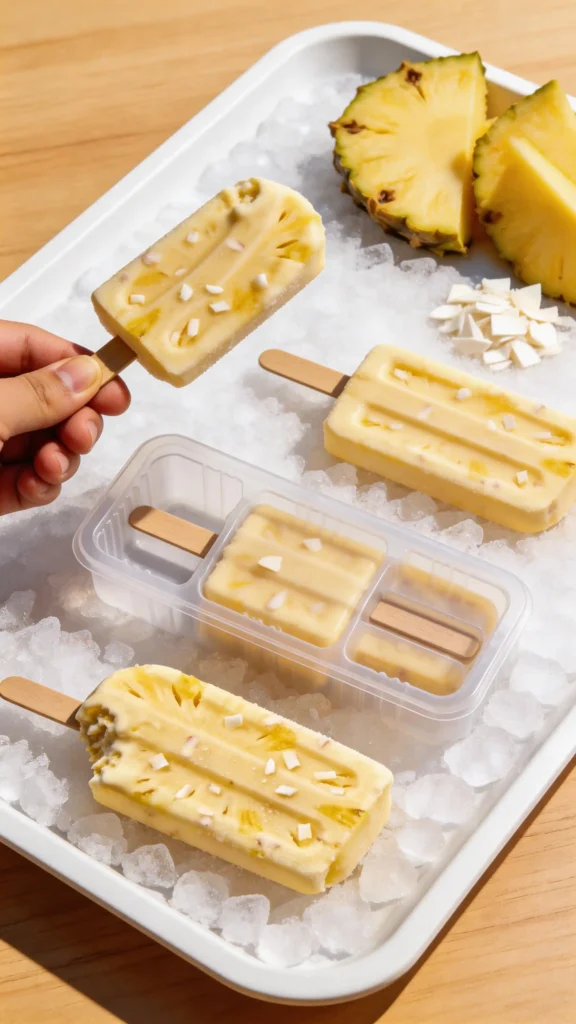
Unmolding Tips
Release Technique
Run mold under warm water for 15-20 seconds. Not hot—just warm.
The outer layer melts slightly. Creates gap between popsicle and mold.
Gently pull stick while wiggling slightly. Popsicle should release cleanly.
If stuck, run under warm water few more seconds.
Don’t force. Forcing breaks popsicle off stick.
Immediate Serving
Serve immediately after unmolding. They melt quickly once out.
Or wrap individually and return to freezer. Keeps them ready to grab.
Storage Tips
Freezer Storage
Store in airtight container or wrap individually in plastic wrap. Prevents freezer burn.
Label with date. Best within 2 months for optimal flavor.
The popsicles stay good longer but quality degrades over time.
Individual Wrapping
Wrap each popsicle in plastic wrap or parchment paper. Makes grabbing easy.
Store wrapped popsicles in freezer bag. Keeps them organized.
Kids can grab their own. No adult supervision needed.
Variations Worth Trying
Mango Pineapple
Replace 1 cup pineapple with mango chunks. Creates tropical blend.
Strawberry Coconut
Use strawberries instead of pineapple. Creates pink popsicles.
Layered Look
Make pineapple layer and coconut layer separately. Pour in layers for striped effect.
Virgin Piña Colada
Add 1-2 tablespoons rum extract. Creates cocktail flavor without alcohol.
Chocolate Drizzle
Dip frozen popsicles in melted chocolate. Let set before eating.
Common Mistakes to Avoid
Using Underripe Pineapple
Creates sour, unpleasant popsicles. Always use ripe fruit.
Overfilling Molds
Causes overflow when freezing. Leave space at top.
Not Blending Enough
Leaves chunks that create icy texture. Blend until smooth.
Inserting Sticks Too Early
Sticks float or tip in liquid. Wait until slushy.
Why These Beat Store-Bought
Store-bought tropical popsicles cost $5-7 per box. Homemade costs about $6 for 10.
You control sugar content. These have less than half commercial versions.
Real fruit provides actual nutrition. Not just flavored sugar water.
The flavor is incomparably better. Fresh ingredients make massive difference.
Perfect for Summer
These cool you down on hot days. Refreshing without being heavy.
Great for pool parties or barbecues. Everyone loves tropical flavors.
Kids think they’re getting treat. You know they’re getting fruit.
Make huge batch. They keep well and disappear quickly.
Budget-Friendly Treat
One pineapple costs $3-4. Coconut cream adds $2-3. Total about $6 for 10 popsicles.
That’s 60 cents per popsicle. Store-bought costs $1-2 each.
Use pineapple on sale. Maximizes savings.
Kid-Approved
Children love these. Tropical flavor is universally appealing.
Let them help make them. Kids excited about food they helped create.
Healthier than juice boxes or sodas. Actual fruit content.
FAQ Section
Can I use coconut milk instead of coconut cream?
Yes, but texture will be icier and less creamy. Coconut cream is thicker and creates better popsicles.
Why are my popsicles icy instead of creamy?
Not enough fat content or blended too coarsely. Use coconut cream and blend very smooth.
Can I make these without honey?
Yes. Use maple syrup, agave, or skip sweetener if pineapple is very ripe and sweet.
How do I prevent ice crystals?
Blend very smooth, freeze quickly at proper temperature, and store in airtight container.
Can I add alcohol for adults?
Yes. Add 2-3 tablespoons rum or vodka. Note: alcohol prevents complete freezing, so texture will be softer.

Pineapple Coconut Popsicles: Tropical Vacation on a Stick
8
popsicles110
kcal4
hours10
minutesPineapple coconut popsicles blend fresh pineapple with coconut cream for tropical frozen treats. Blend pineapple chunks, coconut cream, honey, lime juice until smooth, pour into molds, insert sticks, freeze 4-6 hours. Creamy, naturally sweet popsicles ready in under 6 hours with real fruit flavor.
Ingredients
- Popsicles:
2 cups fresh pineapple chunks
1 can (13.5 oz) coconut cream
1/4 cup honey or maple syrup
1 tablespoon lime juice
1/4 cup shredded coconut (optional)
Pinch salt
- Optional:
Mango, vanilla, rum extract, mint
Directions
- Choose ripe pineapple (smells sweet, golden skin)
- Cut top and bottom off pineapple
- Slice down sides to remove skin
- Quarter lengthwise, remove core
- Chop into 1-inch chunks
- Measure 2 cups chunks
- Shake coconut cream can before opening
- Place pineapple in blender
- Add coconut cream
- Add honey or maple syrup
- Add lime juice and salt
- Blend on high 30-60 seconds until smooth
- Stop, scrape sides halfway
- Taste, adjust sweetness if needed
- Add shredded coconut if using, pulse briefly
- Pour into popsicle molds (leave 1/4 inch space)
- Tap molds to release bubbles
- Insert sticks (or freeze 45 minutes first if no tops)
- Place molds flat in freezer
- Freeze 4-6 hours until solid
- Run under warm water 15-20 seconds to unmold
- Gently pull stick while wiggling
- Serve immediately or wrap individually
- Store wrapped in freezer up to 2 months
Final Thoughts
There you have it—everything you need to make incredible Pineapple Coconut Popsicles that deliver tropical vacation in frozen form. This recipe proves homemade beats store-bought by miles.
The combination of fresh pineapple, creamy coconut, and simple technique creates summer perfection. Make-ahead capability means always having treats ready. So grab that pineapple and fire up that blender—your tastiest, healthiest frozen treat is about to happen.