Some dinners are functional, and some dinners feel like a reward for surviving the week. Queso Enchiladas fall firmly into the second category. I made these on a night I had absolutely no motivation to cook, and my family still talks about them.
If you want something creamy, cheesy, and genuinely comforting without spending your whole evening in the kitchen, this recipe delivers. Rotisserie chicken and a gooey queso sauce do most of the heavy lifting. IMO, this is one of the easiest ways to turn a weeknight into something worth looking forward to.
Why These Queso Enchiladas Work So Well
This recipe leans on shortcuts that don’t sacrifice flavor. Rotisserie chicken skips the whole cooking-from-scratch step, and Velveeta melts into an ultra-smooth queso sauce without any fuss. Together, they create a filling and topping that taste far more impressive than the effort involved.
They also come together in about 40 minutes, start to finish. Have you ever wanted cheesy, restaurant-style enchiladas without actually going out or ordering delivery? This recipe is exactly that answer. It’s kid-approved, easy to customize, and forgiving if you’re not precise with measurements.
The queso sauce deserves its own spotlight here. It blankets every enchilada in that gooey, melty goodness that makes people go back for seconds. FYI, this sauce alone might convince you to make a double batch just for dipping chips later.
Servings and Time You’ll Need
This recipe makes 8 enchiladas, which works out to about 4 generous servings for a family dinner. Here’s the time breakdown:
- Prep time: 20 minutes
- Cook time: 20 minutes
- Total time: About 40 minutes
That’s less time than most people spend scrolling through delivery apps trying to decide what to order.
What You’ll Need for Queso Enchiladas
Most of these ingredients are easy to grab at any grocery store, and several probably live in your fridge already. Here’s the full list.
- Rotisserie chicken, shredded – 3 cups
- Jalapeño pepper, diced – 1
- Taco seasoning – 2 tablespoons
- Sour cream – 1/2 cup, plus more for garnish
- Sharp cheddar cheese, shredded – 1 cup
- Monterey Jack cheese, shredded – 1 cup
- Green chilies, canned and drained – 4 ounces
- Queso Blanco Velveeta – 16 ounces, cubed
- Diced tomatoes with green chilies, canned – 10 ounces
- Flour tortillas – 8
Optional garnishes like fresh tomatoes, extra jalapeño, cilantro, and additional sour cream add a nice fresh contrast on top.
How to Make Queso Enchiladas (Step by Step)
Step 1: Preheat the Oven and Prep Your Dish
Set your oven to 400°F, which is hotter than a lot of casserole-style recipes call for. This higher heat helps everything bake through quickly while still getting that bubbly, golden top. Give the oven plenty of time to fully preheat before the enchiladas go in.
While it heats, lightly coat a 9×13-inch baking dish with nonstick cooking spray. This small step makes cleanup significantly easier once dinner is done. Set the dish aside so it’s ready the moment your enchiladas are assembled.
Step 2: Build the Chicken Filling
In a large mixing bowl, combine your shredded rotisserie chicken with the diced jalapeño and taco seasoning. Stir everything together so the seasoning coats the chicken evenly instead of clumping in one spot. This base builds the savory foundation for your filling.
Add the sour cream next, followed by the shredded cheddar and Monterey Jack cheeses. Stir in the drained green chilies as well, mixing until everything looks evenly distributed throughout the bowl. You want every bite of filling packed with flavor, not just plain shredded chicken.
Set this mixture aside once it’s fully combined. It should look creamy, cheesy, and slightly speckled with jalapeño and chilies. This filling is what makes these enchiladas taste far richer than a basic chicken filling would.
Step 3: Melt the Queso Sauce
Grab a medium saucepan and set it over medium heat on the stove. Add your cubed Velveeta along with the undrained can of diced tomatoes with green chilies. Cubing the cheese first helps it melt faster and more evenly than one large block would.
Stir the mixture gently and consistently as it heats, since Velveeta can stick and scorch if left alone too long. Keep stirring until the cheese fully melts into a smooth, creamy sauce with no lumps remaining. This should take several minutes of steady attention.
Once it looks glossy and fully combined, remove the saucepan from the heat. This queso sauce will do double duty later, both mixed into assembly and poured generously over the top. Set it aside somewhere warm while you move on to rolling the tortillas.
Step 4: Roll and Fill Each Tortilla
Lay one flour tortilla flat on a clean countertop or cutting board. Spoon about half a cup of your chicken filling into the center, spreading it slightly in a line rather than piling it in one spot. This makes rolling much easier and keeps the filling evenly distributed.
Roll the tortilla up tightly around the filling, tucking the edges in as you go. Place it seam-side down into your prepared baking dish so it holds its shape while baking. Repeat this process with each remaining tortilla until your dish is completely filled.
Arrange the rolled tortillas snugly next to each other in the dish. This keeps them from unrolling during baking and helps the queso sauce coat everything evenly once poured over the top. Take a moment to make sure no gaps are left uncovered.
Step 5: Pour the Queso Sauce Over Everything
Take your warm queso sauce and pour it evenly across all the rolled tortillas. Use a spatula or the back of a spoon to spread it out so every enchilada gets its fair share of that cheesy coating. Don’t rush this step; even coverage matters for consistent flavor in every bite.
Make sure the sauce reaches the edges of the dish, not just the center rolls. Those edge pieces deserve just as much cheesy goodness as the middle ones. Once everything looks generously covered, your dish is ready for the oven.
Step 6: Bake Until Bubbly and Golden
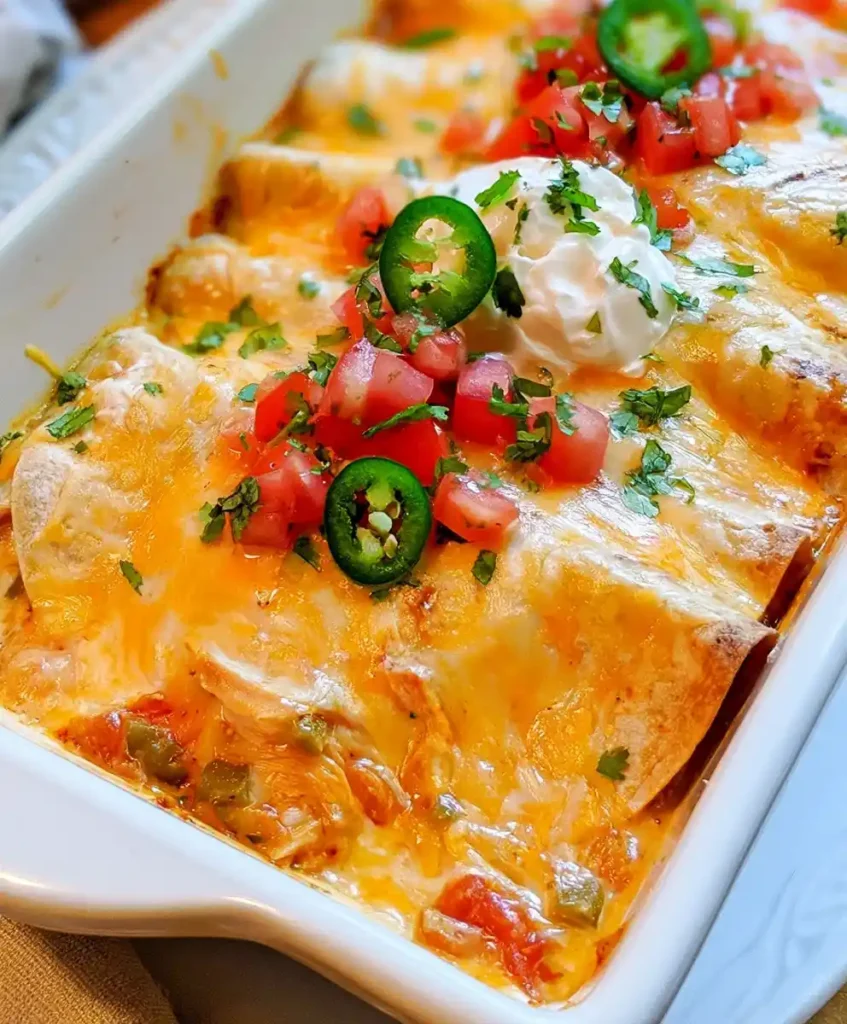
Place the assembled dish into your preheated oven, uncovered, and bake for 15 to 20 minutes. You’re watching for bubbling cheese around the edges and a slightly golden color on top. Every oven runs a little differently, so start checking around the 15-minute mark.
The smell alone will pull everyone toward the kitchen well before it’s finished. Once the cheese looks bubbly and set, pull the dish out and let it rest for a few minutes before serving. This short rest makes slicing and serving noticeably cleaner.
Step 7: Garnish and Serve
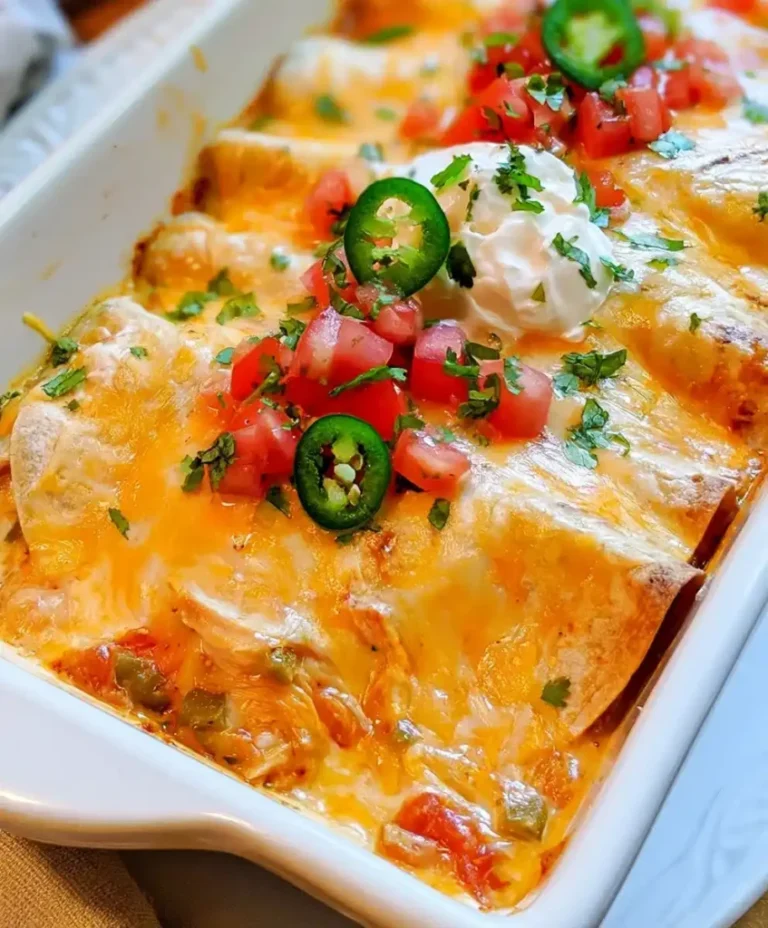
Top your finished Queso Enchiladas with any garnishes you like, such as fresh diced tomatoes, extra jalapeño, chopped cilantro, or a dollop of sour cream. These fresh touches add brightness against all that rich, melted cheese. Serve them warm, straight from the baking dish.
Scoop out generous portions so everyone gets a hearty enchilada covered in that gooey queso sauce. This dish disappears fast, so don’t be surprised if seconds get requested before you even sit down yourself.
Tips for Getting It Right Every Time
A few small habits make a real difference in how these enchiladas turn out. Keep these in mind while cooking:
- Roast your jalapeños beforehand for a deeper, smokier flavor.
- Mix different cheeses for extra depth instead of sticking to just one.
- Prep the filling and sauce ahead of time to speed up dinner later.
- Spray your baking dish thoroughly for easy cleanup and removal.
- Let the dish rest a few minutes before serving for cleaner slices.
Easy Variations to Try
This recipe is flexible enough to fit whatever you’re craving or have on hand. Try one of these swaps next time:
- Black beans, sautéed bell peppers, or zucchini for a vegetarian version.
- Extra jalapeños or diced serrano peppers for more heat.
- Pepper jack or Gouda in place of cheddar for a different flavor profile.
- Corn tortillas instead of flour for a gluten-free option.
- Cream cheese stirred into the queso sauce for an even richer texture.
What to Serve With Queso Enchiladas
Round out your meal with a few classic sides that complement the rich, cheesy flavors here. Here’s what works well:
- Mexican rice for a heartier, complete meal.
- Fresh guacamole to balance the richness.
- A crisp green salad for something light on the side.
- Lime wedges squeezed over the top for a zesty finish.
Frequently Asked Questions
Can I use other proteins besides chicken in these enchiladas? Absolutely, shredded beef, ground turkey, or refried beans all work well as substitutes. Adjust the seasoning slightly depending on which protein you choose.
What if I don’t have Velveeta cheese? Cream cheese or a mix of shredded cheeses can work instead, though the texture will differ slightly. Adding a splash of milk helps recreate that creamy queso consistency.
Can I make Queso Enchiladas ahead of time? Yes, assemble everything up to the baking step, then cover and refrigerate. Bake as directed when you’re ready, adding a few extra minutes since it’ll start out cold.
What sides pair well with Queso Enchiladas? Refried beans, rice, or a fresh corn salad all work nicely alongside this dish. Chips and salsa make a great appetizer to round things out too.
Are these enchiladas freezer-friendly? Yes, assemble them fully and wrap tightly with foil or plastic wrap before freezing. Thaw overnight in the fridge before baking as directed.
Why is my queso sauce grainy instead of smooth? This usually happens when the cheese overheats or isn’t stirred consistently while melting. Keep the heat at medium and stir often for a silky, lump-free sauce.
Final Thoughts on These Queso Enchiladas
Queso Enchiladas take simple, accessible ingredients and turn them into a dinner that feels genuinely special. The seasoned chicken filling and rich queso sauce work together in a way that satisfies picky eaters and cheese lovers alike. It’s the kind of meal that earns repeat requests almost immediately.
Give this recipe a try the next time your week feels a little too long. Once that bubbling, cheesy dish comes out of the oven, you’ll understand exactly why it’s become a permanent fixture in my dinner rotation.
Queso Enchiladas
Ingredients
Method
- Preheat the oven to 400°F and coat a 9x13-inch baking dish with nonstick cooking spray.
- In a mixing bowl, combine shredded rotisserie chicken, diced jalapeño, and taco seasoning. Mix thoroughly.
- Add sour cream, sharp cheddar, Monterey Jack cheeses, and drained green chilies. Mix again until well combined.
- In a medium saucepan over medium heat, combine cubed Velveeta and undrained diced tomatoes. Stir consistently until smooth and creamy.
- Lay a flour tortilla flat and spoon half a cup of chicken filling into the center. Roll tightly and place seam-side down in the prepared baking dish.
- Repeat with remaining tortillas, arranging them snugly in the dish.
- Pour the warm queso sauce over the rolled tortillas, making sure it covers them evenly.
- Bake uncovered for 15-20 minutes until cheese is bubbly and slightly golden.
- Let rest for a few minutes before serving.
- Garnish with fresh toppings like diced tomatoes, jalapeños, cilantro, and sour cream before serving.