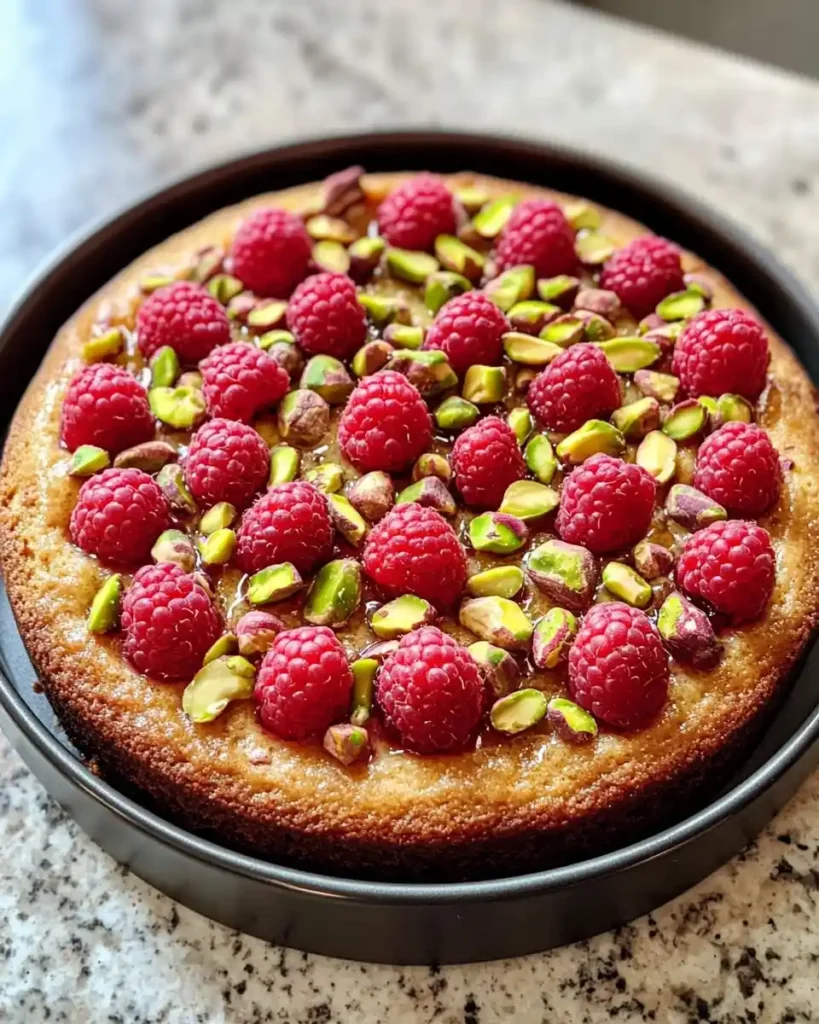
Some cakes disappear before they even cool. Raspberry Orange Pistachio Ricotta Cake belongs in that category. It bursts with fresh fruit, creamy ricotta, crunchy pistachios, and bright citrus flavor. I baked it for a weekend brunch once, and everyone asked for the recipe before they finished their slices.
I love recipes that look impressive without demanding professional baking skills. This cake checks every box. It feels elegant enough for celebrations but simple enough for a relaxing Sunday afternoon. Have you ever wanted a dessert that makes people think you secretly attended pastry school?
The combination of juicy raspberries, fragrant orange zest, creamy ricotta, and crunchy pistachios creates something unforgettable. Every bite feels balanced instead of overly sweet. That balance keeps me coming back for another slice. Well, maybe another two slices, but who’s counting?
This Raspberry Orange Pistachio Ricotta Cake recipe works beautifully for birthdays, afternoon tea, baby showers, or family dinners. It also tastes fantastic with coffee. Honestly, coffee and cake solve more problems than most people admit.
Why You’ll Love Raspberry Orange Pistachio Ricotta Cake
This cake offers more than beautiful colors. Every ingredient contributes something unique to the final result.
You’ll love it because it features:
- Moist ricotta cake texture
- Fresh raspberry flavor
- Bright orange aroma
- Crunchy roasted pistachios
- Simple preparation
- Beautiful presentation
The flavors never compete with each other. Instead, they work together like old friends sharing dessert.
Recipe Overview
Preparation Time: 20 minutes
Baking Time: 40–45 minutes
Cooling Time: 20 minutes
Total Time: About 1 hour 25 minutes
Servings: 12 slices
Ingredients
Cake Batter
- 1/2 cup unsalted butter, softened
- 3/4 cup granulated sugar
- 1 cup whole milk ricotta cheese
- 3 large eggs
- 1 teaspoon vanilla extract
- Zest of 1 large orange
- 1½ cups all-purpose flour
- 1½ teaspoons baking powder
- 1/2 teaspoon salt
- 1/2 cup chopped pistachios
- 1 cup fresh raspberries
Optional Orange Glaze
- 1/2 cup powdered sugar
- 2 tablespoons fresh orange juice
Garnish
- Extra chopped pistachios
- Fresh raspberries
- Orange zest
Kitchen Equipment
You probably already own everything you need.
Prepare these tools before starting:
- 9-inch round cake pan
- Large mixing bowl
- Medium mixing bowl
- Electric mixer or hand whisk
- Rubber spatula
- Measuring cups
- Measuring spoons
- Cooling rack
- Fine grater for orange zest
A little preparation saves time later. Nobody enjoys searching for measuring spoons with flour-covered hands.
Why These Ingredients Work So Well
Ricotta Cheese Creates Incredible Texture
Whole milk ricotta keeps the cake moist and tender.
Unlike heavy frostings or rich fillings, ricotta adds creaminess without making the cake feel heavy.
I tried cream cheese once instead. It tasted good, but ricotta delivered a softer crumb that I preferred.
Fresh Raspberries Add Natural Sweetness
Fresh raspberries create little bursts of juicy flavor.
Frozen berries also work well if you don’t thaw them first.
Have you noticed how raspberries make almost every dessert look fancy with almost no effort?
Orange Zest Brightens Every Bite
Fresh orange zest wakes up the entire cake.
The citrus aroma balances the sweetness perfectly.
Skip bottled orange flavoring whenever possible. Fresh zest wins every single time.
Pistachios Bring Crunch
Pistachios add texture that contrasts beautifully with the soft cake.
They also contribute a mild buttery flavor.
Plus, those green pieces make the cake look gorgeous. Nature really understood presentation.
Step-by-Step Raspberry Orange Pistachio Ricotta Cake Recipe
Step 1: Prepare the Oven
Preheat your oven to 350°F (175°C).
Grease a 9-inch round cake pan with butter.
Lightly dust it with flour or line the bottom with parchment paper.
Preparing the pan properly prevents frustrating sticking later.
Step 2: Mix the Dry Ingredients
Place the flour, baking powder, and salt into a medium bowl.
Whisk everything together until evenly combined.
This simple step spreads the baking powder evenly throughout the flour.
Small details often create the biggest improvements.
Step 3: Cream Butter and Sugar
Place the softened butter into a large mixing bowl.
Beat it until smooth.
Gradually add the sugar.
Continue beating for about four minutes until the mixture looks pale and fluffy.
Air enters the butter during this stage.
That trapped air helps produce a lighter cake.
Don’t rush this step.
Your mixer does most of the work anyway.
Step 4: Add the Ricotta
Add the ricotta cheese to the butter mixture.
Mix until completely smooth.
The batter should become creamy without looking runny.
High-quality ricotta makes a noticeable difference here.
I always choose whole milk ricotta because the texture feels richer.
Step 5: Add Eggs One at a Time
Crack one egg into the bowl.
Mix until fully combined.
Repeat with the remaining eggs.
Adding eggs gradually keeps the batter smooth.
Rushing this step sometimes causes the mixture to separate slightly.
A little patience rewards you with better texture.
Step 6: Add Vanilla and Orange Zest
Pour in the vanilla extract.
Add the freshly grated orange zest.
Mix gently until everything blends together.
The orange fragrance immediately fills the kitchen.
That’s usually the moment people wander into my kitchen asking what I’m baking.
Step 7: Combine Wet and Dry Ingredients
Gradually add the flour mixture.
Fold it gently into the batter using a spatula.
Mix only until no dry flour remains.
Avoid overmixing.
Too much stirring develops gluten, and gluten creates tougher cake.
Nobody dreams about chewy cake.
Step 8: Fold in Pistachios
Add the chopped pistachios.
Fold them carefully through the batter.
Distribute them evenly.
Each slice should contain plenty of crunchy bites.
Step 9: Add the Raspberries
Gently fold the raspberries into the batter.
Move slowly to keep the berries mostly whole.
A few broken berries create beautiful streaks throughout the cake.
Too many broken berries turn everything pink.
Although pink cake isn’t exactly tragic.
Step 10: Fill the Cake Pan
Transfer the batter into the prepared pan.
Spread it evenly with a spatula.
Tap the pan lightly on the counter.
This releases trapped air bubbles.
The smoother surface also helps the cake bake evenly.
Step 11: Bake the Cake
Place the cake into the center of the oven.
Bake for 40 to 45 minutes.
Check the cake after forty minutes.
Insert a toothpick into the center.
If it comes out clean or with a few moist crumbs, the cake is ready.
Every oven behaves differently.
Trust the toothpick more than the timer.
Step 12: Cool Properly
Remove the cake from the oven.
Allow it to cool inside the pan for ten minutes.
Carefully transfer it onto a cooling rack.
Cooling completely keeps the texture firm and prevents the glaze from melting.
FYI, patience actually pays off here.
Step 13: Prepare the Orange Glaze
Whisk powdered sugar with fresh orange juice.
Mix until smooth.
Adjust the consistency by adding a few extra drops of juice if needed.
The glaze should drizzle easily without becoming watery.
Step 14: Decorate the Cake
Drizzle the glaze over the cooled cake.
Sprinkle extra chopped pistachios across the top.
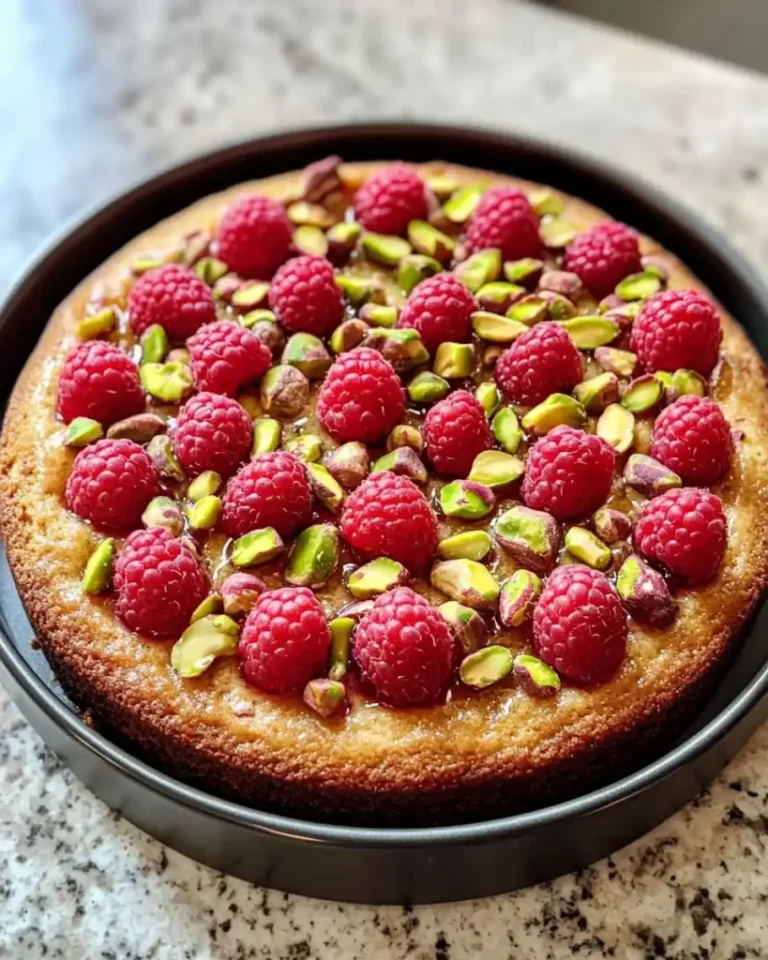
Finish with fresh raspberries and a little orange zest.
The finished cake looks elegant without requiring complicated decorating skills.
Honestly, it almost feels unfair how easy it looks.
Serving Suggestions
This Raspberry Orange Pistachio Ricotta Cake recipe tastes amazing on its own, but a few simple additions make it even better. I love serving it slightly warm because the ricotta stays wonderfully soft.
Pair it with one of these favorites:
- Fresh whipped cream
- Vanilla ice cream
- Greek yogurt
- Fresh raspberries
- Orange slices
- Hot coffee
- Earl Grey tea
- Cappuccino
Have you ever noticed how citrus desserts somehow taste even better with coffee? I never complain about that combination.
Storage Tips
One reason I keep making this cake involves how well it stores. The flavors actually become richer the next day.
Store the cake in an airtight container at room temperature for up to two days.
Refrigerate it for up to five days if your kitchen feels warm.
Bring refrigerated slices to room temperature before serving. The ricotta texture becomes softer and creamier.
You can also freeze individual slices for up to two months.
Wrap each slice tightly before freezing.
Thaw overnight inside the refrigerator before serving.
Easy Variations
Add More Citrus
Love bright flavors?
Mix in a little lemon zest with the orange zest.
The extra citrus creates an even fresher flavor.
Try Different Berries
Fresh blueberries work beautifully.
Blackberries also pair nicely with ricotta.
Strawberries create a sweeter version of this cake.
Every berry changes the personality of the dessert while keeping the same moist texture.
Add Chocolate
Fold in half a cup of white chocolate chips.
Orange and white chocolate create an incredibly smooth combination.
Dark chocolate also works if you prefer richer desserts.
Make It Gluten-Free
Replace the all-purpose flour with your favorite gluten-free flour blend.
Check the cake a few minutes earlier because gluten-free cakes sometimes bake differently.
Baking Tips for Success
Small details often separate good cakes from unforgettable ones.
Follow these simple tips:
- Use room-temperature ingredients
- Measure flour carefully
- Fold raspberries gently
- Don’t overmix the batter
- Bake on the center oven rack
- Cool completely before glazing
These habits improve texture every single time.
Common Mistakes to Avoid
Even experienced bakers occasionally rush through recipes.
Avoid these common mistakes:
- Using cold butter
- Overmixing the batter
- Crushing the raspberries
- Overbaking the cake
- Skipping the cooling time
- Using watery ricotta
Every one of these mistakes affects the final texture.
Why spend an hour baking only to rush the last few minutes?
Why Ricotta Makes This Cake Special
Many fruit cakes rely on sour cream or yogurt.
Ricotta creates something different.
Ricotta keeps the cake moist without making it heavy.
The texture feels almost like cheesecake while still behaving like a classic cake.
IMO, that’s exactly what makes this Raspberry Orange Pistachio Ricotta Cake recipe stand out.
Fresh vs Frozen Raspberries
People ask this question all the time.
Fresh raspberries create the prettiest slices.
Frozen raspberries work perfectly too.
Simply add them while frozen.
Never thaw them first because they release too much liquid.
That little trick keeps the batter from becoming overly wet.
Choosing the Best Pistachios
Use unsalted shelled pistachios whenever possible.
Lightly toasted pistachios provide even more flavor.
Chop them into medium pieces.
Tiny crumbs disappear inside the batter.
Huge chunks make slicing more difficult.
Finding the right balance gives every bite the perfect crunch.
Why Orange Zest Matters
Orange zest contains fragrant natural oils.
Those oils create much stronger flavor than orange juice alone.
Always zest the orange before cutting it.
Avoid the white pith because it tastes bitter.
Fresh zest transforms the cake into something bright and refreshing.
Perfect Occasions for This Cake
This recipe fits almost every celebration.
Serve it during:
- Birthday parties
- Easter brunch
- Mother’s Day
- Afternoon tea
- Baby showers
- Holiday dinners
- Weekend family desserts
- Summer picnics
The colorful raspberries make the cake look festive without extra decorating.
Nutritional Information
The values below represent one slice based on twelve servings.
- Calories: About 220
- Protein: 4 grams
- Fat: 10 grams
- Carbohydrates: 30 grams
- Sugar: 12 grams
- Fiber: 1 gram
These numbers may vary depending on ingredient brands and serving sizes.
Frequently Asked Questions
1. Can I make Raspberry Orange Pistachio Ricotta Cake one day ahead?
Yes. Many people actually prefer the flavor on the second day because the orange and raspberry flavors blend together beautifully.
2. Can I freeze Raspberry Orange Pistachio Ricotta Cake?
Absolutely. Wrap individual slices tightly and freeze them for up to two months. Thaw overnight before serving.
3. Can I use frozen raspberries?
Yes. Add frozen raspberries directly into the batter without thawing them first.
4. Can I replace ricotta cheese?
Yes. Cottage cheese blended until smooth or mascarpone both work well, although ricotta gives the lightest texture.
5. Why did my cake sink in the middle?
Overmixing, opening the oven too early, or underbaking usually causes the center to sink.
6. Can I add more pistachios?
Of course. Sprinkle extra chopped pistachios on top before baking or use them as garnish after glazing.
7. Do I need the orange glaze?
No. The cake tastes wonderful without it, but the glaze adds extra citrus flavor and a beautiful finish.
Final Thoughts
This Raspberry Orange Pistachio Ricotta Cake recipe combines creamy ricotta, juicy raspberries, fragrant orange zest, and crunchy pistachios into one incredibly satisfying dessert. It looks elegant, tastes fresh, and stays wonderfully moist for days. Bake it once, and don’t feel surprised when friends suddenly start inviting themselves over for coffee.
Raspberry Orange Pistachio Ricotta Cake
Ingredients
Method
- Preheat your oven to 350°F (175°C). Grease a 9-inch round cake pan with butter and lightly dust it with flour or line the bottom with parchment paper.
- Place the flour, baking powder, and salt into a medium bowl and whisk together until evenly combined.
- In a large mixing bowl, beat the softened butter until smooth. Gradually add the sugar and continue beating until pale and fluffy, about four minutes.
- Add the ricotta cheese to the butter mixture and mix until completely smooth.
- Add the eggs one at a time, mixing until fully combined after each addition.
- Pour in the vanilla extract and add the freshly grated orange zest, mixing gently until everything blends together.
- Gradually fold in the flour mixture into the batter using a spatula until no dry flour remains.
- Fold in the chopped pistachios carefully.
- Gently fold the raspberries into the batter while keeping them mostly whole.
- Transfer the batter into the prepared cake pan, spreading it evenly. Tap the pan lightly on the counter to release air bubbles.
- Bake for 40 to 45 minutes, checking after 40 minutes with a toothpick. If it comes out clean or with a few moist crumbs, the cake is ready.
- Allow the cake to cool in the pan for ten minutes before transferring it onto a cooling rack.
- Prepare the orange glaze by whisking powdered sugar with fresh orange juice until smooth.
- Drizzle the glaze over the cooled cake and sprinkle with extra chopped pistachios, fresh raspberries, and orange zest.