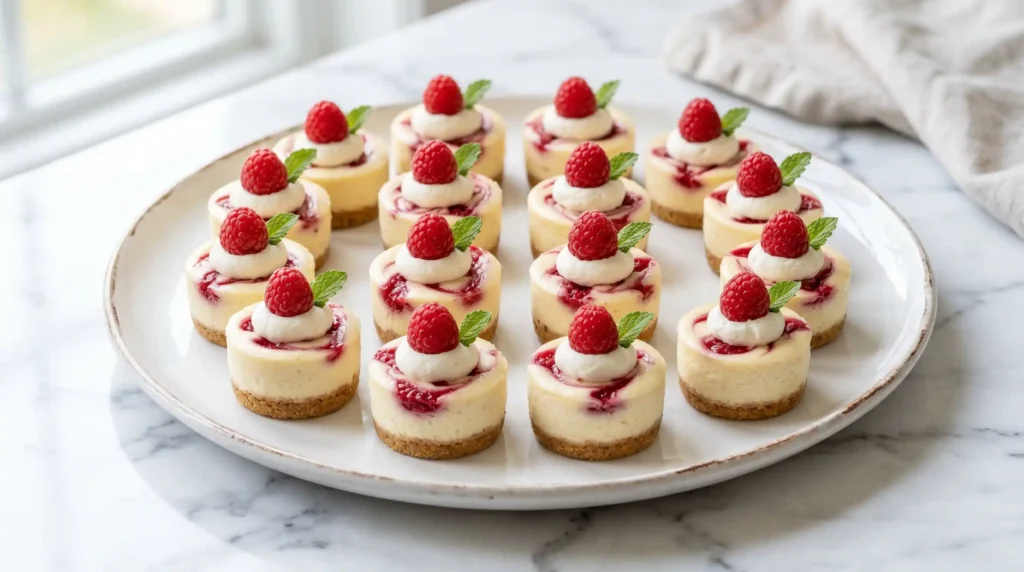
Servings: 24 bites | Prep Time: 20 minutes | Chill Time: 2 hours | Total Time: 2 hours 20 minutes
Some desserts just make people stop mid-conversation and stare. These Raspberry Swirl Cheesecake Bites are exactly that kind of dessert. The first time I brought them to a gathering, they vanished in under ten minutes.
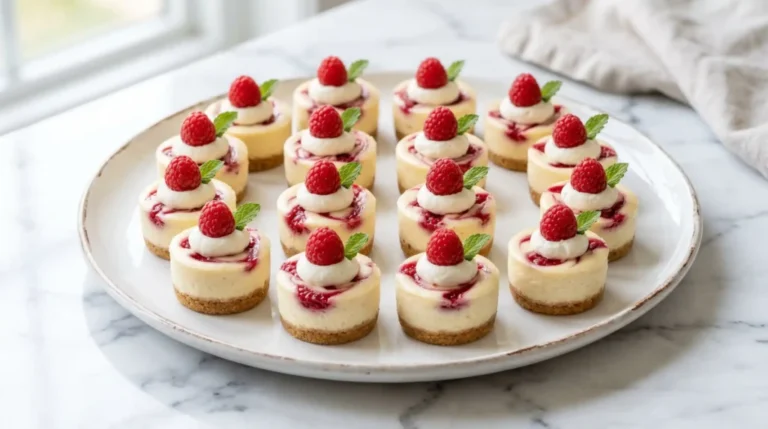
We’re talking creamy cheesecake filling on a buttery graham cracker crust, topped with a gorgeous raspberry swirl. They look like a bakery made them. Nobody needs to know you did it at home in your pajamas.
Why These Raspberry Swirl Cheesecake Bites Are Worth Every Minute
Mini cheesecakes have a serious advantage over full-sized ones. No water bath drama, no agonizing over cracking, no slicing stress. You just pop them out of the pan and they’re done.
Each bite delivers the full cheesecake experience in a two-inch package. The raspberry swirl adds color, tartness, and a little sophistication that makes people think you really went all out. IMO, that’s the perfect dessert move.
They’re also great for parties, holidays, potlucks, or honestly just a random Tuesday when you need something good.
Ingredients You’ll Need
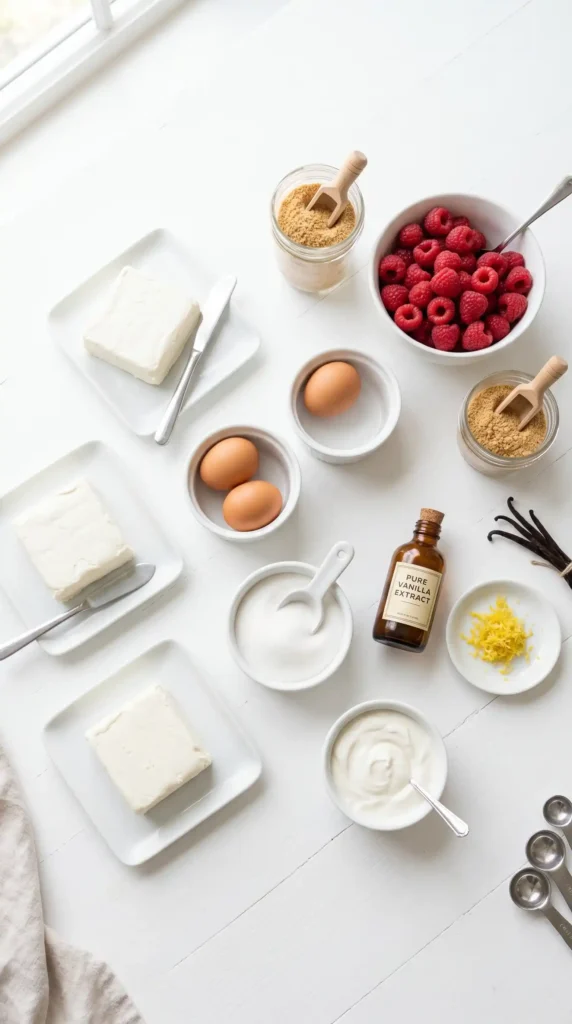
Everything here is easy to find at any grocery store. No specialty ingredients, no weird techniques.
For the crust:
- 1 1/2 cups graham cracker crumbs (about 12 full crackers)
- 3 tablespoons granulated sugar
- 6 tablespoons unsalted butter, melted
For the cheesecake filling:
- 16 oz (2 blocks) full-fat cream cheese, softened to room temperature
- 1/2 cup granulated sugar
- 2 large eggs, at room temperature
- 1 teaspoon pure vanilla extract
- 1/4 cup sour cream
Now For the raspberry swirl:
- 1/2 cup fresh or frozen raspberries
- 2 tablespoons granulated sugar
- 1 teaspoon fresh lemon juice
That’s 13 ingredients. You probably already own half of them.
How to Make Raspberry Swirl Cheesecake Bites
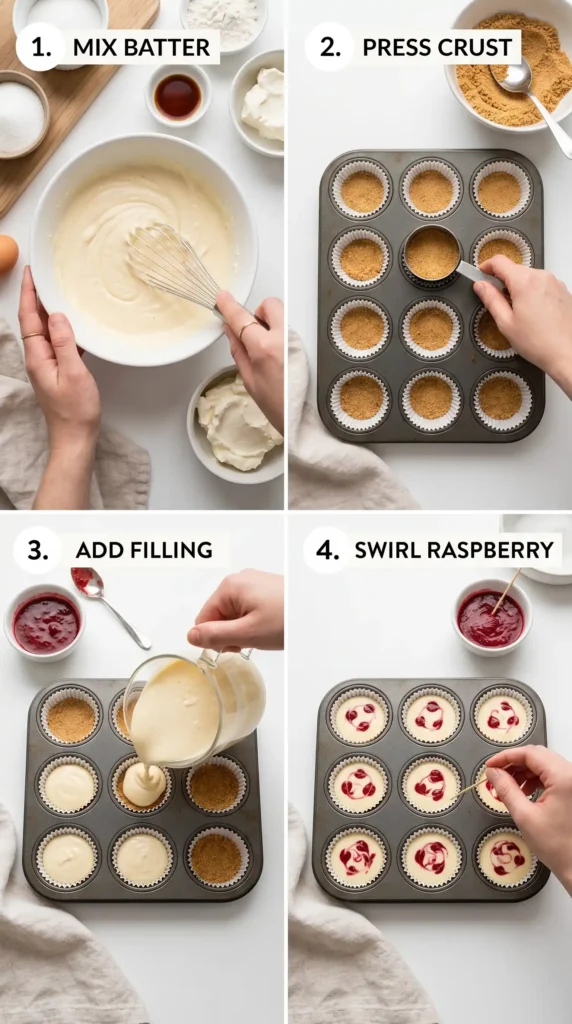
Step 1: Make the Raspberry Sauce First
Start by making the raspberry swirl sauce so it has time to cool before you use it. Warm raspberry sauce on cold cheesecake batter just sinks straight in — not the look we’re going for.
Add the raspberries, 2 tablespoons of sugar, and lemon juice to a small saucepan. Place it over medium heat and stir everything together. The raspberries will start breaking down within two to three minutes.
Let the mixture cook for about five minutes, stirring occasionally, until it thickens slightly and looks syrupy. You want it pourable but not watery — something between juice and jam.
Pour the sauce through a fine mesh strainer into a small bowl. Use a spoon to press it through so you extract all the liquid and leave the seeds behind. Set the smooth sauce aside to cool completely.
Step 2: Prepare Your Pan and Preheat the Oven
Preheat your oven to 325 degrees Fahrenheit. Line a standard 24-cup mini muffin tin with paper or foil mini liners.
The liners make removing the bites incredibly easy later. Without them, even a well-greased pan can stick and tear the crust apart. Skipping the liners is a trap — learn from other people’s mistakes.
Set the lined pan aside while you make the crust.
Step 3: Make and Press the Graham Cracker Crust
Crush the graham crackers into fine crumbs if you haven’t bought pre-made crumbs. You can do this in a food processor or by putting the crackers in a zip-lock bag and rolling over them with a rolling pin.
In a medium bowl, mix together 1 1/2 cups of graham cracker crumbs and 3 tablespoons of sugar. Pour in the 6 tablespoons of melted butter and stir until every crumb feels coated and the mixture looks like wet sand.
Drop about one full teaspoon of the crumb mixture into each mini muffin cup. Use the back of a teaspoon or your fingertip to press it down firmly into an even, compact layer at the bottom.
Press hard. A loosely packed crust crumbles when you try to remove the bites later. You want it tight, flat, and sturdy.
Step 4: Pre-Bake the Crust
Slide the pan into the preheated oven and bake the crusts alone for five minutes. This short pre-bake sets the butter and helps the crust firm up before the filling goes on top.
Pull the pan out and let it cool slightly on the counter for about five minutes. The crust doesn’t need to be cold, just not scorching hot when you add the batter.
Step 5: Make the Cheesecake Filling
This step matters more than any other, so pay attention. Cold cream cheese is the number one reason cheesecake fillings turn out lumpy. Make sure your cream cheese sits at room temperature for at least 30 to 45 minutes before you start.
Beat the softened cream cheese in a large bowl with a hand mixer on medium speed for about two minutes until it looks smooth and fluffy. Scrape down the sides of the bowl once or twice during mixing.
Add the 1/2 cup of sugar and mix again on medium speed for another minute. The mixture should look creamy and slightly lighter in color.
Add the eggs one at a time. Mix on low speed after each addition just until combined. Don’t over-mix after adding the eggs — that’s what causes cheesecake to puff up and crack during baking.
Add the vanilla extract and sour cream. Mix on low just until everything comes together into a smooth, glossy batter. Stop mixing as soon as it looks uniform.
Step 6: Fill the Cups
Spoon the cheesecake filling into each prepared muffin cup, filling each one about three-quarters full. Leave a little room at the top because they will puff slightly in the oven.
Use a small spoon or a cookie scoop for cleaner, more even portions. If batter drips on the sides of the cups, wipe it away with a damp paper towel — it’ll burn and look messy otherwise.
Step 7: Add the Raspberry Swirl
Here’s the fun part. Drop a small amount of the cooled raspberry sauce — about 1/4 teaspoon — onto the center of each filled cup.
Use a toothpick to swirl the raspberry sauce gently through the cheesecake batter. Pull the toothpick in small circular or figure-eight motions. Don’t go too deep — you just want to swirl the top surface.
The pattern doesn’t have to be perfect. A little messy actually looks more artisan and less like you stressed over it for 20 minutes. Which you didn’t. Right?
Step 8: Bake and Cool
Bake the cheesecake bites at 325 degrees Fahrenheit for 15 to 17 minutes. They’re done when the edges look set and the centers still have a very slight jiggle. That slight wobble is intentional — they firm up as they cool.
Don’t overbake them. An overbaked cheesecake bite turns dense and dry, and that ruins everything. Pull them out on the earlier side if you’re unsure.
Let them cool in the pan at room temperature for 30 minutes. Then transfer the whole pan to the refrigerator and chill for at least two hours, or overnight if you have the patience. Chilling is what gives them that dense, creamy, classic cheesecake texture.
Step 9: Remove and Serve
Once fully chilled, gently lift each bite out of the pan by the liner. Peel back the liner and arrange the bites on a serving plate.
If any raspberry sauce remains, you can add a tiny extra drizzle over the top right before serving for a fresher look. Serve cold straight from the fridge.
Tips for Perfect Raspberry Swirl Cheesecake Bites Every Time
A few small details make a big difference:
- Room temperature ingredients — both the cream cheese and eggs should be fully at room temp before mixing. This prevents lumps and over-mixing.
- Don’t skip straining the raspberry sauce — seeds in the swirl look unfinished and change the texture.
- Chill fully before serving — two hours minimum, overnight is better.
- Use full-fat cream cheese — low-fat versions have more water content and produce a softer, less stable bite.
- Press the crust firmly — a compact crust holds together when you remove the liner.
Storage and Make-Ahead Options
These Raspberry Swirl Cheesecake Bites store beautifully, which makes them perfect for prepping ahead. FYI, they actually taste better the next day after a full overnight chill.
Store them in an airtight container in the refrigerator for up to five days. Keep them in the liners until you’re ready to serve so they hold their shape.
You can also freeze them. Place them on a baking sheet in a single layer and freeze until solid, then transfer to a freezer bag. They keep in the freezer for up to two months. Thaw overnight in the fridge.
Common Variations to Try
Have you ever thought about how many directions you could take this base recipe?
- Strawberry swirl — swap raspberries for fresh strawberries in the sauce for a sweeter, milder twist.
- Lemon cheesecake bites — add one tablespoon of lemon zest to the batter and top with a blueberry sauce.
- Chocolate crust version — use Oreo crumbs instead of graham crackers for a deeper, richer base.
- Mixed berry swirl — combine raspberries and blackberries in the sauce for a more complex flavor.
- No-bake version — use a gelatin-set cheesecake filling if you prefer to skip the oven entirely.
Frequently Asked Questions
Can I use a regular muffin tin instead of a mini one?
Yes, you can use a standard 12-cup muffin tin. Increase the bake time to 20 to 22 minutes and check for that slight center jiggle. You’ll end up with 12 larger cheesecake bites instead of 24 mini ones.
Why did my cheesecake bites crack on top?
Cracking usually happens from over-mixing after adding the eggs, or from overbaking. Mix the eggs in on low speed just until combined, and pull the bites out while the centers still jiggle slightly. Also avoid opening the oven door repeatedly during baking.
Can I make these without sour cream?
Yes. You can substitute an equal amount of full-fat plain Greek yogurt or heavy cream for the sour cream. The texture will be slightly different but still delicious.
How do I know when the cheesecake bites are fully baked?
The edges should look set and opaque while the very center still has a slight wobble when you gently shake the pan. They’ll look underdone, but they firm up completely once chilled. Trust the process.
Can I use store-bought raspberry jam instead of making the sauce?
Absolutely. Warm a couple tablespoons of seedless raspberry jam in the microwave for about 15 seconds until it becomes fluid. Use it the same way as the homemade sauce. The flavor is slightly sweeter but works well.
Final Thoughts
These Raspberry Swirl Cheesecake Bites check every box — they look impressive, taste incredible, and come together without any complicated technique. The process is straightforward once you understand each step.
The raspberry swirl is the detail that takes them from basic to bakery-level. And now you know exactly how to nail it every time.
Go make a batch. Then try not to eat six of them straight from the fridge at midnight. I’m not speaking from experience or anything.
Raspberry Swirl Cheesecake Bites
Ingredients
Method
- Combine raspberries, 2 tablespoons of sugar, and lemon juice in a small saucepan over medium heat. Stir and cook for about five minutes until slightly thickened.
- Pour the sauce through a fine mesh strainer to remove seeds and set aside to cool.
- Preheat oven to 325°F (160°C) and line a 24-cup mini muffin tin with paper or foil liners.
- Mix graham cracker crumbs and 3 tablespoons of sugar in a bowl. Add melted butter and stir until combined.
- Press about one teaspoon of the crumb mixture firmly into the bottom of each muffin cup.
- Bake the crust for five minutes and let cool slightly.
- In a large bowl, beat softened cream cheese until smooth. Add sugar and mix until creamy.
- Add eggs one at a time, mixing on low speed until just combined. Then add vanilla and sour cream, mixing until smooth.
- Spoon cheesecake filling into each muffin cup, filling about three-quarters full.
- Add about 1/4 teaspoon of raspberry sauce on top of the filling and swirl gently with a toothpick.
- Bake for 15 to 17 minutes until edges set but centers still jiggle slightly.
- Allow to cool in the pan for 30 minutes then chill in the refrigerator for at least 2 hours before serving.
- Gently lift each bite out using the liners and serve cold. Drizzle with extra raspberry sauce if desired.



