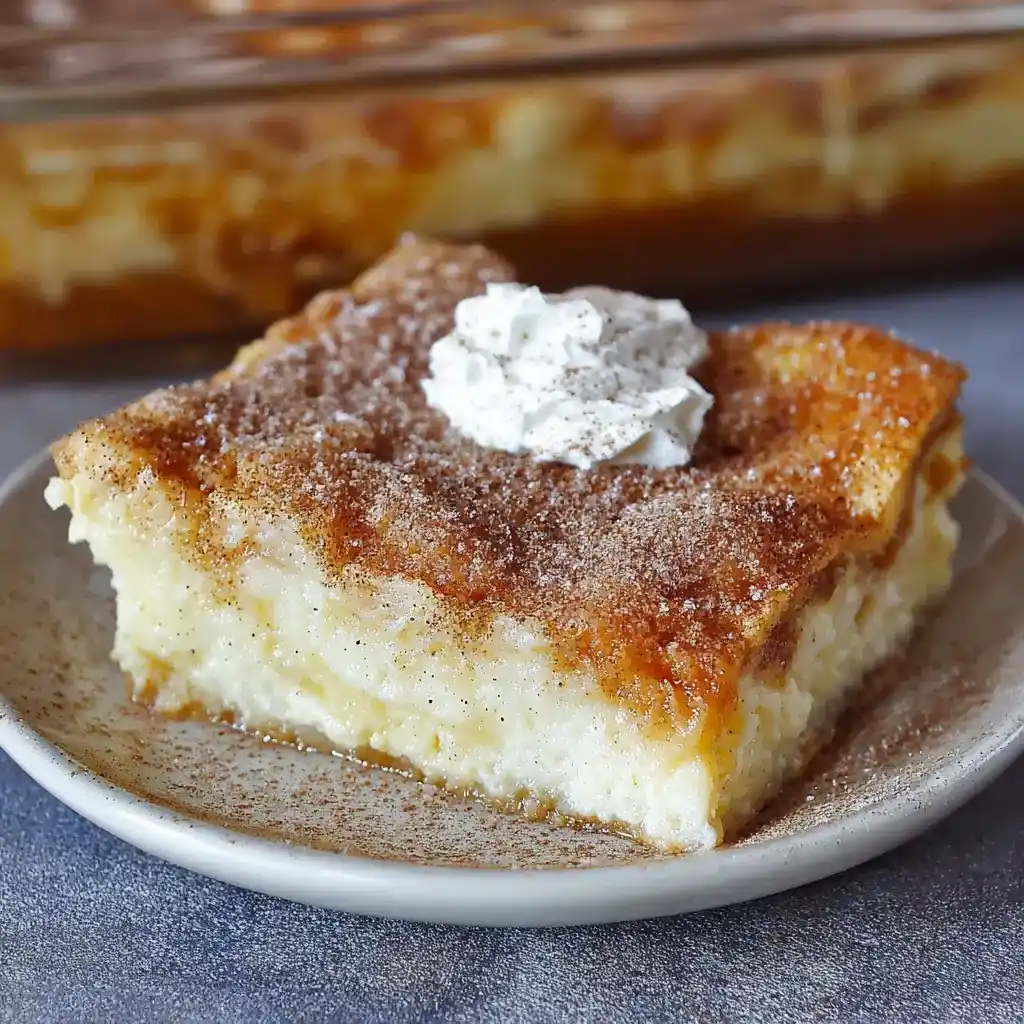
Picture this: cheesecake had a baby with a churro, and that baby grew up to be the most requested dessert at every potluck you attend. That’s sopapilla cheesecake. I made it once for a family dinner and now I’m apparently “the cheesecake person.” IMO, there are worse titles to hold.
Servings: 12 squares | Prep time: 15 minutes | Bake time: 30 minutes | Total time: 45 minutes (plus optional chilling)
What Even Is Sopapilla Cheesecake?
Let’s clear this up first. A traditional sopapilla is a fried, puffy Mexican pastry, usually dusted with cinnamon sugar and drizzled with honey. This recipe borrows that flavor profile and marries it with cheesecake filling.
The result sits between a cheesecake bar and a pastry. You get creamy filling, buttery dough, and a crackly cinnamon top. Have you ever eaten something and immediately wondered why nobody told you about it sooner? That’s this dessert.
I’m not going to pretend this is authentic Mexican cuisine, because it isn’t. It’s an American kitchen hack that happens to taste incredible. And honestly, IMO the taste matters more than the technicality here.
What You’ll Need for This Sopapilla Cheesecake Recipe
Nothing here requires a trip to a specialty store. That’s the beauty of this recipe: it uses ingredients most people already have hanging around. Here’s your shopping list, with exact quantities so nothing gets left out.
- 2 (8 oz) cans of refrigerated crescent roll dough
- 2 (8 oz) packages of cream cheese, softened to room temperature
- 1 cup granulated sugar
- 1 teaspoon vanilla extract
- 1/4 cup butter, melted
- 1 tablespoon ground cinnamon
- 4 tablespoons granulated sugar, for the topping
- Honey, for drizzling (optional but recommended)
That’s eight ingredients total, and half of them are pantry staples. FYI, the cream cheese needs to actually reach room temperature. Cold cream cheese turns your filling lumpy, and lumpy is not the vibe we’re going for here.
How to Make Sopapilla Cheesecake, Step by Step
This is where people get intimidated for absolutely no reason. I promise you this process is closer to assembling a sandwich than baking a soufflé. Let’s walk through it slowly so nothing feels rushed or confusing.
Getting Your Pan and Oven Ready
Start by preheating your oven to 350°F, or 175°C if you’re working in metric. While that heats up, grab a 9×13 inch baking dish and coat it generously with cooking spray. Skipping this step is how people end up scraping dessert off the pan with a spatula and a lot of regret.
Building the Bottom Layer
Open your first can of crescent roll dough and unroll it directly into the greased dish. Press it flat with your fingers, working it all the way into the corners and up the edges slightly. Pinch together any perforated seams so you don’t get gaps. Have you ever had filling leak through a crack? Not fun.
If you have an extra five minutes, pop that bottom layer into the oven alone for about 5 to 8 minutes. This little pre-bake step firms up the dough so it doesn’t turn soggy once the cream cheese layer sits on top. It’s optional, but I do it every single time now.
Whipping Up the Cheesecake Filling
In a mixing bowl, combine your softened cream cheese, the full cup of sugar, and the vanilla extract. Beat this together with a hand mixer or a sturdy whisk until it turns completely smooth with zero lumps. This step takes maybe two minutes, but don’t rush it.
A smooth filling is the difference between a creamy dessert and a grainy one, so take your time here. Once it looks glossy and well blended, spread it evenly across the pre-baked bottom crust using a spatula. Get it all the way to the edges for consistent bites in every square.
Adding the Top Layer
Unroll your second can of crescent dough and carefully drape it over the cream cheese layer. This part can feel a little fussy since the dough wants to tear, so go slow and gently stretch it to cover the surface. It doesn’t need to be perfect; small gaps will disappear once it bakes.
Once the top layer is in place, brush the melted butter across the entire surface using a pastry brush or the back of a spoon. This butter layer is what gives you that golden, slightly crisp finish everyone raves about. Don’t skimp on it.
The Cinnamon Sugar Finish
In a small bowl, stir together your cinnamon and the 4 tablespoons of sugar reserved for topping. Sprinkle this mixture evenly across the buttered dough, making sure every corner gets some love. This is genuinely the best-smelling part of the whole process.
Slide the dish into your preheated oven and bake for about 30 minutes. You’re looking for a deep golden brown color on top with slightly puffed, crisp edges. Every oven runs a little differently, so start checking around the 25-minute mark just in case.
Cooling and Serving
Once it’s out of the oven, let the dessert rest at room temperature for at least 15 minutes before slicing. If you want cleaner, bakery-style squares, chill the whole pan in the refrigerator for a few hours first. I know waiting is torture, but clean slices are worth it.
Cut into squares or triangles, whichever shape makes you happiest, and drizzle honey over the top right before serving. Some people skip the honey. Those people are wrong, IMO, but you do you.
Tips That’ll Save You From a Kitchen Disaster
I’ve made enough versions of this recipe to know exactly where things go sideways. Here are a few pointers that’ll keep your bake looking like the Pinterest photo instead of a science experiment.
- Room temperature cream cheese is non-negotiable. Cold cream cheese refuses to blend smoothly, no matter how hard you beat it.
- Don’t overbake it. Once the top turns golden brown, pull it out. A few extra minutes can dry out the filling.
- Chill before slicing if you want that clean, bakery-style presentation everyone compliments.
- Use a sharp knife wiped clean between cuts for the neatest squares.
Storing and Reheating Your Leftovers (If There Are Any)
Store any leftover squares in an airtight container in the refrigerator, where they’ll stay fresh for up to four days. When you’re ready for another slice, microwave it for about 15 seconds to bring back that just-baked warmth. This dessert also freezes beautifully for up to two months.
Wrap individual slices tightly in plastic wrap before freezing so they don’t pick up freezer odors. When you’re ready to eat one, just thaw it overnight in the refrigerator. It tastes almost as good as the day you made it, which honestly says a lot about this recipe’s staying power.
Fun Twists on This Sopapilla Cheesecake Recipe
Once you’ve nailed the base recipe, it’s basically a blank canvas. Here’s how I like to mix things up depending on the season or who I’m feeding.
- Fruit-forward: Add sliced strawberries, blueberry filling, or diced peaches between the cream cheese and top dough layers.
- Chocolate lovers: Sprinkle mini chocolate chips right into the cream cheese layer before baking.
- Fall flavors: Stir in pumpkin puree and pumpkin spice, or layer in cinnamon-spiced apple slices.
- Nutty and crunchy: Scatter chopped pecans or walnuts over the filling before adding the top crust.
Any of these work without changing the base technique at all. That’s what makes this recipe so forgiving and honestly kind of foolproof 🙂
Frequently Asked Questions About Sopapilla Cheesecake
Can I make sopapilla cheesecake ahead of time?
Yes, absolutely. Bake it the day before your event and store it covered in the refrigerator until you’re ready to serve it.
Do I really need to pre-bake the bottom crust?
It’s optional, but I strongly recommend it. That quick pre-bake keeps the bottom layer from turning soggy under the cream cheese filling.
Can I use low-fat cream cheese instead of full-fat?
You can, though the texture ends up slightly less rich and creamy. Full-fat cream cheese gives you that classic dense cheesecake feel.
What can I use instead of crescent roll dough?
Puff pastry works as a substitute and creates a flakier, more layered crust. Just know it bakes up a bit differently than crescent dough.
How do I know when it’s finished baking?
Look for a deep golden brown color across the top with slightly crisp, puffed edges. If it still looks pale, give it a few more minutes.
Can this dessert be frozen?
Yes, wrap individual slices tightly and freeze them for up to two months. Thaw overnight in the fridge before serving for the best texture.
Wrapping This Up
Sopapilla cheesecake earns its spot as one of those recipes you’ll make on repeat. It’s cheap, it’s fast, and it tastes like you spent way more effort than you actually did. Isn’t that the dream for any home dessert?
Grab two cans of crescent dough, a couple blocks of cream cheese, and go make something people will ask you to bring to every gathering from now on. Just don’t tell them how easy it was. I certainly didn’t :/