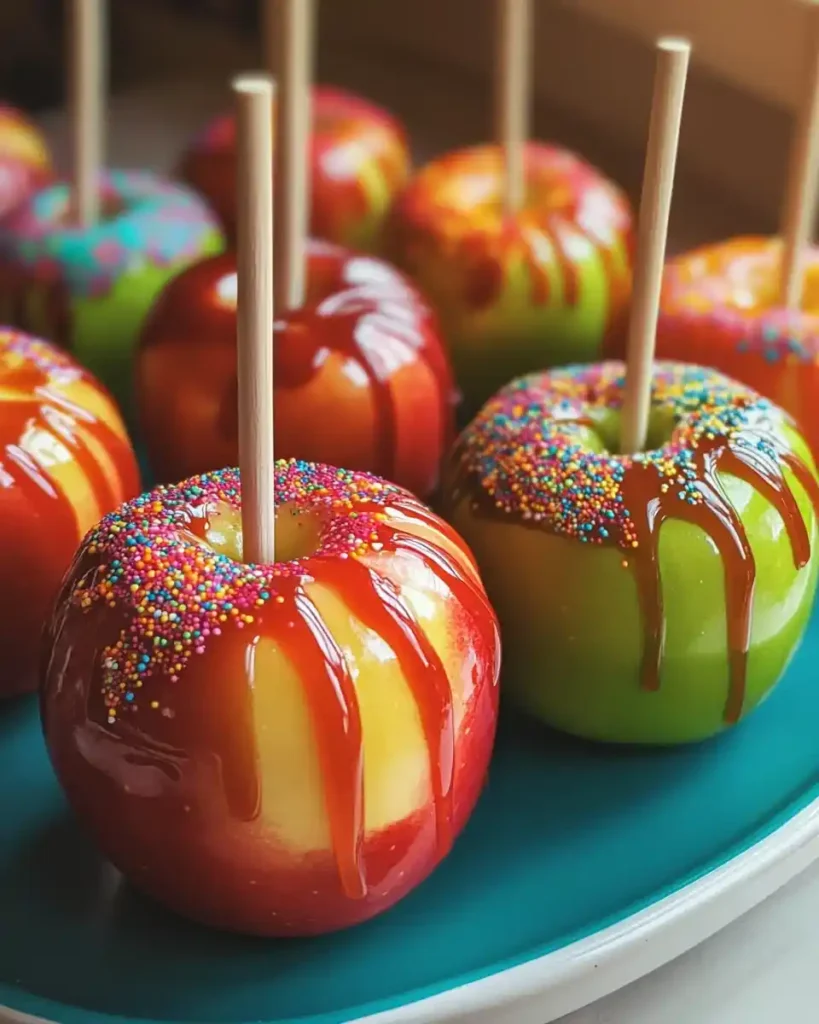
Remember biting into a striped candy apple at the fair and wondering how anyone got those perfect swirls? I wondered the exact same thing until I finally tried making Striped Candy Apples myself. Turns out the trick is simpler than it looks, and way more fun.
If you want a dessert that looks like it came from a professional candy shop but actually comes from your own kitchen, this recipe is it. The hard candy shell cracks perfectly, and those colorful stripes make every apple look like a tiny work of art. IMO, this is one of the most satisfying treats you can make at home.
Why These Striped Candy Apples Work So Well
This recipe relies on one simple sugar syrup split into two colors for that signature striped effect. You’re not juggling multiple recipes or complicated techniques; you’re just working quickly with hot syrup and a little color. That simplicity is exactly why it works so well for beginners.
It also delivers a serious visual payoff for the effort involved. Have you ever wanted a dessert that gets an audible reaction the second you set it down? This is that dessert. It’s customizable for any holiday or party theme, and it genuinely tastes as good as it looks.
The hard crack candy stage is the real star of this process. Getting that syrup to the right temperature creates a glassy, crisp shell that shatters slightly with each bite. FYI, that crunch is the entire reason candy apples became a fairground classic in the first place.
Servings and Time You’ll Need
This recipe makes 6 striped candy apples, perfect for a party platter or a fun weekend project with the kids. Here’s the time breakdown:
- Prep time: 15 minutes
- Cook time: 15 minutes
- Total time: About 30 minutes, plus 20 minutes to fully set
That’s a genuinely quick turnaround for something that looks this impressive.
What You’ll Need for Striped Candy Apples
You don’t need anything exotic here, just a few pantry staples and some food coloring. Gather everything before you start, since the syrup moves fast once it’s hot.
- Small apples (Granny Smith or Cosmic Crisp) – 6
- Wooden skewers or candy apple sticks – 6
- Granulated sugar – 2 cups
- Corn syrup – 1/2 cup
- Water – 1/2 cup
- Food coloring – 2 contrasting colors, a few drops each
Choose apples that are firm, smooth, and free of blemishes, since any imperfections show right through that glossy candy shell.
How to Make Striped Candy Apples (Step by Step)
Step 1: Wash and Dry Your Apples Thoroughly
Start by washing each apple under warm water to remove any wax coating, especially if they’re store-bought. Store apples often have a thin waxy layer that keeps candy coating from sticking properly. Skipping this step is one of the most common reasons candy shells slide right off.
Dip each apple briefly in hot water if the wax feels stubborn, then dry it completely with a clean towel. Any leftover moisture on the surface interferes with how well the candy coating adheres later. Take your time here; dry apples make everything else easier.
Step 2: Insert the Sticks and Chill
Push a wooden skewer or candy apple stick firmly into the top center of each apple, right where the stem used to be. Push it in deep enough to feel secure, but not so deep that it pokes through the bottom. A wobbly stick usually means dinner ends up on the floor instead of on a plate.
Once every apple has its stick, place them in the refrigerator for about 10 minutes. Chilling the apples helps the hot candy syrup set faster once you start dipping. This small step makes a noticeable difference in how quickly your coating firms up.
Step 3: Cook the Sugar Syrup to Hard Crack Stage
In a heavy-bottomed saucepan, combine the granulated sugar, corn syrup, and water over medium heat. Stir gently just until the sugar dissolves, then stop stirring completely. Excess stirring at this stage can cause the sugar to crystallize, giving you a grainy texture instead of a smooth, glassy shell.
Attach a candy thermometer to the side of the pan and let the mixture heat steadily. Wait until it reaches 300°F, known as the hard crack stage, which is what gives candy apples their signature crisp bite. This usually takes around 10 to 15 minutes, so be patient and keep watching the thermometer.
Once the syrup hits the correct temperature, remove the pan from the heat immediately. Leaving it on the burner even a little longer can push the temperature too high and cause a burnt, bitter flavor. Timing really matters here more than almost any other step.
Step 4: Split and Color the Syrup
Carefully pour the hot syrup into two separate heatproof bowls or containers, dividing it as evenly as you can. Work quickly, since the syrup starts to firm up the moment it cools even slightly. Having everything prepped ahead of time makes this step much less stressful.
Add a few drops of one food coloring to the first bowl and a contrasting color to the second. Stir each gently just enough to blend the color through without overworking the syrup. Classic combinations like red and white or blue and yellow create especially eye-catching stripes.
Step 5: Dip and Create the Stripes
Hold an apple by its stick at a slight angle and dip it into the first colored syrup, rotating it slowly to coat the surface evenly. Lift it out and let any excess syrup drip back into the bowl for a few seconds. This prevents thick, uneven pooling anywhere on the apple.
While the first color is still slightly warm and tacky, drizzle the second colored syrup over the top in thin, sweeping lines using a spoon. Move quickly but steadily, letting the syrup fall naturally into streaks rather than one thick blob. This is where those signature stripes come to life.
Place the finished apple stick-side up on a parchment-lined baking sheet. Repeat the dipping and drizzling process with the remaining apples, working as efficiently as possible since the syrup firms up fast. Don’t worry if your first attempt looks a little uneven; the stripes get easier to control with practice.
Step 6: Let the Apples Cool and Set
Once all your apples are dipped and striped, let them sit undisturbed at room temperature for about 20 minutes. This resting period allows the hard candy shell to fully harden into that classic glossy, crisp finish. Moving them too early can smudge the stripes or leave fingerprints in the soft coating.
Work in a cool, dry room if possible, since humidity can keep the candy shell tacky longer than expected. A humid kitchen is basically the archenemy of a crisp candy coating. Once the shells feel completely firm to the touch, your Striped Candy Apples are ready to serve.
Tips for Getting It Right Every Time
A few small habits make a real difference in how these turn out. Keep these in mind while working:
- Use a reliable candy thermometer instead of guessing the syrup temperature.
- Avoid stirring the syrup too much once the sugar has dissolved.
- Work quickly once the syrup is colored, since it firms up fast.
- Chill your apples beforehand to help the coating set quicker.
- Store finished apples in a cool, dry spot to keep that glossy shine.
Easy Variations to Try
This recipe adapts easily for different holidays, parties, or personal taste. Try one of these twists:
- Orange and black stripes for a Halloween-themed batch.
- Red and green stripes for a festive Christmas version.
- Pastel pink and mint stripes for a spring gathering.
- Crushed nuts, sprinkles, or mini chocolate chips pressed onto the surface before it fully sets.
- Edible glitter dusted onto the wet coating for extra sparkle.
What to Serve With Striped Candy Apples
These apples work beautifully as a standalone dessert, but a few extras round out the presentation nicely. Here’s what pairs well:
- A tray of assorted caramel or chocolate-dipped treats for variety.
- Cider or hot chocolate for a cozy fall pairing.
- Cellophane wrap and ribbon for gifting individual apples.
- A tiered stand for an eye-catching party display.
Frequently Asked Questions
What are the best apples for making candy apples? Granny Smith apples work especially well thanks to their tart flavor and firm texture. Cosmic Crisp, Fuji, and Gala are also great choices depending on how sweet you want the contrast to be.
How long do homemade candy apples stay fresh? They typically stay fresh for 2 to 3 days when stored properly in a cool, dry place. Wrapping each apple individually in cellophane helps protect that glossy finish.
Why did bubbles form in my candy coating? This usually happens from too much stirring or an unstable syrup temperature. Keep the heat steady and avoid stirring once the sugar has fully dissolved.
Can I make these apples for a specific holiday theme? Absolutely, adjusting the stripe colors makes this recipe endlessly adaptable. Orange and black for Halloween or red and green for Christmas both work beautifully.
Why did my candy coating slide off the apple? This almost always comes down to moisture or wax left on the apple’s surface. Wash and dry the apples thoroughly before dipping to help the coating stick properly.
Are Striped Candy Apples difficult to make for beginners? They take a little practice, but they’re very doable with the right tools and a bit of patience. A candy thermometer removes most of the guesswork involved.
Final Thoughts on These Striped Candy Apples
Striped Candy Apples take a simple, humble apple and turn it into something that looks like it belongs in a candy shop window. The crisp, glassy shell paired with those colorful stripes makes every bite feel like a little celebration. It’s proof that a bit of technique goes a long way.
Give this recipe a try for your next party or holiday gathering, and watch how quickly they disappear from the tray. Once you nail that first perfect swirl, you’ll be looking for excuses to make another batch.
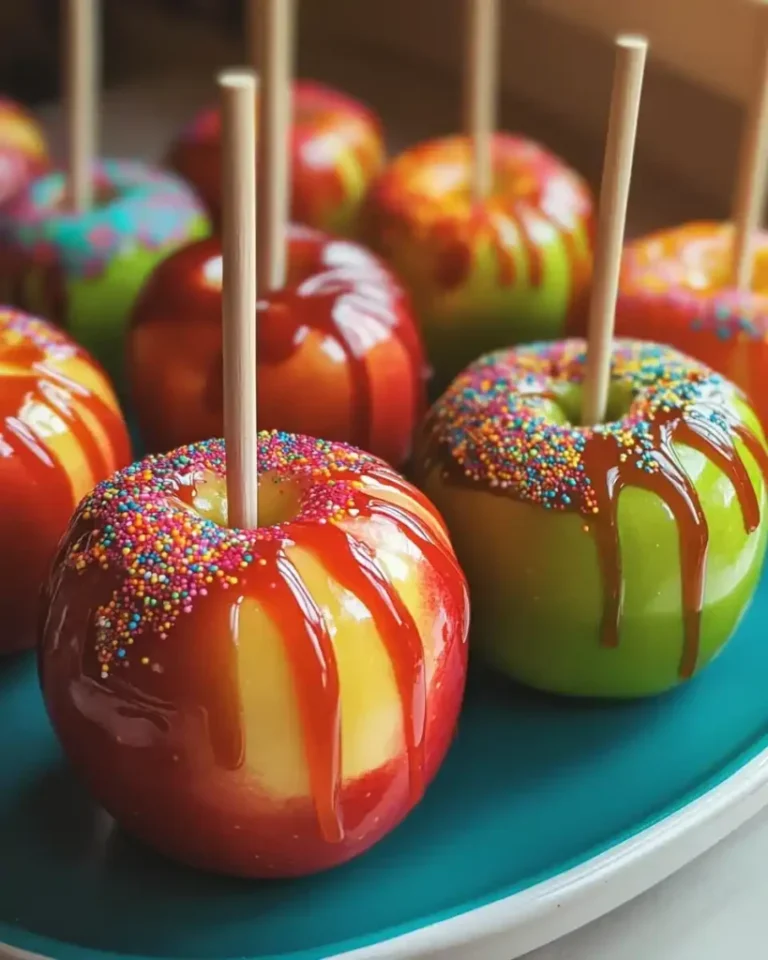
Striped Candy Apples
Ingredients
Method
- Wash each apple under warm water to remove any wax coating and dry thoroughly.
- Insert a wooden skewer into the top center of each apple.
- Chill the apples in the refrigerator for about 10 minutes.
- In a heavy-bottomed saucepan, combine sugar, corn syrup, and water over medium heat, stirring until sugar dissolves.
- Attach a candy thermometer and heat until the mixture reaches 300°F (hard crack stage).
- Pour hot syrup into two separate heatproof bowls and quickly add food coloring, mixing gently.
- Hold an apple by its stick, dip in the first colored syrup, and let excess drip off.
- Drizzle the second colored syrup over the dipped apple to create stripes.
- Place the finished apple on a parchment-lined baking sheet.
- Let the dipped apples sit undisturbed at room temperature for about 20 minutes to harden.