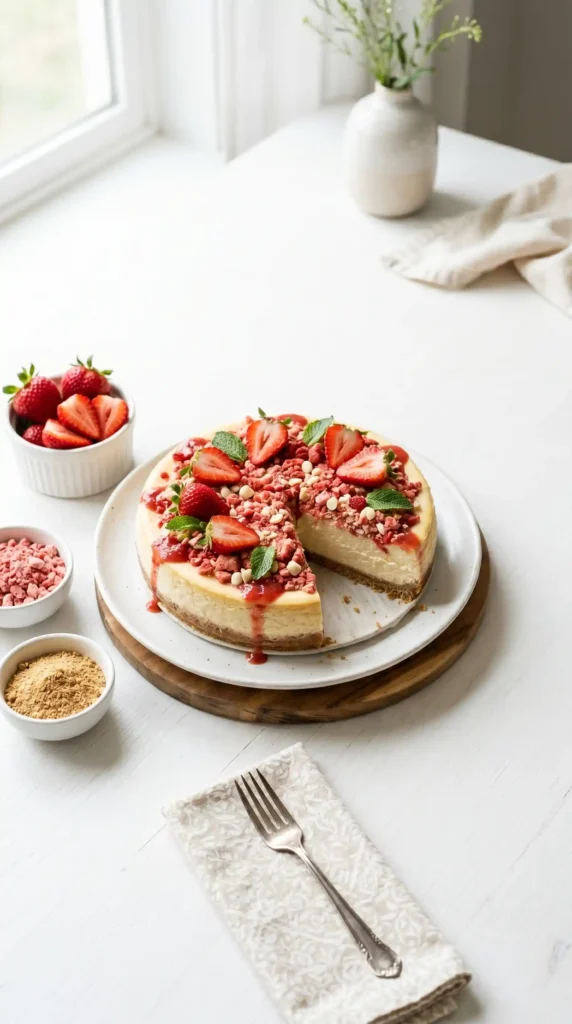
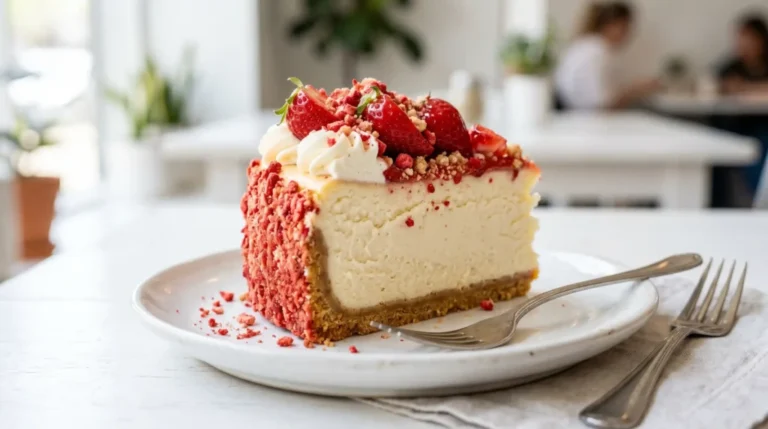
Not all cheesecakes are created equal. Some are good. Some are very good. And then there is Strawberry Crunch Cheesecake — which occupies an entirely different tier. The silky no-bake cream cheese filling, the buttery crust, the fresh strawberry topping, and that legendary strawberry crunch coating that shatters when your fork cuts through it combine into something that makes people genuinely go quiet when they taste it for the first time.
I first encountered a version of this at a family gathering and spent the next three days thinking about it before I made my own at home. My version turned out better than the original — which I say with appropriate humility and zero evidence to the contrary. It has since become the most requested dessert in my household by a significant margin.
Have you ever made a dessert that immediately became your signature dish? This is your chance. Let us build it from scratch, step by step, with no oven required and no guesswork involved.
What Makes This Cheesecake Stand Out From Every Other Version
Standard strawberry cheesecakes are lovely. They have the filling, the crust, the fruit topping, and that is genuinely enough. But the strawberry crunch layer — the buttery, crushed vanilla wafer and freeze-dried strawberry coating that covers the outside and top of the finished cheesecake — elevates this from a great cheesecake to a genuinely iconic one. That crunch is the element that makes people stop mid-sentence and look down at their plate.
The no-bake technique also makes this significantly more achievable than a baked cheesecake. Skip the water bath, forget constant temperature checks, and enjoy a stress-free bake with no cracks and no concern about the center setting just right. You mix, chill, top, and coat. The refrigerator does all the structural work while you do something else entirely. That is genuinely the most relaxed path to an extraordinary cheesecake.
IMO, the make-ahead factor also makes this the ideal dinner party dessert. You make it the evening before, store it overnight, apply the crunch coating in the morning, and arrive at the party with a dessert that looks like you worked on it all day. Nobody needs to know the truth — and the truth is that you spent 30 active minutes on it.
What You Need
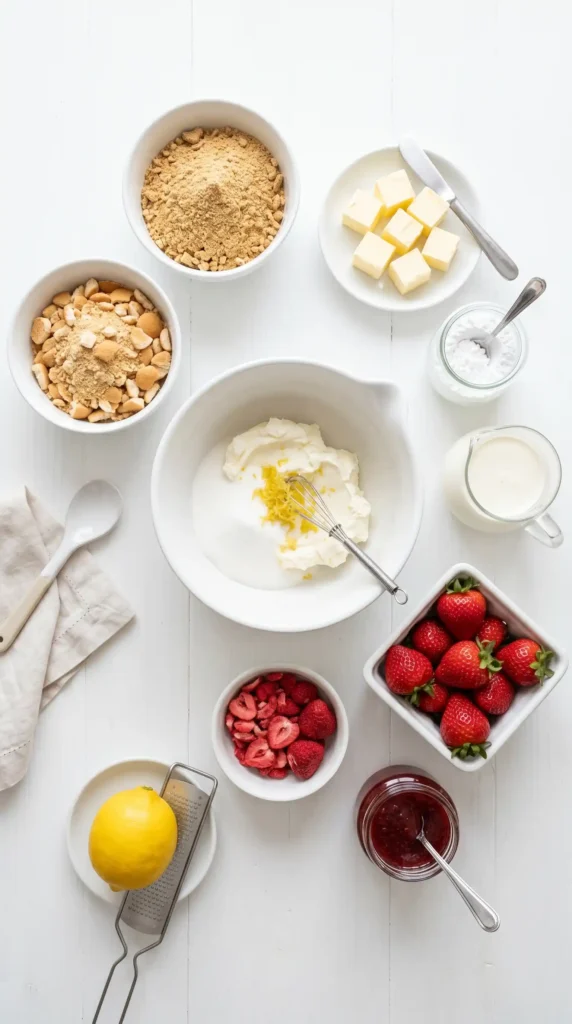
Four components: the crust, the cream cheese filling, the strawberry topping, and the strawberry crunch coating. Every ingredient comes from a standard grocery store. The freeze-dried strawberries are the one ingredient that occasionally surprises people — find them in the dried fruit aisle, the snack section, or online. They are the irreplaceable element in the crunch coating and absolutely worth seeking out.
For the Crust
- 1 and 1/2 cups (150g) graham cracker crumbs (about 12 full sheets, processed)
- 1/2 cup (50g) vanilla wafer cookie crumbs (about 15 cookies, processed)
- 1/3 cup (65g) granulated white sugar
- 1/2 cup (113g) unsalted butter, melted
- Pinch of salt
For the No-Bake Cream Cheese Filling
- 450g (16oz / 2 packages) full-fat cream cheese, softened to room temperature
- 1 cup (120g) powdered sugar, sifted
- 1 teaspoon pure vanilla extract
- 1/2 teaspoon lemon zest
- 1 tablespoon fresh lemon juice
- 1 and 1/2 cups (360ml) heavy whipping cream, cold
- Pinch of salt
Now For the Fresh Strawberry Topping
- 2 cups (300g) fresh strawberries, hulled — half sliced, half halved for varied visual texture
- 2 tablespoons granulated sugar
- 1 teaspoon fresh lemon juice
- 1/4 cup (60ml) strawberry jam, warmed (for glazing the fruit topping)
For the Strawberry Crunch Coating
- 1 cup (about 30) vanilla wafer cookies, crushed to coarse crumbs
- 3/4 cup (22g) freeze-dried strawberries, crushed to a coarse powder
- 4 tablespoons (57g) unsalted butter, melted
- 2 tablespoons granulated sugar
- Optional: 2 tablespoons white chocolate chips, melted, drizzled over the crunch
Room Temperature Cream Cheese — The Single Most Important StepCold cream cheese produces a lumpy, uneven filling that no amount of mixing will fully smooth out. Softened, room-temperature cream cheese beats smooth in under 90 seconds and produces a silky, lump-free filling that sets to a perfect sliceable consistency after chilling. Pull both packages from the fridge at least 1 hour before you plan to make the filling — ideally 90 minutes. FYI — this is the difference between a good cheesecake and a great one, and it costs you nothing but planning.
How to Make Strawberry Crunch Cheesecake Step by Step
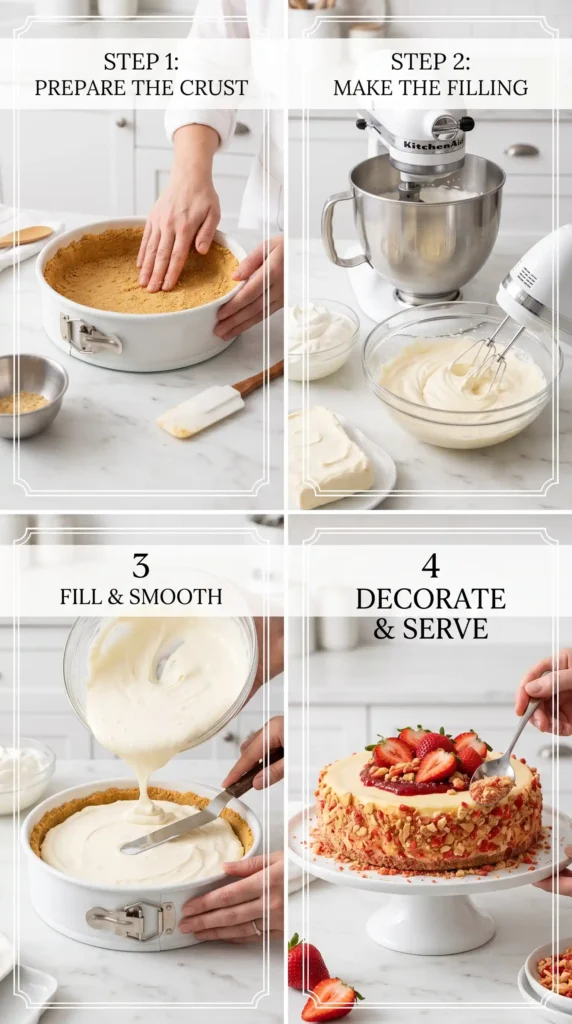
The active work is approximately 30 minutes. The refrigerator handles everything else. The process runs in four stages: make and press the crust, make the filling, assemble and chill, then add the toppings and crunch coating before serving. Make this the evening before your event for the absolute best results — overnight chilling produces a firmer, more cleanly sliceable cheesecake than 6 hours of chilling alone.
Step 1: Make the Crust
Process the graham crackers and vanilla wafer cookies in a food processor until they become fine, uniform crumbs. If you do not have a food processor, place the cookies in a zip-lock bag and crush them thoroughly with a rolling pin — work through the bag in multiple directions until no large pieces remain. The vanilla wafer crumbs add a sweet, buttery flavour note to the crust that plain graham cracker alone does not deliver, and they also help the crust hold together more firmly after chilling.
Combine the graham cracker crumbs, vanilla wafer crumbs, and granulated sugar in a large bowl and stir until evenly mixed. Add the melted butter and pinch of salt and stir vigorously until every crumb is coated in butter and the mixture holds its shape when pressed between your fingers. It should clump together when you squeeze a handful — if it feels dry and crumbles immediately, add an extra tablespoon of melted butter and stir again.
Press the crust mixture into the base of a 23cm (9-inch) springform pan using the flat bottom of a measuring cup or drinking glass. Press firmly and evenly across the entire base, working outward from the centre and pushing the edges up about 3cm along the sides to create a short wall that holds the filling in place. The firmer you press, the better the crust holds together when sliced. Refrigerate the pressed crust for 20 minutes while you make the filling.
Step 2: Make the No-Bake Cream Cheese Filling
In a large mixing bowl, beat the softened cream cheese with a hand mixer or stand mixer on medium speed for about 90 seconds until it looks completely smooth and slightly fluffy with absolutely no lumps visible. If you see any lumps at this stage, the cream cheese was too cold. Microwave it in 10-second intervals, stirring between each, until fully softened before continuing.
Add the sifted powdered sugar, vanilla extract, lemon zest, lemon juice, and pinch of salt to the beaten cream cheese. Beat on medium speed for another 60 seconds until fully incorporated and the mixture looks smooth and uniform. Taste it — it should be pleasantly sweet with a clean tang from both the cream cheese and the lemon. The lemon zest and juice are doing important work here: they brighten the flavour profile and cut through the richness of the cream and cream cheese, preventing the filling from tasting cloying or heavy.
In a separate cold bowl, beat the cold heavy cream with a clean hand mixer on medium-high speed until it reaches stiff peaks — about 2–3 minutes. The cream must be genuinely cold for this to work properly. A cold bowl (kept in the freezer for 10 minutes beforehand) makes the whipping process faster and the peaks firmer. Do not walk away during this step — the cream goes from soft peaks to stiff peaks to over-whipped very quickly at medium-high speed.
Fold the whipped cream into the cream cheese mixture in three equal additions. Use a large rubber spatula and a gentle, sweeping fold motion from the bottom of the bowl upward — never stirring in circles, which deflates the whipped cream and produces a dense, flat filling rather than the light, airy mousse-like texture you are building. After each addition, fold only until the cream streaks disappear before adding the next. The finished filling should look thick, smooth, pale, and hold a clear peak when you lift the spatula.
Step 3: Assemble and Chill
Pour the cream cheese filling over the chilled crust in the springform pan. Use an offset spatula or the back of a large spoon to spread it into a completely even, flat layer that reaches all the way to the edges of the pan with no gaps or low spots around the perimeter. A flat, level surface looks significantly more professional when sliced and ensures every slice has the same ratio of filling to crust.
Cover the pan tightly with cling film — press it gently against the surface of the filling so no air gap forms that would allow a skin to develop. Place the cheesecake in the refrigerator and chill for a minimum of 6 hours, though overnight chilling always produces the best result. The cheesecake needs this time to set completely from a pourable mousse to a firm, sliceable filling that holds its shape when the springform ring is released.
Step 4: Make the Strawberry Crunch Coating
While the cheesecake chills, make the crunch coating. Crush the vanilla wafer cookies in a zip-lock bag until you have coarse crumbs with some variation in size — not a fine powder, but a mixture of small and medium pieces that will provide textural interest. Crush the freeze-dried strawberries separately until they reduce to a fine powder with a few slightly larger pieces for colour variation.
Combine the crushed wafers, freeze-dried strawberry powder, melted butter, and granulated sugar in a bowl and stir until every crumb is evenly coated in the butter mixture. The coating should look uniformly pink-red from the strawberry powder and hold together slightly when pressed. Spread the mixture on a parchment-lined tray and refrigerate for 30 minutes or leave at room temperature for 45 minutes to allow the butter to firm up and the crumbs to bind into a crumbly, clumped texture that adheres to the cheesecake surface.
Step 5: Prepare the Strawberry Topping and Finish the Cheesecake
Toss the sliced and halved fresh strawberries with the granulated sugar and lemon juice in a bowl. Let them sit for 15–20 minutes until slightly glossy and beginning to release their natural juice. In a small saucepan or the microwave, warm the strawberry jam until it is liquid and pourable. Brush or spoon the warm jam over the strawberry pieces to create a glossy, jewel-like glaze that makes each piece look vibrant and fresh.
Remove the chilled Strawberry Crunch Cheesecake from the refrigerator. Carefully release and remove the springform ring. Run a thin knife around the edge of the crust first if the filling has adhered to the ring at all — this prevents any tearing. Arrange the glazed strawberry pieces across the entire top surface of the cheesecake in whatever pattern appeals to you — concentric circles, a loose pile, or a clean grid all look equally effective.
Press the strawberry crunch coating firmly onto the sides of the cheesecake, working around the entire circumference. The filling will still be firm enough to act as an adhesive for the crunch — press each handful gently but with consistent pressure so the coating sticks and stays. Scatter any remaining crunch loosely across the outer edge of the top surface around the strawberry topping. If you are using the white chocolate drizzle, drizzle it over the crunch coating now and allow 5 minutes for it to set before slicing and serving. :/
How to Get Clean Slices Every TimeUse a sharp knife dipped in hot water and wiped clean between each cut. The warm blade glides through the cold cream cheese filling without dragging or tearing the crunch coating off the sides. Score the entire cheesecake into portions before making the first full cut — a light score mark gives you a guide to follow and helps you portion evenly without measuring as you go. Clean slices require a patient knife and regular wiping. Worth every second.
Variations Worth Making
Chocolate Strawberry Crunch Cheesecake
Add 2 tablespoons of high-quality cocoa powder to the filling with the powdered sugar. Use an Oreo cookie crust instead of the graham cracker base — pulse 24 Oreos with 5 tablespoons of melted butter until fine crumbs form. The chocolate filling deepens the strawberry flavour dramatically and makes the crunch coating taste even more like an indulgent strawberry chocolate bar in cheesecake form.
Mini Cheesecake Version
Divide the crust and filling between 12 standard muffin tins lined with cupcake liners. Use about 2 tablespoons of crust per cup, pressed flat, and fill each with the cream cheese mixture to just below the rim. Chill for 4 hours minimum. The mini format is perfect for parties where individual portions make serving cleaner and allow guests to pick up their cheesecake without needing a plate and fork.
Lemon Strawberry Crunch Cheesecake
Increase the lemon zest in the filling to 1 full tablespoon and add an extra tablespoon of lemon juice. Replace the strawberry jam glaze with a lemon curd glaze. The lemon-forward version tastes lighter and more citrusy than the original, which makes it work beautifully as a summer dessert when you want something fresh and bright rather than deeply rich. The strawberry crunch topping stays identical and provides the fruit-flavour balance the lemon filling needs.
Storage and Make-Ahead Tips
Store Strawberry Crunch Cheesecake covered in the refrigerator for up to 4 days. Apply the strawberry topping and crunch coating no more than 2–3 hours before serving for the best appearance — the crunch softens slightly over time as it absorbs moisture from the filling and the fruit topping, though it retains its flavour completely. The cheesecake base with filling stays in perfect condition for 4 days refrigerated.
This cheesecake freezes well without the topping and crunch. Freeze the set cheesecake still in the springform pan, wrapped tightly in two layers of cling film and then foil, for up to 2 months. Thaw overnight in the fridge, then apply the fresh strawberry topping and the crunch coating as directed just before serving. The filling texture after thawing is virtually identical to fresh.
Frequently Asked Questions
How do I know when the no-bake cheesecake is fully set and ready to serve?
The cheesecake is ready when the filling feels completely firm when pressed gently in the centre — no soft, jelly-like give, just a solid, spring-back firmness. The edges will set before the centre and can be misleading indicators. After 6 hours of chilling the filling should be set throughout, but overnight chilling guarantees the firmest, cleanest-slicing result. If you are unsure, insert a knife into the centre — it should come out clean with no wet filling clinging to the blade.
Can I use light cream cheese or low-fat sour cream instead of full-fat?
Light cream cheese contains more water than full-fat, which prevents the filling from setting as firmly during chilling. The result is a softer, less stable cheesecake that may not hold clean slices without collapsing slightly. For a no-bake cheesecake that relies entirely on chilling rather than baking to set its structure, full-fat cream cheese is non-negotiable for the best outcome. If dietary requirements demand lighter options, use a gelatine sheet dissolved in the filling to compensate for the reduced fat content.
Can I use frozen strawberries for the topping?
Fresh strawberries are significantly better for the topping because they hold their shape, colour, and texture after slicing in a way that frozen-and-thawed strawberries do not. Thawed frozen strawberries release a lot of liquid and become soft and slightly colourless, which makes the topping look wilted rather than vibrant. If fresh strawberries are unavailable, use a store-bought strawberry pie filling as the topping — it looks appealing and holds up well without the moisture problem of thawed frozen fruit.
How do I prevent the crunch coating from falling off the sides of the cheesecake?
Three things help: make sure the crunch mixture has enough melted butter so the crumbs clump slightly rather than being completely loose; apply the crunch immediately after releasing the springform ring while the filling is still firm and cold enough to act as an adhesive; and press the crunch firmly against the sides with your palm rather than just scattering it loosely. Refrigerating the coated cheesecake for 15 minutes before serving allows the butter in the crunch to set against the filling and hold everything more securely.
Can I add gelatine to make the cheesecake set more firmly?
This step is helpful if you’re serving in a warm environment or need the cheesecake to hold its shape longer at room temperature. Start by dissolving 1½ teaspoons of unflavoured gelatin in 3 tablespoons of cold water. Let it bloom for 5 minutes. Then warm it gently until fully dissolved and smooth. Fold the dissolved gelatine into the cream cheese mixture before adding the whipped cream. The gelatine-stabilised version slices perfectly even at room temperature and holds for significantly longer before softening.
Final Thoughts
This Strawberry Crunch Cheesecake delivers the full cheesecake experience without using an oven. There’s no need for a water bath, and you won’t have to worry about cracks. The buttery crust pairs perfectly with the silky filling and fresh strawberry topping. The iconic crunch coating adds texture and flavor. Together, they create a dessert that looks impressive and tastes incredible. It’s the kind of treat that earns real compliments and makes you feel like a skilled baker.
Thirty minutes of active work. Six hours of patience. A result that earns genuine appreciation from everyone at the table and recipe requests before anyone has finished their first slice. That is the mark of a recipe worth keeping and repeating.
Pull that cream cheese from the fridge right now so it softens in time. Make the crunch coating today. Assemble it tonight. Serve it tomorrow to people who will absolutely not believe you made it yourself in half an hour. That is the best possible outcome and it is entirely within reach.
Strawberry Crunch Cheesecake
Ingredients
Method
- Process the graham crackers and vanilla wafer cookies in a food processor until they become fine, uniform crumbs.
- Combine the graham cracker crumbs, vanilla wafer crumbs, and granulated sugar in a large bowl and stir until evenly mixed.
- Add the melted butter and pinch of salt and stir until the mixture holds its shape when pressed.
- Press the crust mixture into a 9-inch springform pan and refrigerate for 20 minutes.
- In a large mixing bowl, beat the softened cream cheese until smooth.
- Add the sifted powdered sugar, vanilla extract, lemon zest, lemon juice, and pinch of salt; mix until fully incorporated.
- In a separate bowl, beat the cold heavy cream until it reaches stiff peaks.
- Fold the whipped cream into the cream cheese mixture until smooth.
- Pour the cream cheese filling over the chilled crust and spread evenly.
- Cover and refrigerate for at least 6 hours, preferably overnight.
- Crush the vanilla wafer cookies in a zip-lock bag into coarse crumbs.
- Combine crushed wafers, freeze-dried strawberry powder, melted butter, and sugar in a bowl.
- Refrigerate the mixture for 30 minutes to allow it to firm up.
- Toss sliced and halved strawberries with sugar and lemon juice; let sit for 15–20 minutes.
- Warm the strawberry jam until liquid and brush over the strawberries.
- Remove cheesecake from refrigerator and carefully release the springform ring.
- Arrange glazed strawberries on top and press the crunch coating onto the sides.
- Drizzle with melted white chocolate if desired and let set for 5 minutes before slicing.