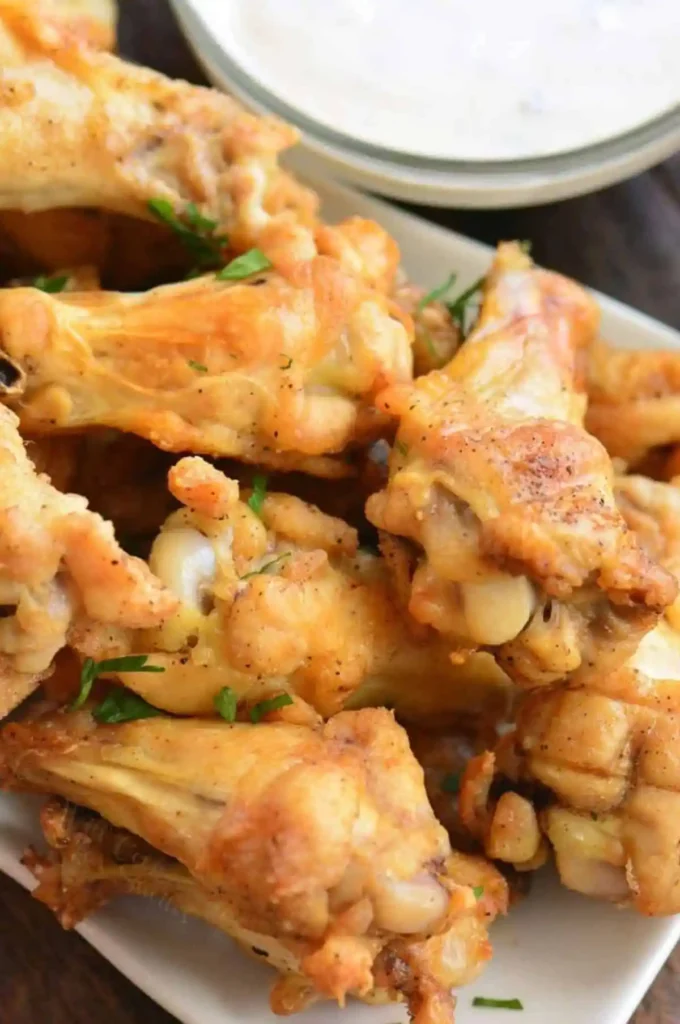
Craving wings but don’t own a deep fryer? Good news: your oven can pull off crispy, juicy chicken wings without a drop of hot oil. I’ve burned through more trays of wings than I care to admit testing this, and I’m handing you the shortcut.
Servings: 4 | Prep Time: 15 minutes | Cook Time: 35-40 minutes | Total Time: about 50-55 minutes
Why Bake Instead Of Fry?
Frying wings tastes amazing, sure, but who wants to deal with a pot of hot oil on a random Tuesday? Baking gets you 90% of that crispy payoff with none of the cleanup drama. IMO, that trade-off is a no-brainer.
What You’ll Need: Ingredients
Here’s everything on the shopping list for this batch, serving about four people as an appetizer or two as a main.
- Chicken wings, whole or already split into flats and drumettes – 2 pounds
- Non-aluminum baking powder – 1 tablespoon
- Salt – 1 teaspoon
- Black pepper – 1/2 teaspoon
- Garlic powder – 1/2 teaspoon
- Cooking oil (for the wire rack) – 1 teaspoon
Quick note on that baking powder: grab the non-aluminum kind specifically. The regular stuff can leave a faint metallic aftertaste, and nobody wants that hiding in their wings.
Breaking Down Whole Wings (Skip If Yours Are Pre-Cut)
Bought whole wings instead of pre-separated ones? No stress, breaking them down takes about two minutes once you know where to cut. Here’s the move.
- Pull the wing apart gently until you can see the joint clearly.
- Slice through the skin and meat right at that joint, between the drumette and the flat.
- Wiggle the wing up and down to pop the bone loose, then finish the cut.
- Repeat the process at the joint connecting the flat and the tip.
You’ll end up with three pieces: drumette, flat, and tip. Toss the tips in your freezer for stock later, or just skip separating them altogether and bake the wings whole. Either way works fine.
Getting Your Oven And Pan Ready
Preheat your oven to 425°F. This temperature is the sweet spot between crispy skin and meat that hasn’t dried out. Line a baking sheet with foil so cleanup doesn’t ruin your evening.
Set a wire rack on top of that lined baking sheet. The rack lifts the wings off the pan so hot air can circulate underneath them too. Rub a little oil over the rack first so nothing sticks once it’s baking time.
Step-By-Step: How To Bake Chicken Wings
Ready for the fun part? Here’s exactly how this comes together, broken into easy stages so nothing gets skipped.
Step 1: Dry The Wings Completely
Grab paper towels and pat every wing bone-dry, front and back. Have you ever wondered why some baked wings turn out soggy? Extra moisture on the skin steams instead of roasts, and steam is the enemy of crispiness here.
Step 2: Coat In The Seasoning Mix
Toss the dried wings in a bowl with the baking powder, salt, pepper, and garlic powder. Mix with your hands until every wing is evenly coated, no dry clumps hanging around in the corners of the bowl. This coating is basically doing all the heavy lifting for that golden, crackly skin.
Step 3: First Bake Round
Arrange the wings in a single layer on the oiled wire rack, leaving a little space between each one. Slide the tray into the oven and bake for 20 minutes. Don’t panic, they’re not done yet, this is just round one.
Step 4: Flip And Finish Baking
Pull the tray out, close the oven door to keep the heat in, and flip every single wing over. Slide the tray back in and bake for another 15 minutes. Smaller wings might be ready a touch sooner, so start checking around the 12-minute mark if yours are on the petite side.
Step 5: Optional Broil For Extra Color
Want that deep golden-brown finish you see in restaurant photos? Switch the oven to low broil for one to two minutes at the very end. Stand right there and watch closely, because broiled wings go from perfect to burnt embarrassingly fast.
How Long Should You Actually Bake Wings?
At 425°F, plan on 35 to 40 minutes total cooking time, split across those two bake rounds. Bumping the oven to 450°F shaves off a few minutes but dries the meat out slightly. Dropping to 400°F keeps things juicier but takes a little longer to crisp up.
Got a mixed bag of small and large wings? Separate them into two trays instead of one. This small step keeps the little ones from overcooking while the big ones catch up.
The Real Secret Behind Crispy Skin
Here’s the part everyone gets wrong: rubbing wings in oil doesn’t actually beat baking powder for crispiness. I tested both side by side, oil versus baking powder, on the exact same wings and oven setting. Baking powder won, hands down, every single time.
The science is simple enough. Baking powder raises the skin’s pH, which breaks down proteins and helps moisture evaporate faster during cooking. Less moisture on the surface means crispier skin by the time your timer goes off.
Sauce And Seasoning Ideas Worth Trying
This base recipe stays intentionally simple so you can go wherever your cravings lead once the wings come out. Buffalo and BBQ are the classic go-tos, but don’t feel boxed in.
- Buffalo sauce for that classic tangy heat everyone expects at game night
- BBQ sauce for smoky sweetness that works on literally any crowd
- Garlic parmesan butter if you want something rich and savory instead
- Dry rub when you’d rather skip sauce entirely and keep the skin crispy longer
Toss cooked wings in sauce right before serving, never before baking. Sauce on raw wings blocks that crisping process completely, and honestly, who wants soggy wings? :/
Serve alongside celery and carrot sticks with ranch or blue cheese for dipping. The cool crunch balances out spicy sauce nicely, plus it makes the plate look like you tried.
Storing And Reheating Leftover Wings
Pop leftover wings into an airtight container and refrigerate them for up to three or four days. FYI, they won’t taste quite as crispy on day two, but reheating the right way helps a lot.
An air fryer is honestly the best reheating option, running wings at 360°F for three to four minutes. No air fryer on hand? The oven works too, at 350°F for 10 to 15 minutes. Skip the microwave unless the wings are already sauced, since it turns bare skin soft and sad.
Frequently Asked Questions
Can I bake frozen chicken wings? Thaw them in the refrigerator first for the best texture. Pat them completely dry before seasoning, since frozen wings hold extra moisture that fights against crispy skin.
Should I sauce the wings before baking? No, always bake them plain and toss in sauce afterward. Baking wings already coated in sauce traps moisture against the skin and prevents any real crisping.
Can I cook two trays of wings at once? Only if your oven has a convection setting, and even then this specific recipe needs adjusted timing. A regular oven struggles to circulate heat evenly across two racks.
What internal temperature means the wings are done? Chicken wings are safe to eat once they hit 165°F internally. Because there’s so little meat around the bone, a quick visual check for golden, crisp skin is usually just as reliable.
Why are my baked wings soggy instead of crispy? Nine times out of ten, it comes down to skipping the drying step or skipping baking powder altogether. Wet skin steams in the oven instead of crisping, so pat those wings dry like you mean it.
Final Thoughts
Baked chicken wings really don’t need a fryer, fancy equipment, or hours of babysitting to turn out crispy and delicious. Dry the wings, coat them in baking powder, and give the oven time to do the rest. Once you taste that crackly skin, going back to soggy oven wings feels impossible.
Give this method a shot this weekend, and don’t blame me when you end up making a double batch next time.



