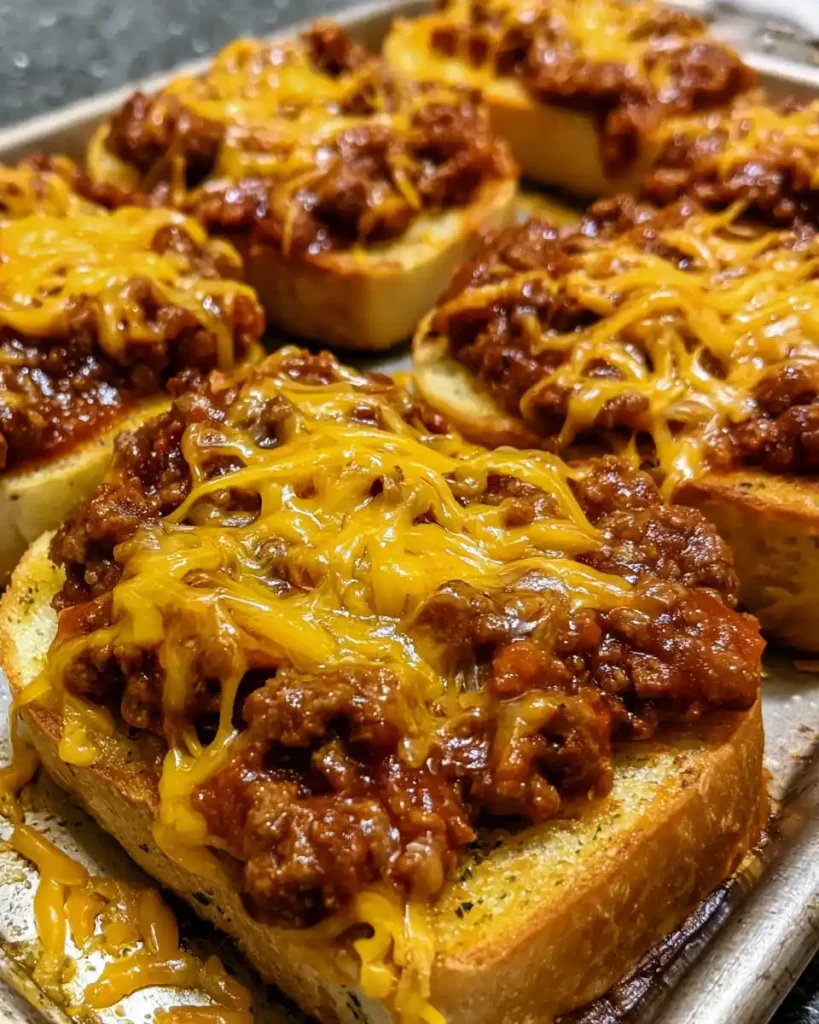
Okay, real talk — some nights you just want something that feels indulgent, requires minimal effort, and makes everyone at the table actually happy. That’s exactly where Cheesy Sloppy Joe Garlic Toast comes in. Saucy beef, melted cheese, buttery garlic toast. Need I say more?
I stumbled onto this combo one hectic Friday night when I had ground beef, a bag of frozen garlic toast, and zero patience. The result? Pure, messy, glorious comfort food that became a weekly staple. You’re going to love it.
Servings and Prep Time
- Servings: 6
- Prep Time: 10 minutes
- Cook Time: 20 to 25 minutes
- Total Time: About 35 minutes
Why Cheesy Sloppy Joe Garlic Toast Works So Well
Have you ever thought about why some meals just feel right? This one nails the texture contrast — soft, saucy meat filling against a crisp, buttery toast base. Then melted cheddar ties it all together.
It’s also incredibly fast to pull together on a weeknight. You cook the filling in one pan, bake the toast in the oven, and dinner is done in under 40 minutes. IMO, that’s a serious win.
Ingredients for Cheesy Sloppy Joe Garlic Toast
Here’s everything you need to make this recipe work:
For the Sloppy Joe Filling:
- 1 lb ground beef (80/20 blend works best)
- 1 small yellow onion, finely diced
- 1 cup tomato sauce
- 3 tablespoons ketchup
- 1 tablespoon yellow mustard
- 1 tablespoon Worcestershire sauce
- 1 tablespoon brown sugar
- 1/2 teaspoon onion powder
- 1/2 teaspoon garlic powder
- Salt and black pepper to taste
For the Toast:
- 1 package (11.25 oz) frozen garlic toast (about 8 to 10 slices)
- 1.5 cups shredded cheddar cheese
How to Make Cheesy Sloppy Joe Garlic Toast
Step 1: Brown the Beef and Onions
Start by placing a large skillet over medium-high heat. Add your ground beef and diced onion together right from the start — don’t wait for the pan to heat before adding the onion. They cook better when they go in together.
Break the meat apart with a wooden spoon as it cooks. You want it browned and crumbled, not in large clumps. This takes about 6 to 8 minutes. Once fully cooked, carefully drain the excess grease — skipping this step makes the sauce greasy and thin.
Step 2: Build the Sloppy Joe Sauce
Reduce the heat to medium after draining. Now add the tomato sauce, ketchup, yellow mustard, Worcestershire sauce, brown sugar, onion powder, and garlic powder directly into the skillet with the meat.
Stir everything together until the ingredients fully combine into a cohesive, glossy sauce. You’ll notice it smells incredible at this point — that’s the Worcestershire and brown sugar doing their thing. Let the mixture simmer for 5 to 7 minutes, stirring occasionally. The sauce should thicken noticeably. If it looks too thick, splash in a tablespoon of water. If it looks too loose, let it bubble a minute longer.
Taste the sauce before you move on. Adjust salt, pepper, or a pinch more brown sugar if it needs balancing. Getting the sauce right at this stage is the most important part of the whole recipe.
Step 3: Preheat the Oven and Prep the Baking Sheet
While the sauce simmers, preheat your oven to 400°F (200°C). Pull out a large rimmed baking sheet and line it with foil — this makes cleanup about 10 times easier, trust me.
Arrange the frozen garlic toast slices in a single layer across the baking sheet. Make sure they don’t overlap. Overlapping slices steam each other and you lose that crispy bottom edge that makes this dish so satisfying.
Step 4: Load Up the Toast
Now spoon the sloppy joe filling generously onto each toast slice. Don’t be shy here — pile it on. A thin layer of filling gets lost under the cheese and doesn’t give you that satisfying bite.
Aim for an even, slightly mounded layer of filling on each slice. Make sure you spread it all the way to the edges so every corner gets some sauce. This step takes maybe two minutes but makes a huge visual difference.
Step 5: Add the Cheese
Sprinkle shredded cheddar cheese evenly over each loaded toast slice. Use a generous hand — about 2 to 3 tablespoons per slice works well. The cheese should fully cover the filling so it melts into a cohesive, gooey blanket rather than patchy spots.
If you want extra browning and a slightly crispy cheese layer, use a mix of shredded cheddar and a small amount of shredded mozzarella. Mozzarella gives you those satisfying cheese pulls.
Step 6: Bake Until Golden and Bubbly
Slide the baking sheet into the preheated oven. Bake for 10 to 15 minutes. Keep an eye on them after the 10-minute mark — ovens vary and the toast can go from perfect to overdone quickly.
You’re looking for melted, bubbly cheese with slightly golden edges on the toast. The filling should be hot all the way through. If you want even more color on the cheese, switch the oven to broil for the final 1 to 2 minutes. Watch it closely during the broil — it moves fast.
Step 7: Rest Briefly and Serve
Pull the tray out of the oven and let it sit for 2 minutes before serving. This brief rest lets the cheese set slightly so it doesn’t slide off the moment someone picks up a slice.
Serve them hot, straight off the tray. These are fantastic as-is, but a sprinkle of fresh parsley or a few dashes of hot sauce on top takes them up a notch if you’re feeling fancy.
Tips for the Best Results
- Don’t skip draining the grease — it’s the difference between a rich sauce and a greasy mess.
- Use frozen garlic toast straight from the freezer — no thawing needed, it bakes perfectly from frozen.
- Simmer the sauce long enough — under-simmered sauce is watery and slides right off the toast.
- Add cheese generously — a thin layer melts unevenly and doesn’t give you that satisfying cheesy pull.
- Check the oven early — toast thickness varies by brand, so start checking at 10 minutes.
Variations to Try
This recipe is a great starting point, but feel free to make it your own:
- Spicy version: Add a teaspoon of red pepper flakes or swap cheddar for pepper jack cheese.
- BBQ twist: Replace ketchup with your favorite BBQ sauce for a smokier flavor.
- Veggie option: Use lentils or a plant-based ground meat substitute in place of beef.
- Extra veggies: Stir diced bell peppers or mushrooms into the filling during Step 1.
- Cheese swap: Try smoked gouda or Colby jack for a different flavor profile entirely.
What to Serve With Cheesy Sloppy Joe Garlic Toast
This dish is hearty enough to stand alone, but pairing it well rounds out the meal:
- Crisp green salad with a light vinaigrette to cut through the richness
- Sweet potato fries or regular potato chips for extra crunch
- Coleslaw — the cool, creamy contrast works beautifully against the warm, cheesy toast
- Cold lemonade or iced tea to balance the savory, bold flavors
FAQs About Cheesy Sloppy Joe Garlic Toast
Can I make the sloppy joe filling ahead of time? Absolutely. Cook the filling up to 3 days in advance and store it in an airtight container in the fridge. When ready to serve, reheat it in a skillet over medium heat before spooning it onto the toast.
What if I can’t find frozen garlic toast? No problem. Use thick-sliced bread, spread it with softened butter, and sprinkle garlic powder on top before loading on the filling. Homemade garlic toast works great and lets you control the garlic level. FYI, Texas toast-style bread holds up best.
Can I freeze assembled slices for later? Yes. Assemble the loaded toast before baking, freeze them on the tray until solid, then transfer to a freezer bag. Bake straight from frozen at 400°F, adding 5 to 7 extra minutes to the cook time.
How do I store and reheat leftovers? Store leftover slices in an airtight container in the fridge for up to 3 days. Reheat in the oven at 350°F for 8 to 10 minutes to bring back the crispy edges. The microwave works in a pinch but softens the toast.
Can I use ground turkey or chicken instead of beef? Definitely. Ground turkey makes a leaner version that still tastes great. Just be aware that turkey has less natural fat, so the filling may be slightly drier. Add an extra splash of Worcestershire sauce to compensate.
Final Thoughts
Cheesy Sloppy Joe Garlic Toast is one of those recipes you make once and immediately add to your regular rotation. It’s quick, crowd-pleasing, budget-friendly, and endlessly customizable. What more could you ask for on a busy weeknight?
The saucy beef filling, crispy buttery toast, and melted cheese combo hits different every single time. Make it once and I guarantee your family starts requesting it by name. Now go grab that skillet — dinner isn’t going to cook itself.
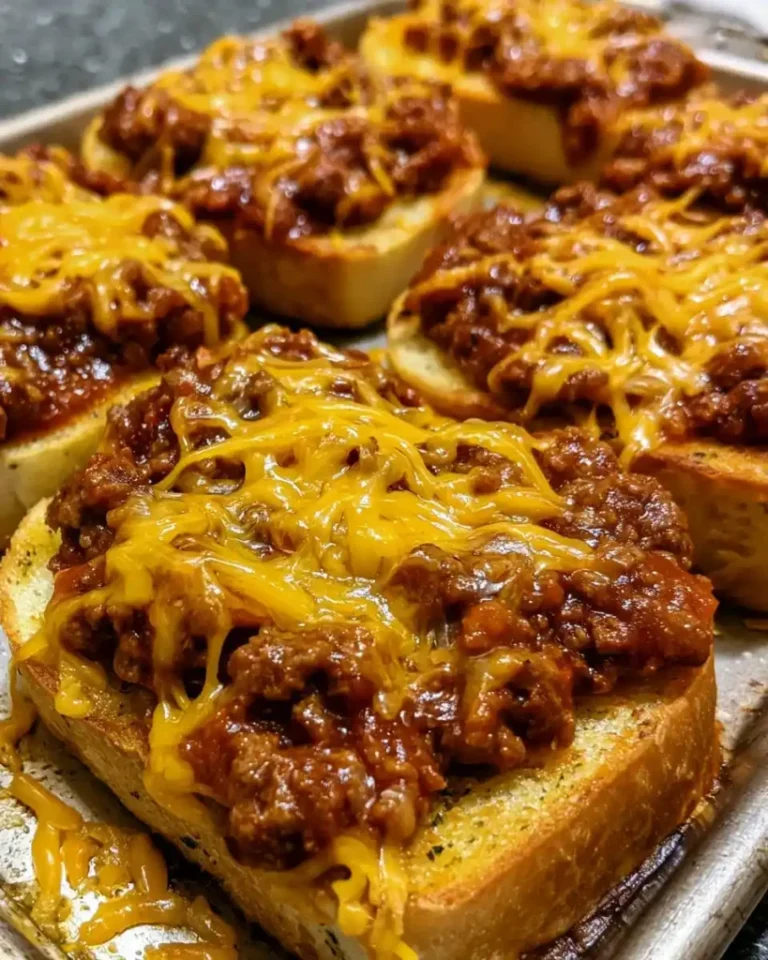
Cheesy Sloppy Joe Garlic Toast
Ingredients
Method
- Start by placing a large skillet over medium-high heat. Add your ground beef and diced onion together and cook for 6 to 8 minutes, breaking the meat apart until browned and crumbled.
- Drain the excess grease from the skillet.
- Reduce the heat to medium and add tomato sauce, ketchup, yellow mustard, Worcestershire sauce, brown sugar, onion powder, and garlic powder. Stir until combined.
- Simmer the sauce for 5 to 7 minutes, stirring occasionally. Adjust seasoning if needed.
- While the sauce simmers, preheat your oven to 400°F (200°C) and line a baking sheet with foil.
- Arrange the frozen garlic toast slices on the baking sheet in a single layer.
- Spoon the sloppy joe filling onto each slice, spreading it to the edges.
- Sprinkle shredded cheddar cheese evenly over each slice.
- Bake for 10 to 15 minutes until the cheese is bubbly and the edges are golden. Broil for 1 to 2 minutes for extra browning if desired.
- Remove from the oven and let rest for 2 minutes before serving.



