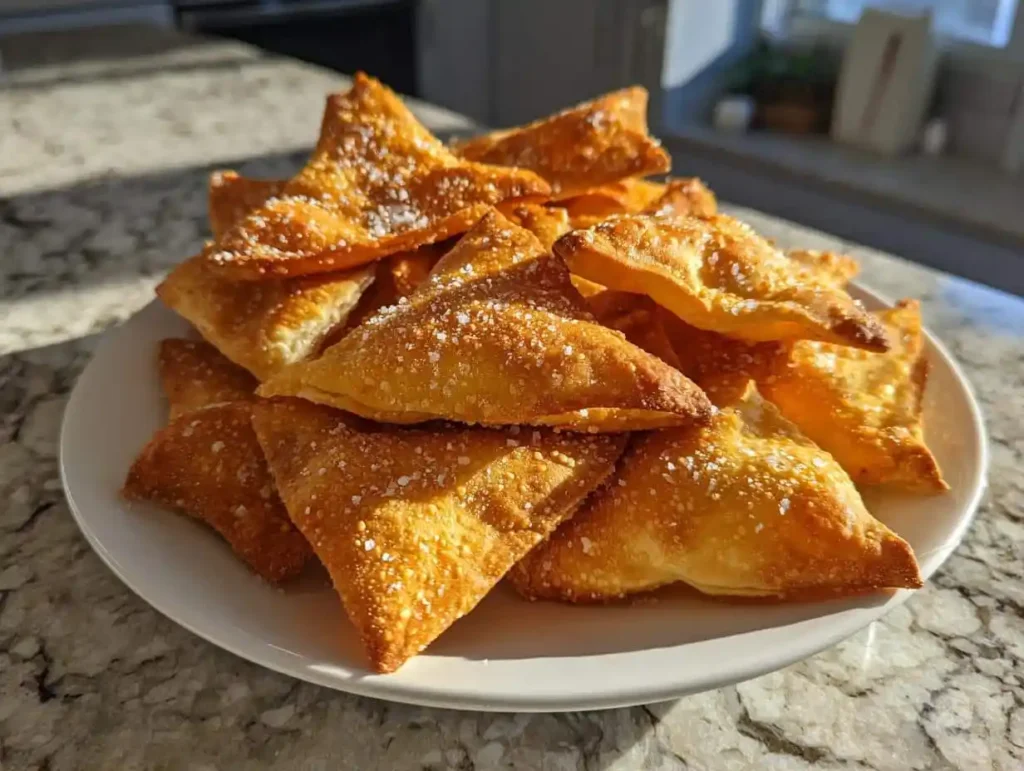
Warning: this Air Fryer Pita That’s Dangerously Crispy recipe will ruin regular pita bread for you. I made a batch on a random Tuesday craving something crunchy for hummus, and now it’s a weekly habit.
Servings: 4 (about 16 triangles) Prep time: 5 minutes Cook time: 5 minutes Total time: 10 minutes
Why This Air Fryer Pita Recipe Deserves a Spot in Your Rotation
Ten minutes stands between you and golden, crunchy pita triangles. No deep fryer, no oil splatter, no standing over a hot pan babysitting bread.
Have you ever wanted that satisfying crunch without the greasy aftermath? That’s exactly what this Air Fryer Pita That’s Dangerously Crispy recipe delivers, minus all the mess.
IMO, this beats store-bought pita chips every single time. Those bags always taste stale by the time you open them, while this comes out fresh and crackly straight from the basket.
Ingredients for Air Fryer Pita That’s Dangerously Crispy
Here’s the short list, with exact quantities so you don’t have to guess.
- 2 medium pita bread rounds, cut into 8 triangles each
- 1 tablespoon extra virgin olive oil
- 1/2 teaspoon kosher salt
- 1/2 teaspoon garlic powder (optional)
That’s genuinely it. Swap garlic powder for smoked paprika or za’atar if you’re feeling adventurous, and don’t be afraid to experiment once you’ve nailed the basic method.
How to Make Air Fryer Pita That’s Dangerously Crispy
Step 1: Preheat Your Air Fryer Properly
Set your air fryer to 375°F and let it fully preheat before adding anything. Skipping this step feels tempting when hunger strikes, but those extra two minutes genuinely matter for even, consistent crisping.
While the machine heats up, this is your window to prep everything else. Don’t walk away completely, though; preheating usually takes less time than you’d expect.
Step 2: Slice the Pita Into Triangles
Take your pita rounds and cut each one into 8 triangles, just like slicing a small pizza. Kitchen scissors work faster than a knife here, though either tool gets the job done fine.
If your pita pockets puff up thickly, gently pull the layers apart first. Thinner halves crisp up far more evenly than thick, doughy pieces do.
Step 3: Coat the Triangles Evenly
Place your pita triangles into a mixing bowl. Drizzle the olive oil over the top, then sprinkle in the salt and garlic powder.
Use your hands to toss everything together gently. You want each triangle lightly coated on all sides, not soaked or dripping, since excess oil actually works against getting that crisp texture.
Step 4: Arrange in a Single Layer
Lay your seasoned pita triangles into the air fryer basket in a single layer, without overlapping. This step matters more than almost anything else in the whole process.
Overcrowding traps steam between pieces, which leaves you with half-crispy, half-soggy results. If your basket runs small, cook in two batches instead of cramming everything in at once.
Step 5: Cook and Shake for Even Browning
Cook the pita triangles for 3 minutes, then pause and shake the basket to flip everything over. This ensures both sides get equal exposure to that hot circulating air.
Return the basket and continue cooking for another 1 to 2 minutes. Watch closely during this final stretch, since pita can go from perfectly golden to noticeably overdone within seconds.
Step 6: Check for Doneness
Look for edges that turn crisp and lightly browned, which usually happens around the 4 to 5 minute mark total. The color should look golden, not deeply dark or burnt.
If a few pieces still feel a little soft, pop them back in for another 30 to 60 seconds. Air fryers forgive small timing mistakes far better than a regular oven does.
Step 7: Let Them Cool Slightly Before Serving
Transfer the finished triangles to a wire rack or plate in a single layer. Avoid stacking them right away, since trapped steam softens that crispy exterior you just worked to create.
Give them a minute or two to rest. They’ll actually crisp up even further as they cool, which feels like a small bonus you didn’t have to work for.
Pro Tips for the Crispiest Air Fryer Pita
- Check early and often, since air fryer models vary widely in actual heat output
- Never overcrowd the basket; cook in batches if needed for even crisping
- Add an extra minute for thicker whole-wheat pita rounds
- Add fresh herbs only after cooking, since they burn and turn bitter otherwise
- Split your salt: season lightly before cooking and add a touch more after for extra flavor
Fun Variations to Try
- Za’atar style: Brush with olive oil after cooking and sprinkle generously with za’atar
- Parmesan crisps: Add grated parmesan before air frying for lacy, crispy edges
- Spicy kick: Toss with crushed red pepper flakes alongside the garlic powder
- Everything bagel style: Swap the seasoning for everything bagel spice blend
- Cinnamon sugar: Toss warm pita in melted butter, then coat in cinnamon sugar for a dessert version
What to Serve With Air Fryer Pita
Warm pita triangles pair perfectly with hummus, tzatziki, or a bowl of whipped feta drizzled with honey. Build a full Mediterranean spread by adding baba ganoush and a crunchy cucumber salad alongside it.
On a colder day, dunk these into a bowl of tomato soup instead of grilled cheese. They disappear fast, so don’t expect leftovers if you’re serving a crowd.
Storage and Reheating
Let the pita cool completely before storing to avoid trapping soggy steam inside the container. Keep them in an airtight container at room temperature, where they stay crunchy for up to three days.
Reheat them in the air fryer at 375°F for 1 to 2 minutes to restore that just-made crunch. Skip the microwave here; it turns crispy pita soft and chewy almost instantly :/
FAQs About Air Fryer Pita That’s Dangerously Crispy
Can I use whole-wheat pita instead of regular? Yes, whole-wheat pita works great and adds a nutty flavor. It’s denser, so add an extra minute or two of cook time and watch closely since the darker color makes doneness harder to spot.
Why isn’t my pita turning out crispy? This usually comes down to an overcrowded basket, too little oil, or skipping the preheat step. Let pieces cool in a single layer afterward too, since stacking traps steam and softens the crunch.
Can I make a big batch ahead of time for a party? Absolutely. Cook everything as usual, let it cool completely, then store with parchment paper between layers. Reheat in the air fryer for about 90 seconds right before guests arrive for a fresh-tasting result.
What’s the best dip to serve with this? Hummus and tzatziki are classic choices that never disappoint. Whipped feta with honey or a blend of roasted red peppers and Greek yogurt also work beautifully here.
Can I use this same method for other flatbreads? Yes, naan, lavash, and even flour tortillas crisp up nicely this way. Thinner breads cook faster, so adjust your timing accordingly and check often to avoid overcooking them.
How many calories are in a serving of air fryer pita? A serving of about half a pita round runs roughly 80 calories, with 3 grams of fat and 12 grams of carbohydrates. These numbers shift slightly depending on your specific brand of pita and how generous you are with the oil.
Final Thoughts
This Air Fryer Pita That’s Dangerously Crispy recipe takes ten minutes and turns basic pantry staples into something genuinely addictive. Crispy, customizable, and endlessly dippable, it earns its spot in your regular snack rotation fast.
Got hummus in the fridge right now? Go make a batch of these tonight. Just don’t blame me when the whole tray disappears before you even sit down