Servings: 8 pillows | Prep Time: 20 minutes | Bake Time: 20–25 minutes | Total Time: ~45 minutes
Some recipes sound fancy but deliver disappointment. Creamy chicken pillows are the opposite — they sound simple but completely over-deliver. Tender shredded chicken wrapped in buttery crescent roll dough with a creamy, cheesy filling inside. Every single bite earns its place on the plate.
I started making these on busy weeknights when I needed something that felt like real comfort food without a two-hour commitment. They became my go-to almost immediately. The whole family finishes them before I’ve even sat down, which is both flattering and mildly annoying. Worth it every time though.
What Exactly Are Creamy Chicken Pillows?
If you’ve never made these before, here’s the quick explanation. Creamy chicken pillows are crescent roll dough triangles filled with a seasoned cream cheese and shredded chicken mixture, then rolled up and baked until golden and flaky. They look impressive. They taste incredible. And they take less than 45 minutes start to finish.
The filling is what makes these genuinely special. Cream cheese, shredded chicken, garlic, herbs, and a little cheddar all come together into something thick, savory, and absolutely addictive. Wrapped in buttery crescent dough and baked golden, the result is crispy outside and melty, creamy inside. That contrast is everything.
Why This Recipe Works for Any Occasion
These aren’t just a weeknight dinner solution — they fit multiple occasions naturally:
- Weeknight dinner — fast, filling, and universally crowd-pleasing
- Party appetizers — make them smaller using quartered dough for bite-sized versions
- Meal prep — the filling holds in the fridge for up to 2 days before baking
- Potluck contribution — they travel well and reheat beautifully
- Comfort food fix — warm, cheesy, and deeply satisfying without hours of effort
IMO, a recipe that works this well across this many situations earns a permanent spot in anyone’s rotation.
Ingredients You’ll Need
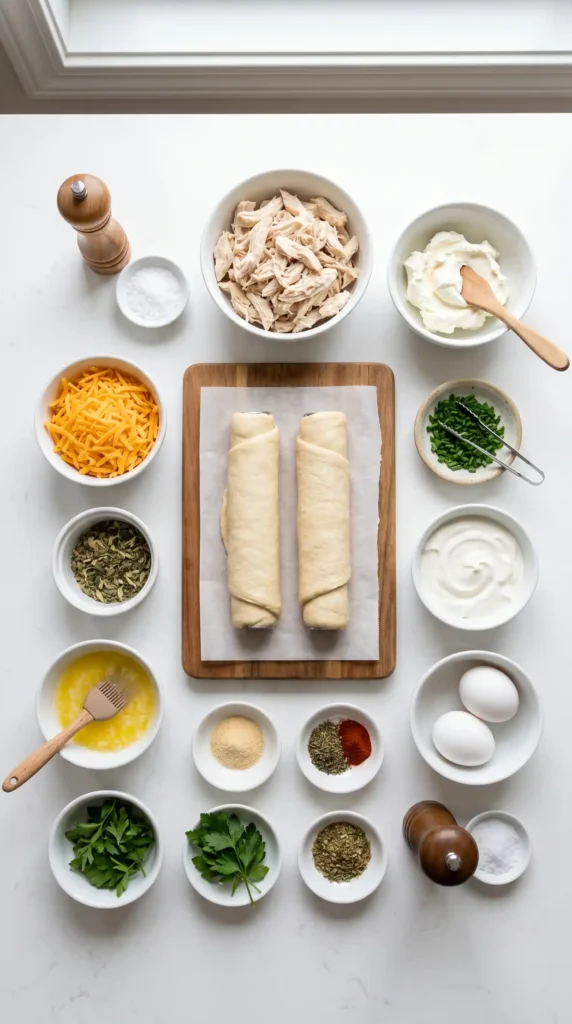
This recipe keeps the ingredient list approachable and short. Every item here contributes something meaningful to the final result.
For the Creamy Chicken Filling
- 2 cups cooked shredded chicken (rotisserie works perfectly)
- 8 ounces cream cheese, softened to room temperature
- 1/2 cup shredded sharp cheddar cheese
- 2 tablespoons sour cream
- 1 teaspoon garlic powder
- 1/2 teaspoon onion powder
- 1/2 teaspoon dried Italian seasoning
- 1/4 teaspoon black pepper
- 1/4 teaspoon salt
- 2 tablespoons fresh chives or green onion, finely chopped
For the Dough and Assembly
- 2 cans (8 ounces each) refrigerated crescent roll dough
- 2 tablespoons unsalted butter, melted
- 1/4 teaspoon garlic powder (for brushing)
Optional Additions
- 1/4 cup diced green bell pepper (adds color and a mild crunch)
- 1/4 teaspoon red pepper flakes (for a little heat)
- 2 tablespoons real bacon bits (stirred into the filling)
- 1/4 cup shredded mozzarella mixed into the cheddar for a stretchier melt
How to Make Creamy Chicken Pillows Step by Step
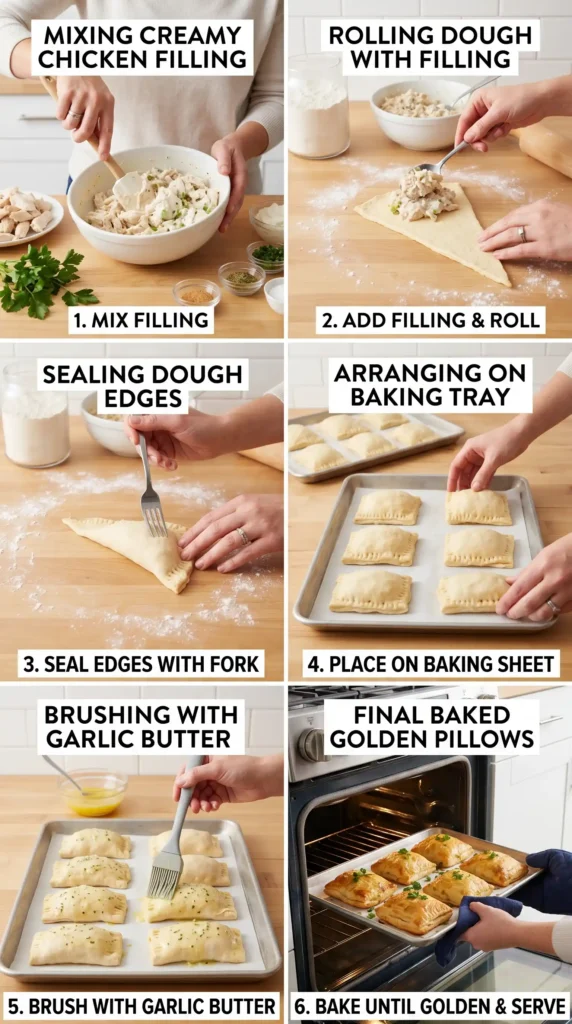
Every step here matters for getting that perfect golden, crispy exterior with a hot, creamy center. Let’s go through the whole process carefully.
Step 1: Prepare the Shredded Chicken
If you’re using rotisserie chicken — and honestly, you should — pull the breast and thigh meat off the carcass and shred it using two forks. Hold one fork steady and pull the other toward you in short strokes to create clean, even shreds. Consistent shreds distribute better through the cream cheese filling and prevent large chunks from tearing through the dough during rolling.
You want 2 full cups of shredded chicken, packed loosely. Too little chicken makes the filling mostly cream cheese with occasional meat, which throws off the balance. Too much crowds the dough and makes rolling the pillows difficult without tearing. Two cups hits the right proportion every time.
If you don’t have rotisserie chicken available, use two medium boneless chicken breasts. Season them with salt and pepper, bake at 400°F for 22–25 minutes until cooked through, then shred immediately while still warm. Warm chicken shreds far more easily and cleanly than cold chicken.
Step 2: Make the Creamy Filling
Softened cream cheese is non-negotiable here — cold cream cheese won’t mix smoothly and leaves lumps throughout the filling that create uneven bites. Pull it from the fridge at least 30 minutes before you start, or microwave it for 15 seconds to soften it quickly if you forgot.
Add the 8 ounces of softened cream cheese into a large mixing bowl. Stir it vigorously with a spatula for about 30 seconds until it looks completely smooth and creamy with no resistance. Smooth cream cheese absorbs the other ingredients evenly and creates a cohesive filling rather than a chunky, separated one.
Add the 2 tablespoons of sour cream and mix it in fully. Sour cream loosens the filling slightly and adds a subtle tang that balances the richness of the cream cheese without overpowering the chicken flavor. Follow that with 1 teaspoon garlic powder, 1/2 teaspoon onion powder, 1/2 teaspoon Italian seasoning, 1/4 teaspoon black pepper, and 1/4 teaspoon salt. Stir everything together until the seasonings distribute evenly throughout the cream cheese base.
Add your 1/2 cup shredded sharp cheddar and the 2 tablespoons of chopped chives. Fold them in gently rather than stirring aggressively — you want the cheese distributed evenly without breaking it down. Finally, add your 2 cups of shredded chicken and fold the entire mixture together until every piece of chicken gets a good coating of the cream cheese blend.
Taste the filling at this stage before it goes into the dough. Adjust the salt, add more garlic powder if you want a stronger savory note, or add red pepper flakes if you want a little heat. This is your best opportunity to personalize the flavor — once it’s wrapped in dough, you can’t adjust anything.
Step 3: Prepare Your Oven and Baking Sheet
Preheat your oven to 375°F (190°C). Line a large baking sheet with parchment paper. Parchment prevents the bottoms from sticking and makes cleanup nearly effortless. If you skip the parchment, the melted cream cheese that occasionally seeps out during baking welds itself to the pan and takes ages to scrub off.
Mix your 2 tablespoons of melted butter with 1/4 teaspoon garlic powder in a small bowl and set it aside. This garlic butter goes on top of the pillows just before baking and gives them that golden, savory, bakery-style finish that makes them look as good as they taste.
Step 4: Open and Separate the Crescent Dough
Open both cans of crescent roll dough carefully. Unroll each can and separate the dough along the pre-scored perforations into individual triangles. Each can gives you 8 triangles, and you’ll use 16 total — pairing them up to create 8 slightly larger rectangles for filling.
Here’s the trick most people miss: pair two triangles together by pressing their long edges firmly along the diagonal seam to form a rectangle. Press that seam closed with your fingertips so no gap remains. A gap at the seam allows filling to leak out during baking, and nobody wants to clean caramelized cream cheese off the oven floor.
If you want smaller, appetizer-sized creamy chicken pillows, keep the triangles individual and use about 2 tablespoons of filling per triangle. For the dinner-sized version this recipe targets, the doubled rectangles give you a better dough-to-filling ratio in every bite.
Step 5: Fill and Roll Each Pillow
Lay your first dough rectangle flat on your work surface with one of the short ends facing you. Spoon about 3–4 tablespoons of the creamy chicken filling onto the center of the rectangle. Spread it slightly but keep it away from the edges by at least half an inch on all sides — this border prevents filling from squeezing out during rolling and baking.
Fold the two long sides of the dough up and over the filling toward the center, overlapping them slightly. Then fold the bottom short end up and press it firmly to seal. Roll the entire package upward, ending with the seam side facing down. Press the top edge down firmly to close it.
Place each finished pillow seam-side down on your lined baking sheet, spacing them about 2 inches apart. They expand slightly during baking and need room to brown on all sides without crowding. A crowded pan traps steam between the pillows and prevents that golden, crispy exterior from forming properly.
Step 6: Brush With Garlic Butter and Bake
Brush the top and sides of each creamy chicken pillow generously with your garlic butter mixture. Don’t be timid here — a good coating of garlic butter is what produces that deep golden color and the savory aroma that hits the moment you open the oven door. Use a pastry brush and cover every exposed surface.
Slide the baking sheet into your preheated 375°F oven and bake for 20–25 minutes. Check at the 18-minute mark — ovens vary, and some run hotter than their settings suggest. The pillows are ready when the tops turn deep golden brown and the dough feels firm and set when you tap it lightly with a finger.
Pull them out and let them rest on the pan for 3–4 minutes before serving. The filling inside stays extremely hot directly from the oven and needs a brief rest to settle. Cutting into them immediately causes the creamy filling to run out rather than staying thick and molten inside each pillow.
Tips for Perfect Results Every Time
A handful of consistent habits make every batch of these come out well:
- Soften cream cheese fully before mixing — lumpy filling is harder to roll and unpleasant to eat
- Seal dough seams firmly with your fingers — gaps cause filling to leak during baking
- Don’t overfill — 3–4 tablespoons per pillow is the right amount; more causes blowouts
- Space pillows apart on the baking sheet — crowding prevents even browning
- Rest before cutting — 3–4 minutes allows the filling to thicken back up after baking
Serving Suggestions That Work Really Well
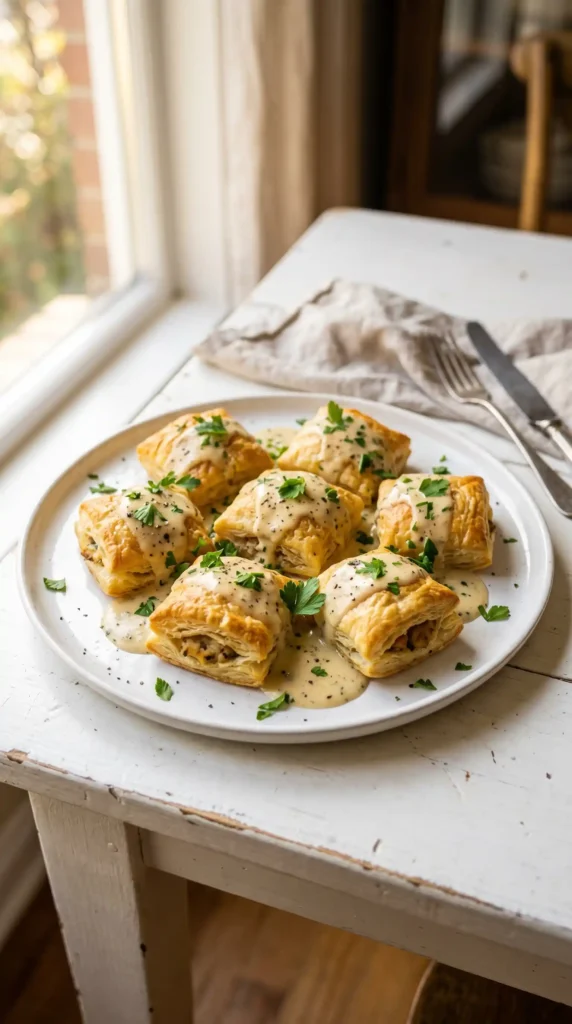
These creamy chicken pillows pair naturally with several sides and dipping sauces:
- Ranch dressing for dipping — classic, crowd-pleasing, and universally loved
- A simple green salad to balance the richness of the filling
- Roasted vegetables alongside for a complete dinner plate
- Cream of mushroom soup on the side for a full comfort food spread
- Hot sauce drizzled over the top for anyone who wants extra heat
FAQ: Creamy Chicken Pillows Recipe
Q1. Can I make creamy chicken pillows ahead of time? Yes — assemble them fully, place them on a lined baking sheet, cover with plastic wrap, and refrigerate for up to 8 hours before baking. Add 3–4 extra minutes to the bake time since they start cold from the fridge. The filling can also be made separately up to 2 days ahead.
Q2. Can I freeze creamy chicken pillows? Freeze them either before or after baking. For unbaked, freeze on a sheet until solid then transfer to a zip-lock bag for up to 2 months — bake from frozen at 375°F for 28–30 minutes. For already-baked pillows, cool completely before freezing and reheat in a 350°F oven for 10–12 minutes.
Q3. What can I use instead of crescent roll dough? Puff pastry sheets work excellently as a substitute — cut them into rectangles of similar size and follow the same filling and rolling process. Puff pastry produces an even flakier, more buttery result. Refrigerated biscuit dough also works for a thicker, bread-like version with a softer exterior.
Q4. Can I use canned chicken instead of fresh? Yes, canned chicken works and saves time. Drain it thoroughly and break it apart with a fork before mixing into the filling. The texture is slightly softer than freshly shredded chicken but the flavor is fine. Drain really well — excess moisture from the can makes the filling too loose.
Q5. Why did my creamy chicken pillows burst open during baking? Bursting almost always comes from one of two causes — overfilling the dough or not sealing the seams firmly enough. Use no more than 4 tablespoons of filling per pillow and press every seam closed firmly with your fingers before baking. Keeping the filling away from the dough edges also prevents pressure buildup.
Conclusion
Creamy chicken pillows deliver exactly what you want from a weeknight dinner recipe — fast prep, great flavor, and a result that genuinely impresses people without requiring advanced cooking skills. Shredded chicken, cream cheese, sharp cheddar, and crescent dough baked golden is a combination that never fails.
Follow the sealing and filling steps carefully, use softened cream cheese, and give the finished pillows a few minutes to rest before serving. Once you’ve made these a couple of times, the whole process takes well under 20 minutes to assemble. Go make a batch tonight — your dinner problem is officially solved. FYI, make extra. They always go faster than expected.

Creamy Chicken Pillows
Ingredients
Method
- If using rotisserie chicken, shred the breast and thigh meat into clean, even shreds. Aim for 2 cups of shredded chicken.
- In a large mixing bowl, stir softened cream cheese until smooth. Mix in sour cream, garlic powder, onion powder, Italian seasoning, pepper, and salt.
- Fold in shredded cheddar, chopped chives, and the shredded chicken until evenly combined.
- Preheat your oven to 375°F (190°C) and line a baking sheet with parchment paper.
- Roll out crescent dough and pair triangles to form rectangles. Place about 3-4 tablespoons of filling in the center.
- Fold and roll the dough to seal in the filling, placing each pillow seam-side down on the baking sheet.
- Brush with garlic butter mixture and bake for 20-25 minutes until golden brown.
- Let the pillows rest for 3-4 minutes before serving.