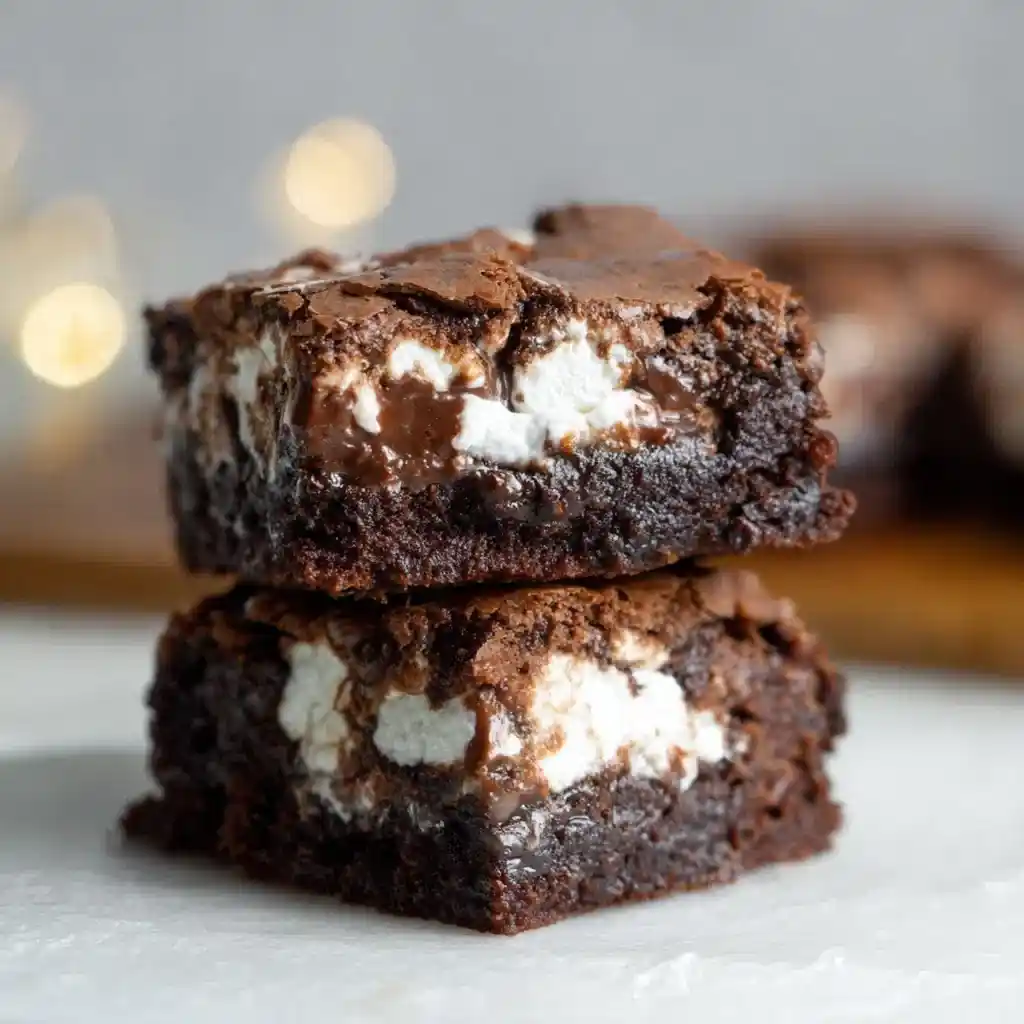
Rich chocolate brownies, a gooey marshmallow layer, and smooth frosting on top? These Marshmallow Brownies hit different. IMO, this is the dessert that turns “just one bite” into “well, half the pan is gone now.”
I made these for a bake sale years ago, and they sold out before I even finished setting up the table. That’s when I knew this recipe was a keeper.
Servings: 24 bars
Prep Time: 20 minutes
Bake Time: 22–27 minutes
Total Time: Under 1 hour (plus cooling)
Why Marshmallow Brownies Deserve a Spot in Your Recipe Box
Regular brownies are great, sure, but they’re missing something. These bring three layers of texture that turn a basic dessert into something people actually remember and request again.
Here’s what makes them stand out:
- Fudgy chocolate base made from scratch, no boxed mix required
- Gooey marshmallow layer that puffs up right in the oven
- Smooth chocolate frosting poured on top while everything’s warm
- Nostalgic flavor that feels like a classic bake sale favorite
Have you ever eaten a brownie and wished it had more going on? This recipe solves that problem completely.
What You’ll Need
Nothing here requires a special trip to a fancy grocery store. Most of this sits in your pantry already, aside from the marshmallows maybe hiding behind your hot cocoa packets.
For the brownies, you’ll need unsweetened chocolate, butter, granulated sugar, eggs, kosher salt, all-purpose flour, and miniature marshmallows. For the frosting, grab butter, unsweetened cocoa powder, milk, and powdered sugar.
A Quick Note on Marshmallows
Miniature marshmallows work best here since they melt and puff evenly across the brownie surface. Large marshmallows work too, but chop them first, or you’ll get uneven gooey patches.
How to Make Marshmallow Brownies (Step-by-Step)
This recipe has two parts—brownies and frosting—but neither one is complicated. Take it one step at a time, and you’ll have a full pan ready before you know it.
Step 1: Prep Your Pan and Oven
Preheat your oven to 350 degrees Fahrenheit first. Line a 9×13 inch pan with parchment paper, or grease it thoroughly so nothing sticks once baked.
Parchment paper makes lifting the bars out way easier later. Skip this step, and you’ll be fighting stuck brownie edges with a butter knife, which is nobody’s favorite kitchen activity.
Step 2: Melt the Chocolate and Butter
Combine your unsweetened chocolate and butter in a microwave-safe bowl. Heat in 30-second intervals, stirring between each round, until the mixture turns smooth and glossy.
Rushing this step usually ends in scorched chocolate. Slow and steady wins here, even though waiting between intervals feels like it takes forever when you’re craving brownies.
Step 3: Add Sugar, Eggs, and Salt
Stir the granulated sugar, eggs, and salt into your melted chocolate mixture. Mix until everything looks fully combined and glossy, with no streaks of egg remaining.
This step builds the fudgy texture brownies are known for. Don’t overthink it—just stir until smooth, and resist the urge to keep mixing longer than necessary.
Step 4: Fold in the Flour
Add your flour and mix just until it disappears into the batter. Overmixing at this stage develops gluten, which turns your brownies cakey instead of dense and fudgy.
A few gentle folds usually does the trick. IMO, this is the step where patience really separates fudgy brownies from disappointing, cake-like ones.
Step 5: Bake the Brownie Base
Spread your batter evenly into the prepared pan, smoothing the top with a spatula. Bake for 20 to 25 minutes, until the center looks just set, not wobbly.
Every oven behaves a little differently, so start checking around the 20-minute mark. A toothpick with a few moist crumbs is exactly what you want here.
Step 6: Add the Marshmallows
Once your brownies come out of the oven, sprinkle miniature marshmallows evenly across the hot surface. Return the pan to the oven for about two minutes.
Watch closely during this short bake. You’re looking for puffed, slightly golden marshmallows, not a marshmallow volcano spilling over your pan’s edges.
Step 7: Make the Chocolate Frosting
While your brownies cool slightly, melt butter, cocoa powder, and milk together in a saucepan over medium heat. Stir constantly until the mixture turns smooth and glossy.
Remove the saucepan from heat once combined. Whisk in your sifted powdered sugar gradually, until the frosting turns creamy and pourable.
Step 8: Frost the Marshmallow Layer
Pour your warm frosting evenly over the puffed marshmallow layer. Work quickly here, since the frosting sets faster than you’d expect once it hits the cooler marshmallows.
Spread gently with a spatula if needed. Why rush this step? Because warm frosting glides over marshmallows way easier than frosting that’s already started firming up.
Step 9: Cool and Slice
Let your brownies cool completely before slicing into bars. Cutting too early turns this dessert into a gooey puddle instead of neat, stackable squares.
Lightly grease your knife before cutting for the cleanest slices. Have you ever tried cutting marshmallow layers with a dry knife? Total sticky nightmare
Storage and Serving Tips
Serve these brownies at room temperature for the best texture and flavor balance. Cold brownies firm up the marshmallow layer more than you’d probably like.
Store leftovers in an airtight container at room temperature for up to three days. If your kitchen runs warm, refrigerate them instead for up to five days.
Freeze individual brownies for up to two months, wrapped tightly. Thaw at room temperature before serving for the best gooey texture.
Fun Variations to Try
Once you’ve nailed the classic version, small swaps completely change the flavor profile. Here are a few worth experimenting with.
- Peanut butter swirl: mix peanut butter into the batter before baking
- Rocky road twist: add chopped nuts and mini chocolate chips
- Mint version: add peppermint extract into the frosting
- Salted caramel upgrade: drizzle caramel sauce and sprinkle sea salt on top
Frequently Asked Questions
Can I use boxed brownie mix instead of making it from scratch?
Yes, prepare it as directed on the box, then follow the marshmallow and frosting steps as written.
Do the marshmallows melt completely during baking?
No, they puff up and soften but stay gooey underneath the frosting layer, which is exactly the texture you want.
Can I use large marshmallows instead of mini ones?
Yes, just cut them into smaller pieces first for even coverage across the brownie surface.
How do I keep the brownies from sticking to the pan?
Line your pan with parchment paper, or grease it thoroughly before adding the batter.
Can I make these brownies ahead of time?
Yes, they actually taste even better the next day once everything sets and the flavors settle.
Final Thoughts
Marshmallow Brownies bring together fudgy chocolate, gooey marshmallow, and smooth frosting in one seriously satisfying dessert. They’re simple enough for a weeknight bake yet impressive enough for any potluck table.
So next time you’re craving something chocolatey and a little nostalgic, skip the store-bought box. Make a batch, share if you’re feeling generous, and watch how fast that pan empties out.