Servings: 16 brownies | Prep Time: 15 minutes | Bake Time: 25-28 minutes | Total Time: ~45 minutes
Crinkle Top Fudgy Brownies-You know that crinkled, paper-thin top on a bakery brownie that crackles when you bite into it? That is not an accident. That is science — and you can absolutely recreate it at home. These Crinkle Top Fudgy Brownies deliver that exact result, every single time.
I spent longer than I care to admit chasing the perfect crinkle top brownie. Cakey ones, dense ones, flat ones, overcooked ones. Finally, after way too many test batches (which nobody complained about eating), I landed on this recipe. And I have not touched another brownie recipe since.
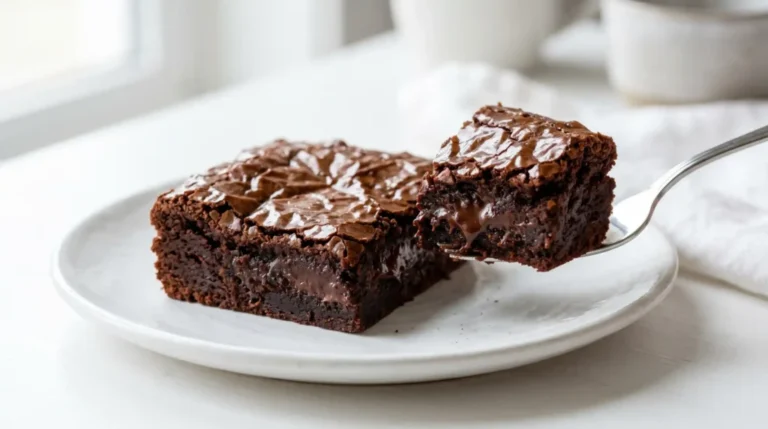
These Crinkle Top Fudgy Brownies are deeply chocolatey, dense in the center, chewy at the edges, and crowned with that iconic shiny, crinkled crust. Sound good? Let’s make them.
The Secret Behind That Crinkle Top
Before we get into the recipe, let’s talk about what actually creates the crinkle top — because understanding this makes you a better baker. Have you ever wondered why some brownie recipes get the crinkle and others stay flat on top?
The crinkle comes from dissolved sugar rising to the surface as the brownie bakes. When you whisk your eggs and sugar together vigorously and for long enough, the sugar partially dissolves and forms a thin, glossy meringue-like layer. That layer bakes into the crinkled crust.
Two other factors help: hot melted butter and chocolate poured directly into the egg-sugar mixture, and resting the batter briefly before baking. These combined steps give you that signature shiny, crackled surface without any box mix or tricks involved.
This is why brownie technique matters as much as the ingredient list. The right steps in the right order produce a completely different — and far superior — result.
Why These Brownies Stand Out
There are thousands of brownie recipes on the internet. Here is why this one is worth your time.
- Shiny crinkle top — achieved through proper technique, not luck
- Fudgy center — dense, moist, and intensely chocolatey
- Chewy edges — that contrast with the soft center makes every bite interesting
- One bowl recipe — minimal cleanup, maximum reward
- No mixer required — a whisk and some elbow grease are all you need
- Uses pantry staples — nothing exotic, nothing hard to source
Ingredients You Will Need-Crinkle Top Fudgy Brownies
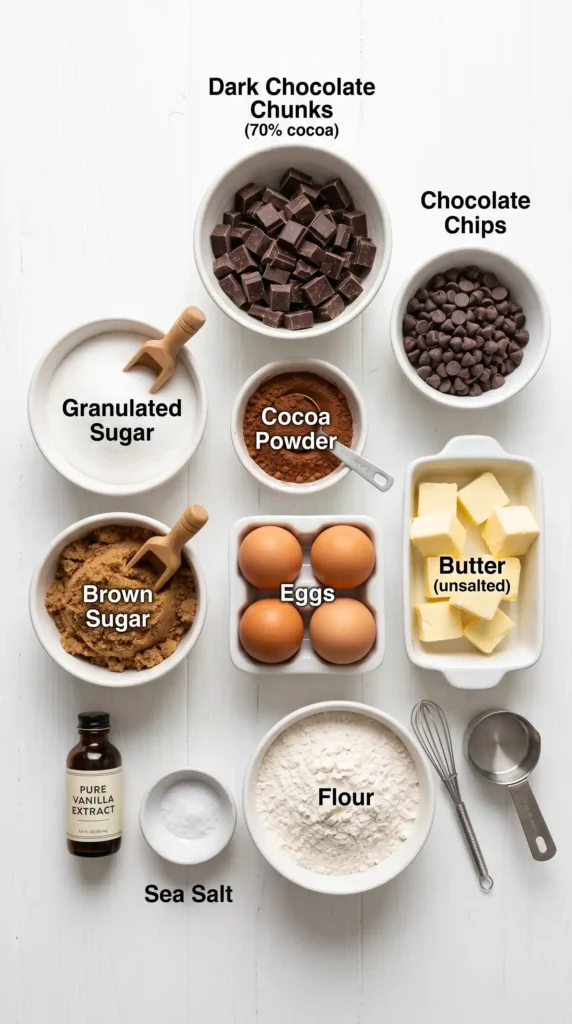
Every ingredient here serves a specific purpose. This is not a long list, but every item matters.
- 1/2 cup (115g) unsalted butter
- 4 oz (115g) dark chocolate, chopped (60 to 70 percent cacao recommended)
- 1 cup (200g) granulated white sugar
- 1/4 cup (50g) light brown sugar, packed
- 3 large eggs, at room temperature
- 1 teaspoon pure vanilla extract
- 3/4 cup (95g) all-purpose flour
- 1/4 cup (25g) unsweetened cocoa powder
- 1/2 teaspoon salt
- 1/2 cup (85g) chocolate chips, optional but strongly recommended
Why Each Ingredient Matters
This is where most brownie recipes skip important context. Let’s break down the key players so you understand what you are working with.
Dark chocolate plus cocoa powder: Using both gives you a deeper, more complex chocolate flavor than either alone. The chopped chocolate adds richness and fat; the cocoa powder intensifies the chocolate color and taste.
Two sugars: Granulated white sugar contributes to the crinkle top and structure. Brown sugar adds moisture and a subtle caramel note that makes these brownies taste more complex than standard recipes.
Three eggs: More eggs mean more structure and a slightly denser crumb. They also contribute to the shiny top when whisked well with the sugar. Room temperature eggs incorporate more smoothly — don’t use cold eggs straight from the fridge.
Minimal flour: Only 3/4 cup for the entire batch. Less flour means a fudgier, denser brownie. Resist any temptation to add more — extra flour tips the texture toward cakey, and that is not what we are going for here.
Equipment You Will Need
- 8×8 inch square baking pan
- Parchment paper
- A medium saucepan or microwave-safe bowl for melting butter and chocolate
- A large mixing bowl
- A whisk
- A rubber spatula
- A wire cooling rack
How to Make Crinkle Top Fudgy Brownies: Step-by-Step
Follow these steps carefully and you will get the crinkle, the fudgy center, and the chewy edges. Every step exists for a reason.
Step 1: Prepare Your Pan and Preheat the Oven
Start by preheating your oven to 325 degrees Fahrenheit (165 degrees Celsius). A slightly lower temperature than most brownie recipes is intentional — it lets the brownies bake more slowly, keeping the center fudgy while the surface sets into that crinkled crust.
Line your 8×8 inch baking pan with parchment paper, leaving an overhang on at least two sides. Grease the parchment lightly with butter or non-stick spray. The overhang acts as handles that let you lift the entire slab of brownies out cleanly after cooling. This is a small step that makes cutting and serving so much easier.
Step 2: Melt the Butter and Chocolate
Combine the chopped dark chocolate and butter in a medium saucepan over low heat. Stir constantly as they melt together — you want a smooth, glossy mixture with no lumps. Low heat is important here. High heat scorches chocolate almost instantly and leaves it grainy and bitter.
Alternatively, melt them together in a microwave-safe bowl in 30-second intervals, stirring well between each interval until fully melted. The microwave method is faster but requires more attention — chocolate holds its shape even when melted, so it can overheat before you realize it. Stir after every interval without skipping.
Once melted and smooth, set the mixture aside and let it cool for about 5 minutes. You do not want to pour piping hot chocolate into your eggs — that would cook them and leave you with scrambled egg brownies. Which sounds funny until it happens to you.
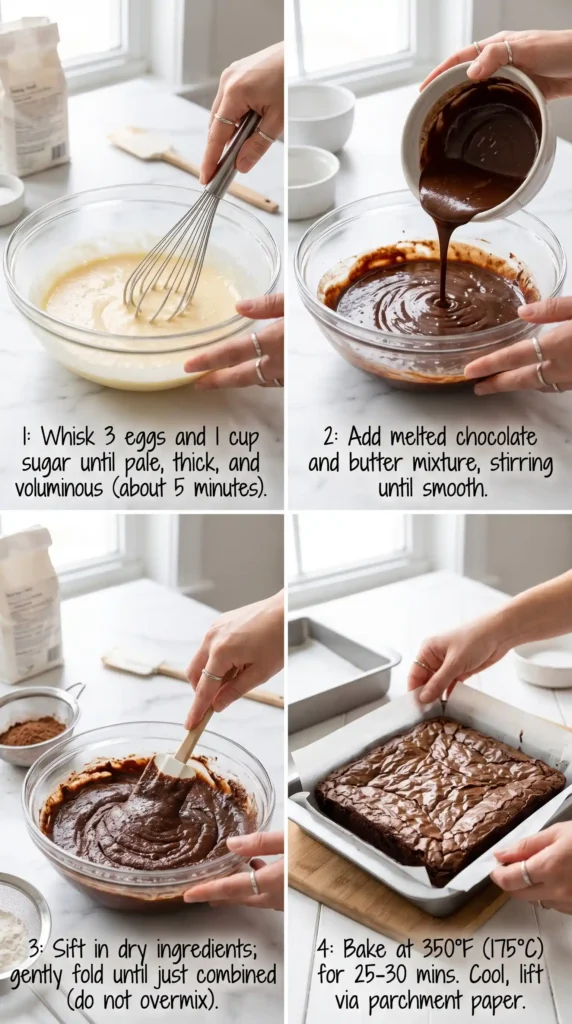
Step 3: Whisk the Eggs and Sugar — This Step Is Critical
In your large mixing bowl, combine both the granulated white sugar and the brown sugar. Add all three eggs and the vanilla extract. Whisk vigorously for a full 2 to 3 minutes until the mixture looks pale, thick, and falls off the whisk in ribbons. Set a timer if you need to.
This is the most important step in the entire recipe. Thorough whisking partially dissolves the sugar and incorporates air into the egg mixture. That dissolved sugar is what migrates to the surface of the brownie as it bakes and creates the shiny, crinkled crust. Underwhisk here and you lose the crinkle entirely.
FYI — you cannot overdo this step. If your arm gets tired, switch hands. A pale, thick, ribbon-stage mixture is exactly what you want. The color should shift from deep yellow to a light, creamy pale yellow as you whisk.
Step 4: Combine the Chocolate Mixture with the Egg Mixture
Pour the cooled melted chocolate and butter into the whisked egg and sugar mixture in a slow, steady stream while stirring constantly. Adding it slowly prevents the residual heat from cooking the eggs. Stir as you pour, not after. Keeping things moving is the key.
Once fully combined, the batter should look glossy, smooth, and deeply chocolate-colored. Take a moment to appreciate this — it is genuinely one of the best-looking batters in baking. Stir in the vanilla extract if you haven’t added it already and mix until just combined.
Step 5: Add the Dry Ingredients
Sift the flour, cocoa powder, and salt directly into the chocolate batter. Use a rubber spatula to fold the dry ingredients in with slow, deliberate strokes. Fold from the bottom up and around the sides of the bowl. Stop the moment you no longer see dry streaks of flour.
Overmixing at this stage develops the gluten in the flour and produces a tougher, chewier texture — and not in the good way. Fold, do not stir. The difference between folding and stirring is the difference between a fudgy brownie and a dense, rubbery one. Ten to twelve gentle folds should be enough.
If you are adding chocolate chips, fold them in now with the last two or three strokes. The chips add pockets of melted chocolate inside the baked brownie that make each bite genuinely exciting. IMO, leaving them out is a mistake you will only make once. 🙂
Step 6: Rest the Batter
Pour the batter into your prepared pan and spread it into an even layer using your spatula. Then let the batter rest in the pan for 10 minutes before putting it in the oven. This short rest allows the sugar to settle and further contributes to crinkle top formation.
This step feels unnecessary when you are standing there waiting, but it actually makes a measurable difference in the crust. Bake immediately and the top is flatter. Rest for 10 minutes and the crinkle develops more dramatically. Just set a timer and do something else for a few minutes.
Step 7: Bake the Brownies
Slide the pan into the center rack of your preheated oven and bake for 25 to 28 minutes. At 25 minutes, insert a toothpick into the center. If it comes out with moist, fudgy crumbs attached, the brownies are done. If it comes out with wet batter, give it 2 to 3 more minutes and check again.
Do not bake until the toothpick comes out clean. Clean toothpick means overbaked brownies — dry, crumbly, and disappointing. Fudgy crumbs on the toothpick are exactly what you want. The brownies will continue to set as they cool, so pulling them slightly underdone is always the right call.
The top should look shiny and crinkled, the edges should be set, and the center should have a very slight wobble when you shake the pan. That wobble disappears as the brownies cool into their perfect fudgy texture.
Step 8: Cool Completely Before Cutting
Let the brownies cool in the pan on a wire rack for at least 1 hour before cutting. This is genuinely the hardest part. But cutting warm brownies produces messy, crumbly slices that fall apart. Cooled brownies slice cleanly with sharp edges and hold together perfectly.
Once cooled, lift the entire slab out using the parchment overhang, place it on a cutting board, and cut with a sharp knife. Wipe the blade clean between cuts for the neatest slices. For extra clean edges, chill the brownies in the refrigerator for 30 minutes before cutting.
Tips for Perfect Crinkle Top Fudgy Brownies
- Use good quality dark chocolate — the better the chocolate, the better the brownie. This is not the place to cut corners
- Room temperature eggs whisk more easily and incorporate more air than cold eggs
- Do not skip the 10-minute batter rest — it directly impacts how pronounced the crinkle becomes
- Pull the brownies when the toothpick shows moist crumbs, not when it runs clean
- Cool fully before cutting — patience here pays off in clean, beautiful slices
- For extra fudgy results, refrigerate the cut brownies overnight and serve cold
Variations to Try

Espresso Brownies: Add 1 teaspoon of instant espresso powder to the melted chocolate. Coffee intensifies chocolate flavor without making the brownies taste like coffee. It is a subtle upgrade that makes a noticeable difference.
Salted Caramel Crinkle Brownies: Swirl 3 tablespoons of thick caramel sauce into the batter just before baking and sprinkle flaky sea salt over the top. The salt-caramel-chocolate combination is hard to argue with.
Nutty Brownies: Fold in 1/2 cup of toasted walnuts or pecans along with the chocolate chips. Toasting the nuts first removes any raw bitterness and adds a warm, deep nuttiness that pairs perfectly with dark chocolate.
How to Store Your Brownies
- Room temperature: Store in an airtight container for up to 4 days. Place a sheet of parchment between layers to prevent sticking
- Refrigerator: Keeps for up to 7 days. Cold brownies are denser and even fudgier — many people prefer them this way
- Freezer: Wrap individual brownies in plastic wrap, then store in a freezer bag for up to 3 months. Thaw at room temperature for an hour before serving
Frequently Asked Questions
1. Why did my brownies not get a crinkle top?
The most common cause is under-whisking the eggs and sugar. You need a full 2 to 3 minutes of vigorous whisking to dissolve enough sugar and build that meringue-like layer. Also make sure your chocolate mixture has cooled before adding it to the eggs — hot chocolate added too quickly can deflate the aerated egg mixture.
2. Can I use milk chocolate instead of dark chocolate?
You can, but the brownies will taste noticeably sweeter and less complex. Milk chocolate has more sugar and less cocoa, which changes both flavor and texture. If you prefer a milder chocolate taste, go ahead — but for the fullest, richest Crinkle Top Fudgy Brownies experience, dark chocolate at 60 to 70 percent is the right call.
3. Can I double this recipe?
Yes, easily. Double all ingredients and bake in a 9×13 inch pan. The baking time increases slightly — check at 28 minutes and adjust from there. The crinkle top still develops well in the larger pan as long as you whisk the eggs and sugar properly.
4. Why are my brownies cakey instead of fudgy?
Cakey brownies usually result from too much flour, too many eggs, or overmixing the batter after adding the flour. Make sure you measure flour by spooning it into the cup and leveling off — not scooping directly from the bag, which packs it in and adds too much. Also fold gently and stop as soon as the flour disappears.
5. Can I make these brownies without dark chocolate and use only cocoa powder?
You can substitute the chopped chocolate with an additional 1/4 cup of cocoa powder and 2 tablespoons of extra butter to compensate for the fat lost. The flavor will be slightly less rich and the texture a little different, but the result is still a solid, fudgy brownie worth making.
6. How do I know when my brownies are perfectly baked?
Insert a toothpick into the center at 25 minutes. Moist, fudgy crumbs clinging to the toothpick means the brownies are done. The edges should look set and the center should have a very slight wobble. If wet batter transfers to the toothpick, bake for 2 more minutes and check again. Never bake to a clean toothpick.
Final Thoughts
These Crinkle Top Fudgy Brownies are what every brownie promises to be and rarely delivers. The crinkle is real, the fudgy center is real, and the deep chocolate flavor is absolutely real. And now that you know the technique behind the crinkle, you can recreate it every single time.
The key takeaways are simple: whisk the eggs and sugar properly, use good chocolate, rest the batter before baking, and pull the brownies before the toothpick runs clean. Four things. That’s it. So preheat that oven, grab your whisk, and make a batch this weekend. Then sit back and wait for someone to ask you how you got the top to look like that. Take a moment. Let them wonder. You earned it.
Crinkle Top Fudgy Brownies
Ingredients
Method
- Preheat the oven to 325°F (165°C) and line an 8x8 inch baking pan with parchment paper.
- In a medium saucepan over low heat, melt the butter and dark chocolate while stirring constantly until smooth.
- In a large mixing bowl, whisk together the granulated and brown sugars with the eggs and vanilla for 2-3 minutes until pale and thick.
- Slowly pour the melted chocolate mixture into the egg mixture while whisking continuously.
- Sift the flour, cocoa powder, and salt into the batter and gently fold until just combined.
- If using, fold in the chocolate chips.
- Allow the batter to rest for 10 minutes in the pan.
- Bake in the preheated oven for 25-28 minutes. Test with a toothpick; it should come out with moist crumbs.
- Cool the brownies in the pan on a wire rack for at least 1 hour before cutting.