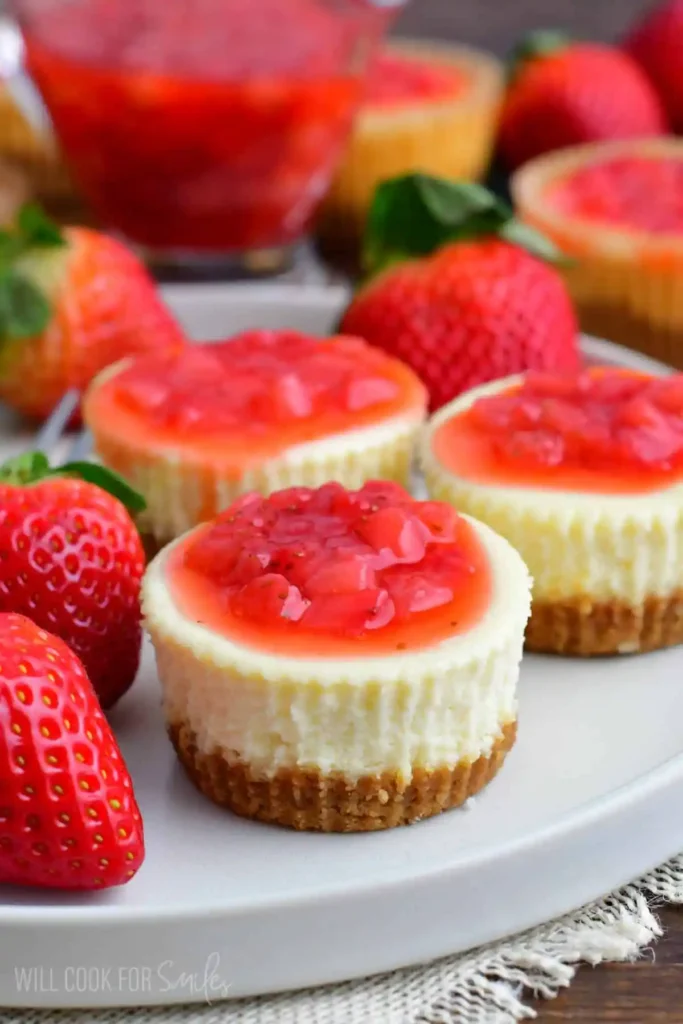
Okay, let’s talk about the dessert that solves the eternal cheesecake dilemma: you want that rich, creamy flavor, but you don’t want to commit hours of your day to a giant water bath production.
I started making these mini versions after years of baking full-sized cheesecakes for every occasion. Same smooth, luscious texture, way less effort, and perfectly portioned for anyone who struggles with portion control (me, constantly).
Servings: 12 mini cheesecakes | Prep time: 15 minutes | Cook time: 18 minutes | Cool and chill time: 3 hours | Total time: 3 hours 33 minutes
Why This Mini Cheesecakes Recipe Works So Well
Ever wonder why mini desserts feel so much more satisfying than a giant slice? Portion control aside, these little cheesecakes bake faster and more evenly than their full-sized counterparts, which honestly makes the whole process less stressful.
Here’s the best part: no water bath required. After testing it both ways extensively, the difference turned out negligible, so this recipe skips that fussy step entirely without sacrificing texture.
What You’ll Need for Mini Cheesecakes
This ingredient list splits into two simple parts: a graham cracker crust and a classic cream cheese filling. Nothing complicated here, just straightforward pantry staples.
For the crust:
- Graham cracker crumbs – 1 1/4 cups
- Unsalted butter – 5 tablespoons, melted
- Vanilla extract – 1/2 teaspoon
For the filling:
- Full-fat cream cheese – 16 ounces, softened
- Granulated sugar – 2/3 cup
- Egg – 1 large, room temperature
- Sour cream – 1/4 cup
- Heavy whipping cream – 2 tablespoons
- Cornstarch – 1 tablespoon
- Vanilla extract – 1 teaspoon
Use full-fat cream cheese here for the richest, smoothest results. Reduced-fat versions tend to leave the filling slightly thinner and less luxurious.
How to Make Mini Cheesecakes, Step by Step
Let’s slow down and walk through each stage carefully. This recipe moves quickly, but a little attention to detail keeps the texture smooth and prevents any cracking.
Step 1: Preheat the Oven and Prep Your Pan
Set your oven to 325°F and let it fully heat while you prep. Line a standard muffin pan with parchment paper cupcake liners, making sure each cup is fully covered.
Using liners here matters more than it seems. Have you ever tried removing a cheesecake stuck directly to a metal pan? Liners save you that headache entirely and make serving effortless.
Step 2: Mix and Press the Graham Cracker Crust
In a medium bowl, combine the graham cracker crumbs, melted butter, and vanilla extract. Stir until the mixture looks completely moistened, with no dry, powdery crumbs remaining anywhere in the bowl.
Spoon a heaping tablespoon of this mixture into each lined muffin cup. Use the back of a spoon or a small measuring cup to pack it down firmly and evenly across the bottom.
Step 3: Beat the Cream Cheese Until Smooth
In a large mixing bowl, beat your softened cream cheese and granulated sugar together for a couple of minutes. You’re aiming for a completely smooth texture with absolutely no lumps remaining.
This step forms the backbone of your entire filling. IMO, rushing this part is the number one reason mini cheesecakes end up grainy instead of silky and luxurious.
Step 4: Add the Egg and Sour Cream
Beat in the egg and sour cream, mixing until everything is fully incorporated. These two ingredients add richness and structure, giving the finished cheesecake its classic tangy, creamy flavor.
Scrape down the sides of the bowl as needed throughout this process. Any unmixed cream cheese hiding along the edges will show up as unpleasant lumps in your finished dessert.
Step 5: Fold In the Remaining Ingredients
Lower your mixer speed and beat in the heavy whipping cream, cornstarch, and vanilla extract. These final additions thicken the batter slightly while adding an extra layer of smoothness.
Scrape the bottom and sides of the bowl one more time, then beat for a few more seconds. The finished batter should look completely uniform, glossy, and free of any streaks.
Step 6: Fill the Muffin Cups
Divide the cheesecake filling evenly among your prepared muffin cups, filling each one about three-quarters of the way full. Avoid overfilling, since the batter needs a little room to set properly.
FYI, using a small cookie scoop here helps keep every cup filled to roughly the same level. That consistency means all your mini cheesecakes finish baking at exactly the same time.
Step 7: Bake Until Just Set
Slide the muffin pan into your preheated oven and bake for 18 to 20 minutes. The centers should still jiggle slightly when you gently shake the pan; that’s exactly what you want.
Don’t mistake that jiggle for undercooked batter. The centers continue setting as they cool, and pulling them too late leaves you with dry, overbaked cheesecakes instead of creamy ones.
Step 8: Cool and Chill Before Serving
Let the mini cheesecakes cool to room temperature directly in the pan. This gradual cooling prevents any sudden temperature shock that could cause cracking across the surface.
Cover the pan and refrigerate for two to four hours before serving. Top with your favorite garnish and enjoy these perfectly portioned little treats whenever the craving strikes 🙂
Tips for the Best Mini Cheesecakes
- Use room temperature cream cheese and eggs for the smoothest possible batter.
- Don’t overmix once you add the eggs, since overmixing can cause cracking.
- Fill cups only three-quarters full to leave room for proper setting.
- Cool gradually at room temperature before refrigerating for the best texture.
- Store leftovers tightly covered in the fridge for up to five days.
Easy Variations to Try
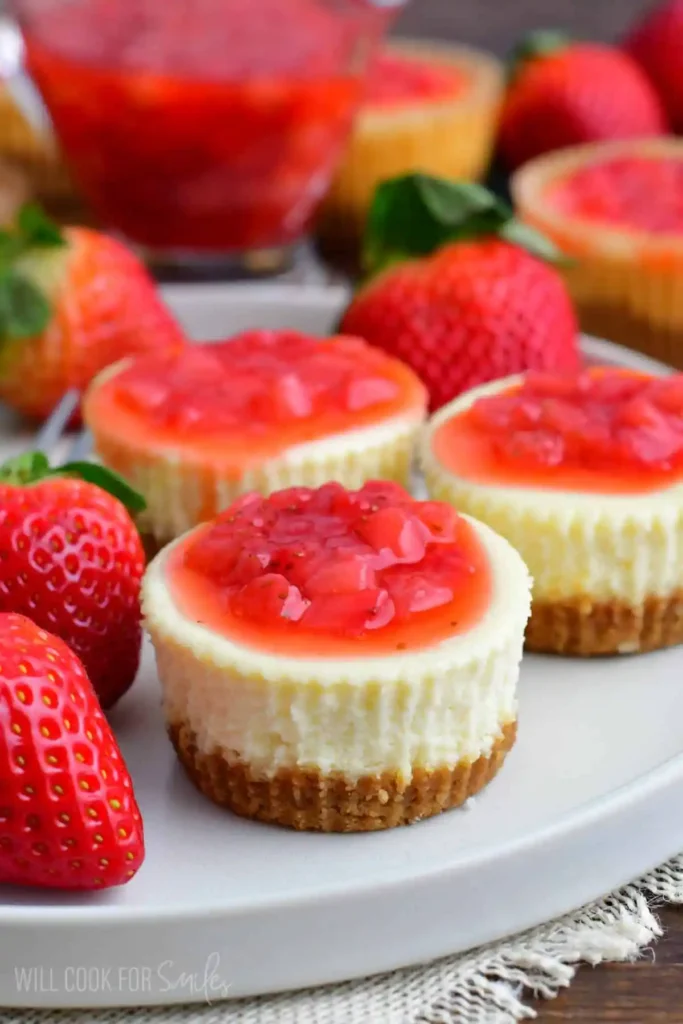
- Fruit topping: Add strawberry sauce, fresh berries, or a fruit compote before serving.
- Chocolate lover’s version: Top with chocolate ganache or fudge sauce instead of fruit.
- Boozy twist: Add a Baileys or eggnog whipped cream topping for a festive touch.
- Caramel finish: Drizzle with caramel or dulce de leche right before serving.
- Cookie crust swap: Use crushed Oreos or vanilla wafers instead of graham crackers.
Which topping sounds most tempting? IMO, the caramel drizzle deserves way more attention than it usually gets at gatherings.
FAQs About Mini Cheesecakes
Do I really need a water bath for mini cheesecakes? No, thankfully. Testing shows minimal difference in texture, so this recipe skips that fussy extra step entirely without any real tradeoff.
Why do my mini cheesecakes crack on top? Overmixing after adding eggs or cooling too quickly are the usual culprits. Cool gradually at room temperature before refrigerating for the best results.
Can I make these mini cheesecakes ahead of time? Absolutely. They actually taste better after chilling for a few hours, making them a great make-ahead option for parties.
How long do mini cheesecakes last in the fridge? Stored properly in an airtight container, they stay fresh for up to five days in the refrigerator.
Can I freeze mini cheesecakes? Yes, without toppings. Wrap each one individually, freeze for up to two months, and thaw overnight in the fridge before serving.
Why are my cheesecakes still jiggly after baking? That slight jiggle in the center is completely normal. They continue setting as they cool, so don’t overbake trying to eliminate it.
Final Thoughts
Mini Cheesecakes prove that you don’t need hours of effort or a fussy water bath to get that classic New York style creaminess. Individual portions, faster baking, and endless topping options make this recipe genuinely worth adding to your rotation.
Make a batch for your next gathering, or just because you deserve a perfectly portioned treat. Some recipes just earn their spot as a go-to, and this one absolutely has.
Mini Cheesecakes
Ingredients
Method
- Preheat the oven to 325°F and line a muffin pan with parchment paper cupcake liners.
- In a medium bowl, mix graham cracker crumbs, melted butter, and vanilla extract until moistened.
- Spoon mixture into each lined muffin cup and pack down evenly.
- In a large bowl, beat cream cheese and granulated sugar until smooth.
- Add the egg and sour cream, mixing until fully incorporated.
- Fold in heavy whipping cream, cornstarch, and vanilla extract until glossy and uniform.
- Divide filling evenly among prepared muffin cups, filling each about 3/4 full.
- Bake for 18 to 20 minutes, until centers jiggle slightly.
- Allow mini cheesecakes to cool at room temperature, then refrigerate for 2 to 4 hours before serving.



