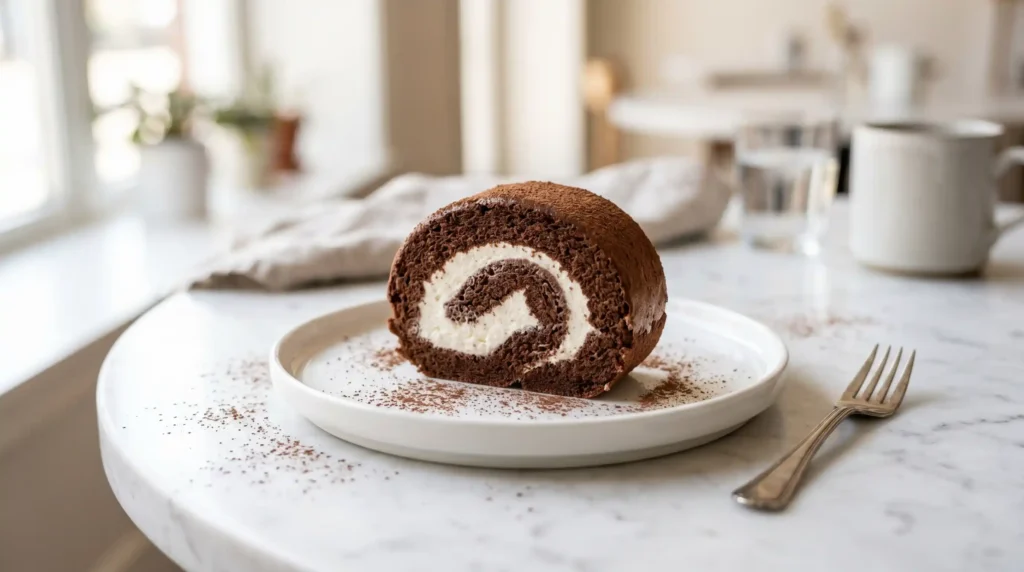
Servings: 8 to 10 slices | Prep Time: 25 minutes | Bake Time: 12 to 14 minutes | Chill Time: 1 hour | Total Time: ~1 hour 45 minutes
The Chocolate Swiss Roll Cake has a reputation for being terrifying to make. It cracks, it tears, it refuses to roll cleanly — or so people say. I believed that too, until I actually made one and realized the cracking comes from one specific mistake that’s completely avoidable.
I first attempted a chocolate swiss roll on a rainy afternoon with zero expectations and came out of it genuinely shocked at how good it was. The sponge was soft and springy, the cream filling was light and cool, and the spiral looked like something from a proper bakery window. I’ve made it at least a dozen times since.
Have you ever avoided a recipe because it looked intimidating, only to discover it was actually manageable once you understood the technique? That’s this recipe. The chocolate swiss roll cake is more about timing and temperature than skill. Follow the steps carefully and you’ll roll a perfect log every time.
What Makes a Chocolate Swiss Roll Cake Special
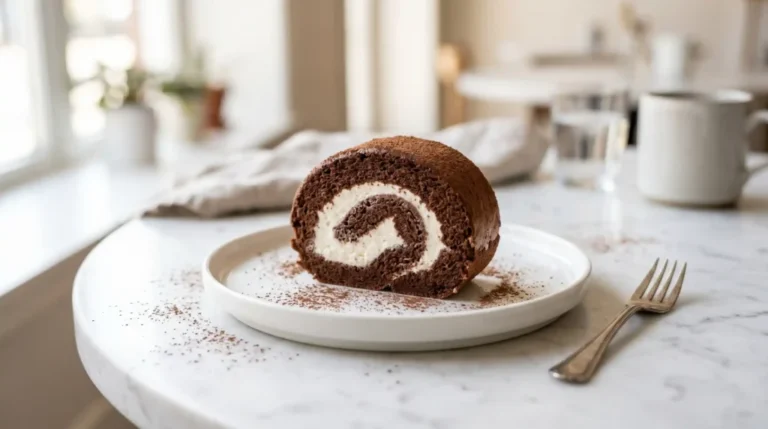
The chocolate swiss roll cake — also called a roulade or jelly roll — combines a thin, flexible chocolate sponge with a creamy filling, all rolled into a tight spiral. When you slice it, every piece shows that beautiful swirl of dark chocolate cake and white cream. It looks impressive with relatively minimal effort.
What separates a great chocolate swiss roll from a mediocre one is the sponge. A good sponge is soft enough to roll without cracking but structured enough to hold its shape. This balance comes from whipping the eggs correctly and not overbaking — two things this recipe handles with clear instruction.
IMO, this is one of the most satisfying bakes you can do. The rolling step looks dramatic but it’s actually a confidence booster once you nail it. And the end result — a sliceable log that reveals a perfect spiral — never gets old to look at.
Ingredients With Full Quantities
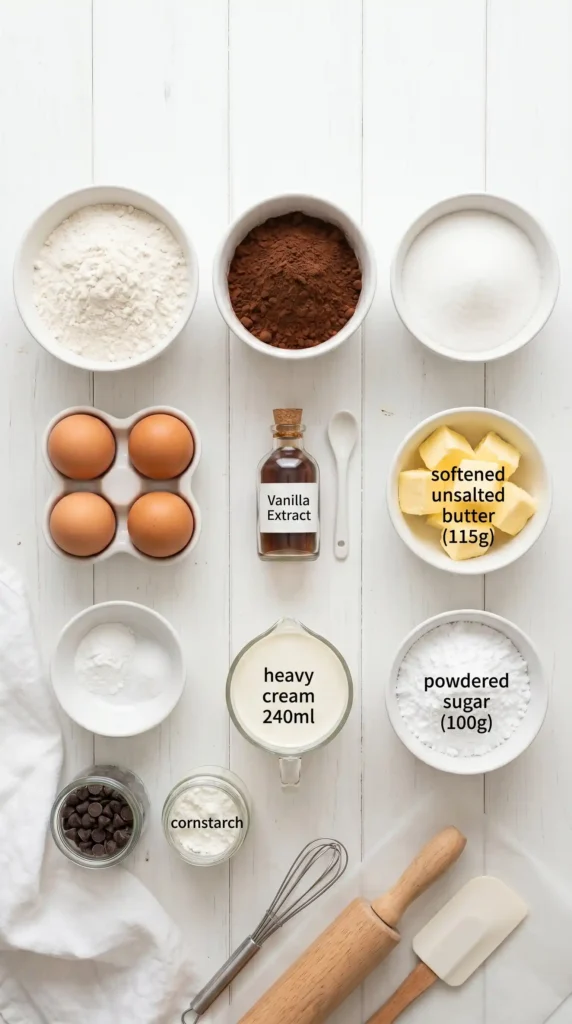
For the Chocolate Sponge
- 4 large eggs, at room temperature
- 3/4 cup (150g) granulated sugar
- 1 teaspoon pure vanilla extract
- 1/3 cup (40g) all-purpose flour
- 1/3 cup (35g) unsweetened cocoa powder
- 1 teaspoon baking powder
- 1/4 teaspoon salt
- 2 tablespoons (30ml) whole milk
- 2 tablespoons (28g) unsalted butter, melted and cooled
For the Whipped Cream Filling
- 1 and 1/2 cups (360ml) heavy whipping cream, very cold
- 3 tablespoons (24g) powdered sugar
- 1 teaspoon pure vanilla extract
For Finishing
- 2 to 3 tablespoons (16 to 24g) powdered sugar, for dusting
- Optional: 2 tablespoons unsweetened cocoa powder, mixed with the powdered sugar for dusting
- Optional: shaved dark chocolate or fresh berries for garnish
Why This Recipe Gives You a Crack-Free Roll
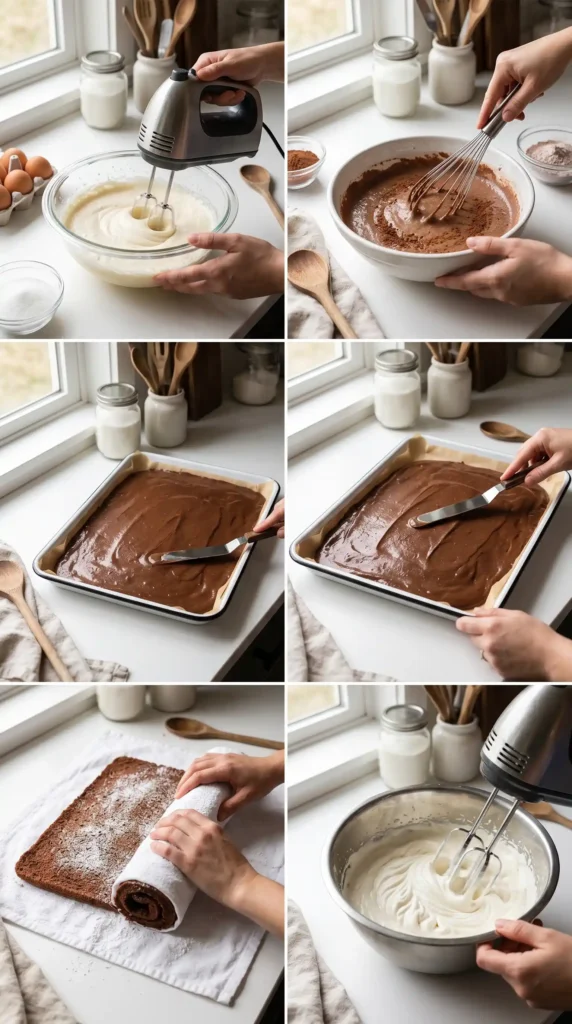
Most chocolate swiss roll cakes crack because the sponge overbakes and loses flexibility. This recipe bakes the sponge at a higher temperature for a shorter time — 12 to 14 minutes at 375 degrees Fahrenheit — to keep it moist and pliable. That brief bake locks in just enough moisture to let the cake roll without splitting.
The second key is rolling the cake while it’s still hot, wrapped in a clean kitchen towel. Rolling it warm trains the sponge into the curved shape. Unrolling it later to add filling and re-rolling doesn’t cause cracking because the sponge already remembers the shape. This technique is the difference between a beautiful log and a pile of frustrated cake fragments.
Using melted butter and milk in the batter adds fat and moisture that keep the sponge supple through baking and rolling. A dry sponge — one made with only eggs and flour — is far more brittle. Those two tablespoons of each ingredient do more work than their quantities suggest.
How to Make Chocolate Swiss Roll Cake Step by Step
Let’s break this down into manageable stages. There are four: making the sponge, baking it, rolling it warm, and filling and finishing. Each one is straightforward when you know what you’re doing.
Step 1: Prepare Your Pan and Preheat the Oven
Start by preheating your oven to 375 degrees Fahrenheit (190 degrees Celsius). Line a 10×15 inch jelly roll pan — also called a rimmed baking sheet — with parchment paper. Let the parchment hang slightly over the edges so you can lift the sponge out easily. Lightly grease the parchment with a thin layer of butter or cooking spray.
Also prepare your rolling station now, before you even mix the batter. Lay a clean, dry kitchen towel flat on your counter. Dust it generously with powdered sugar or cocoa powder. This is what you’ll flip the sponge onto straight from the oven. Having everything ready means you can move fast when the cake comes out — and speed matters at that moment.
Step 2: Make the Chocolate Sponge Batter
Separate your egg whites and yolks into two clean mixing bowls. Add the granulated sugar to the yolks and beat with a hand mixer on high speed for 3 to 4 minutes until the mixture turns pale yellow, thick, and ribbon-like. When you lift the beaters, the batter should fall in a slow, continuous ribbon. This step builds the structure of the sponge.
Add the vanilla extract, melted cooled butter, and milk to the yolk mixture. Mix briefly on low speed until just combined. Sift the flour, cocoa powder, baking powder, and salt directly into the bowl. Fold gently with a spatula using large, slow strokes — don’t stir vigorously or you’ll knock out the air you just built in. Stop folding the moment no dry streaks remain.
In the second bowl, beat the egg whites with clean beaters on medium-high speed until they hold firm, glossy peaks — meaning they stand up straight without drooping. This takes about 3 to 4 minutes. Now fold the whites into the chocolate mixture in two additions. Add the first half and fold until mostly combined, then fold in the second half until just incorporated. Work gently — these whites are what make the sponge light.
Step 3: Bake the Sponge
Pour the batter into the prepared pan and spread it into an even layer using an offset spatula. Work from the center outward, pushing the batter right into the corners. An uneven layer bakes unevenly — thicker spots stay underdone while thin spots overbake and turn brittle. Take 60 seconds to get it level before it goes in the oven.
Bake for 12 to 14 minutes. The sponge is done when the top springs back lightly when pressed and the edges pull slightly away from the sides of the pan. Do not wait for a deep golden color — this is a chocolate sponge and it will look dark even when underdone. Trust the spring test more than the color.
Step 4: Roll the Sponge While Hot
This is the step that makes or breaks a chocolate swiss roll cake. The moment the pan comes out of the oven, act within 2 minutes. Run a knife around the edges if needed to loosen, then flip the hot sponge directly onto your prepared dusted towel. Peel the parchment off carefully and slowly — start from one corner and pull back at a low angle.
Starting from one of the short ends, roll the sponge up tightly inside the towel. Roll firmly but without crushing. The towel goes inside the roll — you’re rolling the cake around the towel, not just wrapping it on the outside. This trains the sponge into the curved shape it needs to remember. Place the rolled sponge seam-side down on a wire rack to cool completely, about 45 to 60 minutes.
Do not rush the cooling. Filling a warm roll melts the whipped cream and creates a runny, soggy mess. I know it’s tempting to speed things up but the patience pays off. While the roll cools, you can whip the cream and clean up the kitchen — good use of time, no stress.
Step 5: Whip the Filling and Assemble
Pour the cold heavy cream into a chilled mixing bowl. Add the powdered sugar and vanilla extract. Beat on medium-high speed until the cream holds firm, stable peaks — it should stand up without drooping and feel thick enough to spread without sliding. This usually takes 3 to 4 minutes. Don’t overwhip or it will turn grainy and separate.
Once the rolled sponge is completely cool, unroll it gently on your work surface. Don’t force it flat — let it stay in its natural curved position and spread the filling within that curve. Spread the whipped cream evenly over the surface, leaving a 1-inch border around all edges so it doesn’t squeeze out when you roll.
Now re-roll the sponge, this time without the towel. Roll it firmly and evenly, using the towel or parchment as a guide if helpful. Place the finished roll seam-side down on a serving plate or tray. Wrap it loosely in plastic wrap and refrigerate for at least 1 hour before slicing. Chilling sets the cream and makes the slices come out clean and defined.
Step 6: Finish and Serve
Right before serving, dust the top generously with sifted powdered sugar or a cocoa-powdered sugar blend. Use a stencil for a decorative pattern if you like. Trim the ends of the roll with a sharp serrated knife — this reveals the clean spiral inside and makes the presentation look intentional and professional.
Slice the roll with slow, gentle sawing motions using a serrated knife. Wipe the blade between cuts for the cleanest slices. Serve immediately or keep refrigerated until ready to eat. The roll holds beautifully in the fridge for up to 3 days.
Tips for the Best Chocolate Swiss Roll Cake
- Room temperature eggs: Cold eggs don’t whip to the same volume. Take them out of the fridge 30 minutes before you start.
- Don’t overbake: A 14-minute sponge is far more flexible than a 17-minute one. Set a timer and check early.
- Roll while hot: This is the most important step. A cold sponge will crack. Roll within 2 minutes of pulling it from the oven.
- Chill before slicing: At least 1 hour in the fridge. The cream needs to firm up before the roll can be sliced cleanly.
- Use cold cream: Warm cream won’t whip to firm peaks. Keep it refrigerated until the exact moment you need it.
Chocolate Swiss Roll Cake Variations
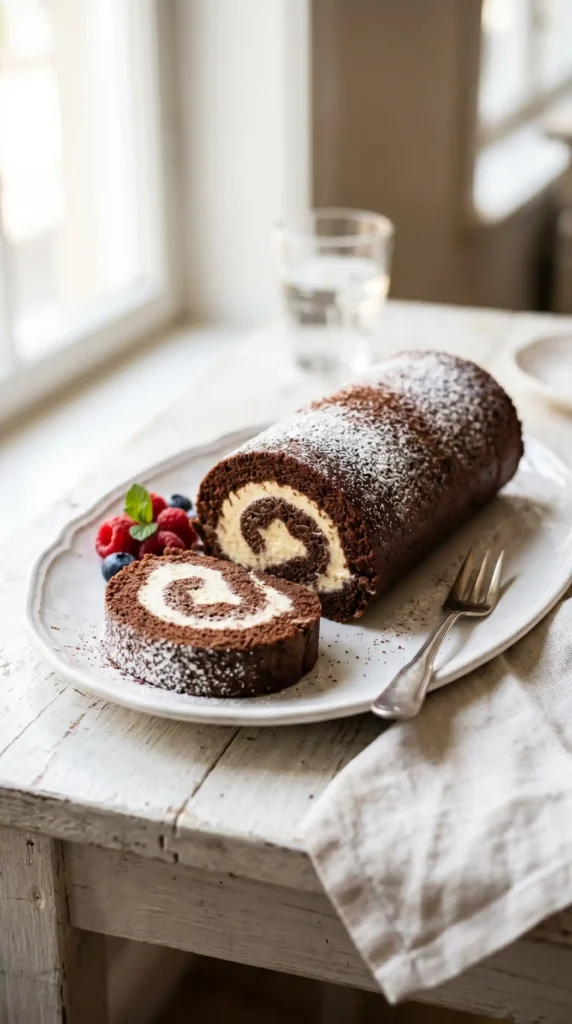
Once you master the base recipe, here are some excellent ways to change it up:
- Mocha Filling: Add 1 teaspoon of instant espresso powder to the whipped cream for a coffee-chocolate combination.
- Strawberry Cream: Fold 1/2 cup of finely diced fresh strawberries into the whipped cream before spreading.
- Chocolate Ganache Coating: Pour a simple ganache of equal parts heavy cream and melted dark chocolate over the finished roll for a richer presentation.
- Mint Cream: Add 1/4 teaspoon of peppermint extract to the whipped cream for a mint-chocolate version.
- Nutella Swirl: Spread a thin layer of warmed Nutella on the sponge before adding the whipped cream layer.
Frequently Asked Questions
Why did my chocolate swiss roll crack when I rolled it?
The most common cause is overbaking the sponge or waiting too long to roll it after baking. Both remove too much moisture and make the sponge brittle. Bake for the minimum time stated, flip it out immediately, and roll it while it’s still steaming hot. Those two adjustments solve most cracking problems.
Can I make the chocolate swiss roll cake ahead of time?
Yes. You can make the complete roll up to 24 hours ahead and keep it refrigerated, tightly wrapped in plastic wrap. The powdered sugar dusting should go on just before serving, not ahead of time, as it absorbs into the surface and disappears. The flavor actually improves after a night in the fridge.
Can I freeze a chocolate swiss roll?
Yes. Wrap the un-dusted roll tightly in plastic wrap then foil and freeze for up to 2 months. Thaw overnight in the refrigerator before serving. The whipped cream texture changes very slightly after freezing but the overall result is still excellent. Dust with sugar just before serving.
What size pan do I need for a swiss roll?
You need a 10×15 inch jelly roll pan with a 1-inch rim. Using a regular flat baking sheet without rims lets the batter spread too thin and bake too fast. If your pan is slightly different in size, the baking time may shift by 1 to 2 minutes — check the sponge early and go by the spring test.
Why is my whipped cream filling runny after I unroll the cake?
Two likely causes: the sponge was still warm when you filled it, or the cream wasn’t whipped to firm enough peaks before spreading. Always wait until the roll is completely cool at room temperature before unrolling and filling. Whip the cream until it holds stiff, stable peaks — not soft, droopy ones.
Final Thoughts
The Chocolate Swiss Roll Cake rewards anyone willing to follow the steps carefully. The sponge, the cream, the roll, the spiral — it all comes together into something that genuinely looks and tastes bakery-worthy. And once you’ve done it once, the second time feels almost effortless.
The key things to remember: bake it short, roll it hot, cool it completely, fill it gently, and chill before slicing. Those five points are the whole recipe in essence. Everything else is just filling in the details. So preheat that oven, lay out your towel, and commit. You’re going to pull a perfect chocolate swiss roll out of your kitchen — and it’s going to look incredible
Chocolate Swiss Roll Cake
Ingredients
Method
- Preheat your oven to 375°F (190°C). Line a 10×15 inch jelly roll pan with parchment paper, allowing it to hang slightly over the edges. Lightly grease the parchment.
- Prepare a clean kitchen towel dusted with powdered sugar or cocoa powder for rolling the sponge later.
- Separate egg whites and yolks into two mixing bowls. Beat yolks with granulated sugar for 3-4 minutes until thick and pale.
- Add vanilla, melted butter, and milk to yolks, mixing briefly. Sift flour, cocoa, baking powder, and salt into the bowl and fold gently.
- Whip egg whites until stiff peaks form, then gently fold into the chocolate mixture in two additions.
- Pour batter into the prepared pan and spread evenly. Bake for 12-14 minutes until springy to the touch.
- Immediately after baking, flip the hot sponge onto the prepared towel and peel off the parchment. Roll tightly with the towel and let it cool seam-side down.
- Once cooled, whip the cream together with powdered sugar and vanilla until firm. Unroll the sponge gently, spread the filling, and re-roll without the towel.
- Wrap the roll in plastic wrap and chill for at least 1 hour. Dust with powdered sugar before serving.
- Slice using a serrated knife and serve immediately or refrigerate until ready to eat.



