Servings: 24 cookie cups | Prep Time: 20 minutes | Bake Time: 10–12 minutes | Total Time: ~45 minutes
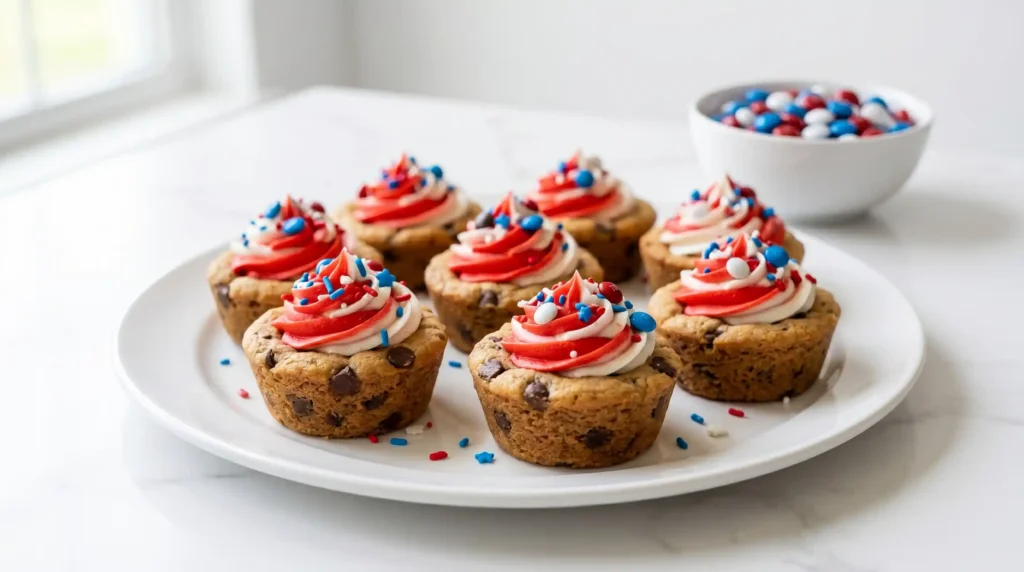
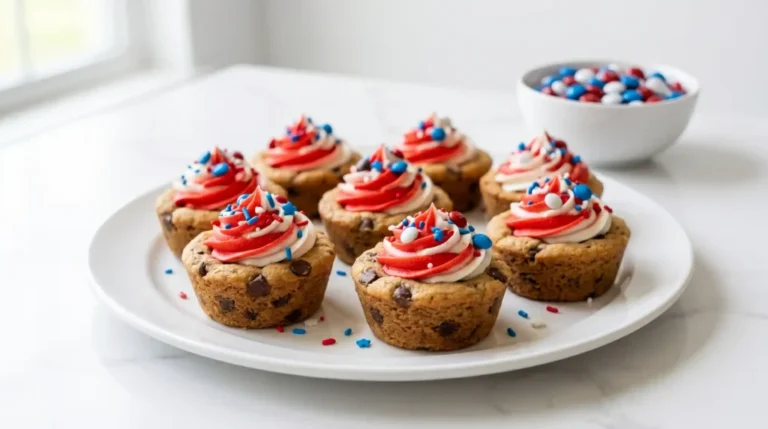
Red, white, and blue has never tasted this good. These Patriotic Chocolate Chip Cookie Cups combine everything you love about a classic chocolate chip cookie — gooey center, crisp edges, loads of chocolate — then top it all off with swirled red and white buttercream. They’re fun, festive, and honestly kind of addictive.
Why These Patriotic Chocolate Chip Cookie Cups Are Worth Making
These aren’t regular cookies you can just grab from a bag. The edible cookie cup shape holds the frosting like a little bowl, making every bite a perfect combo of soft cookie and creamy buttercream. They look impressive on a platter and take about 45 minutes start to finish.
IMO, the best part is how customizable they are. You can swap toppings, change frosting colors, or mix in different candies depending on the holiday. Make them for July 4th, Memorial Day, or honestly any occasion that deserves a little extra flair.
Ingredients You’ll Need Patriotic Chocolate Chip Cookie Cups
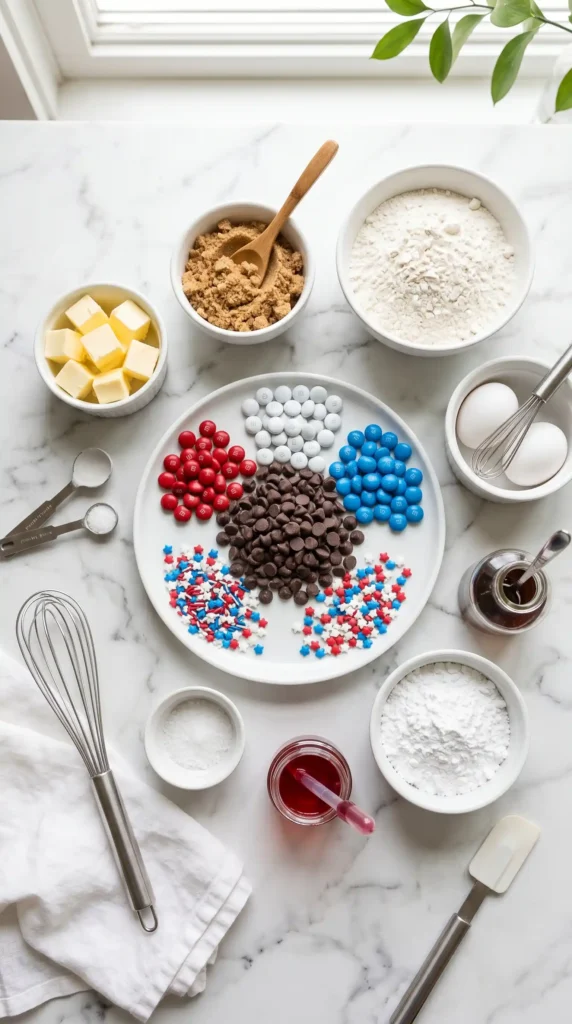
For the Cookie Cups:
- 1/2 cup (1 stick) unsalted butter, softened to room temperature
- 1/2 cup brown sugar, packed
- 1/4 cup granulated sugar
- 1 large egg
- 1 teaspoon vanilla extract
- 1 1/4 cups all-purpose flour
- 1/2 teaspoon baking soda
- 1 teaspoon cornstarch
- 1/4 teaspoon salt
- 3/4 cup semi-sweet chocolate chips
- 1/2 cup chopped M&Ms (red, white, and blue)
- 2 tablespoons red, white, and blue sprinkles
For the Buttercream Frosting:
- 1/4 cup salted butter, softened
- 1/4 cup vegetable shortening
- 2 cups powdered sugar
- 1 teaspoon vanilla extract
- 1–2 tablespoons water or milk
- Red gel icing color
- Extra sprinkles for decorating
How to Make Patriotic Chocolate Chip Cookie Cups
Step 1: Preheat the Oven and Prep Your Pan
Start by preheating your oven to 350°F (176°C). While the oven heats up, grab your standard 24-cup mini muffin tin and spray every single cup generously with non-stick cooking spray. Don’t rush this step — if any cup doesn’t get coated, the cookie cups will stick and you’ll spend 10 minutes prying them out. Ask me how I know.
For extra insurance, you can wipe a thin layer of softened butter around each cup with a paper towel. Either way, make sure the whole inside surface gets covered, including the edges.
Step 2: Cream the Butter and Sugars
In a large mixing bowl, combine the softened unsalted butter with the brown sugar and granulated sugar. Using an electric hand mixer, beat them together on medium speed for 3 to 4 minutes until the mixture turns light, pale, and fluffy.
This step matters more than people realize. Creaming properly introduces air into the dough, which gives your cookie cups a soft, tender texture instead of a dense, heavy one. If you skip straight to mixing after 30 seconds, the texture will suffer. Take your time here.
Step 3: Add the Egg and Vanilla
Crack in the egg and pour in the teaspoon of vanilla extract. Beat on medium speed until fully combined, about one minute. Stop the mixer halfway through and scrape down the sides of the bowl with a spatula — you want every bit of butter incorporated, not stuck to the sides.
The vanilla does a lot of heavy lifting here. It rounds out the flavor of the cookie and plays beautifully with the chocolate chips and M&Ms. Don’t skip it or try to substitute.
Step 4: Mix the Dry Ingredients
In a separate medium bowl, whisk together the flour, baking soda, cornstarch, and salt. Whisking the dry ingredients before adding them ensures everything distributes evenly through the dough. The cornstarch is the secret ingredient — it keeps the cookies soft and slightly chewy even after they cool.
Add the dry ingredients to the butter mixture gradually. Mix on low speed just until the flour disappears. Stop as soon as the dough comes together. Overmixing develops gluten, which makes cookies tough and dense. You want soft and tender, so less is more here.
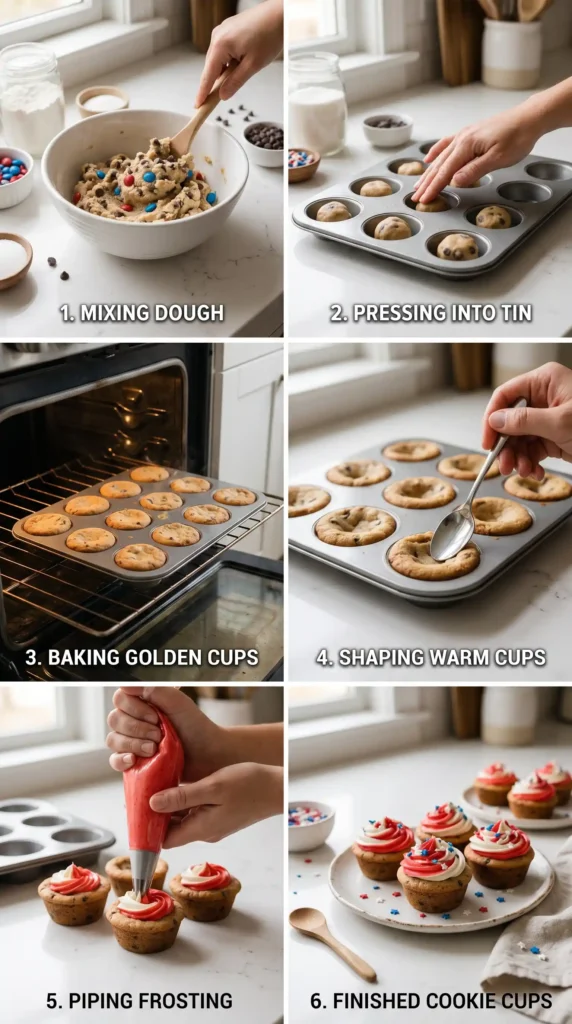
Step 5: Stir in the Mix-Ins
Now comes the fun part. Fold in the semi-sweet chocolate chips, chopped M&Ms, and red, white, and blue sprinkles using a spatula or wooden spoon. The dough will feel thick and slightly sticky — that’s exactly what you want.
Don’t try to use the electric mixer for this step. Stirring by hand keeps the chocolate chips and candies whole. If you beat them in with a mixer, you’ll end up with broken pieces and sad-looking cookie cups :/
Step 6: Portion the Dough Into the Pan
Scoop about 2 tablespoons of dough per cup. A cookie scoop works perfectly here because it keeps all the portions the same size, which means they all bake at the same rate. Press each ball of dough down into the cup, spreading it along the bottom and pushing it about halfway up the sides.
Think of it like forming tiny cookie bowls. The dough doesn’t need to go all the way up — just enough to create a little well in the center where the frosting will sit later. Press firmly so there are no gaps or air pockets at the bottom.
Step 7: Bake Until Just Golden
Slide the pan into the preheated oven and bake for 10 to 12 minutes. Watch the edges — once they turn a light golden brown, they’re done. The centers will still look slightly underdone and soft. That’s intentional.
Cookie cups continue cooking from the residual heat of the pan after they come out of the oven. If you wait until the centers look fully set, they’ll be overbaked and dry by the time they cool. Pull them out when the edges are golden and the centers look just barely set.
Step 8: Shape the Cups While Warm
Let the cookie cups cool in the pan for about 5 minutes. Then, while they’re still warm and pliable, use the round bottom of a tablespoon or a small round measuring spoon to gently press down the center of each cup, deepening the well.
This is the trick that makes the Patriotic Chocolate Chip Cookie Cups actually look like cups. If you skip this step or wait too long, the centers firm up and you lose that perfect bowl shape. Work quickly while they’re still warm.
After shaping, carefully remove each cup from the pan and let them cool completely on a wire rack before frosting.
Step 9: Make the Buttercream Frosting
In a clean mixing bowl, beat the softened salted butter and shortening together on medium speed until the mixture looks smooth and creamy. Add one cup of powdered sugar and beat on low until it incorporates, then increase to medium and mix for another minute.
Add the vanilla extract and one tablespoon of water or milk. Beat until fluffy. Then add the second cup of powdered sugar and continue beating, adding a little more milk or water a teaspoon at a time until you reach a spreadable, fluffy consistency. The frosting should hold its shape but not feel stiff.
Step 10: Color, Pipe, and Decorate
Divide the frosting evenly between two bowls. Leave one bowl white. In the second bowl, add a few drops of red gel food coloring and stir until the color is fully blended and even.
Spoon each color of frosting into its own piping bag fitted with a star or open round tip. Place both bags side by side inside a third, larger piping bag. When you pipe, both colors come out together, creating a gorgeous red-and-white swirl in each cookie cup.
Pipe a generous swirl into each cooled cookie cup. Then immediately top each one with extra sprinkles, a few M&Ms, or any patriotic decorations you like. The frosting sets quickly, so add the toppings right after piping.
Tips for Perfect Cookie Cups Every Time
- Room-temperature butter blends faster and gives you a smoother, fluffier result.
- Don’t overmix the dough after adding the flour — stop the mixer as soon as the streaks of flour disappear.
- Use gel food coloring, not liquid — gel gives you a vibrant red without watering down the frosting.
- Cool completely before frosting — warm cookie cups melt the buttercream and turn the whole thing into a slide of sadness.
- A cookie scoop keeps all your portions uniform so they bake evenly and look consistent on the platter.
FAQs About Patriotic Chocolate Chip Cookie Cups
Can I make the dough ahead of time? Yes! Make the dough up to 24 hours in advance and store it covered in the fridge. When you’re ready to bake, let it sit at room temperature for about 10 minutes so it’s easier to press into the pan.
Can I freeze these cookie cups? Absolutely. Bake and cool the unfrosted cups, then freeze them in an airtight container for up to three months. Thaw overnight in the fridge, then bring to room temperature and frost before serving.
Can I use a regular muffin tin instead of a mini muffin tin? You can, but the cups will be much larger and the baking time will increase to about 13–16 minutes. Check them at the 12-minute mark and watch for those golden edges.
Can I make these gluten-free? Yes — substitute the all-purpose flour with a 1:1 gluten-free flour blend. The texture changes slightly but the cups still taste delicious. Make sure your chocolate chips and M&Ms are also certified gluten-free.
How long do these stay fresh? Store them in an airtight container at room temperature for up to 5 days. FYI — they taste even better on day two once the flavors have settled in.
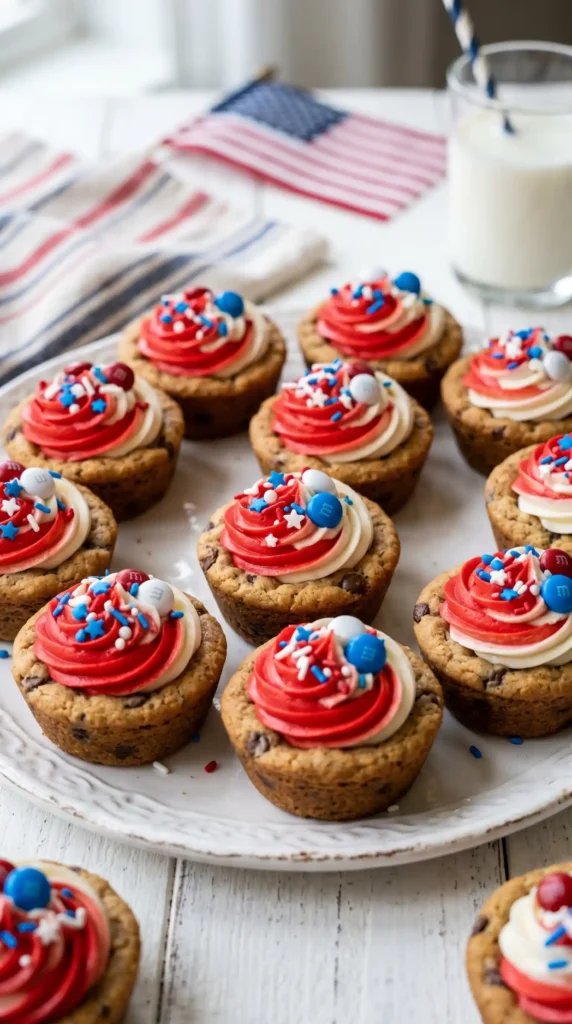
Conclusion: Make These for Your Next Get-Together
The Patriotic Chocolate Chip Cookie Cups check every box — they’re easy, festive, crowd-pleasing, and flexible enough to adapt for other holidays too. The combination of soft cookie, gooey chocolate, and swirled buttercream makes them genuinely hard to stop eating.
Whether you’re taking them to a Fourth of July cookout or making them just because it’s the weekend and you feel like baking something fun, these won’t let you down. Preheat that oven and go make something worth celebrating.
Patriotic Chocolate Chip Cookie Cups
Ingredients
Method
- Preheat your oven to 350°F (176°C) and spray all cups of a standard 24-cup mini muffin tin with non-stick cooking spray.
- In a large mixing bowl, cream together softened unsalted butter, brown sugar, and granulated sugar using an electric mixer on medium speed for 3-4 minutes until light and fluffy.
- Add the egg and vanilla extract to the mixture and beat on medium speed until fully combined.
- In a separate bowl, whisk together the flour, baking soda, cornstarch, and salt, then gradually add to the butter mixture until just combined.
- Fold in the chocolate chips, chopped M&Ms, and sprinkles using a spatula.
- Scoop about 2 tablespoons of the dough into each cup and press it down into the cup to form a cookie bowl.
- Bake the cookie cups for 10-12 minutes, until the edges are lightly golden brown while the centers are still soft.
- After 5 minutes of cooling, use the bottom of a tablespoon to press down the center of each cookie cup to deepen the well.
- In a clean mixing bowl, beat together the salted butter and shortening until creamy.
- Gradually add the powdered sugar and beat until incorporated; then add vanilla and milk/water as needed until a fluffy consistency is reached.
- Divide the frosting into two bowls, leaving one white and coloring the other red with gel icing color.
- Pipe the frosting into the cooled cookie cups, topping with additional sprinkles and M&Ms as desired.


