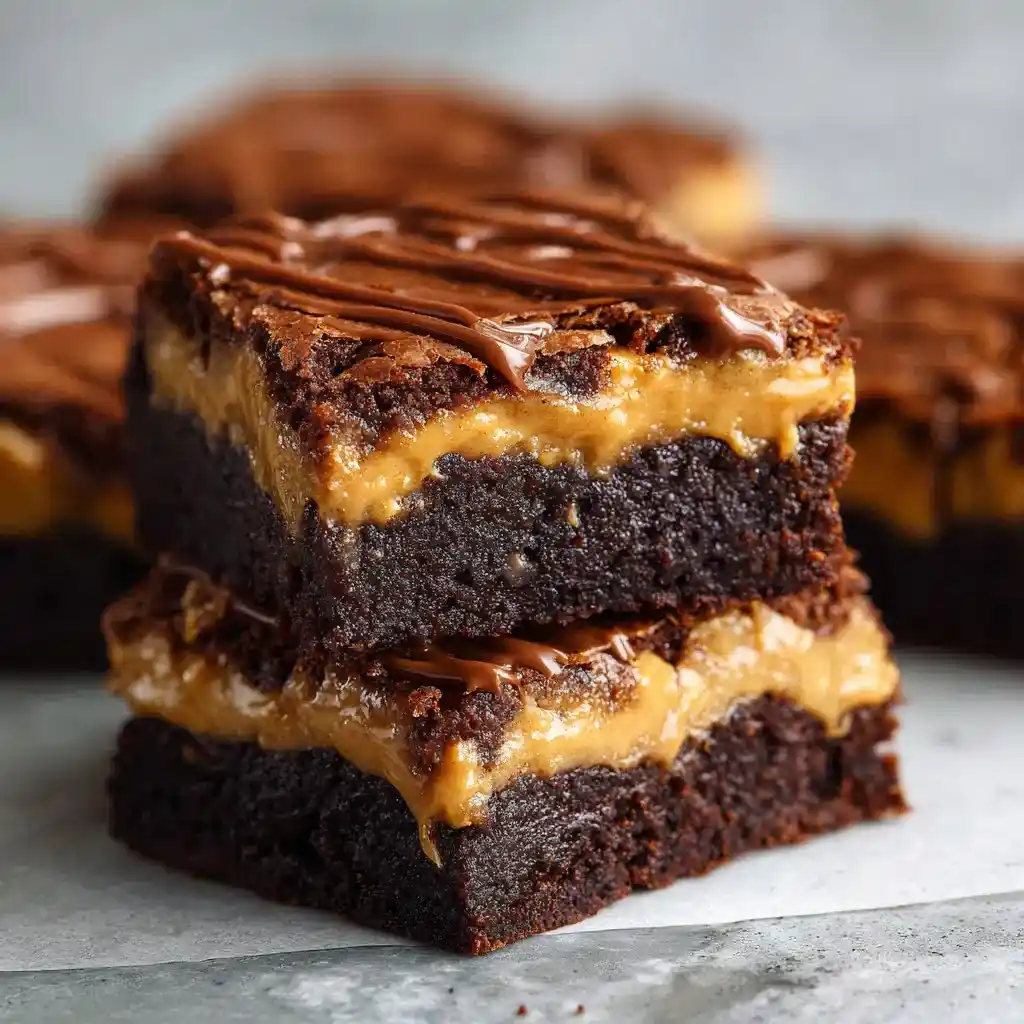
Regular brownies just got demoted. Peanut Butter Fudge Brownies stuff a thick layer of creamy peanut butter fudge right into the center of a fudgy chocolate base. Have you ever taken one bite of something and immediately known your dessert standards just changed forever? That’s this recipe.
I made these for a bake sale once, and they sold out within ten minutes flat. IMO, that’s basically the highest compliment any dessert can receive.
Prep time: 20 minutes Cook time: 40 to 50 minutes Cool time: 1 to 2 hours Total time: About 2.5 hours Servings: 24 squares
What Makes These Brownies So Irresistible?
This recipe layers rich, fudgy brownie batter around a creamy peanut butter fudge center made from white chocolate, condensed milk, and peanut butter. The result is a dessert that’s part brownie, part candy, and entirely addictive.
Why does hiding fudge inside brownies work so well? That hidden layer creates a surprise texture contrast, giving you fudgy chocolate on the outside and creamy peanut butter richness in every center bite.
Why This Recipe Deserves a Spot in Your Baking Rotation
Some “extra special” desserts require ingredients you’ve never heard of and techniques you’ll never master. This one doesn’t, and here’s exactly why Peanut Butter Fudge Brownies earn a permanent spot in your dessert lineup:
- Delivers bakery-level results with basic ingredients
- Makes a full 13×9 pan, perfect for sharing
- Works for parties, bake sales, or personal cravings
- Freezes well for future dessert emergencies
- Combines two beloved flavors into one unforgettable treat
Have you ever wanted a dessert that looks impressive enough for a party but doesn’t require professional baking skills? This recipe delivers exactly that.
Ingredients You’ll Need
Nothing overly complicated here, just a solid list split between the brownie layer and the fudge center. Here’s your full shopping list:
For the brownie layer:
- 18 tablespoons unsalted butter, cut into tablespoon-sized pieces
- 3/4 cup semisweet chocolate chips
- 3/4 cup unsweetened cocoa powder
- 1 1/2 cups granulated sugar
- 3/4 cup brown sugar, packed
- 3 large eggs
- 1 egg yolk
- 1 teaspoon vanilla extract
- 1/2 teaspoon salt
- 1 1/2 cups all-purpose flour
For the peanut butter fudge layer:
- 2 cups white chocolate chips
- 1 can sweetened condensed milk
- 1/2 cup peanut butter
- 1/4 teaspoon vanilla extract
- 1/8 teaspoon salt
FYI, using both a whole egg yolk and full eggs here is what gives these brownies that extra fudgy, dense texture.
How to Make Peanut Butter Fudge Brownies (Step-by-Step)
This recipe breaks into two components: the brownie batter and the fudge filling. Layering them together takes patience, but the process itself stays pretty simple.
Step 1: Preheat and Prep
Preheat your oven to 350°F and spray a 13×9-inch pan generously with baking spray. This prevents any sticking once your layered brownies come out of the oven.
Step 2: Melt the Butter and Chocolate
In a large microwave-safe bowl, combine the butter and semisweet chocolate chips. Microwave for 30 seconds, stir well, then continue microwaving in 15-second intervals, stirring between each one, until the mixture turns fully smooth.
Step 3: Add the Cocoa Powder
Stir the cocoa powder directly into your melted butter and chocolate mixture. Mix until it turns completely smooth with no lumps remaining.
Step 4: Mix in the Sugars
Add the granulated sugar and brown sugar into the bowl and mix until fully combined. This creates a thick, glossy base that forms the heart of your brownie batter.
Step 5: Add the Eggs
Add the eggs and egg yolk into the batter one at a time, stirring thoroughly after each addition. Taking this step slowly prevents the batter from turning grainy or separating.
Step 6: Add Vanilla and Salt
Stir in the vanilla extract and salt, mixing until everything is evenly distributed. These final flavor additions round out the deep chocolate taste of the batter.
Step 7: Add the Flour
Add the flour into the batter and mix just until combined. Overmixing at this stage toughens the brownies, so stop stirring the moment you no longer see streaks of flour.
Step 8: Spread Half the Batter
Spread exactly half of your finished brownie batter evenly into the prepared pan. This bottom layer becomes the base that holds your fudge filling in place.
Step 9: Make the Peanut Butter Fudge
In a medium saucepan over medium-low heat, combine the white chocolate chips, sweetened condensed milk, and peanut butter. Stir frequently until everything melts together into one smooth, glossy mixture.
Skipping frequent stirring here is a rookie mistake. White chocolate scorches easily, so keep that spoon moving to avoid any burnt spots ruining your fudge.
Step 10: Finish the Fudge Layer
Remove the saucepan from heat and stir in the vanilla extract and salt. Pour this finished fudge mixture evenly over your brownie batter, spreading it gently if needed to reach every corner.
Step 11: Let the Fudge Set
Let the fudge layer sit for about 5 minutes so it firms up slightly before adding the next layer. This short rest keeps the layers from mixing together once you add the remaining batter.
Step 12: Add the Final Brownie Layer
Carefully spread the remaining brownie batter over the fudge layer, covering it as evenly as possible. Take your time here, since the fudge underneath can shift if you press too hard.
Step 13: Bake to Fudgy Perfection
Bake the entire pan for 40 to 50 minutes, checking for doneness starting at the 40-minute mark. You’re looking for a toothpick that comes out with moist, fudgy crumbs rather than wet batter.
Step 14: Cool Completely
Let the brownies cool completely before slicing into them. This cooling time allows the fudge center to fully set, giving you clean, defined layers in every square.
Serving Suggestions That Actually Work
These brownies taste incredible on their own, but a few extras take them even further. Try any of these serving ideas:
- A scoop of vanilla ice cream on the side
- A drizzle of melted peanut butter on top
- A sprinkle of flaky sea salt for contrast
- Chopped peanuts for extra crunch
- A cold glass of milk alongside each square
Have you ever eaten a brownie so rich that a glass of milk felt absolutely mandatory? Same here, every single time with this recipe.
Storage and Reheating Tips
These brownies hold up beautifully, making them great for prepping ahead of parties or bake sales. Keep these tips in mind:
- Store in an airtight container at room temperature for up to 3 days
- Refrigerate for up to 7 days for a firmer fudge texture
- Freeze individually wrapped squares for up to 2 months
- Chill before slicing if you want super clean, defined edges
- Serve at room temperature for the best overall flavor and texture
Fun Variations to Try Next Time
Once you’ve mastered the classic version, these brownies practically invite experimentation. Here are a few directions worth trying:
- Reese’s version: sprinkle chopped Reese’s cups directly over the fudge layer
- Dark chocolate version: swap semisweet chips for dark chocolate chips
- Crunchy version: use crunchy peanut butter instead of creamy
- Salted version: sprinkle flaky sea salt on top before baking
- Espresso version: add espresso powder to intensify the chocolate flavor
Have you ever added a pinch of espresso powder to chocolate and instantly noticed a deeper flavor? IMO, that trick works wonders here too.
Frequently Asked Questions
Can I use a boxed brownie mix instead of making batter from scratch? Yes, prepare the boxed mix as directed on the package and layer it the exact same way as the homemade version.
Why do I need to cool these completely before cutting? Cooling allows the fudge center to fully set, which gives you clean, defined slices instead of a messy, oozing center.
Can I use milk chocolate instead of white chocolate in the fudge? White chocolate provides the best structure for the fudge layer, though milk chocolate will work with a slightly softer result.
Do these brownies freeze well? Yes, wrap individual squares tightly and freeze them for up to 2 months without any noticeable loss in flavor or texture.
Can I use natural peanut butter instead of regular? Yes, just stir it well before using, since natural peanut butter tends to be slightly softer and less stable.
Final Thoughts
Peanut Butter Fudge Brownies prove that combining two favorite desserts creates something even better than either one alone. Rich, fudgy, and packed with that unmistakable peanut butter center, they’re worth every minute of patient layering and cooling.
Bake a batch for your next gathering and watch how quickly the pan empties out. Just don’t be surprised when people start requesting these for literally every occasion from now on.



