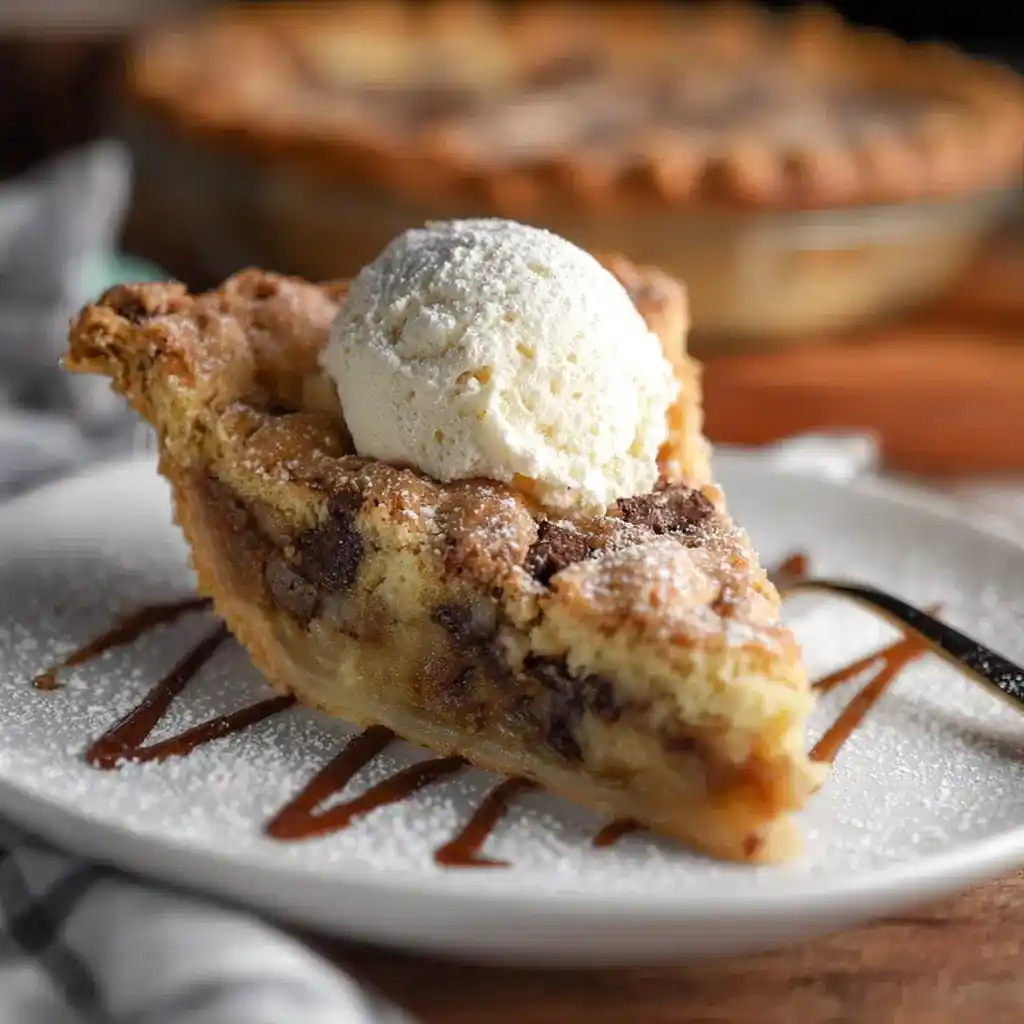
Can’t decide between a chocolate chip cookie and a slice of pie? This Toll House Pie recipe stops that argument dead by combining both into one ridiculously good dessert.
I made this the first time for a potluck where I had zero time to bake anything fancy. It disappeared in fifteen minutes flat, and IMO, that’s the only review a recipe really needs.
Servings: 8 | Prep Time: 15 minutes | Cook Time: 50 to 55 minutes
Why Toll House Pie Actually Works
Have you ever wondered why a cookie baked inside a pie crust tastes better than either dessert on its own? The crust adds a crisp, buttery edge while the center stays soft, gooey, and unmistakably cookie-like.
This isn’t just a chocolate chip cookie dumped into a pie shell. The egg-heavy batter bakes up denser than a regular cookie, landing somewhere between a brownie and a classic Nestlé cookie.
I’ve made plain chocolate chip cookies my whole life. This pie version genuinely competes with them, and that’s saying a lot coming from someone who takes cookies very seriously.
What You’ll Need
Here’s the full ingredient list with quantities included so nothing gets left to guesswork.
- 2 large eggs
- ½ cup all-purpose flour
- ½ cup granulated sugar
- ½ cup brown sugar
- ¾ cup salted butter, softened, not melted
- 1 teaspoon vanilla extract
- 1 cup semi-sweet chocolate chips
- 1 cup chopped pecans or walnuts, optional
- 1 nine-inch unbaked pie crust
That’s a short list for a dessert that tastes this indulgent. Most of these ingredients are probably already sitting in your pantry.
How to Make Toll House Pie
Let’s slow down and go through each stage carefully. This recipe is simple, but a few small details make a real difference in texture.
Step 1: Preheat and Prep
Preheat your oven to 325°F. This lower temperature matters more than you’d think, since it’s what keeps the center soft instead of turning the whole pie into a dry, overbaked mess.
Grab your unbaked pie crust and set it aside in its dish. There’s no need to pre-bake it here; it bakes perfectly alongside the filling.
Step 2: Whisk the Eggs Until Foamy
In a large mixing bowl, whisk the two eggs until they turn light, pale, and slightly foamy on top. This step incorporates air into the batter, which helps the pie set up with the right texture.
Don’t rush this part. A quick ten-second whisk won’t cut it; give the eggs a solid minute or two of real whisking effort.
Step 3: Add the Dry Ingredients
Add the flour, granulated sugar, and brown sugar directly into the whisked eggs. Mix everything together until it’s fully combined and no dry streaks of flour remain visible.
The batter should look thick and slightly grainy at this stage from the sugar. That’s completely normal, so don’t panic if it doesn’t look like traditional pie filling yet.
Step 4: Mix in the Butter and Vanilla
Add the softened butter, making sure it’s soft and not melted, along with the vanilla extract. Mix until the batter turns smooth, glossy, and fully combined with no visible butter chunks left.
Why does softened butter matter so much here? Melted butter changes the texture entirely, making the pie greasier instead of achieving that dense, cookie-like bite everyone loves.
Step 5: Fold in the Chocolate Chips and Nuts
Gently fold the chocolate chips into the batter using a spatula, along with the chopped pecans or walnuts if you’re using them. Folding instead of stirring vigorously keeps the batter from deflating.
Feel free to skip the nuts entirely if that’s not your thing. This pie tastes fantastic either way, and nobody’s judging your nut preferences here.
Step 6: Fill the Crust and Bake
Pour the finished batter into your prepared pie crust and smooth the top out evenly with a spatula. Place the pie in your preheated oven and bake for 50 to 55 minutes.
You’ll know it’s ready when a toothpick inserted halfway between the center and the crust edge comes out clean. The very center should still look slightly soft; that’s exactly what you want.
Step 7: Cool Before Slicing
Let the pie cool slightly on a wire rack before slicing into it. Cutting too early causes the gooey center to spill everywhere instead of holding its shape in each slice.
Patience pays off here more than in almost any other step. A few extra minutes of cooling makes cleaner, more presentable slices every time.
Tips for the Best Results
A handful of small details separate an average Toll House Pie from a genuinely great one. Here’s what I’ve learned from making this more times than I probably should admit:
- Use softened, not melted, butter for the correct dense, chewy texture.
- Don’t overbake it; a slightly soft center is the whole point of this pie.
- Cool before slicing for cleaner cuts that hold together properly.
- Stick with semi-sweet chocolate chips for the best balance against the sweet crust.
None of these tips require extra effort. They just make sure your pie turns out exactly the way it’s supposed to.
Serving and Storage Tips
Serve this pie warm with a scoop of vanilla ice cream or a dollop of whipped cream on top. For cleaner, more photogenic slices, let it cool completely before cutting instead.
Store leftovers covered at room temperature for up to two days. If you need it to last longer, refrigerate covered slices for up to five days without any noticeable quality drop.
Want to save some for later? Freeze the fully baked pie wrapped tightly for up to three months. Reheat individual slices in the microwave for fifteen to twenty seconds to soften the chocolate again.
Fun Variations to Try
Once you’ve mastered the classic version, experimenting becomes seriously addictive. Here are a few directions worth trying next:
- Double Chocolate: add cocoa powder and extra chocolate chips for a richer bite.
- Peanut Butter Chip: swap half the chocolate chips for peanut butter chips.
- Espresso Chocolate: stir in instant espresso powder to deepen the chocolate flavor.
- S’mores Pie: add mini marshmallows and graham cracker pieces before baking.
- Bourbon Chocolate Pecan: splash in a tablespoon of bourbon for extra depth.
Each variation keeps the same simple method while completely shifting the final flavor profile.
Frequently Asked Questions
Is Toll House Pie supposed to be gooey in the center? Yes, the center should stay soft and cookie-like rather than fully set and dry like a traditional baked pie.
Can I use unsalted butter instead of salted? Yes, just add about a quarter teaspoon of extra salt to balance out the flavor properly.
Do I need to pre-bake the pie crust first? No, the crust bakes perfectly alongside the filling without any pre-baking required beforehand.
Can I make this pie a day ahead of time? Absolutely, bake it a day early and store it covered until you’re ready to serve it.
Can I freeze Toll House Pie for later? Yes, wrap it tightly once fully baked and cooled, then freeze for up to three months.
Why does this recipe bake at such a low temperature? Baking at 325°F keeps the center soft and gooey instead of letting the edges over-brown before the middle finishes.
Can I skip the nuts in this recipe? Yes, the nuts are entirely optional and the pie tastes great with or without them.
Wrapping This Up
Toll House Pie proves that combining two beloved desserts often beats picking just one. A crisp crust, a chewy cookie-like center, and pools of melted chocolate make this one seriously hard to resist.
Bake this for your next potluck, holiday table, or random weeknight when you need something impressive with minimal effort. Just make extra, because one pie never seems to last as long as you’d expect.



