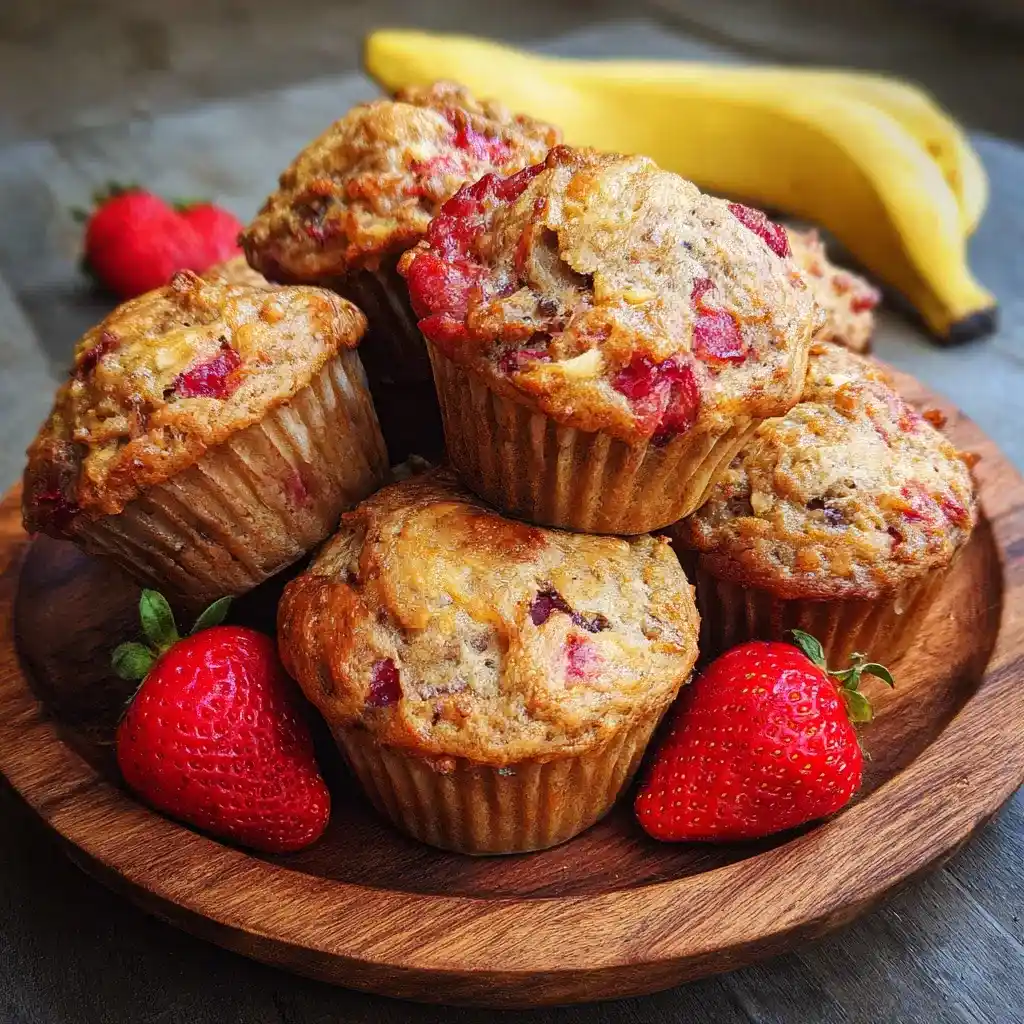
Got ripe bananas sitting on your counter and a carton of strawberries about to turn? Good, because you’re about two bowls away from the best muffins you’ll make all month. I’ve tested this combo more times than I care to admit, and it never gets old.
Prep time: 15 minutes | Cook time: 26 minutes | Total time: about 55 minutes (includes resting) | Servings: 12 muffins
Why You’ll Love These Strawberry Banana Muffins
I’ll be honest, I used to think fruit muffins turned out either soggy or bland. These do neither. The banana keeps them moist, and the strawberries add a little tartness that cuts through the sweetness perfectly.
They’re also naturally dairy-free, which surprised me the first time I made them. IMO that’s a huge win if you’re baking for a crowd with mixed dietary needs. Nobody will guess these are allergy-friendly just by tasting them.
Have you ever bitten into a muffin that tasted more like cake filler than actual fruit? Yeah, me too. This recipe fixes that problem by using real diced strawberries, not some sad extract pretending to be one.
What You’ll Need: Ingredients List
Nothing fancy here. You probably have most of this in your kitchen right now.
Wet Ingredients
- 1 ⅓ cups mashed ripe bananas (roughly 3 medium bananas)
- ½ cup diced strawberries, for blending into the batter
- ⅓ cup vegetable oil
- ½ cup granulated sugar
- 1 large egg
- 1 teaspoon vanilla extract
Dry Ingredients
- 1 ½ cups all-purpose flour
- 1 teaspoon baking soda
- ½ teaspoon salt
Mix-Ins and Topping
- 1 ¼ cups diced strawberries, for folding into the batter
- 2 tablespoons all-purpose flour, for coating the strawberries
- Coarse sanding sugar, optional, for the top
Quick note: the flour coating on the strawberries isn’t optional if you want fruit distributed evenly. Skip it, and you’ll get a sad strawberry pile at the bottom of every muffin.
How to Make Strawberry Banana Muffins
Let’s slow this down step by step, because rushing muffin batter is how you end up with dense, chewy hockey pucks instead of fluffy muffins.
Step 1: Blend the Banana-Strawberry Base
Toss your mashed bananas and the smaller ½ cup of diced strawberries into a blender. Blend until it’s smooth and pink-ish. This little trick works so well because it hides the fruit texture in the base while still packing in flavor.
Step 2: Mix the Wet Ingredients
Pour that banana-strawberry puree into a large mixing bowl. Add the oil, sugar, egg, and vanilla extract. Whisk everything together until it looks uniform and slightly glossy.
Step 3: Fold in the Dry Ingredients
Sprinkle the flour, baking soda, and salt over the wet mixture. Stir gently with a spatula, just until you don’t see dry streaks anymore. Overmixing here is the number one reason muffins turn out tough, so stop as soon as it comes together.
Step 4: Coat and Fold the Strawberries
Toss your remaining 1 ¼ cups of diced strawberries with the 2 tablespoons of flour in a small bowl. This coating stops the fruit from sinking straight to the bottom during baking. Gently fold the coated strawberries into your batter using slow, careful strokes.
Step 5: Rest the Batter
Cover the bowl and let it sit for 15 minutes at room temperature. I know waiting is annoying when muffins are calling your name, but this step genuinely improves the texture. The flour hydrates fully, which gives you taller, softer muffins.
Step 6: Preheat and Prep Your Pan
While the batter rests, preheat your oven to 425°F. Line a standard 12-cup muffin pan with paper liners. Skipping the liners is fine too, just grease the pan well so nothing sticks.
Step 7: Fill the Liners Generously
Scoop the batter into each liner, filling them all the way to the top. Don’t be shy here, bakery-style muffins need that full, domed look. A slightly overfilled liner is exactly what gives you that impressive muffin top.
Step 8: Top It Off
Press a few reserved strawberry pieces onto each muffin top. Sprinkle with coarse sanding sugar if you’re feeling fancy. This isn’t required, but it does make them look like they came from a proper bakery counter.
Step 9: Bake in Two Stages
Bake at 425°F for 7 minutes first. This blast of high heat is what creates that tall, bakery-style muffin top, so don’t skip it. Then lower the oven to 375°F and continue baking for another 19 to 21 minutes.
Step 10: Cool Before Digging In
Let the muffins sit in the pan for 10 minutes once they’re out of the oven. Then move them to a wire rack to finish cooling. I know the smell makes patience nearly impossible, but a few extra minutes keeps the centers from turning gummy.
Tips for Bakery-Style Muffins Every Time
A few small habits make a big difference between okay muffins and genuinely great ones.
- Don’t overmix the batter. Stir just until combined; lumps are fine and actually preferred.
- Use ripe, spotty bananas. They mash easier and taste noticeably sweeter than firm yellow ones.
- Coat your fruit in flour. This one step solves nearly every sinking-fruit complaint people have.
- Fill liners fully. Half-filled cups give you flat, sad muffins instead of tall ones.
- Don’t skip the temperature drop. Starting hot and finishing lower gives that classic domed top.
Storage and Reheating
These muffins hold up well, which honestly makes them great for meal prep. Here’s how to keep them fresh.
- Store at room temperature in an airtight container for up to 2 days
- Refrigerate for up to 5 days if your kitchen runs warm
- Freeze individually wrapped muffins for up to 3 months
- Reheat frozen or fridge muffins briefly in the microwave for that fresh-baked texture
FYI, reheating for just 15 to 20 seconds brings back that just-baked softness almost instantly. Skip the toaster oven unless you enjoy dry muffin edges.
Fun Variations to Try
Once you’ve nailed the base recipe, there’s a lot of room to experiment. Here are some of my favorite twists.
- Chocolate Chip – fold in ¾ cup mini chocolate chips
- Nutty Version – add ½ cup chopped walnuts or pecans
- Cinnamon Sugar Top – sprinkle cinnamon sugar before baking
- Lemon Strawberry – stir in 1 teaspoon lemon zest
- Gluten-Free – swap in a 1:1 gluten-free flour blend
- Vegan – replace the egg with a flax egg
- Protein Boost – add 2 tablespoons vanilla protein powder
- Muffin-to-Loaf – bake as bread in a loaf pan for 50 to 55 minutes
Have you tried any fruit muffin variation that flopped horribly? I once added way too much lemon zest and basically made cleaning spray. Lesson learned: measure your citrus.
Frequently Asked Questions
Can I use frozen strawberries? Yes, dice them while still frozen and toss them in flour before folding into the batter.
Can I use frozen bananas instead of fresh? Absolutely, just thaw them first and drain off any extra liquid before mashing.
Are these muffins actually dairy-free? Yes, completely, as written with no substitutions needed.
Can I cut down on the sugar? Yes, reducing to about a third of a cup still gives you a nicely balanced muffin.
Why do I need to rest the batter before baking? Resting lets the flour hydrate fully, which gives you a taller, softer finished muffin.
Can I make these muffins gluten-free? Yes, a 1:1 gluten-free flour blend swaps in easily without changing the method.
How do I stop the strawberries from sinking? Coating the fruit in flour before folding it in keeps everything distributed evenly.
Final Thoughts
These strawberry banana muffins hit that sweet spot between quick weekday breakfast and genuine bakery treat. The two-fruit combo, the resting step, and that hot-then-lower baking trick all work together for a reason. Once you bake a batch, plain banana muffins might start feeling a little boring.
Give this recipe a try this weekend, and don’t be surprised when the whole batch disappears before lunch. If you tweak the recipe with your own favorite mix-in, I’d genuinely love to know how it turns out.